1. Introduction
This manual provides detailed instructions for the installation, operation, and maintenance of your V-TAC VT-5135 IP Security Camera. This 1080P bullet camera is designed for both indoor and outdoor surveillance, offering reliable monitoring with its robust features. Please read this manual thoroughly before using the product to ensure proper setup and functionality.

Figure 1: V-TAC VT-5135 IP Security Camera
2. Safety Information
- Ensure the power supply voltage matches the camera's requirements (220-240V, 50Hz).
- Do not attempt to disassemble or modify the camera. This may void the warranty and cause damage.
- Keep the camera away from extreme temperatures, humidity, and direct sunlight.
- Use only V-TAC approved accessories and power adapters.
- For outdoor installations, ensure all connections are properly sealed to maintain the IP65 rating.
3. Package Contents
Verify that all items are present in the package:
- 1 x V-TAC VT-5135 IP Security Camera
- Mounting screws and wall plugs
- Waterproof connector kit
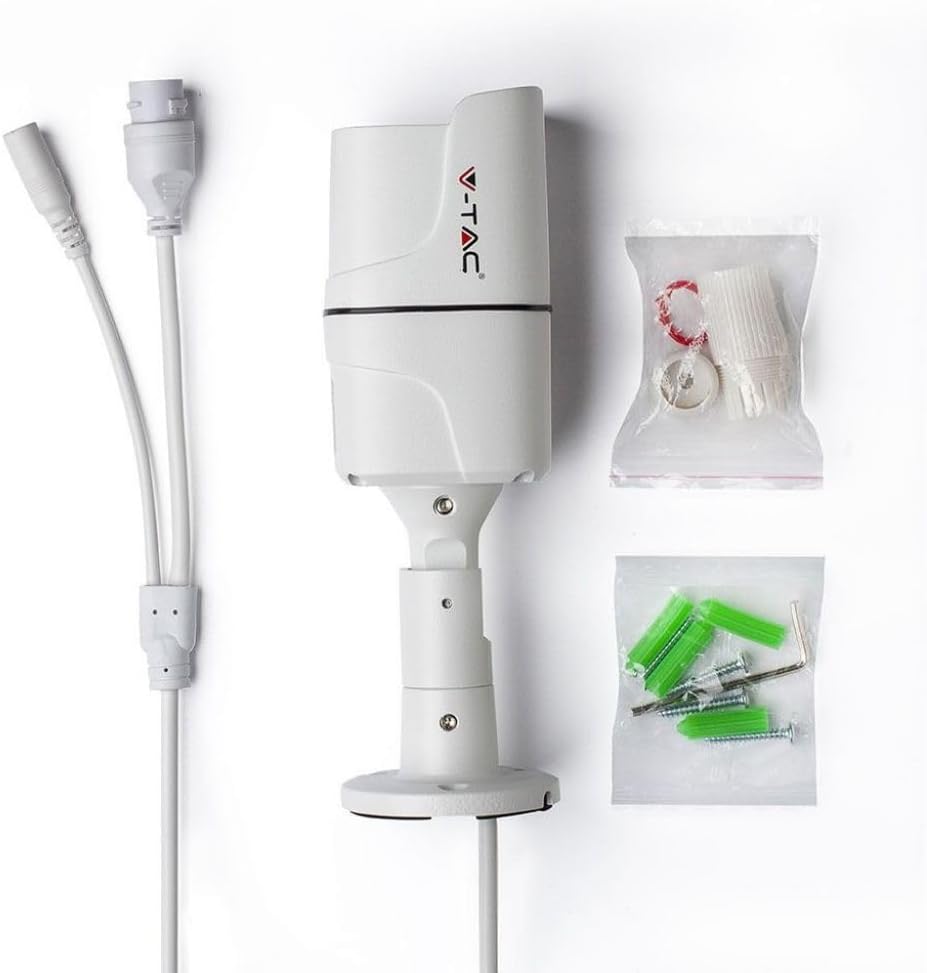
Figure 2: Camera and included accessories
4. Product Overview
The V-TAC VT-5135 is a 2.0MP bullet-style IP camera featuring 1080P resolution. It is equipped with a 3.6mm lens at f/1.8 and supports various network protocols for seamless integration into your surveillance system.
4.1 Key Features
- Resolution: 1080p @20fps
- Weather Resistance: IP65 rated for indoor/outdoor use
- Lens: M12 type, 3.6mm @f/1.8
- Night Vision: Up to 30 meters IR distance
- Connectivity: 10/100 Mbps Adaptive Ethernet (RJ45)
- Protocols: Supports TCP/IP, HTTP, DHCP, DNS, DDNS, PPPoE, SMTP, NTP

Figure 3: Special Features Overview
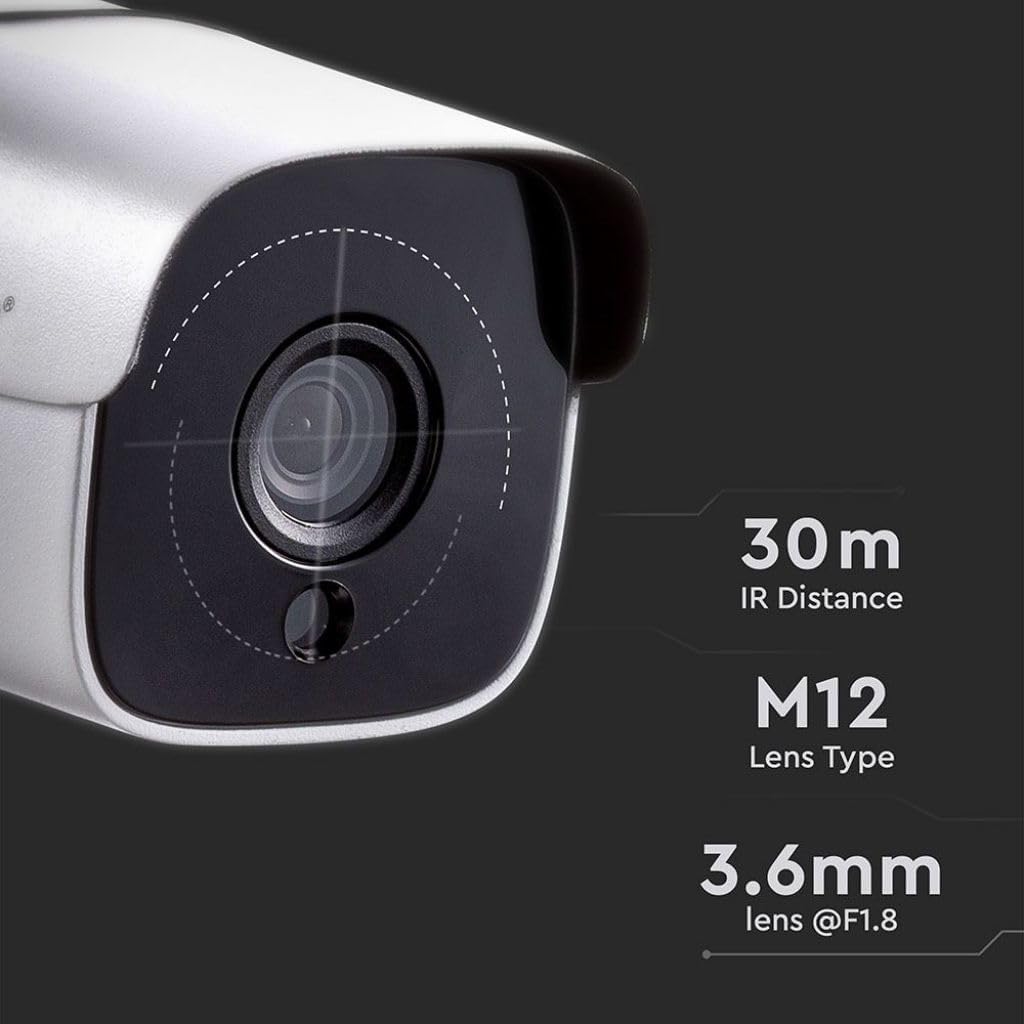
Figure 4: Lens and IR Specifications
5. Setup
5.1 Mounting the Camera
The VT-5135 camera is designed for wall-mount installation. Choose a suitable location that provides the desired viewing angle and is within reach of power and network connections.
- Mark the drilling points on the wall using the camera's base as a template.
- Drill holes and insert the provided wall plugs.
- Secure the camera base to the wall using the mounting screws.
- Adjust the camera's angle for optimal coverage.
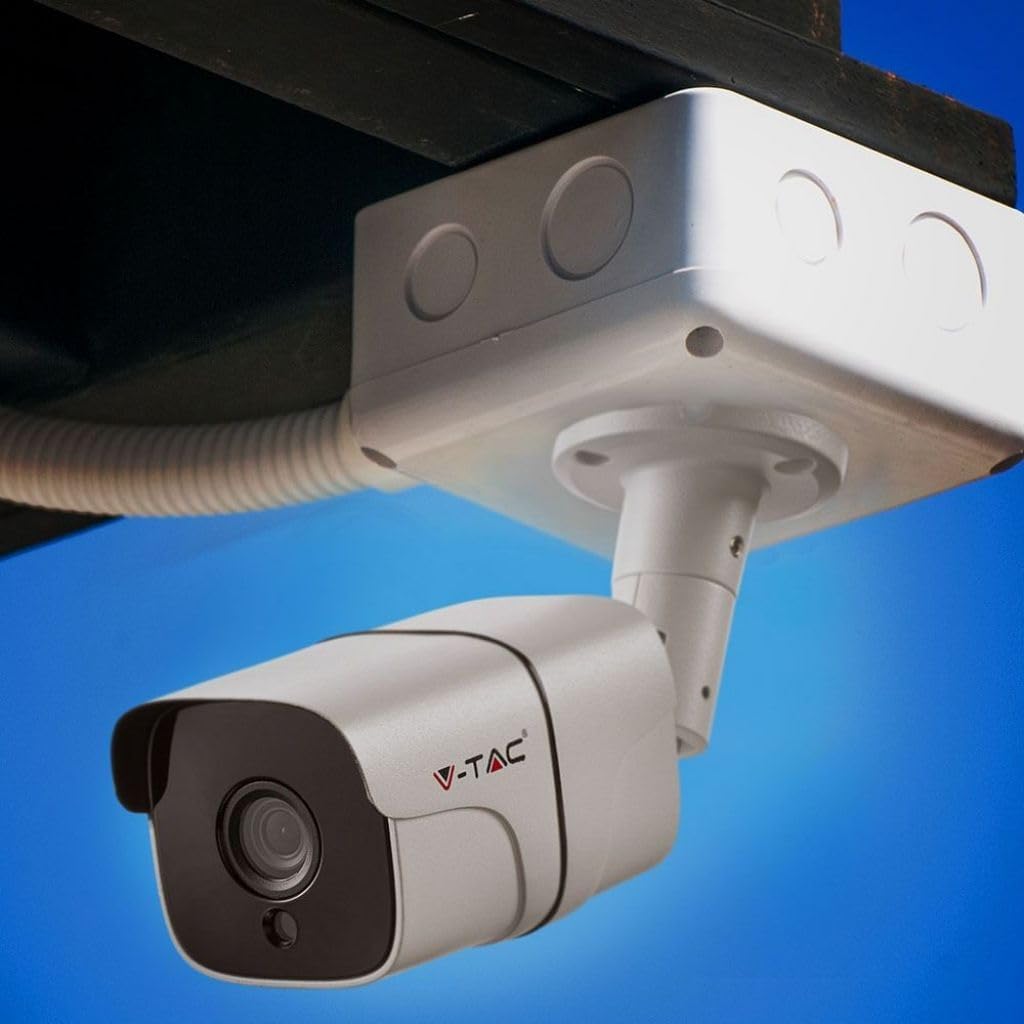
Figure 5: Example of outdoor camera mounting
5.2 Wiring and Network Connection
Connect the camera to power and your network:
- Connect the power adapter to the camera's power input and then to a suitable power outlet.
- Connect an Ethernet cable to the camera's RJ45 port and the other end to your network router or switch. Use the waterproof connector kit for outdoor installations to protect the RJ45 connection.
- Ensure all connections are secure.
6. Operating Instructions
6.1 Initial Access and Configuration
After connecting the camera to your network, you will need to access it via a client application or web browser for initial setup. Refer to the specific software instructions provided by V-TAC for detailed steps on discovering the camera on your network, setting up user accounts, and configuring network settings (e.g., IP address, port forwarding).
6.2 Live View and Recording
Once configured, you can view the live feed from the camera through the client software or web interface. Most applications allow for:
- Real-time video monitoring
- Recording video footage (manual, scheduled, or motion-triggered)
- Adjusting image settings such as saturation, brightness, and contrast.
6.3 Night Vision
The VT-5135 features automatic night vision, providing clear surveillance even in low-light conditions up to 30 meters. The camera automatically switches to infrared (IR) mode when ambient light is insufficient.

Figure 6: 1080P Night Vision Capability
7. Specifications
| Model Name | VT-5135 |
| Resolution | 1080p @20fps |
| IP Rating | IP65 |
| Lens Type | M12 |
| Lens Objectives | 3.6mm @f/1.8 |
| IR Distance | 30 meters |
| Communication Interface | 1 x 10/100 Mbps Adaptive Ethernet (RJ45) |
| Power Source | Corded Electric Component |
| Wattage | 7 watts |
| Voltage/Frequency | 220-240 Volts / 50 Hertz |
| Product Dimensions | 8.5 x 20 x 9 cm |
| Item Weight | 1 kg |
| Special Features | Night Vision |
8. Troubleshooting
8.1 No Image/Offline Camera
- Check Power: Ensure the camera is properly connected to a power source and the adapter is functioning.
- Check Network Connection: Verify the Ethernet cable is securely connected to both the camera and the router/switch. Confirm network activity lights are blinking.
- Network Configuration: Ensure the camera's IP address and network settings are correctly configured and compatible with your network.
- Router/Switch: Restart your network router or switch.
8.2 Poor Image Quality
- Clean Lens: Gently clean the camera lens with a soft, dry cloth.
- Lighting: Ensure adequate lighting in the surveillance area, especially during the day.
- Software Settings: Adjust brightness, contrast, and other image settings through the camera's client software or web interface.
9. Maintenance
- Cleaning: Regularly clean the camera's exterior and lens with a soft, damp cloth. Avoid abrasive cleaners.
- Firmware Updates: Check the V-TAC official website periodically for firmware updates to ensure optimal performance and security.
- Cable Inspection: Periodically inspect power and network cables for any signs of wear or damage, especially for outdoor installations.
10. Warranty and Support
For warranty information, technical support, or service inquiries, please refer to the warranty card included with your product or visit the official V-TAC website. Keep your purchase receipt as proof of purchase.


