1. Introduction
Thank you for choosing the Tbest Motorcycle DVR Dash Cam. This device is designed to record your rides in Full HD, providing crucial evidence in case of incidents and capturing memorable moments. This manual provides detailed instructions for installation, operation, and maintenance to ensure optimal performance and longevity of your device.
2. Product Overview
2.1 Components
The Tbest Motorcycle DVR Dash Cam system includes the main display unit and two external cameras for front and rear recording.

Image 2.1: Main DVR unit and two camera modules.
2.2 Key Features
- 3.0-inch LCD Display: Provides a clear view of recordings and menu options.
- 1080P Full HD Recording: Captures high-resolution video from both front and rear cameras.
- Dual Camera System: Simultaneous recording from front and rear perspectives.
- 130° Wide Viewing Angle: Each camera offers a broad field of view to capture more of the road.
- G-Sensor: Automatically detects sudden impacts or collisions and locks the current video file to prevent overwriting.
- Loop Recording: Continuously records by overwriting the oldest unlocked files when the memory card is full.
- Parking Monitoring: Records automatically if an impact is detected while the motorcycle is parked.

Image 2.2: The 3-inch LCD display, showing a clear image with 1280x720 resolution.

Image 2.3: Illustration of the 130-degree wide-angle lens capturing a broad view.
3. Setup
3.1 Memory Card Installation
- Ensure the device is powered off.
- Locate the memory card slot on the main DVR unit.
- Insert a Class 10 or higher MicroSD card (up to 32GB recommended for optimal performance, as larger cards may not be fully supported) into the slot until it clicks into place.
- To remove, gently push the card in until it springs out.
3.2 Camera and Main Unit Mounting
The cameras and main unit are designed for adhesive mounting. Choose locations that provide clear views and are secure from vibrations.
- Front Camera: Mount the front camera in a position that provides an unobstructed view of the road ahead, typically near the headlight or on the front fairing.
- Rear Camera: Mount the rear camera to capture the view behind your motorcycle, often near the license plate or rear fender.
- Main DVR Unit: Secure the main unit in a location accessible for operation and viewing, such as on the handlebars or dashboard, using the provided adhesive mount.
- Route all cables carefully, ensuring they do not interfere with steering or moving parts, and are protected from heat and moisture.
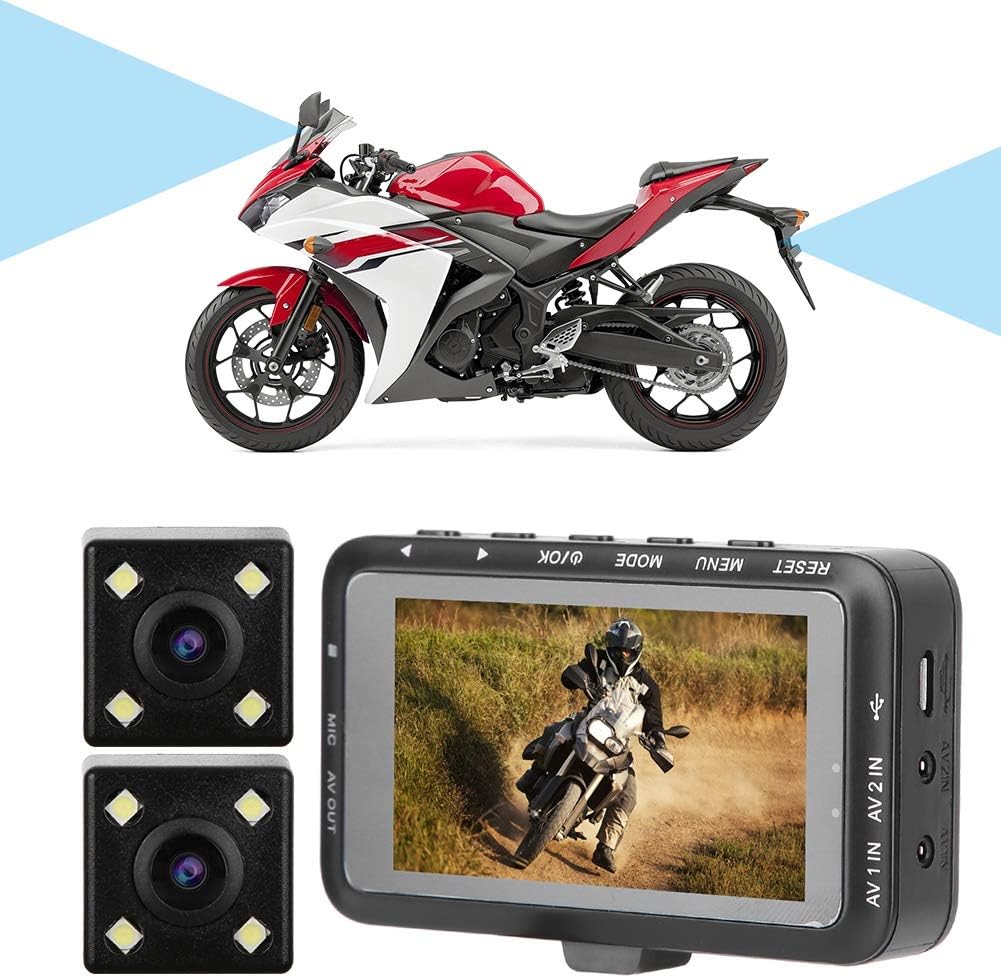
Image 3.1: Example of the DVR system installed on a motorcycle.
3.3 Power Connection
Connect the power cable to your motorcycle's power source according to the provided wiring diagram (if applicable) or consult a professional for installation. Ensure a stable power supply to prevent data loss.
4. Operating Instructions
4.1 Basic Controls
The main unit features several buttons for control:
- RESET: Resets the device to factory settings. Use a thin object to press.
- MENU: Accesses the system settings menu.
- MODE: Switches between video recording, photo mode, and playback mode.
- OK / Power: Confirms selections in the menu, starts/stops recording, or powers the device on/off.
- Up/Down Arrows: Navigates through menu options or playback files.
4.2 Powering On/Off
- Power On: The device typically powers on automatically when the motorcycle ignition is turned on. Alternatively, press and hold the OK button.
- Power Off: The device usually powers off automatically when the ignition is turned off. Alternatively, press and hold the OK button.
4.3 Recording Video
- Upon powering on, the device will typically start recording automatically. A recording indicator (e.g., a flashing red dot) will appear on the screen.
- To manually start/stop recording, press the OK button.
4.4 Loop Recording
The device records video in continuous loops (e.g., 1, 3, or 5-minute segments). When the memory card is full, the oldest unlocked video files are automatically overwritten by new recordings. This ensures continuous recording without manual intervention.

Image 4.1: Visual representation of the loop recording function.
4.5 G-Sensor and Emergency Lock
The built-in G-Sensor detects sudden acceleration, braking, or impacts. When triggered, it automatically locks the current video segment, preventing it from being overwritten by loop recording. These locked files are stored in a separate folder on the memory card.
4.6 Parking Monitoring
When enabled, parking monitoring uses the G-Sensor to detect impacts while the motorcycle is parked and the DVR is off. If an impact is detected, the device will automatically power on and record a short video segment, then power off again. This feature requires a continuous power supply or a dedicated hardwire kit (not included).

Image 4.2: Emergency lock and parking monitoring features in action.
4.7 Menu Settings
Press the MENU button to access system settings. Use the Up/Down arrows to navigate and OK to select. Common settings include:
- Video Resolution (e.g., 1080P, 720P)
- Loop Recording Duration
- G-Sensor Sensitivity
- Date/Time Stamp
- Parking Monitor On/Off
- Format Memory Card
5. Maintenance
- Cleaning: Use a soft, dry cloth to clean the main unit screen and camera lenses. Avoid abrasive cleaners or solvents.
- Memory Card: Regularly format the memory card (at least once a month) to prevent data corruption and ensure smooth operation. Back up important files before formatting. Replace the memory card if you experience frequent errors or slow performance.
- Cable Management: Periodically check all cables for wear, damage, or loose connections. Secure any loose cables to prevent interference or damage.
- Environmental Protection: While designed for outdoor use, avoid prolonged exposure to extreme temperatures, direct sunlight when parked, or heavy rain without proper protection.
6. Troubleshooting
- Device not powering on: Check power connections. Ensure the ignition is on if connected to the motorcycle's power.
- Not recording: Ensure a memory card is inserted and formatted. Check if the memory card is full (if loop recording is off or locked files occupy too much space).
- Poor video quality: Clean camera lenses. Ensure cameras are securely mounted and not vibrating excessively. Check video resolution settings.
- Memory card error: Reformat the memory card. If the issue persists, try a different Class 10 (or higher) MicroSD card, preferably 32GB or smaller, as larger capacities may not be fully compatible.
- Buttons unresponsive: Try pressing the RESET button with a thin object.
7. Specifications
| Feature | Detail |
|---|---|
| Brand | Tbest |
| Model | B07X11T56X |
| Display Type | 3.0-inch LCD |
| Video Capture Resolution | 1080p Full HD |
| Viewing Angle | 130 Degrees (per camera) |
| Control Method | Buttons (Touch functionality not explicitly detailed in product info, but listed as 'Touch' in spec. Prioritizing physical buttons as primary control based on image.) |
| Mounting Type | Adhesive Mount |
| Included Components | Memory Card (Note: Capacity may vary, 32GB recommended) |
| Item Weight | 13.4 ounces |
| Package Dimensions | 7.4 x 5.2 x 3.2 inches |
8. Warranty and Support
For warranty information, technical support, or service inquiries, please refer to the documentation included with your purchase or contact Tbest customer service through their official channels. Keep your purchase receipt as proof of purchase.