
1. Product Overview
The DEWENWILS 24-Hour Digital Outlet Timer is designed to automate the power control of various electrical devices. It features a single daily repeat program, a large display for easy readability, and a backup battery to retain settings during power outages. This timer is suitable for indoor use with lamps, fans, small appliances, and seasonal lighting, helping to conserve energy and enhance convenience.
The timer includes one polarized outlet for controlled devices and an "Always ON" outlet for continuous power. Its slim design ensures it does not obstruct adjacent outlets.
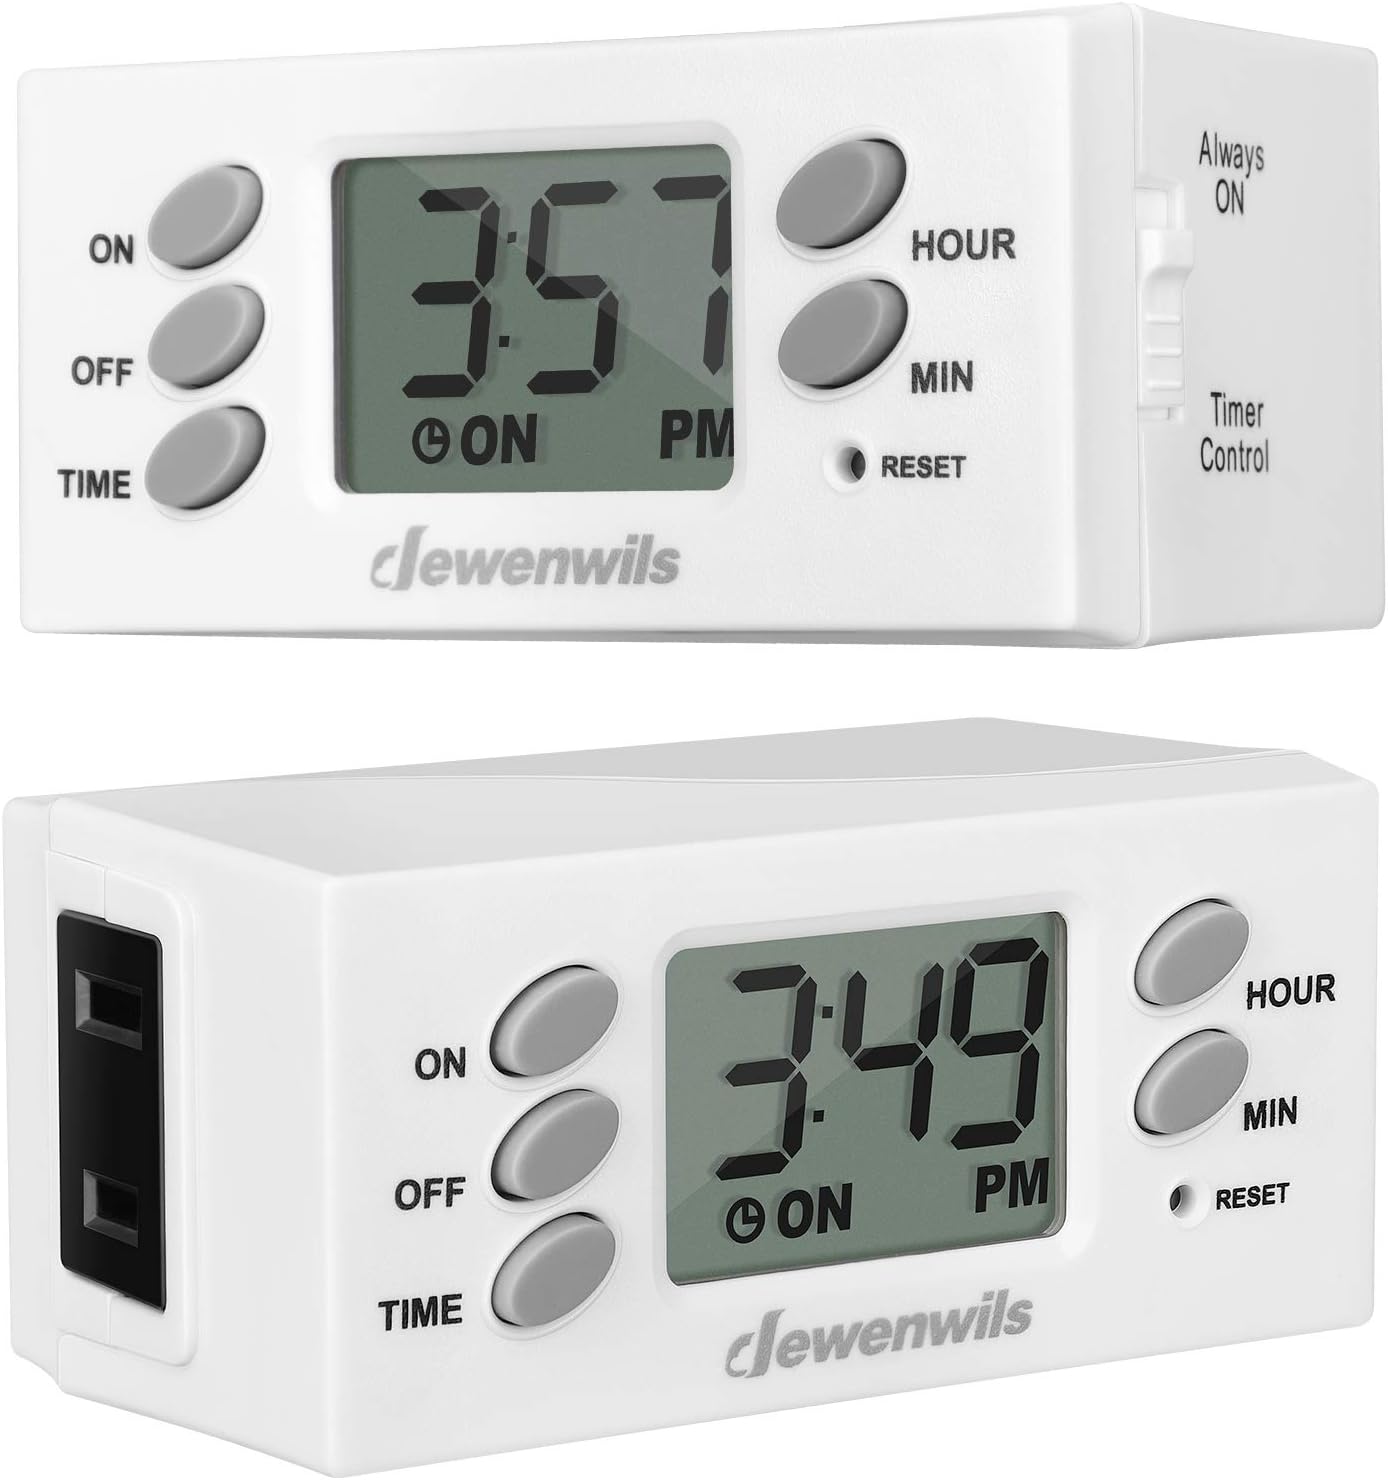
Figure 1: Front and side view of the DEWENWILS 24-Hour Digital Outlet Timer, highlighting the display, control buttons, and the "Always ON / Timer Control" switch.

Figure 2: The timer operates silently, making it suitable for use in quiet environments like bedrooms.
2. Safety Information
- This timer is UL listed, ensuring compliance with safety standards.
- Electrical Rating: 125V, 60Hz, 15A/1000W. Do not exceed these ratings.
- For indoor use only. Do not expose to water or damp conditions.
- Do not use with appliances that require continuous supervision, such as heating appliances.
- Ensure the timer is securely plugged into a polarized wall outlet.
- Do not disassemble or attempt to repair the timer. Refer to qualified service personnel.
- Keep out of reach of children.
3. Setup
- Initial Charge: Before first use, plug the timer into an electrical outlet for at least 30 minutes to charge the internal backup battery. This battery retains your settings during power outages or when the timer is unplugged.
- Placement: Insert the timer into a standard 125V polarized wall outlet. The slim bar design ensures that the timer does not block the second outlet, allowing it to be used simultaneously.
- Connect Device: Plug the device you wish to control into the polarized outlet on the right side of the timer (labeled "Timer Control"). The outlet on the left side is "Always ON" and is not controlled by the timer function.

Figure 3: The timer's slim design allows access to the adjacent wall outlet.

Figure 4: A lamp connected to the timer-controlled polarized outlet.
4. Operating Instructions
The timer has five buttons: ON, OFF, TIME, HOUR, MIN, and a recessed RESET button. There is also a slide switch on the right side to select between "Always ON" and "Timer Control" modes.
4.1 Setting the Current Time
- Press and hold the TIME button.
- While holding TIME, press the HOUR button to adjust the current hour. The display will cycle through 12-hour AM/PM format.
- While holding TIME, press the MIN button to adjust the current minute.
- Release the TIME button when the correct time is set.
4.2 Setting the ON/OFF Program
This timer supports one daily ON/OFF program.
- Set ON Time:
- Press and hold the ON button.
- While holding ON, press HOUR to set the desired ON hour.
- While holding ON, press MIN to set the desired ON minute.
- Release the ON button. The display will show "ON" next to the set time.
- Set OFF Time:
- Press and hold the OFF button.
- While holding OFF, press HOUR to set the desired OFF hour.
- While holding OFF, press MIN to set the desired OFF minute.
- Release the OFF button. The display will show "OFF" next to the set time.
4.3 Selecting Operating Mode
Use the slide switch on the right side of the timer to select the operating mode:
- Always ON: The connected device will receive continuous power, bypassing the timer program.
- Timer Control: The connected device will turn ON and OFF according to your programmed schedule.

Figure 5: Timer controls and programming steps.
4.4 Resetting the Timer
To clear all programmed settings, use a small pointed object (like a pen tip) to press the recessed RESET button. The display will reset to 12:00 AM.
4.5 Usage Examples
The DEWENWILS timer is versatile and can be used for various indoor applications:
- Holiday Lighting: Automate your Christmas tree lights or other seasonal decorations to turn on and off daily.
- Aquarium Lighting: Maintain a consistent light cycle for your aquarium to support aquatic life.
- Lamps and Fans: Schedule desk lamps, floor lamps, or small fans to operate only when needed.

Figure 6: Timer used to schedule Christmas lights daily.

Figure 7: Timer used for aquarium lighting to save energy and maintain a schedule.

Figure 8: Timer set for daily repeat operation with a desk lamp.
5. Maintenance
- Cleaning: Disconnect the timer from the power outlet before cleaning. Wipe the exterior with a soft, dry cloth. Do not use liquid cleaners or abrasive materials.
- Storage: When not in use, store the timer in a cool, dry place away from direct sunlight and moisture.
- Backup Battery: The internal backup battery is designed to last for several years. It is not user-replaceable. If the timer consistently loses settings after being unplugged, the battery may need servicing by a qualified technician or the unit may need replacement.
6. Troubleshooting
| Problem | Possible Cause | Solution |
|---|---|---|
| Timer display is blank or dim. | Timer is not plugged in, or backup battery is depleted. | Ensure the timer is securely plugged into a live outlet. Allow 30 minutes for the backup battery to charge. |
| Device does not turn ON/OFF at programmed times. |
|
|
| Timer loses settings when unplugged. | Backup battery is not sufficiently charged or has reached end of life. | Plug the timer into an outlet for at least 30 minutes to charge the backup battery. If the issue persists, the internal battery may be depleted and the unit may require replacement. |
| Timer is difficult to program. | Unfamiliarity with button combinations. | Refer to Section 4.1 and 4.2 for detailed programming steps. Ensure buttons are pressed and held simultaneously as instructed. Consider using the RESET button to clear all settings and start fresh. |
7. Specifications
| Feature | Detail |
|---|---|
| Brand | DEWENWILS |
| Model Number | AUB07WWWGLMG |
| Material | Polycarbonate |
| Product Dimensions (D x W x H) | 3" x 1.7" x 1.3" |
| Item Weight | 12.6 ounces (358 Grams) |
| Number of Settings | 1 (Daily Repeat ON/OFF) |
| Screen Size | 2 Inches |
| Power Source | AC |
| Voltage | 120 Volts |
| Wattage | 1000W (Max 1875W) |
| Amperage Capacity | 15 Amps |
| Installation Method | Plug-in |
| Display Style | LCD |
| Plug Format | A - US style (Polarized) |
| Switch Style | Push Button / Slide Switch |
| Certification | UL Listed |
| Backup Battery | Internal, non-replaceable (retains settings for up to 3 months) |
8. Warranty and Support
For warranty information or technical support, please refer to the product packaging or contact DEWENWILS customer service directly. Contact details are typically available on the manufacturer's official website or through your purchase platform.
Please have your model number (AUB07WWWGLMG) and purchase date available when contacting support.