
1. Product Overview
This manual provides essential information for the installation, maintenance, and safe operation of your cciyu 2 inch Wheel Spacers. These adapters are designed to increase the offset of your wheels, providing additional clearance and potentially enhancing vehicle stability. Please read all instructions carefully before proceeding with installation.

Image 1: cciyu 2 inch Wheel Spacers with studs and lug nuts.
2. Product Specifications
The cciyu 2 inch Wheel Spacers are engineered for specific vehicle and wheel compatibility. Verify these specifications match your vehicle's requirements before installation.
- Thickness: 2 inches (50.8mm)
- Vehicle Bolt Pattern: 4x100mm (4x3.94 inches)
- Wheel Bolt Pattern: 4x100mm (4x3.94 inches)
- Center Bore: 56.1mm
- Threaded Studs/Nuts: 12x1.5
- Material: 6061-T6 Aircraft-Grade Aluminum Billet
- Quantity: 2 Pieces per package
- Item Weight: Approximately 7.65 pounds (per pair)
- Product Dimensions: Approximately 7.09 x 6.5 x 5.51 inches
- Model Number: 119667-5210-1820576581
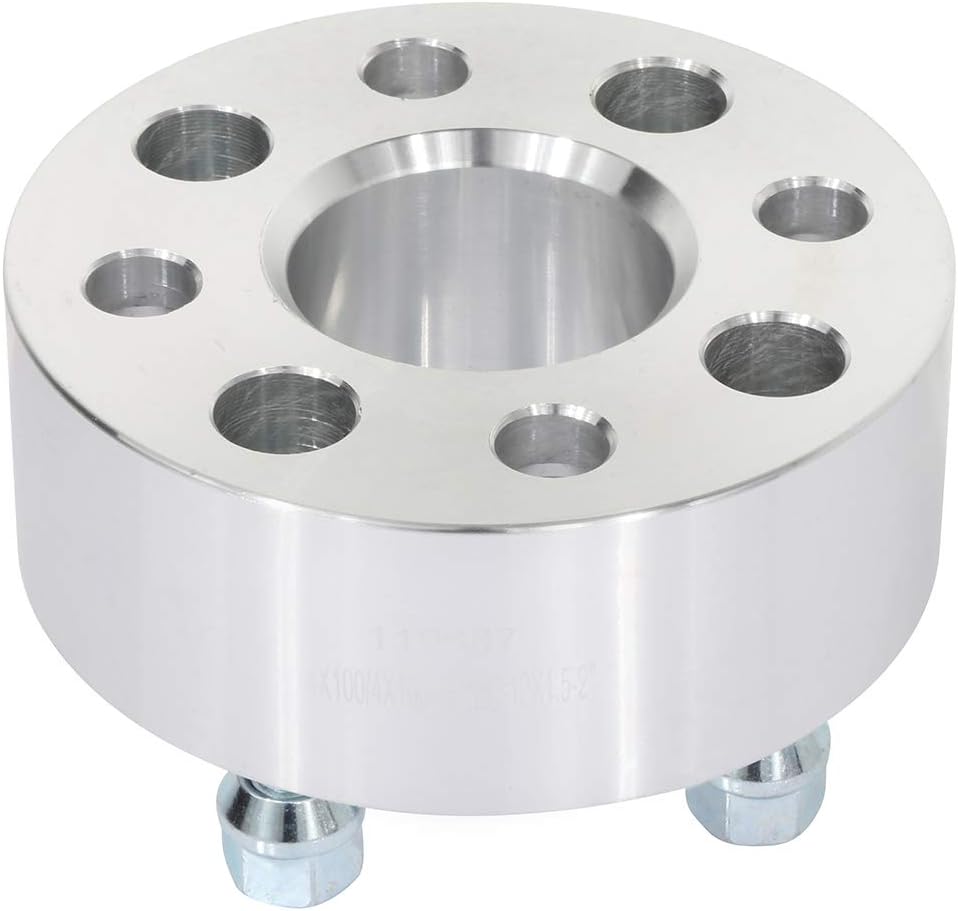
Image 2: Top view of a cciyu wheel spacer, highlighting the bolt pattern and center bore.
3. Vehicle Fitment
These wheel spacers are compatible with various vehicles that share the 4x100 bolt pattern and 56.1mm center bore. Please confirm your vehicle's specifications before installation.
- 1980-1989 for Prelude
- 2007-2019 for Fit
- 1980-2007 for Civic
- 2004-2008 for Aveo
- 1988-1991 for CRX
- 2002-2007 for Lancer
- 1993-2018 for Mirage
- 1993-1997 for Civic del Sol
- 2017-2018 for Mirage G4
- 1990-2001 for Integra
- 2010-2014 for Insight
4. Important Safety Information
Improper installation or use of wheel spacers can lead to serious safety hazards. It is highly recommended that installation be performed by a qualified automotive technician. Always adhere to the following safety guidelines:
- Stud Protrusion: After the wheel spacer is installed, ensure that the original vehicle wheel studs do not protrude beyond the face of the spacer. If they do, trimming the studs will be necessary to ensure the wheel sits flush against the spacer. Failure to do so will prevent proper wheel seating and can affect driving safety.
- Torque Specifications: Always tighten lug nuts to the vehicle manufacturer's recommended torque specifications. Re-check torque after the first 50-100 miles of driving and periodically thereafter.
- Clean Surfaces: Ensure all mating surfaces (hub, spacer, wheel) are clean and free of rust, dirt, or debris before installation.
- Proper Fitment: Confirm that the wheel spacer's center bore matches your vehicle's hub and that the bolt patterns are identical.
- Professional Installation: If you are unsure about any step of the installation process, consult a professional mechanic.

Image 3: Detail of a 10.9 grade bolt on the wheel spacer.
5. Installation Guide
Follow these steps for proper installation of your cciyu wheel spacers. Ensure your vehicle is on a level surface and properly supported with jack stands before beginning.

Image 4: Installation diagram for wheel spacers.
- Prepare Vehicle: Park the vehicle on a flat, stable surface. Engage the parking brake. Loosen the lug nuts on the wheel you intend to work on, but do not remove them completely.
- Lift Vehicle: Safely lift the vehicle using a jack and secure it with jack stands. Ensure the vehicle is stable before proceeding.
- Remove Wheel: Fully remove the lug nuts and carefully take off the wheel.
- Clean Hub Surface: Thoroughly clean the vehicle's hub surface to remove any rust, dirt, or corrosion. A wire brush can be used for this purpose. Ensure the surface is smooth and flat.
- Inspect Studs: Check if the vehicle's original wheel studs protrude beyond the face of the wheel spacer when placed against the hub. If they do, they must be trimmed to ensure the wheel can sit flush against the spacer.
- Install Spacer: Place the cciyu wheel spacer onto the vehicle's hub. Ensure it sits flush against the hub.
- Secure Spacer: Use the provided lug nuts to secure the wheel spacer to the vehicle's hub. Tighten these lug nuts in a star pattern to the vehicle manufacturer's recommended torque specifications.
- Install Wheel: Mount the wheel onto the studs of the newly installed wheel spacer.
- Secure Wheel: Install your wheel's lug nuts onto the spacer's studs. Tighten these lug nuts in a star pattern to the vehicle manufacturer's recommended torque specifications.
- Lower Vehicle: Carefully lower the vehicle until the wheel touches the ground, then remove the jack stands. Fully lower the vehicle.
- Final Torque Check: Perform a final torque check on all lug nuts (both those securing the spacer to the hub and those securing the wheel to the spacer) to ensure they are properly tightened.
- Post-Installation Check: After driving the first 50-100 miles, re-check the torque of all lug nuts to ensure they have not loosened.
6. Maintenance
Regular maintenance is crucial for the safe and reliable operation of your wheel spacers.
- Periodic Torque Checks: Regularly check the torque of all lug nuts (both spacer-to-hub and wheel-to-spacer) every few thousand miles or during routine tire rotations.
- Visual Inspection: Periodically inspect the wheel spacers for any signs of damage, cracks, or corrosion. Ensure all studs are intact and free from damage.
- Cleanliness: Keep the area around the wheel spacers clean to prevent debris buildup that could affect seating or cause corrosion.
7. Troubleshooting
If you encounter issues after installing your wheel spacers, consider the following common problems and solutions:
- Vibration: If you experience vibrations after installation, re-check all lug nut torque specifications. Ensure the wheel and spacer are sitting flush against their respective mating surfaces. Unbalanced wheels or damaged tires can also cause vibration.
- Improper Wheel Seating: If the wheel does not sit flush against the spacer, verify that the vehicle's original studs are not protruding past the spacer's face. If they are, they must be trimmed. Also, ensure there is no debris between the mating surfaces.
- Loose Lug Nuts: If lug nuts repeatedly loosen, ensure they were torqued correctly initially and re-torqued after the break-in period. Damaged studs or lug nuts may need replacement.
8. Warranty and Support
For specific warranty information or technical support regarding your cciyu wheel spacers, please refer to the product packaging or contact cciyu customer service directly through their official channels. Keep your purchase receipt as proof of purchase.