
NICREW AL-16U
NICREW Digital Outlet Timer Instruction Manual
Model: AL-16U
Brand: NICREW
Introduction
This manual provides detailed instructions for the operation and maintenance of your NICREW Digital Outlet Timer. This device is designed to automate the power supply to various electrical appliances, offering convenience and energy efficiency. It is ideal for controlling aquarium lights, lamps, kitchen appliances, and other mechanical devices, allowing you to easily set up to 16 on/off programs that repeat every 24 hours.

Image: The NICREW Digital Outlet Timer can be used with a wide range of indoor appliances to automate their operation.
Safety Information
- For indoor use only.
- Do not exceed the maximum load capacity of 15A / 1800W.
- Do not immerse in water or use in wet conditions.
- Keep out of reach of children.
- Ensure the timer is securely plugged into a grounded outlet.
- Do not disassemble or attempt to repair the unit.
Product Overview
The NICREW Digital Outlet Timer (Model AL-16U) features a sophisticated white molded design with an LED indicator and a large LCD display for easy programming.
Components

Image: Front view of the NICREW Digital Outlet Timer, highlighting the digital display, programming buttons, and the integrated power outlet.

Image: Detailed diagram of the timer's front panel, indicating the 7-day programmable feature, large LCD display, 16 separate timing programs, setting panel, reset button, and pilot lamp.
- LCD Display: Shows current time, day, and programming status.
- PROG Button: Enters and exits programming mode.
- WEEK Button: Selects the day(s) of the week for programming.
- HOUR Button: Adjusts the hour.
- MIN Button: Adjusts the minute.
- ON/AUTO/OFF Button: Cycles through manual ON, automatic, and manual OFF modes.
- CLOCK Button: Sets the current time and day.
- RES/RCL Button: Resets or recalls programs.
- R Button (Reset): Small recessed button for full reset.
- Pilot Lamp (LED Indicator): Indicates power status (red LED).
Setup
Initial Charge and Reset
Before first use, plug the timer into an electrical outlet for at least 30 minutes to charge the internal battery. This battery retains programming information during power outages. After charging, use a small pointed object (like a pen tip) to press the recessed R (Reset) button to clear all previous settings.
Setting Current Time and Day
- Press and hold the CLOCK button.
- While holding CLOCK, press the WEEK button repeatedly to set the current day of the week (MO, TU, WE, TH, FR, SA, SU).
- While holding CLOCK, press the HOUR button repeatedly to set the current hour (12-hour or 24-hour format).
- While holding CLOCK, press the MIN button repeatedly to set the current minute.
- Release the CLOCK button. The current time and day are now set.
Operating Instructions
The NICREW Digital Outlet Timer allows for up to 16 ON/OFF programs, providing flexible scheduling for your devices.

Image: The timer plugged into a wall outlet, illustrating its key features: 16 programmable settings, 1800W maximum load, 24/7 programmability, and a large LCD display.
Programming On/Off Times
- Press the PROG button once. The display will show "1 ON".
- Press the WEEK button to select the day(s) for this program. Options include individual days, weekdays (MO TU WE TH FR), weekends (SA SU), or all 7 days (MO TU WE TH FR SA SU).
- Press the HOUR button to set the desired ON hour.
- Press the MIN button to set the desired ON minute.
- Press the PROG button again. The display will show "1 OFF".
- Repeat steps 2-4 to set the desired OFF time for the first program.
- Continue pressing PROG to cycle through programs 2 ON, 2 OFF, up to 16 ON, 16 OFF. If you do not need all 16 programs, simply press CLOCK to exit programming mode.
- To activate the programs, ensure the timer is in AUTO mode. Press the ON/AUTO/OFF button until "AUTO" is displayed on the screen.
Manual Override
To temporarily turn the connected appliance ON or OFF outside of the programmed schedule:
Press the ON/AUTO/OFF button. The timer will cycle through:
- ON: Appliance is continuously ON.
- AUTO: Appliance operates according to programmed schedule.
- OFF: Appliance is continuously OFF.
To resume programmed operation, ensure the timer is set to AUTO.
Maintenance
The NICREW Digital Outlet Timer requires minimal maintenance.
- Disconnect the timer from the power outlet before cleaning.
- Wipe the exterior with a soft, dry cloth. Do not use abrasive cleaners or solvents.
- Do not open the casing; there are no user-serviceable parts inside.
Troubleshooting
| Problem | Possible Cause | Solution |
|---|---|---|
| Timer display is blank. | Internal battery is depleted. | Plug the timer into an outlet for at least 30 minutes to charge the battery. |
| Programs are not running. | Timer is not in AUTO mode. | Press the ON/AUTO/OFF button until "AUTO" is displayed. |
| Appliance does not turn on/off at programmed times. | Incorrect program settings or time. | Verify current time and day. Recheck program settings (ON/OFF times and days). Ensure the appliance is properly connected and functional. |
| Timer is unresponsive. | Temporary malfunction. | Perform a full reset by pressing the recessed R button. You will need to reprogram the timer. |
Specifications
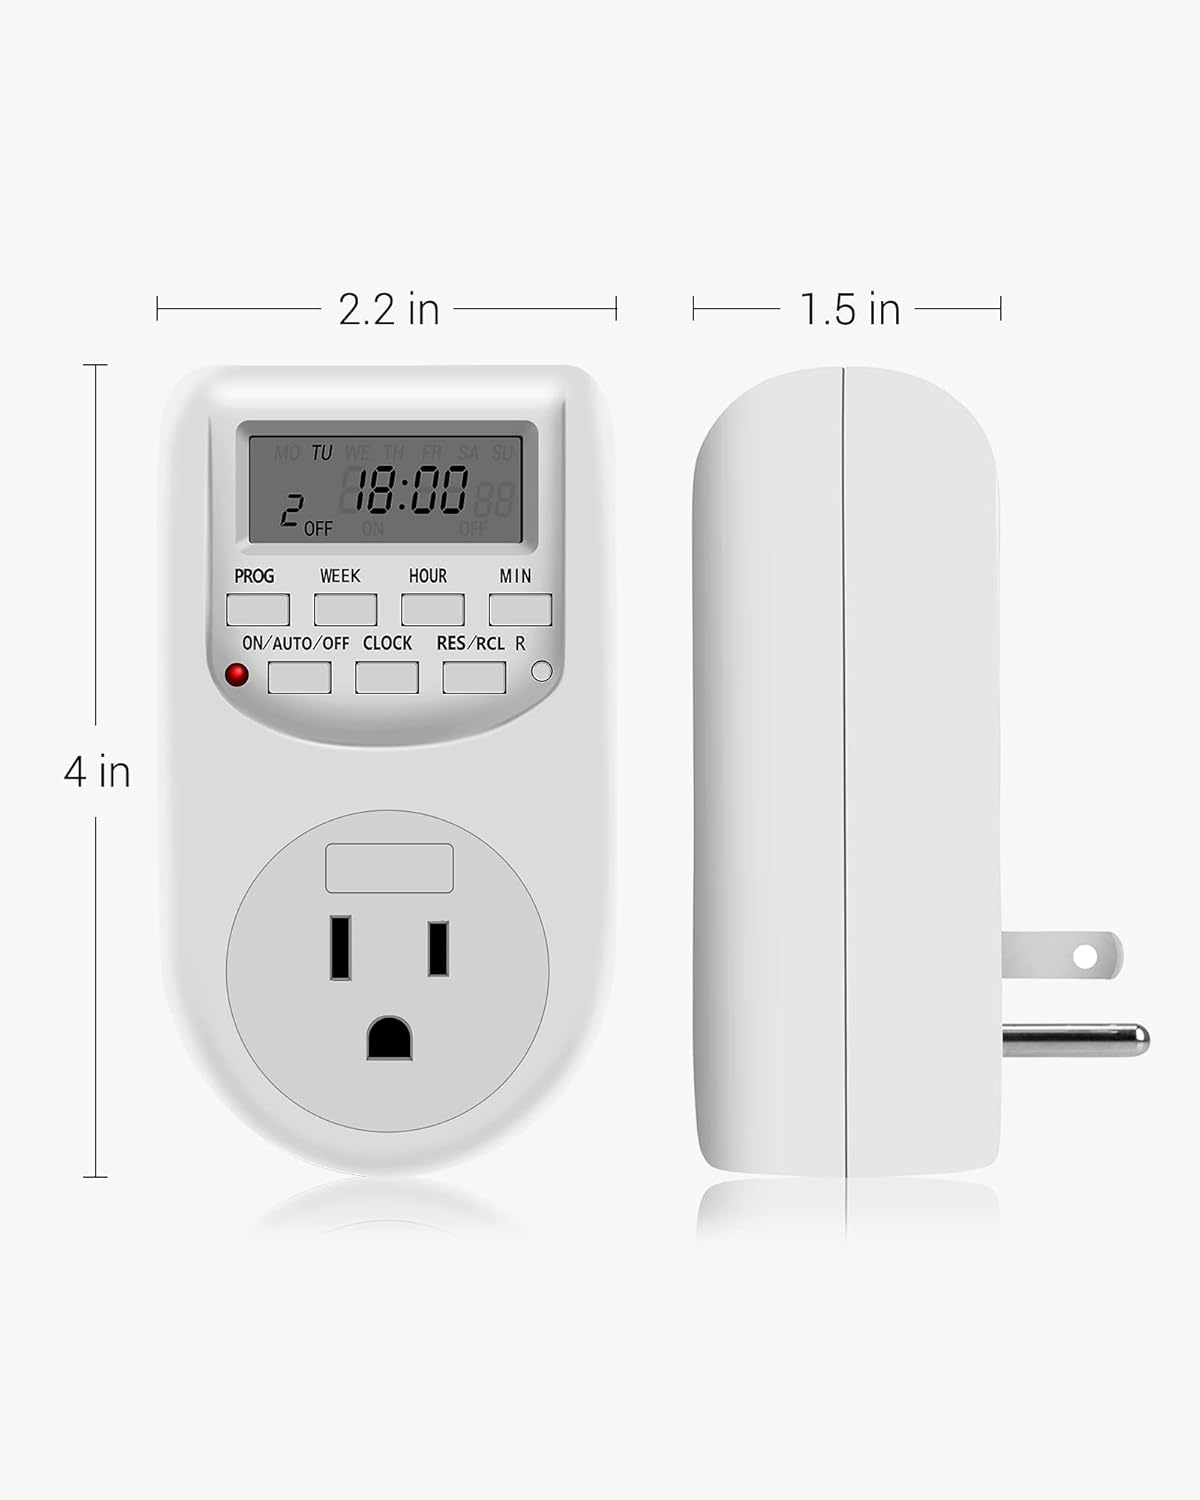
Image: Dimensions of the NICREW Digital Outlet Timer.

Image: Back view of the timer, displaying the product label with electrical specifications.
- Model: AL-16U
- Color: White
- Material: Plastic
- Product Dimensions: 1.5"D x 2.2"W x 4"H
- Item Weight: 4.7 ounces (132 Grams)
- Number of Settings: 16 ON/OFF programs
- Max Power: 1800W
- Max Current: 15A
- Voltage: AC 120V / 60Hz
- Battery: 1 Lithium Ion battery (included, internal)
- Usage: Indoor use only
Warranty and Support
NICREW offers a hassle-free 12-month warranty for this product. For technical support, troubleshooting assistance, or warranty claims, please contact NICREW customer service.
You can find more information and contact details on the official NICREW website or through your purchase platform.
Note: Please retain your proof of purchase for warranty purposes.
Ask a question about this manual
Ask about setup, troubleshooting, compatibility, parts, safety, or missing instructions. Manuals+ will review the question and use this page’s manual context to help answer it.