1. Introduction and Overview
This manual provides essential information for the safe and effective use of your Flashpoint Pro Air-Cushioned Light Stand. Designed for photography and studio applications, this stand offers stability, adjustable height, and a protective air-cushioned system. Please read these instructions thoroughly before assembly and operation.

Image 1.1: The Flashpoint Pro Air-Cushioned Light Stand, showcasing its yellow accents and black finish.
2. Key Features
- Air-Cushioned Design: Prevents sudden drops of equipment by providing a controlled descent, protecting your gear and hands.
- Durable Construction: Made from aircraft-grade aluminum for lightweight strength and longevity.
- Adjustable Height: Extends up to 9.5 feet (289.5 cm) with secure twist locks for precise positioning.
- Universal Compatibility: Features a reversible 1/4"-20 or 3/8"-16 spigot adapter for various lighting equipment and accessories.
- Stable Base: Three-legged support design with strong connection joints ensures stability.
- Portable: Foldable design for easy storage and transport.

Image 2.1: Enhanced features of the light stand, including the secure twist lock and double-end spigot adapter.
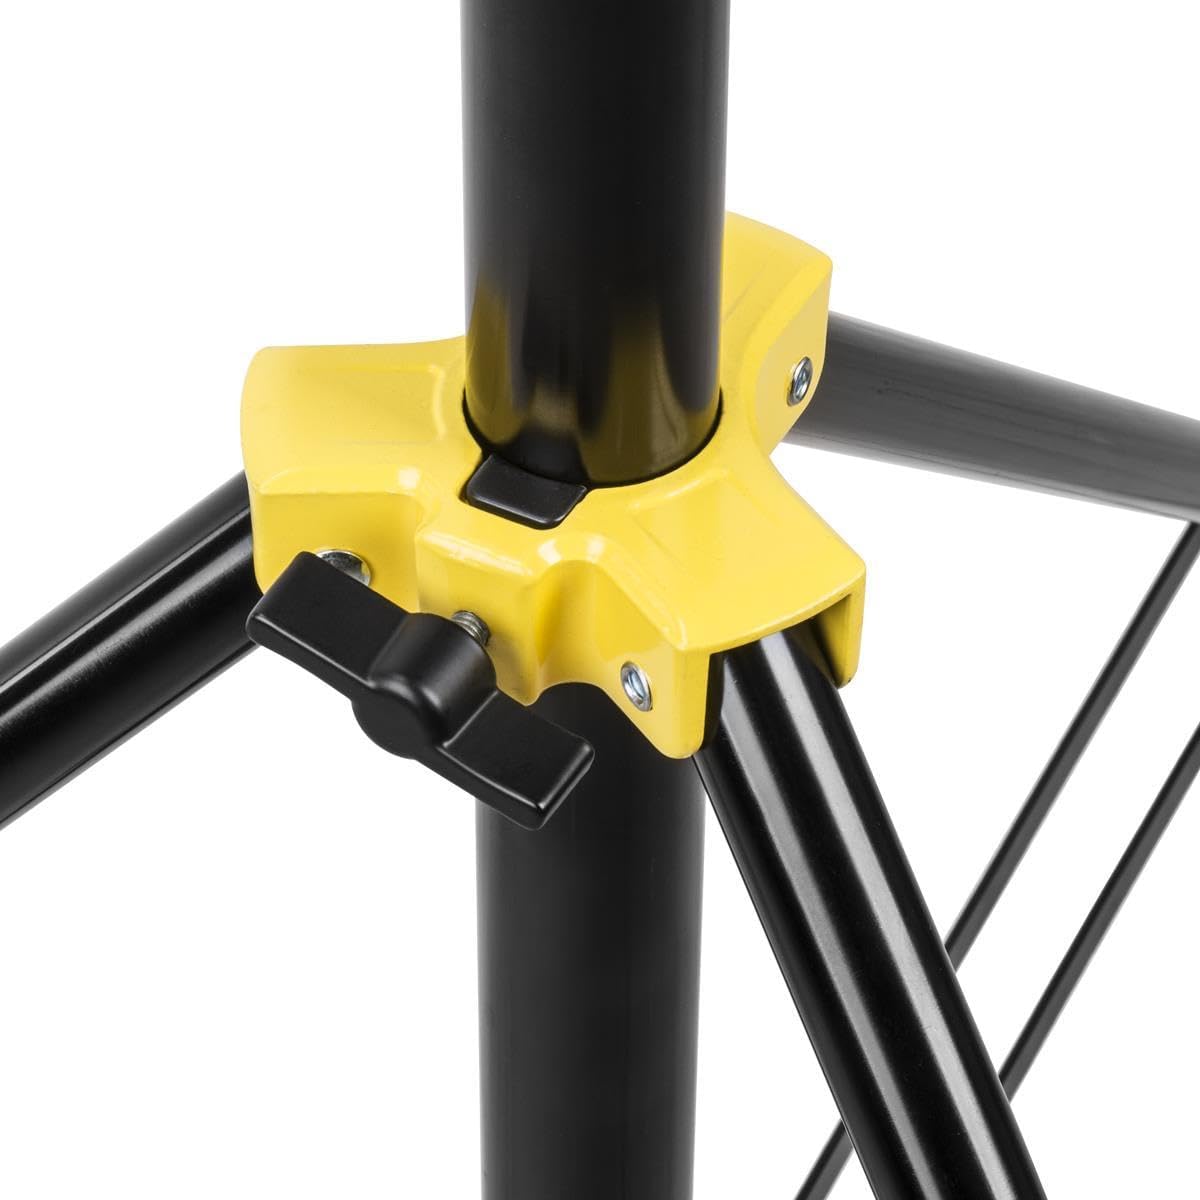
Image 2.2: Flexible height adjustment capabilities, from a folded height of 35.2 inches to a maximum height of 9.5 feet.

Image 2.3: The universal reversible adapter, compatible with various photography devices.

Image 2.4: Explanation of the air-cushioned mechanism for equipment protection.
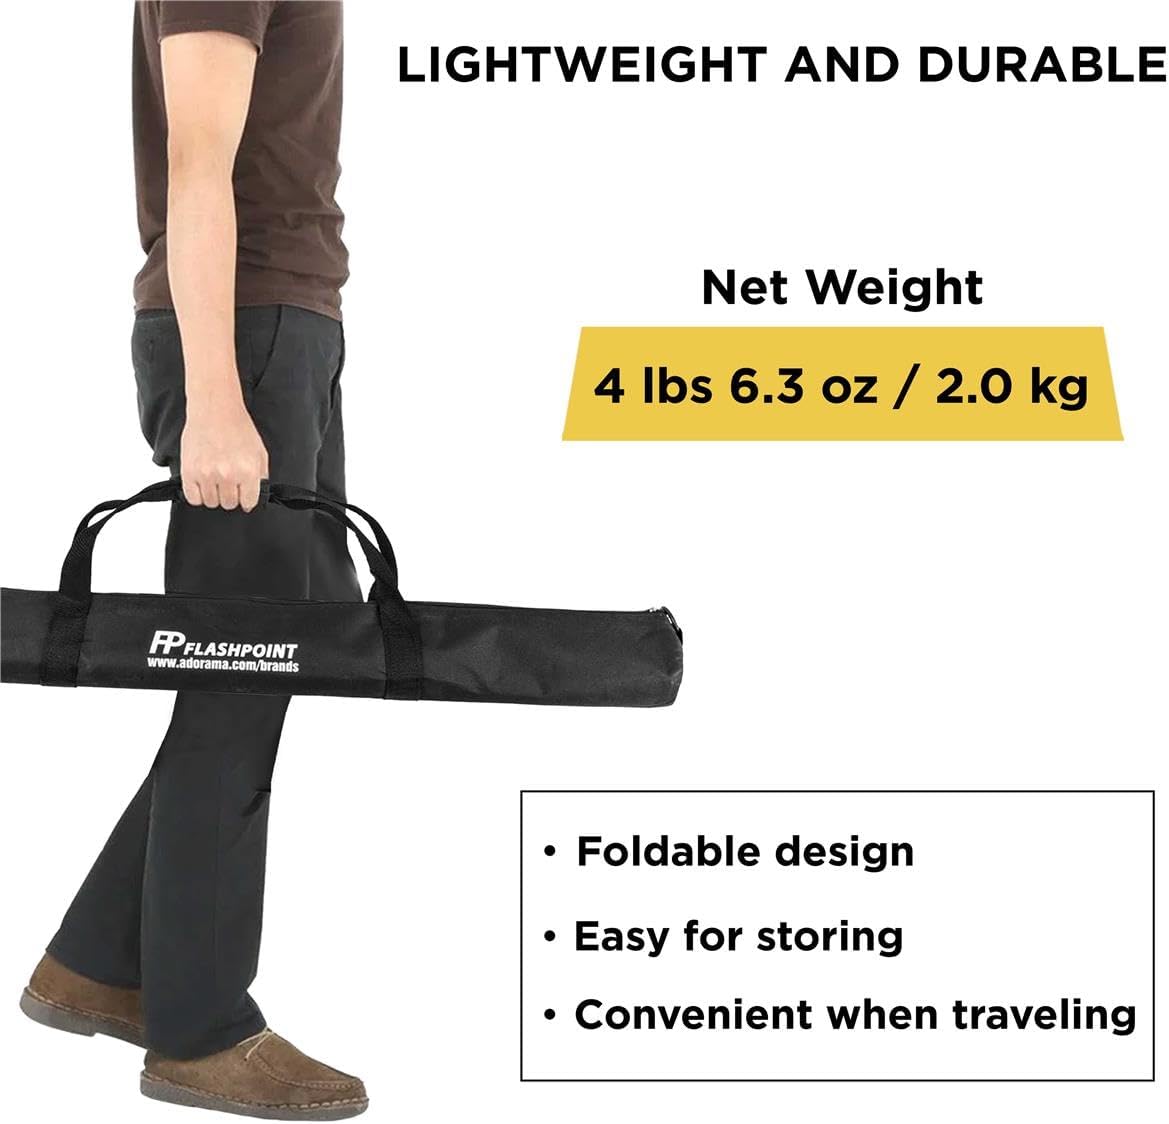
Image 2.5: The light stand's lightweight and durable construction, weighing 4 lbs 6.3 oz (2.0 kg).
3. Setup Instructions
- Unfold the Legs: Place the stand on a flat, stable surface. Gently pull the legs outwards until they are fully extended and locked into position, forming a stable tripod base. Ensure all three legs are evenly spread.
- Extend the Center Column: Loosen the twist lock knobs on each section of the center column. Carefully pull the sections upwards to the desired height.
- Secure the Height: Once the desired height is reached, firmly tighten all twist lock knobs to secure the sections in place. Ensure each section is locked before proceeding.
- Attach Equipment: The top of the stand features a reversible spigot adapter. Depending on your equipment, ensure the correct thread size (1/4"-20 or 3/8"-16) is facing upwards. Mount your lighting equipment or accessory onto the spigot and secure it.

Image 3.1: The light stand fully extended, ready for equipment attachment.
4. Operating Instructions
- Adjusting Height: To adjust the height, support your equipment with one hand, then loosen the twist lock knob of the desired section. Slowly raise or lower the section. Once at the new desired height, firmly tighten the knob. The air-cushioned system will prevent rapid drops, but always maintain control.
- Positioning Equipment: Ensure your equipment is balanced on the stand. For optimal stability, position heavier equipment directly over one of the legs.
- Relocating the Stand: Before moving the stand, always lower the center column to its minimum height and remove any attached equipment to prevent tipping or damage.
5. Maintenance
- Cleaning: Wipe down the stand with a soft, dry cloth after each use to remove dust and debris. For stubborn dirt, use a slightly damp cloth and dry thoroughly. Avoid abrasive cleaners or solvents.
- Lubrication: Periodically inspect the moving parts and twist locks. If they become stiff, apply a small amount of silicone-based lubricant to the sliding sections and threads of the knobs.
- Storage: Store the stand in a dry, cool place, preferably in its original carrying bag, to protect it from dust and potential damage.
- Inspection: Regularly check all screws, bolts, and joints for tightness. Ensure the legs open and close smoothly and that the air-cushioned system functions correctly.
6. Troubleshooting
- Stand is unstable: Ensure the legs are fully extended and locked. Verify the stand is on a flat, level surface. Distribute the weight of your equipment evenly.
- Sections slide down unexpectedly: Confirm that all twist lock knobs are tightened firmly. If the issue persists, inspect the internal air-cushioned mechanism for any obstructions or damage.
- Knobs are stiff or difficult to turn: Apply a small amount of silicone lubricant to the knob threads. Do not overtighten, as this can cause wear.
7. Specifications
| Feature | Detail |
|---|---|
| Model Number | Air Cushioned Stand |
| Maximum Height | 9.5 feet (289.5 cm) |
| Minimum Height | 41.1 inches (104.5 cm) |
| Folded Height | 35.2 inches (89.5 cm) |
| Max Load Capacity | 16 lbs (7.3 kg) |
| Net Weight | 4 lbs 6.3 oz (2.0 kg) |
| Material | Aircraft Grade Aluminum |
| Spigot Adapter | Reversible 1/4"-20 and 3/8"-16 |
| Product Dimensions | 36 x 4.25 x 4.25 inches (folded) |
8. Safety Information
- Always ensure the stand is placed on a stable, level surface before extending or mounting equipment.
- Do not exceed the maximum load capacity of 16 lbs (7.3 kg). Overloading can cause instability and damage.
- Always tighten all twist lock knobs securely after adjusting height.
- Keep hands and fingers clear of moving parts when adjusting the stand to prevent pinching.
- Do not leave the stand unattended with heavy equipment mounted, especially in windy conditions or high-traffic areas.
- Lower the stand to its minimum height and remove equipment before moving it.
- This product is not a toy. Keep out of reach of children.
9. Warranty and Support
For warranty information, technical support, or service inquiries regarding your Flashpoint Pro Air-Cushioned Light Stand, please contact Flashpoint customer service directly. Refer to the official Flashpoint website or your purchase documentation for contact details.


