Introduction
The Klarus HC3 is a versatile, lightweight, and rechargeable cap visor light designed for various activities such as fishing, running, camping, and reading. It features multiple lighting modes, motion sensor control, and a durable, waterproof design. This manual provides essential information for the proper use and maintenance of your HC3 light.

Image: The Klarus HC3 cap visor light, showcasing its compact design and integrated clip.
Product Features
- 5 Lighting Modes: Includes Medium, Bright (100 lumens), Low, Red, and Flashing Red.
- Gentle COB LED: Designed to reduce eye strain and enhance visual comfort.
- Lightweight Design: Weighs approximately 1.34 ounces (38 grams) for comfortable wear.
- 0-180° Angle Adjustment: Allows precise direction of light.
- USB-C Rechargeable: Fast charging, providing up to 27 hours of runtime on a single charge.
- Motion Sensor Control: Intuitive gesture-based on/off function, which can be disabled.
- Universal Headband: Compatible with brimless hats, included for versatile use.
- Firm Clip: Securely attaches to hats or other gear for hands-free operation.
- IPX5 Waterproof: Resistant to water splashes from any direction, suitable for various weather conditions.
Package Contents
Please verify that all items are present in your package:
- Klarus HC3 Visor Clip Lamp x 1
- Headband x 1
- USB-C Charging Cable x 1
- User Manual x 1
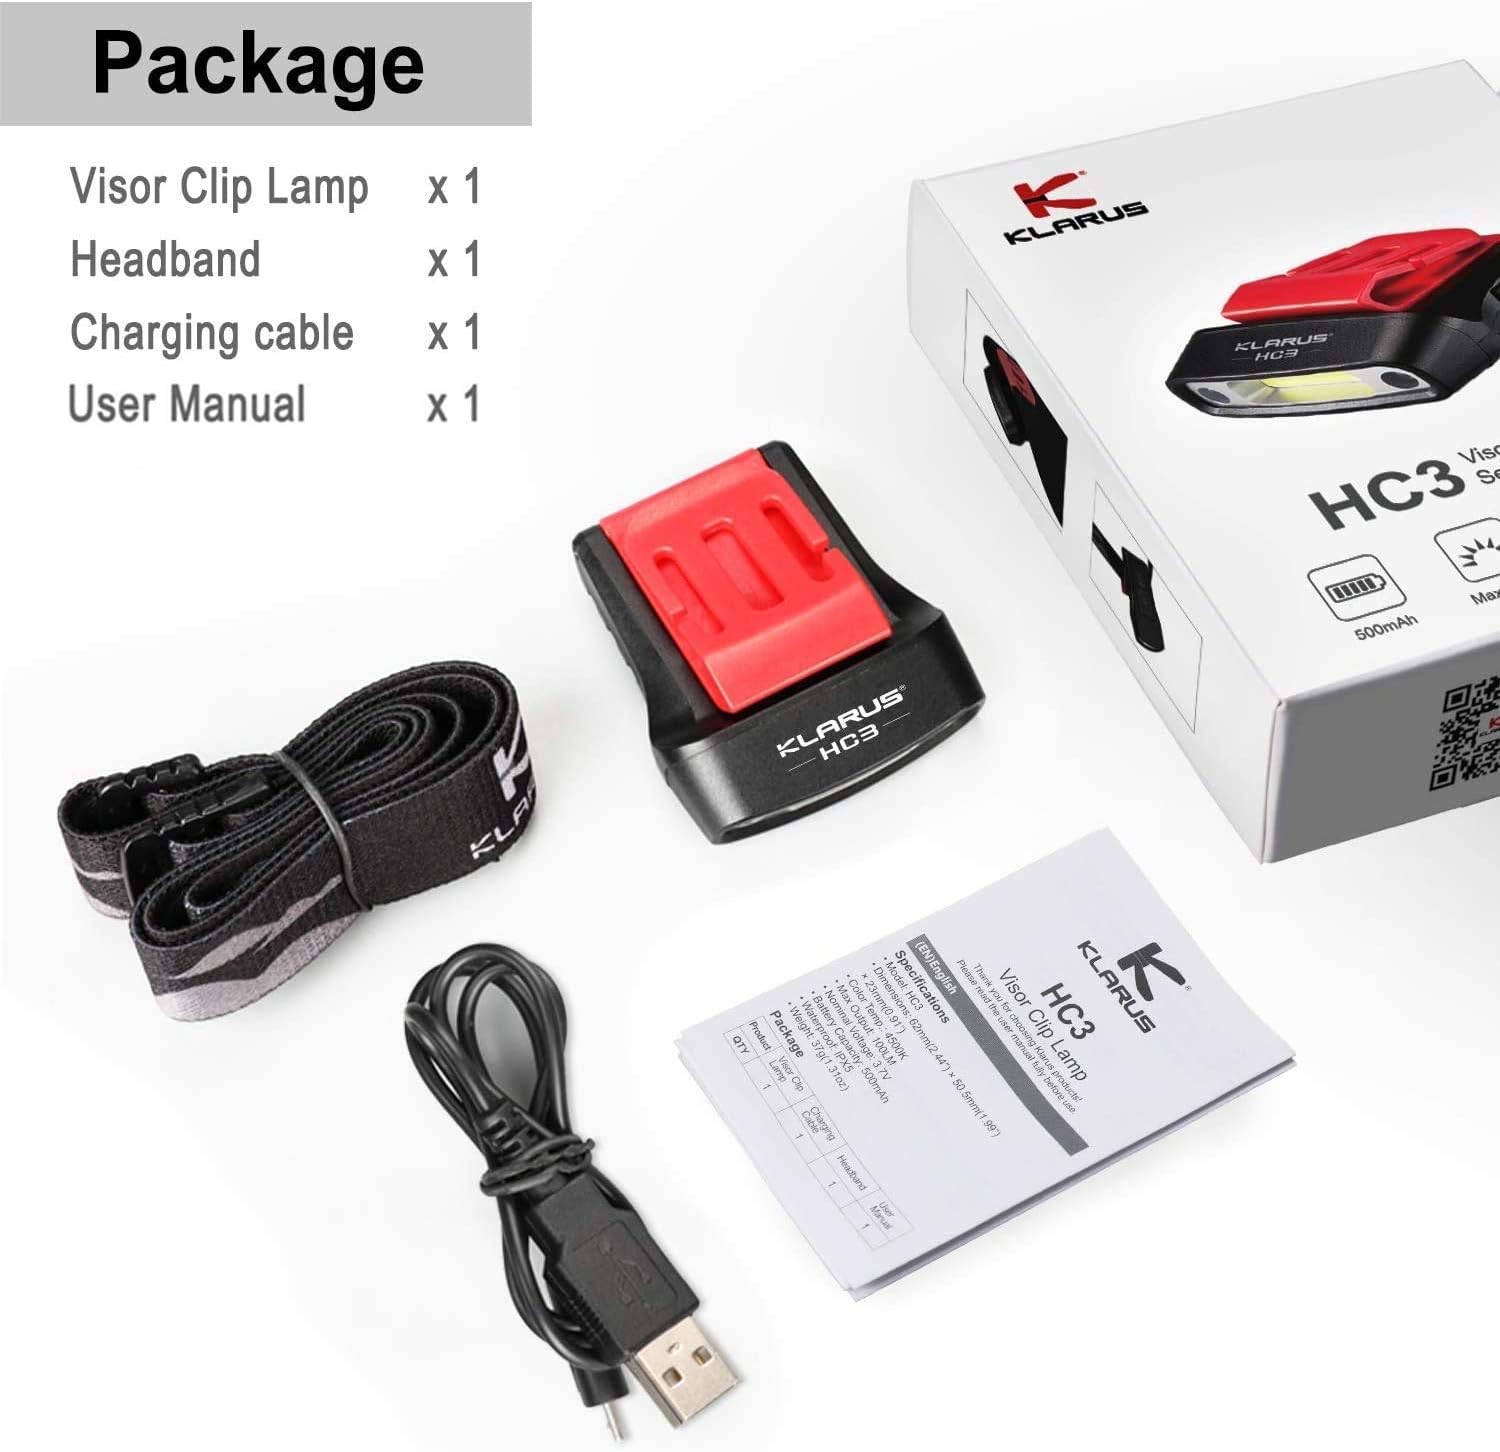
Image: Contents of the Klarus HC3 package, including the light, headband, charging cable, and user manual.
Setup
1. Initial Charging
Before first use, fully charge the Klarus HC3. Connect the provided USB-C charging cable to the light's charging port and to a USB power source (e.g., computer, wall adapter). The charge indicator will show the battery level.
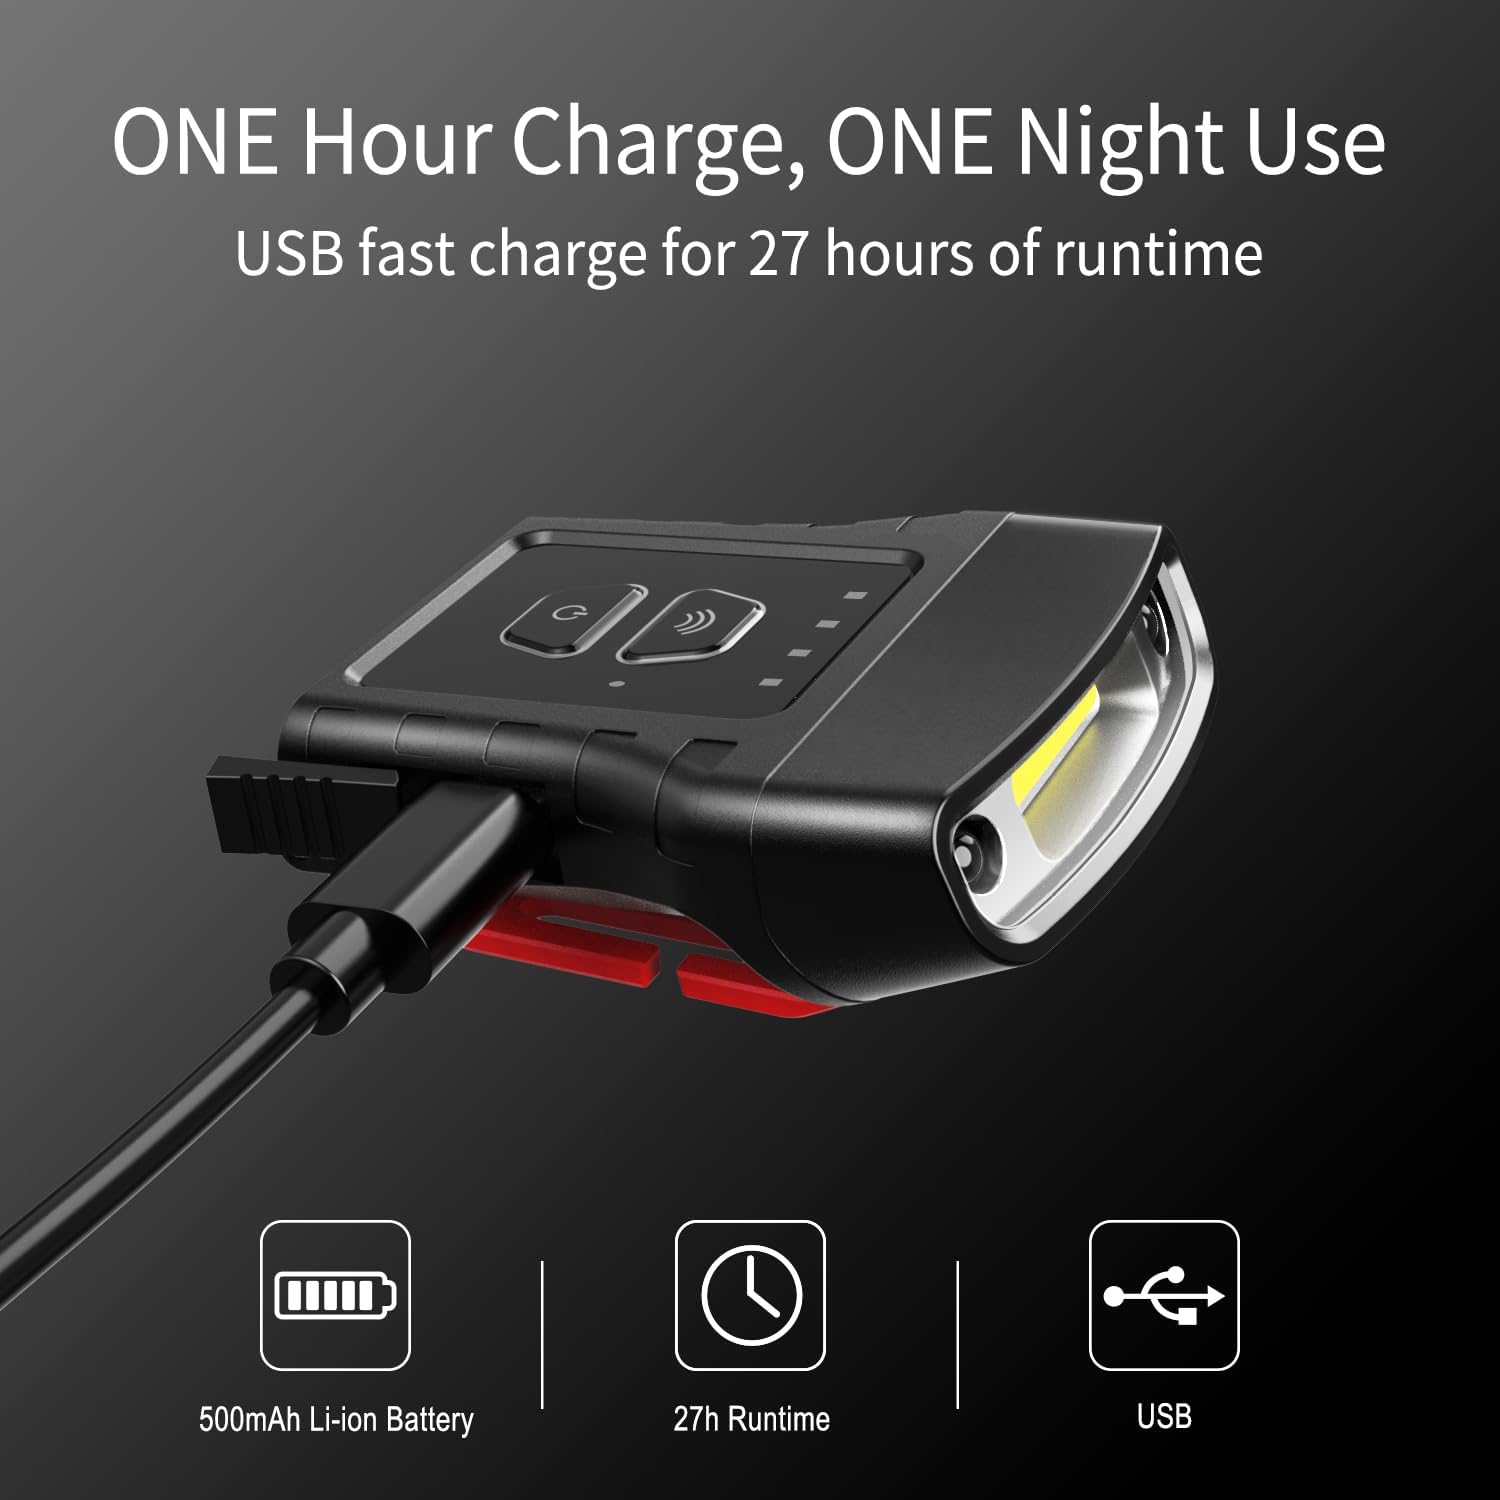
Image: The Klarus HC3 connected to a USB-C charging cable, illustrating the charging process.
2. Attaching the Light
The HC3 can be used in two primary ways:
- Clip-on Hat: Securely attach the integrated clip to the brim of a cap or hat. Ensure the light is facing the desired direction.
- Headband: For use with brimless hats or directly on the head, attach the light to the included universal headband. Adjust the headband for a comfortable and secure fit.
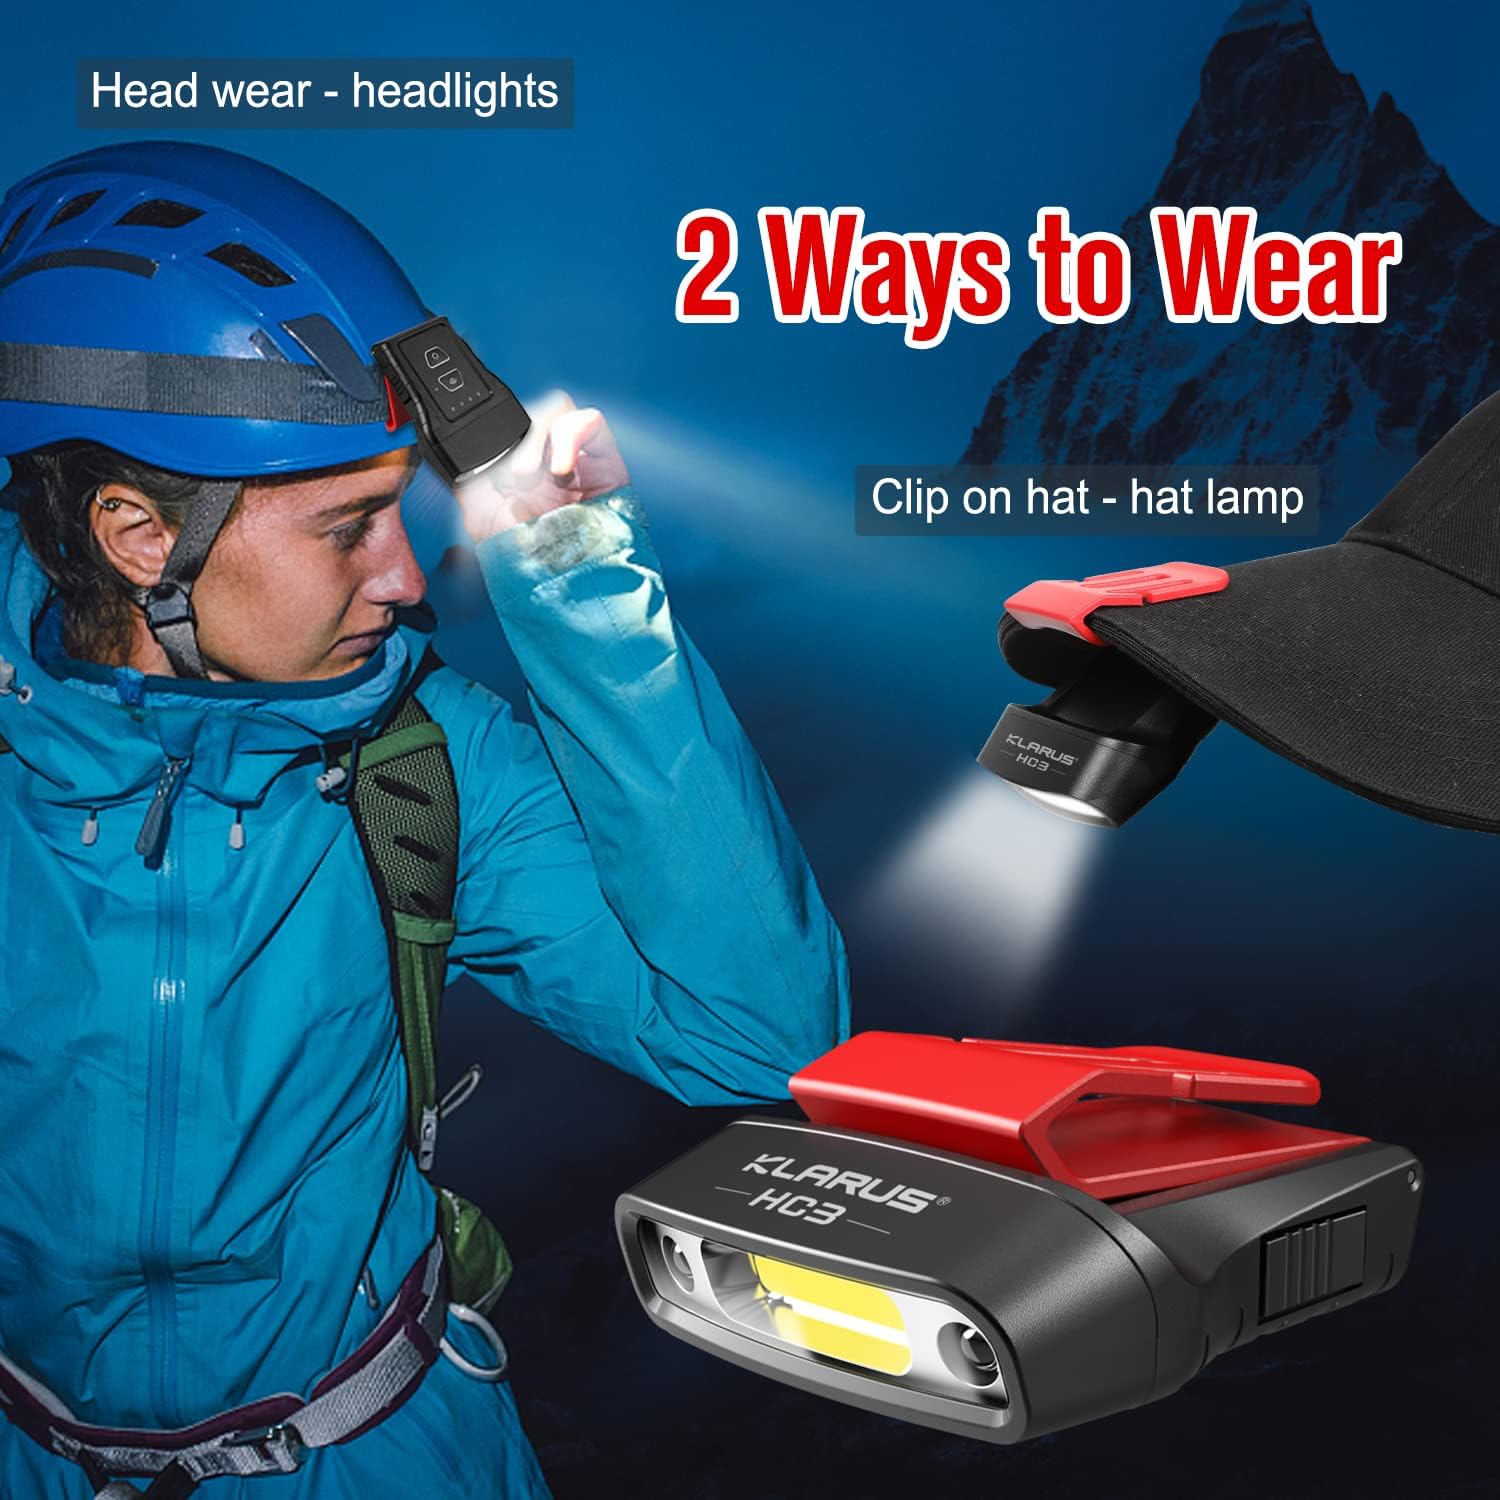
Image: Demonstrates two wearing methods: clipped onto a hat and worn as a headlamp with the included headband.
Operating Instructions
1. Power On/Off and Mode Selection (Manual Control)
Press the main power button to cycle through the lighting modes:
- Press once for Medium White light.
- Press again for Bright White light (100 lumens).
- Press again for Low White light.
- Press again for Red light.
- Press again for Flashing Red light.
- Press again to turn off the light.
To turn off the light from any mode, press and hold the power button for approximately 1 second.

Image: Visual representation of the five lighting modes: White Medium, White High (Bright), White Low, Red High, and Red Strobe.
2. Motion Sensor Control
The HC3 features a motion sensor for hands-free operation:
- Activate Motion Sensor: While the light is on, press the dedicated motion sensor button (usually indicated by a wave icon). The sensor indicator light will illuminate.
- Gesture Control: Once activated, wave your hand within 10-15 cm (4-6 inches) in front of the light to turn it on or off.
- Deactivate Motion Sensor: Press the motion sensor button again. The sensor indicator light will turn off.

Image: Illustrates both manual button control and motion sensing for turning the light on and off.
3. Angle Adjustment
The light head can be rotated 0-180 degrees to direct the beam precisely where needed. This is useful for various tasks and activities.

Image: Shows the Klarus HC3 light head adjusting through a 0-180 degree range.
4. Usage Scenarios
The Klarus HC3 is suitable for a wide range of activities, providing hands-free illumination:

Image: Collage depicting various uses of the HC3, including running, fishing, camping, and walking.
Maintenance
1. Cleaning
Wipe the light with a soft, damp cloth to remove dirt or debris. Do not use abrasive cleaners or solvents, as these can damage the device.
2. Battery Care
- Recharge the battery regularly, even if the light is not frequently used, to maintain battery health.
- Avoid fully depleting the battery before recharging.
- Store the light in a cool, dry place when not in use for extended periods.
3. Waterproofing
The HC3 has an IPX5 waterproof rating, meaning it is protected against low-pressure water jets from any direction. While it can withstand rain and splashes, it is not designed for submersion in water.
Image: The Klarus HC3 shown with water droplets, indicating its IPX5 waterproof capability.
Troubleshooting
- Light does not turn on:
- Ensure the battery is charged. Connect to a USB-C power source and check the charge indicator.
- Verify that the power button is pressed correctly.
- If using motion sensor, ensure it is activated and your hand is within the detection range.
- Motion sensor is not responding:
- Confirm the motion sensor mode is active (sensor indicator light on).
- Ensure there are no obstructions between your hand and the sensor.
- Try deactivating and reactivating the motion sensor mode.
- Short battery life:
- Ensure the light is fully charged before use.
- Operating in higher brightness modes consumes more power. Use lower modes for extended runtime.
- Battery performance can decrease over time with repeated charge cycles.
If you encounter issues not listed here, please contact Klarus customer support for assistance.
Specifications
| Feature | Detail |
|---|---|
| Model | HC3 |
| Light Source Type | COB LED |
| White Brightness | Up to 100 Lumens |
| Light Modes | Medium, Bright, Low, Red, Flashing Red |
| Power Source | Battery Powered (Lithium Ion) |
| Battery Capacity | 500mAh (built-in) |
| Charging Port | USB-C |
| Max Run Time | Up to 27 hours |
| Item Weight | 1.31 ounces (approx. 37 grams) |
| Material | Plastic (High quality hard ABS) |
| Water Resistance Level | IPX5 (Waterproof) |
| Angle Adjustment | 0-180° |
Warranty and Support
Klarus products are manufactured to high-quality standards. For warranty information or technical support, please refer to the warranty card included with your product or visit the official Klarus website. If you have any questions or require assistance, please contact Klarus customer service.