1. Introduction
This manual provides detailed instructions for the proper use and maintenance of your Zerone AYNEFY0oxm4abc37 USB Endoscope. This device is designed for visual inspection in hard-to-reach areas, offering compatibility with Android smartphones and various computer operating systems. Please read this manual thoroughly before operating the endoscope to ensure optimal performance and longevity.
2. Product Overview
2.1 Key Features
- Compact Design: Features a slim 5.5mm diameter lens for accessing narrow spaces.
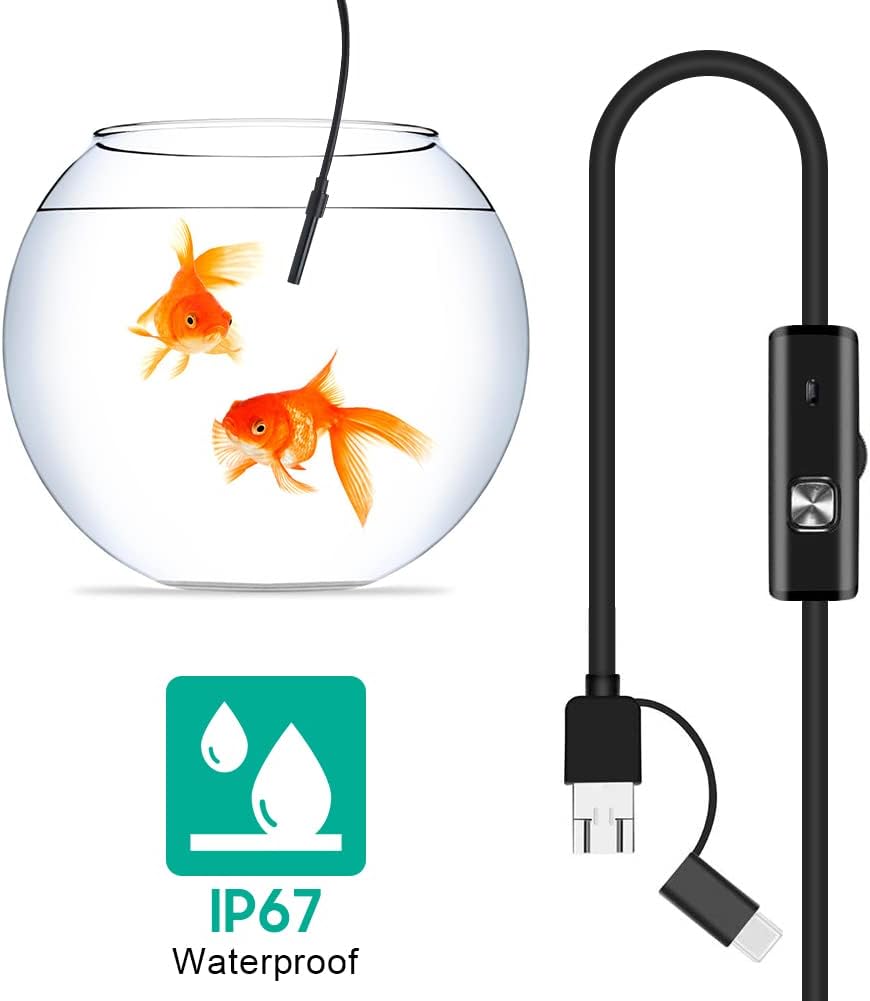
- Waterproof Rating: IP67 waterproof-rated, suitable for moist or underwater inspections.
- Adjustable Illumination: Equipped with 6 adjustable LED lights to enhance visibility in dark environments.
- High-Definition Imaging: 2.0MP CMOS HD camera provides clear and detailed images and videos.
- Durable Construction: Crafted from high-quality materials for reliability and extended use.
- Wide Compatibility: 3-in-1 USB connector supports Android smartphones (with OTG function) and computers (Windows XP/W7/W8/VISTA/W10).
- Extended Reach: Includes a 5-meter USB cable for flexible inspection tasks.
2.2 Components


3. Setup
3.1 System Requirements
- Android Devices: Android 4.4 or higher with OTG (On-The-Go) and UVC (USB Video Class) support.
- Computers: Windows XP, Windows 7, Windows 8, Windows Vista, Windows 10.
3.2 Software Installation
For Android devices, download and install a compatible camera application from the Google Play Store that supports USB OTG endoscopes. Recommended applications include 'USB Camera', 'AN98', or 'CameraFi'. For Windows computers, the device typically functions with the built-in 'Camera' application or other webcam software. Drivers are usually installed automatically upon connection.
3.3 Connecting the Endoscope
- For Android: Connect the appropriate connector (Micro-USB or USB-C) of the endoscope cable to your smartphone. Ensure your phone's OTG function is enabled in settings if it doesn't automatically detect the device.
- For PC: Connect the standard USB-A connector of the endoscope cable to an available USB port on your computer.
- Open the installed camera application on your device. The endoscope feed should appear.
4. Operating Instructions
4.1 Adjusting LED Brightness
The control unit on the cable features a wheel or button to adjust the brightness of the 6 LED lights at the camera tip. Rotate the wheel or press the button to increase or decrease illumination as needed for clear viewing in various environments.
4.2 Using Accessories
- Side Mirror: Attach the side mirror to the camera tip to view objects at a 90-degree angle. This is useful for inspecting walls of pipes or tight corners.
- Magnet: Attach the magnet to the camera tip to retrieve small metallic objects from inaccessible areas.
- Hook: Attach the hook to the camera tip to retrieve small non-metallic objects.
4.3 Capturing Images and Videos
Use the functions within your chosen camera application to capture still images or record video footage from the endoscope. Refer to your application's specific instructions for these features.

5. Maintenance
5.1 Cleaning
- After each use, gently wipe the camera lens and probe with a soft, dry cloth.
- For stubborn dirt, a slightly damp cloth can be used, ensuring no liquid enters the control unit or connectors.
- Do not use abrasive cleaners or solvents, as these can damage the lens or casing.
5.2 Storage
- Store the endoscope in a cool, dry place, away from direct sunlight and extreme temperatures.
- Avoid kinking or sharply bending the cable to prevent internal damage.
- Keep the lens cap on when not in use to protect the lens from dust and scratches.
6. Troubleshooting
- No Image/Device Not Detected:
- Ensure the endoscope is securely connected to your device.
- For Android, verify that OTG function is enabled in your phone's settings.
- Try a different USB port on your computer.
- Ensure the correct camera application is open and selected (if multiple cameras are detected).
- Restart your device and try again.
- Blurry Image:
- The endoscope has a fixed focal length. Ensure the object being viewed is within the optimal focal range (typically a few centimeters from the lens).
- Clean the camera lens for any smudges or debris.
- Adjust the LED brightness to prevent overexposure or underexposure.
- LED Lights Not Working:
- Check the LED brightness adjustment wheel/button on the control unit.
- Ensure the endoscope is properly connected and receiving power.
- Application Crashes/Freezes:
- Try a different compatible camera application.
- Ensure your device's operating system is up to date.
- Close other background applications to free up system resources.
7. Specifications
| Feature | Specification |
|---|---|
| Model Number | AYNEFY0oxm4abc37 |
| Lens Diameter | 5.5mm |
| Camera Resolution | 2.0MP CMOS HD (Video Capture Resolution: 1080p) |
| LED Lights | 6 Adjustable LEDs |
| Cable Length | 5 meters |
| Waterproof Rating | IP67 |
| Connectivity | 3-in-1 USB (USB-A, Micro-USB, USB-C) |
| Compatibility | Android (OTG/UVC support), Windows XP/7/8/VISTA/10 |
| Product Dimensions | 4.72 x 4.72 x 1.38 inches |
| Item Weight | 4.6 ounces |
| Color | Black |
| Manufacturer | Zerone |
8. Warranty and Support
For warranty information or technical support, please refer to the product packaging or contact the retailer from whom the product was purchased. You may also visit the official Zerone website for further assistance.
