
1. Introduction and Overview
This manual provides essential information for the setup, operation, maintenance, and troubleshooting of your ASUS ROG Strix G Gaming Laptop, model GL531GU-WB53. The laptop features a streamlined design, integrating a 9th Gen Intel Core processor and NVIDIA GeForce graphics for gaming and multitasking. It includes a 120Hz Full HD display and a PCIe SSD.
Key Features:
- NVIDIA GeForce GTX 1660 Ti 6GB GDDR6 Graphics
- Intel Core i5-9300H Quad-core Processor
- 120Hz 15.6” 1920x1080 IPS Type Display
- 8GB DDR4 2666MHz RAM and 512GB PCIe SSD
- Windows 10 Home Operating System
- Gigabit Wave 2 Wi-Fi 5 (802.11ac 2x2)
- ROG Intelligent Cooling thermal system with dual 12V fans and anti-dust technology

Figure 1: Front view of the ASUS ROG Strix G Gaming Laptop.
2. What's in the Box
Upon unboxing your ASUS ROG Strix G Gaming Laptop, please verify that all the following items are included:
- ASUS ROG Strix G GL531 Gaming Laptop
- Power Adapter & Cord
- User Guide
- Warranty Card
3. Setup Guide
Follow these steps to set up your new ASUS ROG Strix G Gaming Laptop:
- Connect Power: Plug the power adapter into the laptop's power port and then into a wall outlet. Ensure the power indicator light illuminates.
- Initial Boot: Open the laptop lid and press the power button. The laptop will begin its initial boot sequence.
- Operating System Setup: Follow the on-screen prompts to complete the Windows 10 Home setup. This includes selecting your region, language, accepting terms, and creating a user account.
- Network Connection: Connect to a Wi-Fi network or use an Ethernet cable for internet access during setup and for updates.
- Install Updates: After initial setup, it is recommended to check for and install all available Windows updates and driver updates to ensure optimal performance and security.
- MyASUS Application: Utilize the pre-installed MyASUS application for system updates, diagnostics, and customization.
Video 1: MyASUS Product Video, demonstrating features for system management and customization.
4. Operating Instructions
Power On/Off:
- Power On: Press the power button located on the top right of the keyboard.
- Shut Down: Click the Windows Start button, then select Power > Shut down.
- Sleep Mode: Close the laptop lid or select Power > Sleep from the Start menu.
Keyboard and Touchpad:
- The laptop features an RGB backlit keyboard. Lighting can be customized via ASUS Aura Sync software.
- The touchpad supports multi-touch gestures for navigation. Refer to Windows settings for customization.

Figure 2: Top-down view of the laptop's keyboard and touchpad.
Connecting Peripherals:
The laptop offers various ports for connecting external devices:
- USB Ports: Connect USB devices such as mice, keyboards, and external storage.
- HDMI Port: Connect to external displays or projectors.
- Audio Jack: Connect headphones or external speakers.
- Ethernet Port: For wired network connections.
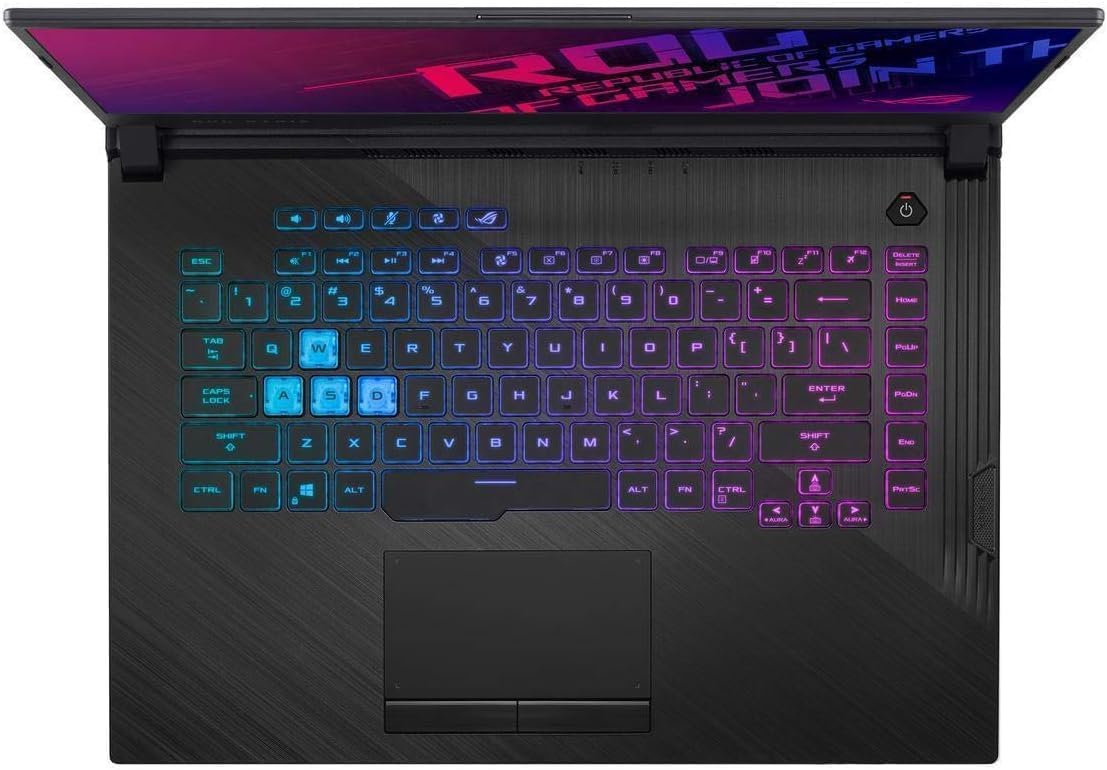
Figure 3: Side view of the laptop, highlighting available ports.
5. Maintenance
- Cleaning: Use a soft, lint-free cloth to clean the screen and chassis. For stubborn marks, dampen the cloth slightly with water or a screen cleaner. Avoid harsh chemicals.
- Ventilation: Ensure the laptop's ventilation openings are clear of obstructions to prevent overheating. Regularly clean dust from the vents using compressed air.
- Battery Care: To prolong battery life, avoid consistently discharging the battery completely or keeping it at 100% charge for extended periods. MyASUS software offers battery health management features.
- Software Updates: Regularly update Windows and device drivers to maintain system stability, security, and performance.
6. Troubleshooting
If you encounter issues with your laptop, consider the following common troubleshooting steps:
- No Power: Ensure the power adapter is securely connected to both the laptop and a working power outlet. Check the power indicator light.
- Display Issues: If the screen is blank, try connecting an external monitor to verify if the issue is with the laptop's display or graphics output. Ensure display drivers are updated.
- Performance Slowdown: Close unnecessary applications, check for background processes, and ensure sufficient free storage space. Run system diagnostics via MyASUS.
- Network Connectivity: Verify Wi-Fi is enabled and connected to the correct network. Restart your router/modem. For wired connections, check the Ethernet cable.
- Overheating: Ensure vents are clear. Adjust fan profiles using MyASUS or ROG Armoury Crate software. Avoid using the laptop on soft surfaces that block airflow.
For more advanced diagnostics and support, refer to the MyASUS application or the ASUS support website.
7. Specifications
| Brand | ASUS |
| Model Name | ROG Strix G |
| Model Number | GL531GU-WB53 |
| Screen Size | 15.6 Inches |
| Display Resolution Maximum | 1920x1080 Pixels (Full HD) |
| Refresh Rate | 120 Hz |
| CPU Model | Intel Core i5-9300H (Quad-core, up to 4.1 GHz) |
| Graphics Coprocessor | NVIDIA GeForce GTX 1660Ti (6GB GDDR6) |
| RAM Memory Installed Size | 8 GB DDR4 (2666 MHz) |
| Hard Disk Size | 512 GB PCIe NVMe SSD |
| Operating System | Windows 10 Home |
| Wireless Technology | Wi-Fi 5 (802.11ac 2x2), Bluetooth |
| Total USB Ports | 4 |
| HDMI Ports | 1 |
| Item Weight | 5.3 Pounds |
| Item Dimensions (L x W x Thickness) | 14.2"L x 10.8"W x 1"Th |
8. Warranty and Support
Warranty Information:
Your ASUS ROG Strix G Gaming Laptop comes with a 1-year International Warranty, 1-year Accidental Damage Protection (ADP) with 1-way free shipping, 30-Day Zero Bright Dot guarantee, 2-way FREE shipping for standard warranty repair, and 24/7 technical support. Please refer to the included Warranty Card for full terms and conditions.
Customer Support:
For technical assistance, product inquiries, or warranty claims, please visit the official ASUS support website or contact ASUS customer service. The MyASUS application on your laptop also provides direct access to support resources and diagnostic tools.