
1. Product Overview
The DONGKER CA-266S is a universal LED TV backlight inverter constant current board designed for 32-65 inch LED televisions. This board converts a DC input voltage into the necessary constant current and voltage to power LED backlight strips, ensuring stable and efficient operation.
It supports a wide input voltage range and offers adjustable output current to accommodate various LED backlight specifications.

Figure 1: Top view of the DONGKER CA-266S LED TV Backlight Inverter Board. This image displays the main components and layout of the circuit board.
2. Specifications
- Input Power Supply: Supports 10-28V DC input.
- Output Voltage: Automatic adaptation below 88V (minimum limit for input voltage; no depressurization).
- Output Current: Default 80mA. Adjustable up to 480mA by shorting specific resistors (R22, R21, R18, R15, R24). Each shorted resistor increases the current by 80mA.
- Suitable for Light Bar: Large size 32-65 inch LED TVs (maximum voltage 88V).
- Dimensions: 120mm (Length) x 29.5mm (Width).
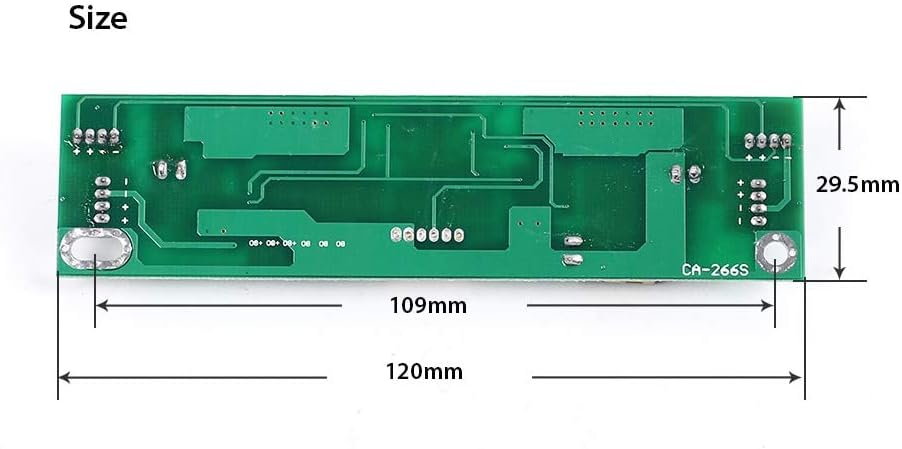
Figure 2: Dimensions of the CA-266S board, showing a length of 120mm and a width of 29.5mm.
3. Setup and Connection
3.1 Input Interface Definition
The input interface provides connections for power, control, and dimming signals. Refer to the diagram below for pin assignments:
- Pin 1: Power Supply (VCC)
- Pin 2: Power Supply (VCC)
- Pin 3: ENA Switch Control (Enable)
- Pin 4: Brightness Adjustment Signal (Voltage Dimming)
- Pin 5: Ground Wire (GND)
- Pin 6: Ground Wire (GND)

Figure 3: Diagram illustrating the input interface pins and their respective functions (10-28V input definition).
3.2 Output Interface Definition
The board features four output interfaces, commonly defined as ++--. These are parallel interfaces, and their definitions are identical.
When connecting 2-pin LED light strips with left positive and right negative polarity, the 2nd and 3rd pins of the output interface can be inserted directly into the center. The 1st and 4th pins will remain empty.

Figure 4: Diagram showing the output interface definition (++--) and how a 2-pin connector can be inserted into the middle two pins.
4. Operating Instructions
4.1 Current Adjustment
The output current of the board can be adjusted to match the requirements of your LED backlight strip. The motherboard has six 1206 resistors (R22, R21, R18, R15, R24, and one default R13). Each resistor represents an 80mA increase in current.
- By default, only one R13 resistor is connected, providing an output current of 80mA. This default setting is designed to prevent damage to the lamp strip.
- To increase the current, carefully short additional resistors (R22, R21, R18, R15, R24) on the board. Each shorted resistor will add 80mA to the total output current.
- The maximum output current achievable is 480mA when all six resistors are connected/shorted.
Caution: Ensure the current setting matches the specifications of your LED backlight strip to prevent damage.
5. Troubleshooting
- LEDs appear too dark, blinking, or flashing: This often indicates insufficient current. Try increasing the output current by shorting additional resistors as described in Section 4.1.
- No load condition: The board is designed not to be damaged when operating without a load (no lamp strip connected). In such cases, the output voltage will drop to the input voltage level. Similarly, if the load voltage exceeds 88V, the output voltage will also reduce to the input voltage value.
6. Maintenance
The DONGKER CA-266S board requires minimal maintenance. Keep the board clean and free from dust and moisture. Ensure proper ventilation around the board to prevent overheating. Avoid exposing the board to extreme temperatures or corrosive environments.
7. Support
For any questions, concerns, or if you are not satisfied with the product, please contact DONGKER customer support. We are committed to providing high-quality assurance and assistance.