Introduction
The Tripp Lite EN1812 Wireless Access Point Enclosure is designed to secure and organize your router, modem, or wireless access point. This enclosure protects equipment from theft, tampering, and environmental factors while ensuring optimal Wi-Fi signal transmission. Its impact-resistant plastic construction and secure locking mechanism make it suitable for various indoor environments such as offices, dormitories, hotels, classrooms, and retail locations.
Key features include:
- Accommodates a wide range of equipment, including most Wi-Fi access points up to 1102 cubic inches.
- Transparent to wireless signals, maintaining strong Wi-Fi coverage.
- Features convenient knockout ports for organized cable routing.
- Swings open on a hinge for easy access during installation and maintenance.
- Locks securely with included keys to prevent unauthorized access.
- Vents on each end promote airflow to prevent equipment overheating.
Safety Information
Please read and understand all instructions before installing or operating this product. Failure to follow these instructions may result in product damage or personal injury.
- Ensure the mounting surface is structurally sound and can support the weight of the enclosure and its contents.
- Do not install the enclosure in areas with excessive moisture or extreme temperatures.
- Keep keys in a secure location away from unauthorized personnel.
- Do not obstruct the ventilation openings on the enclosure.
- Use appropriate tools and safety gear during installation.
Setup and Installation
Package Contents
Verify that all components are present before beginning installation:
- Wireless Access Point Enclosure with Lock, 18 x 12 in.
- (2) M6 screws, 1 in.
- (2) M6 trusshead screws, 0.25 in.
- (4) M6 flathead screws, 0.25 in.
- (10) Cable ties
- Nylon washer
- (2) Nylon spacers
- T-bar bracket
- Shelf bracket
- (2) Keys
- Installation guide

Figure 1: Package Contents
Mounting the Enclosure
The EN1812 enclosure can be mounted horizontally or vertically on a wall or ceiling. It comes fully assembled. Use the included hardware for secure installation.
- Select a suitable mounting location that is structurally sound and allows for proper ventilation and cable access.
- Position the enclosure against the desired surface. The back of the enclosure features pre-drilled holes for mounting.
- Mark the drilling points through the mounting holes on the back of the enclosure.
- Drill pilot holes into the mounting surface as appropriate for your wall type.
- Secure the enclosure to the wall or ceiling using the provided screws and any necessary anchors (not included, depending on wall type).
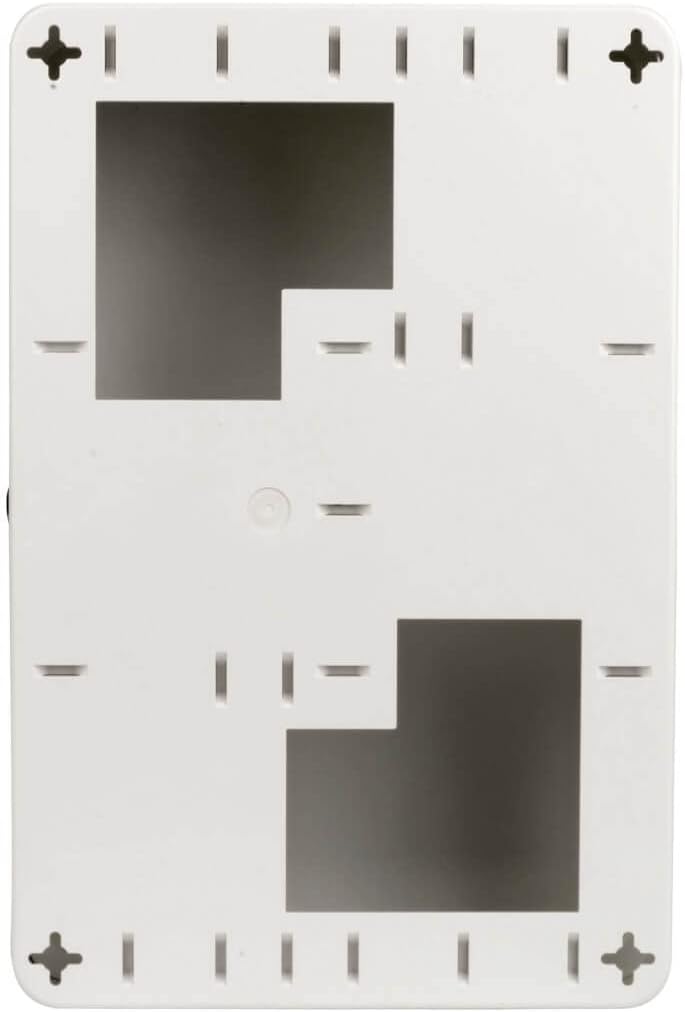
Figure 2: Rear Mounting Points

Figure 3: Enclosure Interior (Empty)
Installing Equipment
The enclosure is designed to house various wireless access points, routers, or modems. It includes a shelf and a universal T-bar bracket for flexible mounting options.
- Open the enclosure by unlocking it with the provided key and swinging the front panel open.
- Attach the shelf bracket or T-bar bracket to the interior mounting points as needed for your device.
- Place your wireless access point, router, or modem onto the installed shelf or attach it to the T-bar bracket. Ensure it is securely positioned.

Figure 4: Enclosure with Shelf Installed

Figure 5: Equipment Placed on Shelf
Cable Management
The enclosure features pre-cut knockout ports for routing cables, reducing clutter and maintaining a clean installation.
- Identify the appropriate knockout ports for your power and network cables.
- Carefully remove the knockout covers.
- Route all necessary cables through the chosen ports to connect to your installed equipment.
- Use the included cable ties to organize cables neatly within the enclosure.

Figure 6: Cable Routing
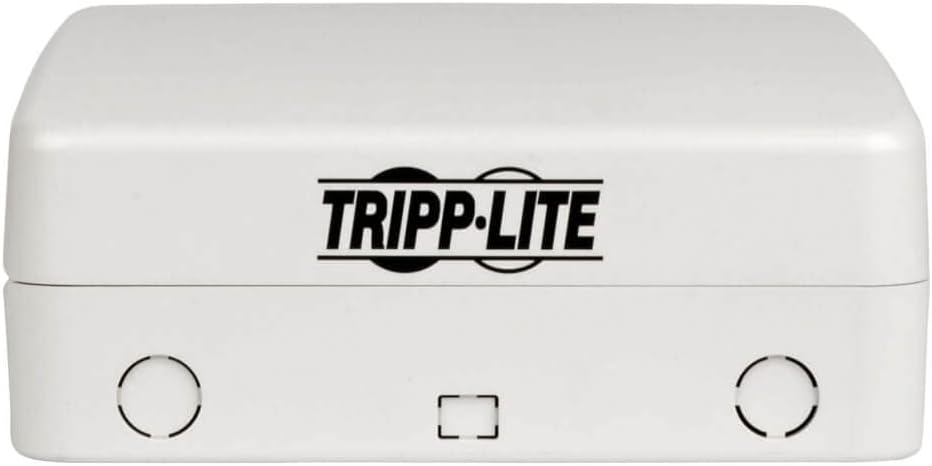
Figure 7: Top View with Knockout Ports
Operation
Securing the Enclosure
Once your equipment is installed and cables are routed, close and lock the enclosure to protect its contents.
- Gently swing the front panel of the enclosure closed until it latches.
- Insert one of the provided keys into the lock on the side of the enclosure.
- Turn the key to the locked position. Remove the key and store it in a safe place.

Figure 8: Closed Enclosure with Lock

Figure 9: Side View of Lock
Accessing Equipment
To access the equipment inside the enclosure for maintenance or adjustments:
- Insert the key into the lock and turn it to the unlocked position.
- Gently pull the front panel open. The enclosure will swing away from the wall on its hinge, providing full access to the interior.
Maintenance
The Tripp Lite EN1812 enclosure requires minimal maintenance to ensure continued performance and protection.
- Cleaning: Periodically wipe the exterior of the enclosure with a soft, damp cloth. Avoid using harsh chemicals or abrasive cleaners, as these may damage the plastic finish.
- Ventilation: Ensure that the ventilation openings on the enclosure remain clear of dust and obstructions to allow for proper airflow and prevent equipment overheating.
- Lock Mechanism: Occasionally check the lock and hinge for smooth operation. If the lock becomes stiff, a small amount of graphite lubricant can be applied.
- Mounting Security: Periodically inspect the mounting screws to ensure they remain tight and secure.
Troubleshooting
This section addresses common issues you might encounter with the EN1812 enclosure.
- Issue: Wi-Fi signal is weak or non-existent.
Solution: Ensure your wireless access point is powered on and functioning correctly inside the enclosure. Verify that the enclosure is properly closed and locked. While the enclosure is transparent to wireless signals, extreme obstructions or improper placement of the WAP within the enclosure could potentially affect signal strength. - Issue: Enclosure does not close or lock properly.
Solution: Check for any obstructions inside the enclosure that might be preventing the door from closing fully. Ensure that the hinge mechanism is free of debris. If the lock is stiff, apply a small amount of lubricant. - Issue: Equipment inside the enclosure feels warm.
Solution: Verify that the ventilation openings on both ends of the enclosure are not blocked. Ensure there is adequate space around the equipment inside for air circulation. If the issue persists, consider the ambient temperature of the installation environment. - Issue: Enclosure feels loose on the wall.
Solution: Inspect the mounting screws and tighten them if necessary. If the mounting surface is damaged, consider remounting the enclosure in a more secure location or reinforcing the existing mounting points.
Specifications
| Feature | Specification |
|---|---|
| Brand | Tripp Lite |
| Model Number | EN1812 |
| Product Dimensions (LxWxH) | 5.1 x 11.9 x 17.9 inches |
| Item Weight | 5.73 pounds |
| Color | White |
| Compatible Devices | Wireless Access Points, Routers |
| Material | Impact-resistant plastic |
| Mounting Type | Surface Mount (Wall or Ceiling) |
| Lock Type | Key Lock |
| UPC | 037332217820 |
Warranty Information
Tripp Lite products are backed by a limited warranty. Specific warranty terms and conditions, including duration and coverage, are typically provided with your product at the time of purchase or can be found on the official Tripp Lite website. Please retain your proof of purchase for warranty claims.
Customer Support
For technical assistance, product information, or warranty inquiries, please contact Tripp Lite customer support. You can find contact details and additional resources on the official Tripp Lite website:
Visit Tripp Lite Official Website
When contacting support, please have your product model number (EN1812) and purchase information readily available.


