
AODSK AED-100
Contents
AODSK AED-100 Electric Drum Set User Manual
Model: AED-100
Product Overview
The AODSK AED-100 Electric Drum Set offers a realistic drumming experience with its comprehensive features and portable design. This set is ideal for beginners and includes all necessary components for immediate use.
- Complete Set: Includes 4x8'' drum pads, 3x10" cymbals, a drum module, sturdy metal frame, drum throne, drumsticks, headphones, and all required cables.
- Extensive Sound Library: Features 120 built-in sounds, 20 drum kits, and 20 demo songs covering various music styles to aid learning and creativity.
- Portable and Foldable: Designed for easy transportation and storage, suitable for both home practice and outdoor performances.
- Responsive Drumheads: Equipped with high-density rebound sponge drumheads for a feel close to real drums and enhanced durability.
- Connectivity: Offers AUX input and USB MIDI output for connecting to external devices, recording, and live performance.
- User-Friendly Module: Features an easy-read LED display, built-in metronome, and headphone output mode for silent practice.
Package Contents
Before assembly, please verify that all components listed below are present in your package:
- 1 x 8" Snare Pad
- 3 x 8" Tom Pads
- 2 x 10" Hi-Hat Cymbals
- 1 x 10" Ride Cymbal
- 1 x Sound Module
- 1 x Hi-Hat Pedal
- 1 x Kick Pedal
- 1 x Drum Throne
- 1 pair of Drum Sticks
- 1 x Drum Stand
- 1 x Headphones
- All necessary cables (including USB printer cable)
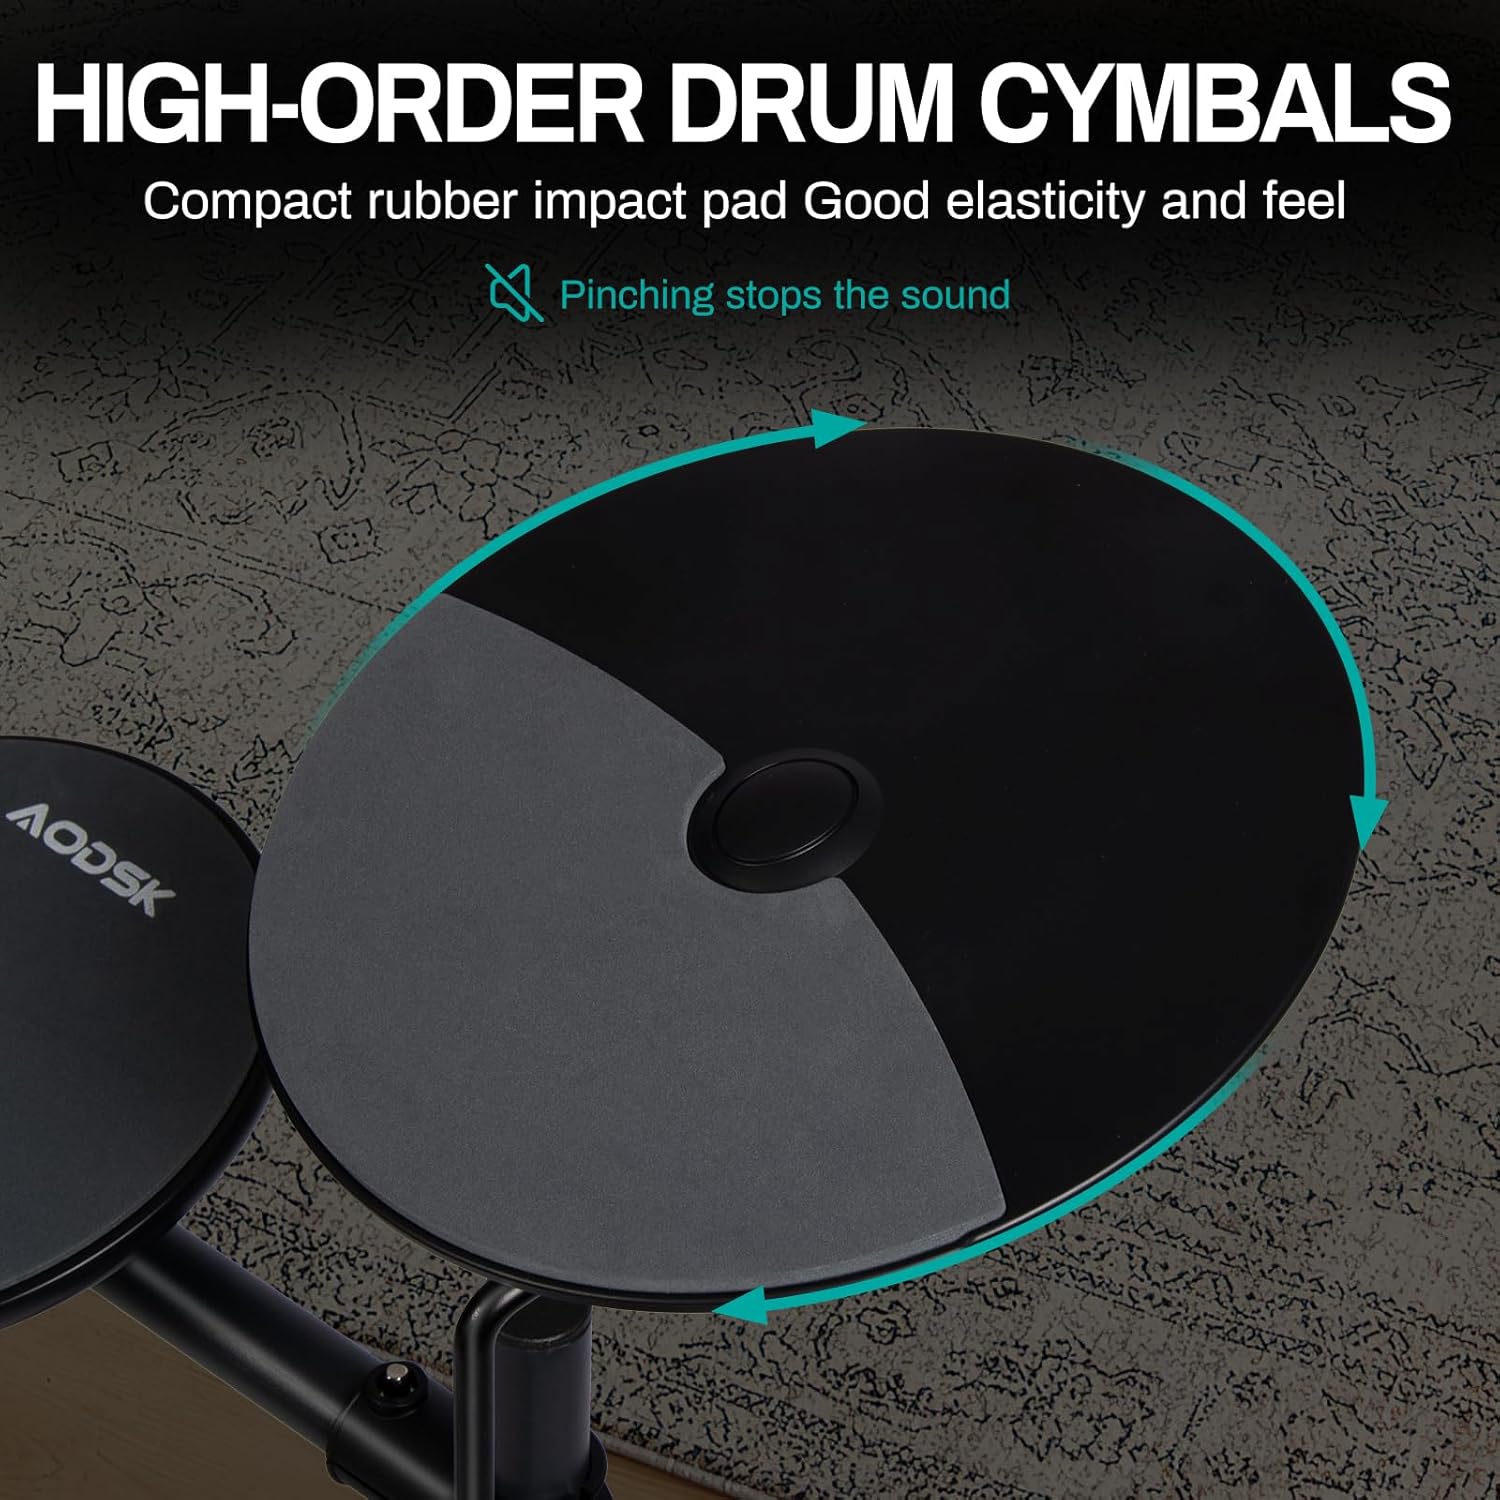
Figure 1: Complete Eight-Piece Set with Labeled Components. This diagram shows the snare pad, tom pads, hi-hat cymbals, ride cymbal, sound module, hi-hat pedal, kick pedal, drum throne, drum sticks, and drum stand.

Figure 2: Included Accessories. This image displays the drumsticks, headphones, drum throne, and USB printer cable that come with the drum set.
Setup and Assembly
Follow these steps to assemble your AODSK AED-100 Electric Drum Set:
- Unpack Components: Carefully remove all parts from the packaging and lay them out on a clean, flat surface. Refer to the 'Package Contents' section to ensure all items are present.
- Assemble Drum Stand: Connect the various sections of the drum stand frame according to the included quick-start guide. Ensure all connections are secure.
- Attach Drum Pads and Cymbals: Mount the snare pad, tom pads, and cymbals onto the designated arms of the drum stand. Adjust their positions for comfortable playing.
- Install Sound Module: Securely attach the sound module to the main frame of the drum stand.
- Connect Pedals: Place the hi-hat pedal and kick pedal on the floor in their playing positions.
- Cable Management: Connect all drum pads, cymbals, and pedals to the sound module using the provided cables. Ensure cables are routed neatly to prevent tangling and damage. Use the fixing buckles on the frame to secure cables, as shown in Figure 3.
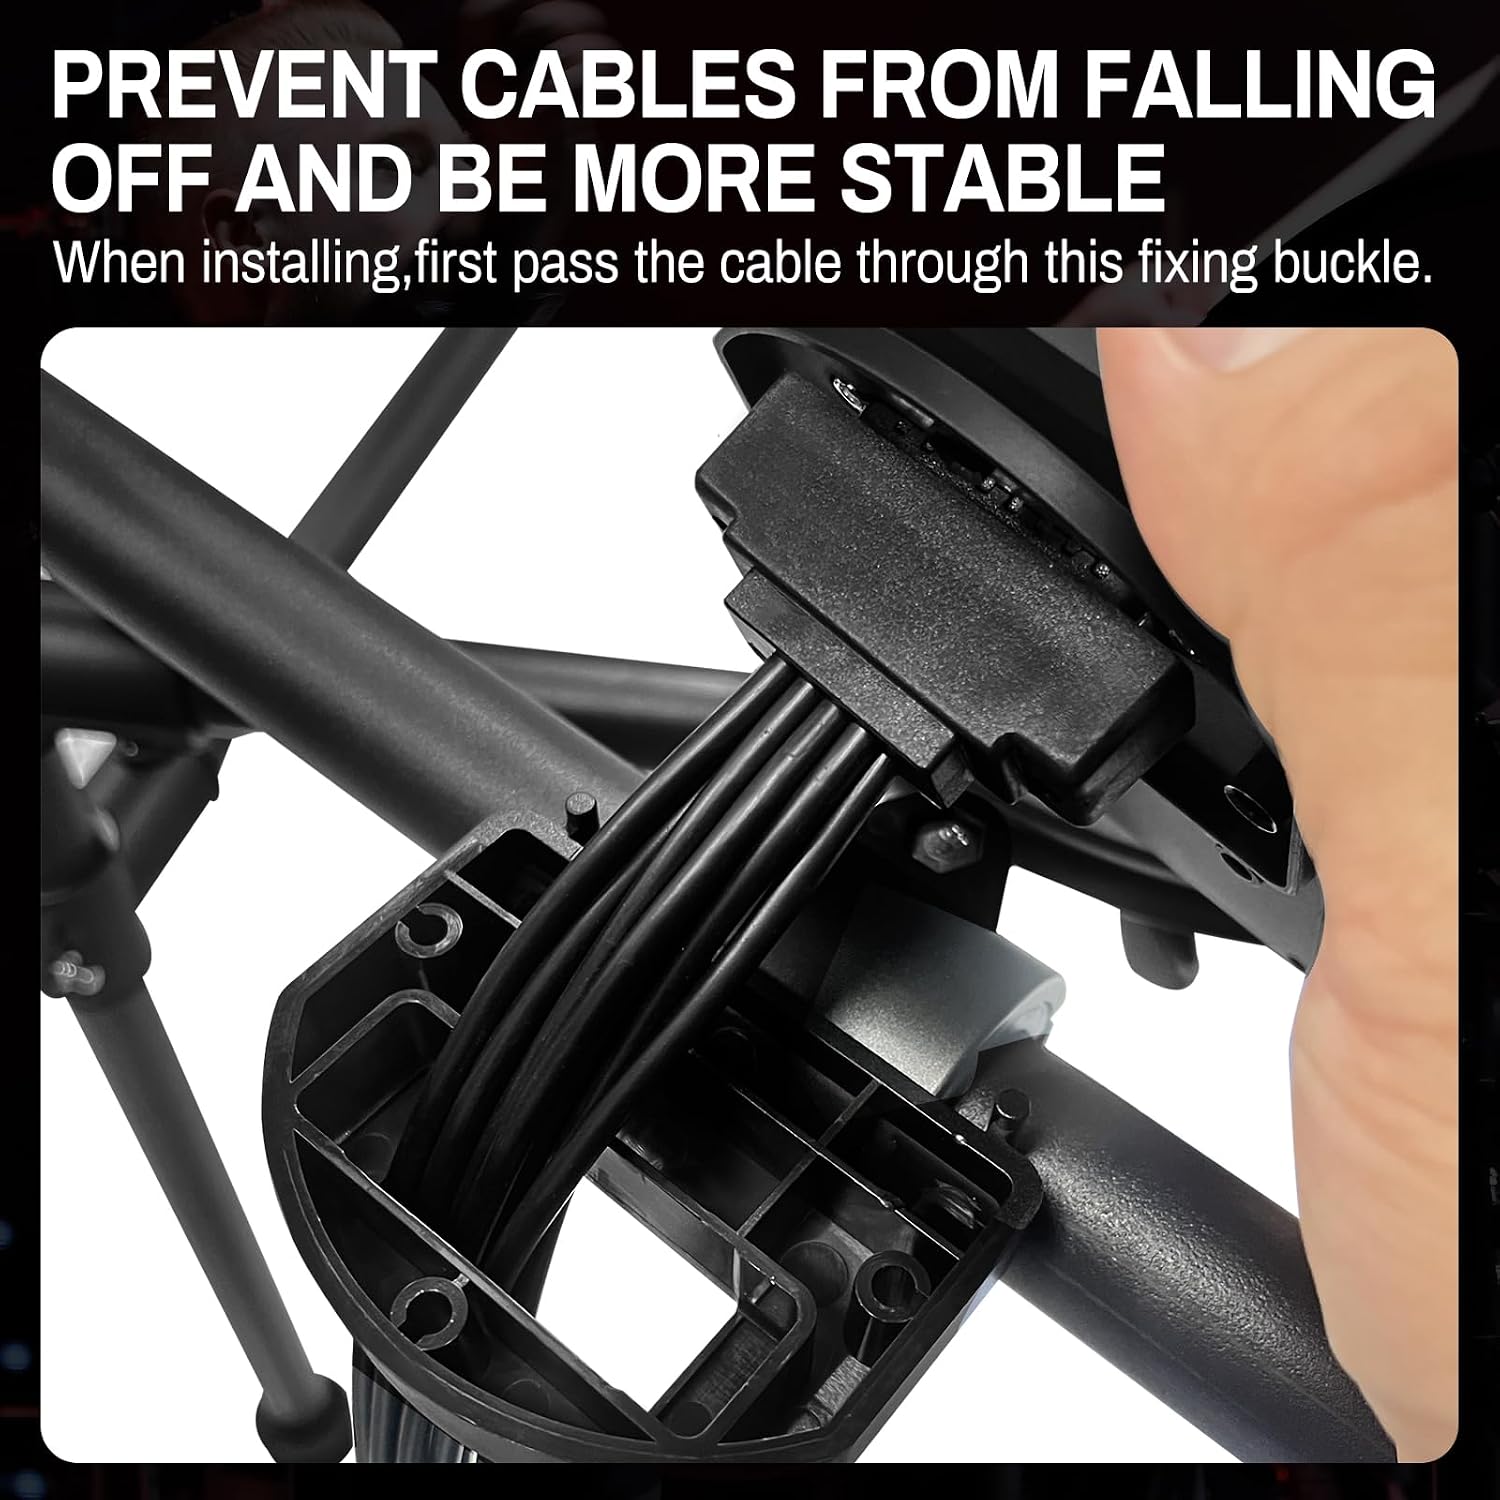
Figure 3: Cable Management. Pass cables through the fixing buckle to prevent them from falling off and ensure stability.
- Set Up Drum Throne: Assemble the drum throne and adjust its height to a comfortable playing position.
- Power Connection: Connect the DC 9V power adapter to the sound module and plug it into a power outlet.

Figure 4: Fully Assembled Drum Set. This image displays the complete drum set ready for use.
Operating Instructions
Familiarize yourself with the sound module and its functions for optimal performance.
Sound Module Functions

Figure 5: Powerful Drum Module. The module features a digital display and controls for various settings.
- Power On/Off: Press the power button to turn the module on or off.
- Kit Selection: Use the 'KIT' button to cycle through the 20 available drum kits. The display will show the selected kit number.
- Sound Selection: Access 120 different sounds by navigating through the module's settings.
- Tempo Adjustment: Use the 'TEMPO' button and +/- controls to adjust the metronome speed.
- Demo Songs: Press the 'DEMO' button to play through the 20 pre-loaded demo songs.
- Reverb Control: Toggle the reverb effect ON or OFF using the dedicated switch.
- Volume Control: Adjust the master volume using the main rotary knob.
Connectivity
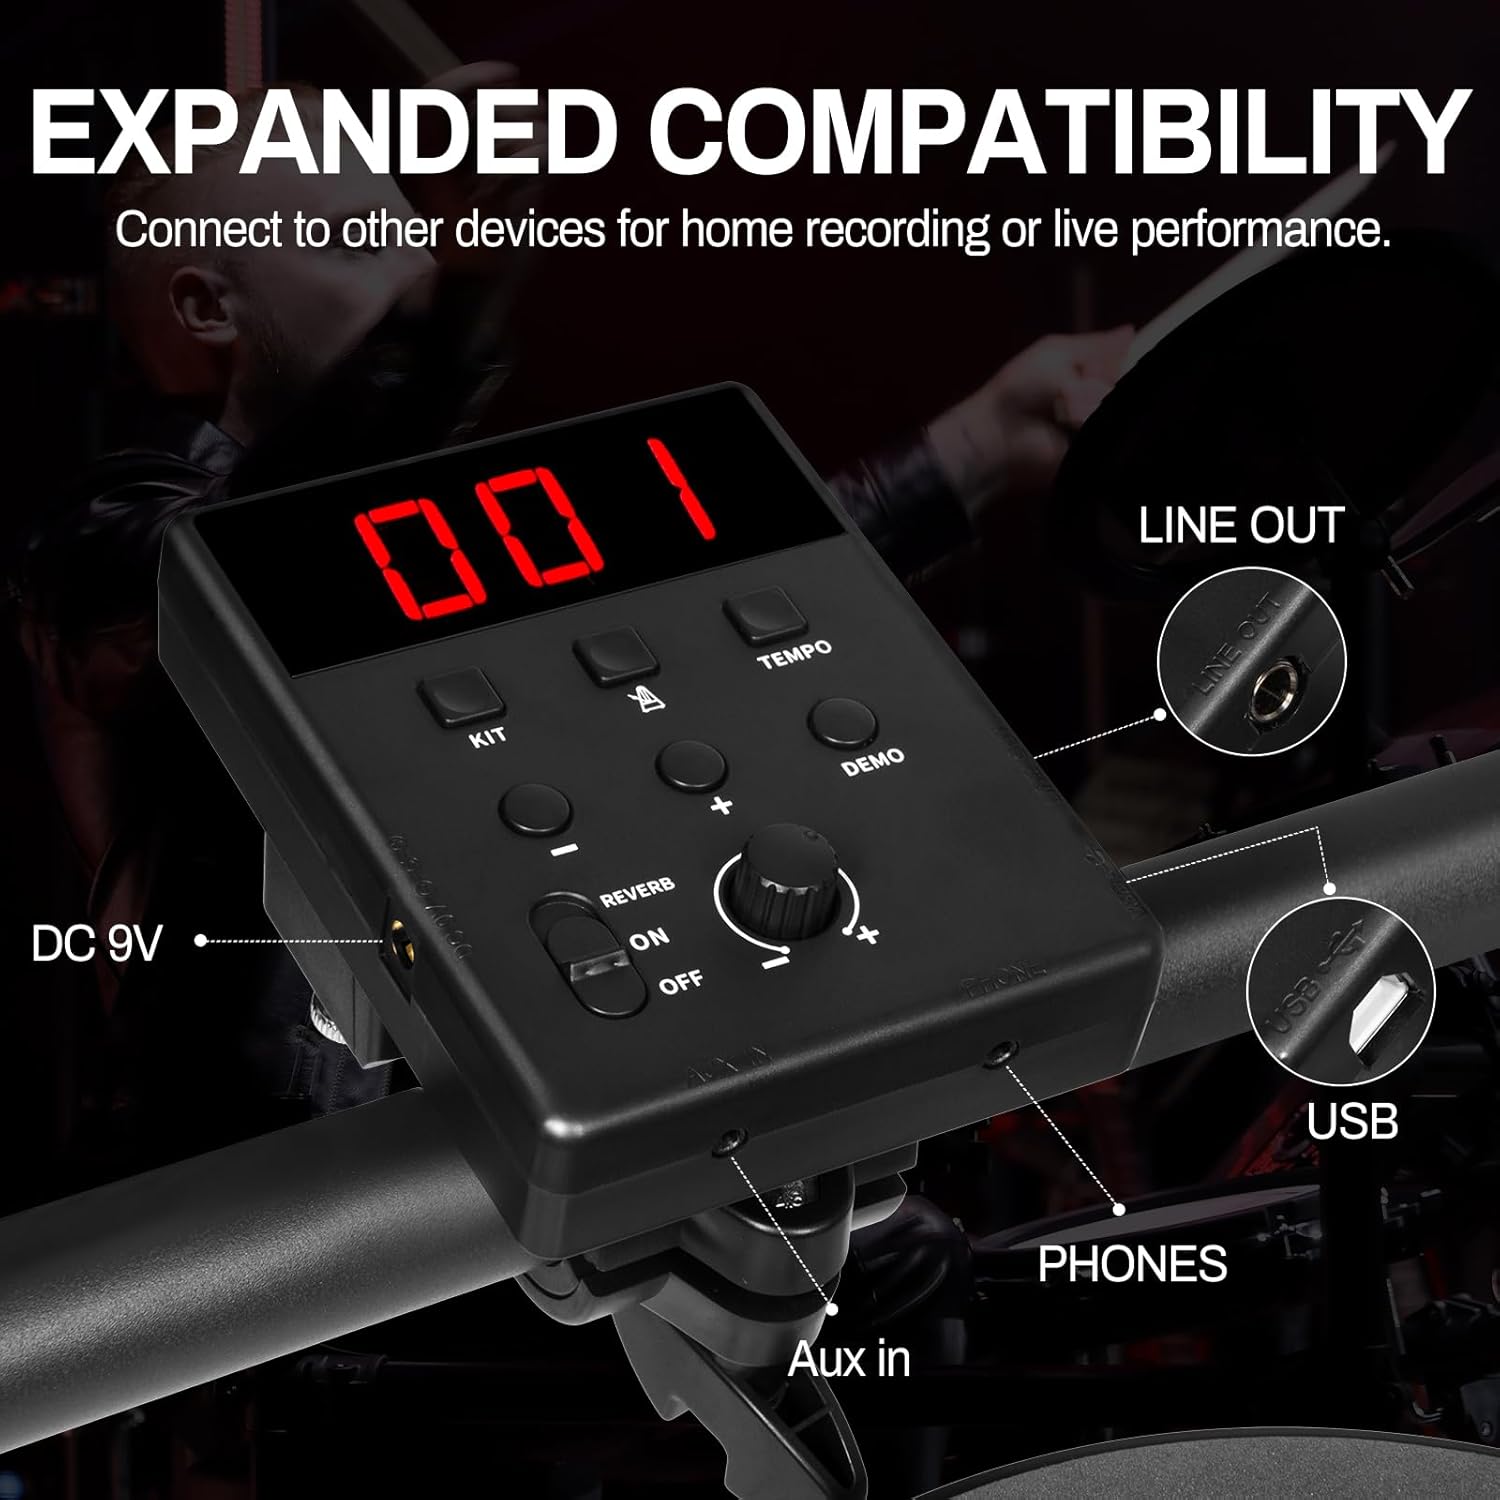
Figure 6: Expanded Compatibility. The module provides various ports for external connections.
- PHONES Output: Connect the included headphones to this jack for silent practice.
- LINE OUT: Connect to an external amplifier or speaker system for amplified sound.
- AUX IN: Connect an external audio device (e.g., smartphone, MP3 player) to play along with your favorite music.
- USB MIDI: Connect the module to a computer for MIDI recording, using drum software, or for firmware updates.
Playing Techniques
- Drum Pads: The 8-inch high-density rebound sponge drumheads provide a realistic feel. Strike them with the drumsticks for sound.
- Cymbals: The 10-inch cymbals offer good elasticity and feel. Pinching the cymbal edge can stop the sound (choke function).

Figure 7: High-Density Rebound Sponge Drumhead. Provides a percussion feel similar to a dumb drum pad, offering durability and better feel.
Figure 8: High-Order Drum Cymbals. These compact rubber impact pads offer good elasticity and feel, with a choke function when pinched.
Maintenance and Care
Proper maintenance ensures the longevity and optimal performance of your drum set.
- Cleaning: Use a soft, dry cloth to wipe down the drum pads, cymbals, module, and frame. Avoid abrasive cleaners or solvents that could damage surfaces.
- Cable Management: Regularly check all cable connections. Ensure they are securely fastened and not pinched or tangled. Proper cable routing (as shown in Figure 3) prevents wear and tear.
- Storage: When not in use, store the drum set in a cool, dry place away from direct sunlight and extreme temperatures. The set is foldable for convenient storage (see Figure 9).
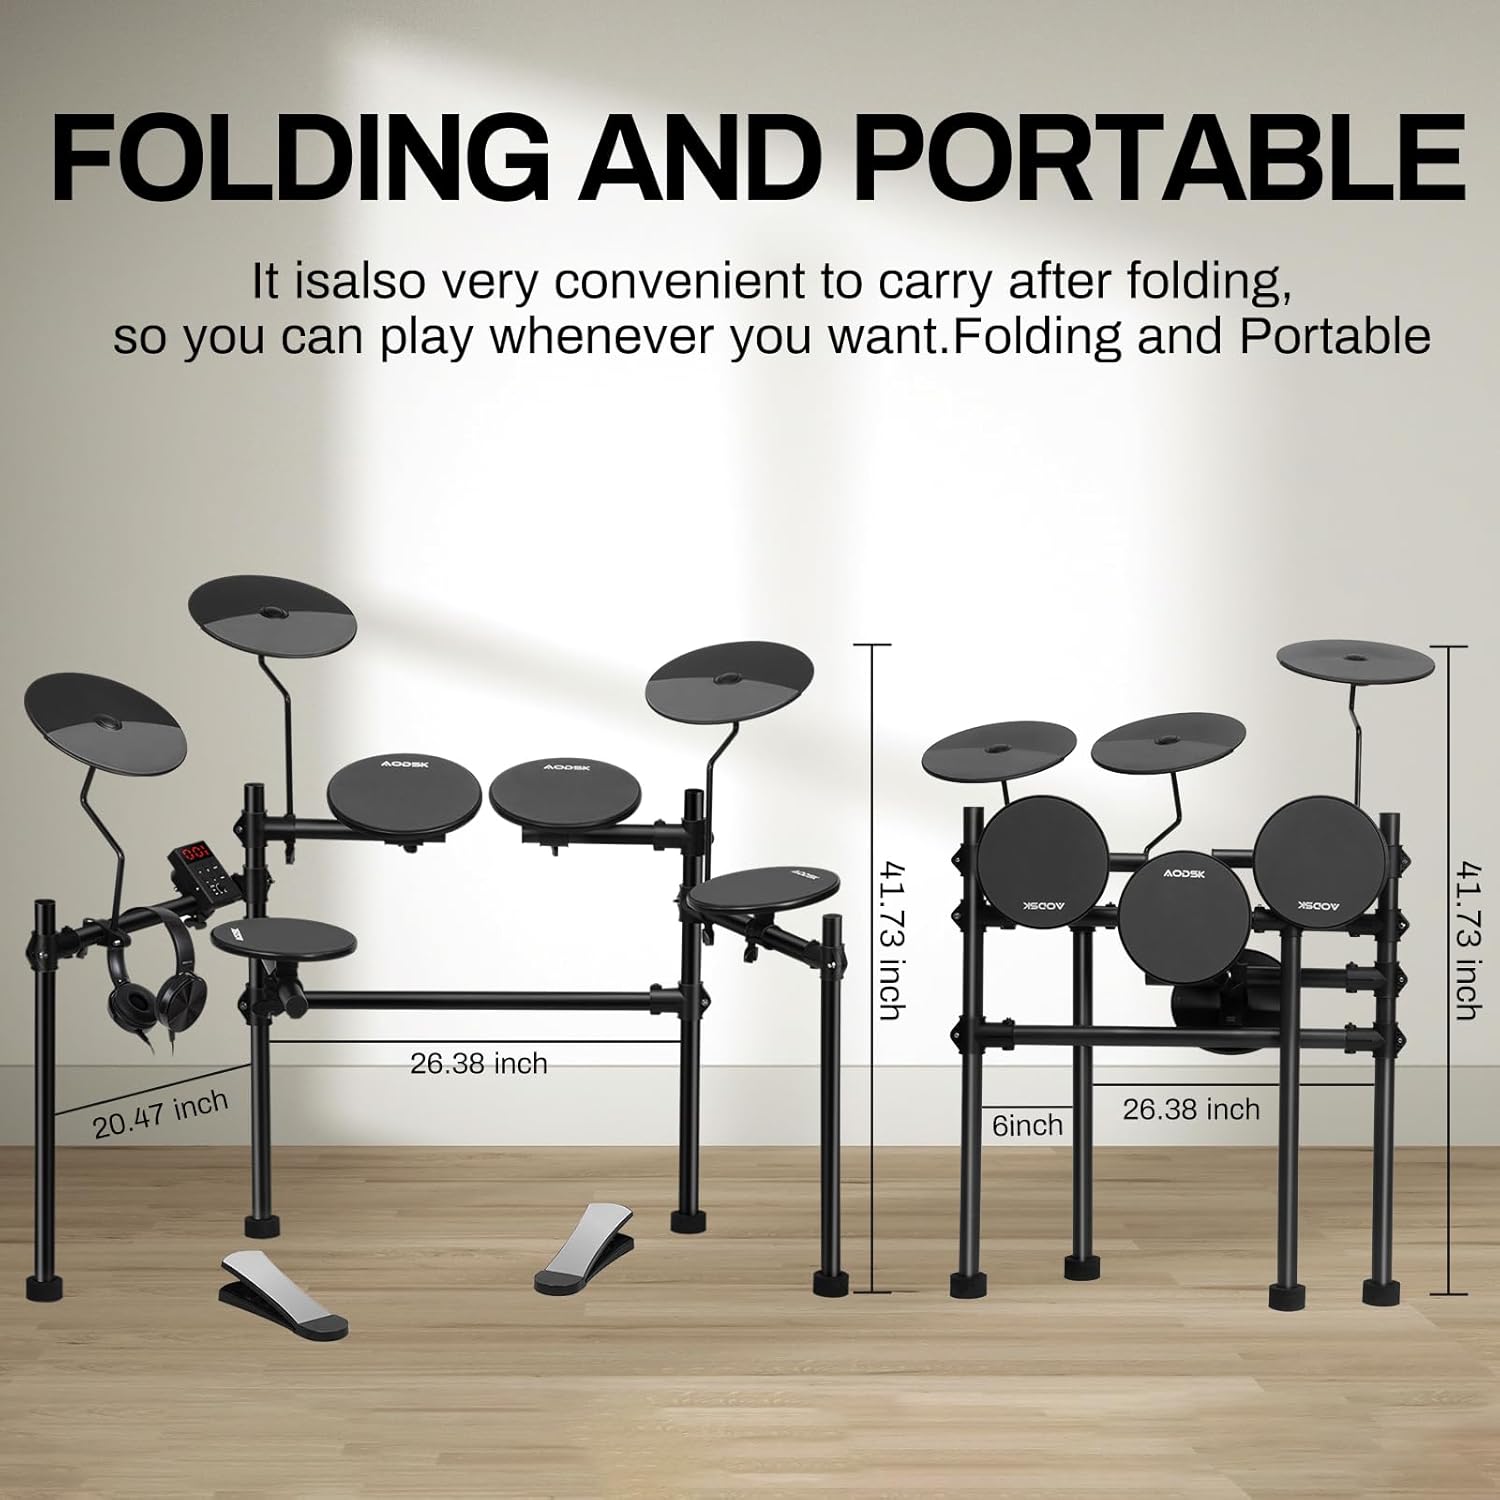
Figure 9: Folding and Portable Design. The drum set can be easily folded for convenient transportation and storage.
- Pad and Cymbal Care: While durable, avoid excessive force when striking pads and cymbals. Inspect them periodically for any signs of wear.
- Headphones and Drumsticks: Store headphones and drumsticks properly to prevent damage.
Troubleshooting
If you encounter issues with your AODSK AED-100 Electric Drum Set, refer to the following common problems and solutions:
- No Sound from Pads/Cymbals:
- Ensure the sound module is powered on.
- Check all cable connections from pads/cymbals to the module are secure.
- Verify the master volume on the module is turned up.
- If using headphones, ensure they are fully plugged into the 'PHONES' jack. If using external speakers, check their power and connection to 'LINE OUT'.
- Inconsistent Sound or Triggering:
- Check for loose cable connections.
- Ensure pads and cymbals are securely mounted and not wobbling.
- Verify that the drumsticks are in good condition and not excessively worn.
- Module Not Powering On:
- Ensure the power adapter is correctly connected to the module and a working power outlet.
- Try a different power outlet.
- No Sound from Headphones:
- Ensure headphones are fully inserted into the 'PHONES' jack.
- Check the headphone cable for damage.
- Test the headphones with another device to confirm they are functional.
If the issue persists after attempting these solutions, please contact AODSK customer support for further assistance.
Specifications
| Feature | Specification |
|---|---|
| Model Name | AED-100 |
| Item Weight | 24.2 Pounds (10.98 kg) |
| Product Dimensions (L x W x H) | 26.38 x 20.47 x 41.73 inches (67 x 52 x 106 cm) |
| Body Material | Iron, Plastic, Polymer, Metal |
| Color | AED-100 Black |
| Connector Type | USB |
| Included Components | Drum Throne, Drumsticks, Headphones, Electronic Drum Kits |
| Drum Pads | 4 x 8-inch Quiet Drum Pads (Snare, 3 Toms) |
| Cymbals | 3 x 10-inch Cymbals (2 Hi-Hats, 1 Ride) |
| Sounds | 120 |
| Drum Kits | 20 |
| Demo Songs | 20 |
Warranty and Support
For warranty information and customer support, please refer to the documentation included with your purchase or visit the official AODSK website. Keep your proof of purchase for any warranty claims.
Contact Information: Please refer to the contact details provided on the AODSK official website or your product packaging for the most up-to-date support information.
Ask a question about this manual
Ask about setup, troubleshooting, compatibility, parts, safety, or missing instructions. Manuals+ will review the question and use this page’s manual context to help answer it.