1. Introduction
The HFBTE NDJ-8S Rotational Viscometer is a precision instrument designed for measuring the absolute viscosity of Newtonian liquids and the apparent viscosity of non-Newtonian fluids. It is widely used across various industries including oil, paints, plastics, food, and detergents. This manual provides comprehensive instructions for the proper setup, operation, and maintenance of the NDJ-8S viscometer to ensure accurate and reliable measurements.
The instrument features high sensitivity and reliable test results, combined with ease of operation and an elegant design. It incorporates advanced mechanical design, manufacturing technology, and microcomputer control for precise data acquisition. The blue backlight LED display ensures clear visibility of data.
2. Key Features
- Wide Measurement Range: Capable of measuring viscosity from 1 to 2,000,000 mPa.s.
- Multiple Rotors and Speeds: Equipped with 4 standard rotors (#1, #2, #3, #4) and 8 rotational speeds (0.3, 0.6, 1.5, 3, 6, 12, 30, 60 r/min), offering 32 combinations for diverse measurement requirements.
- High Accuracy: Provides a measurement precision of ±1% for Newtonian liquids.
- Automatic Selection: Features automatic selection of the proper rotor and speed for convenience.
- Stable Reading Indicator: A vertical cursor block indicates when reading data is stable.
- User-Friendly Display: High brightness LED display with blue backlight for clear data presentation.
- Leveling Device: Integrated leveling device for convenient and intuitive instrument setup.
- Adjustable Head: Head lifting and lowering mechanism with a fixed handwheel for precise positioning.
- Robust Construction: Features 304 stainless steel rotors and a sturdy support rod.

Figure 2.1: Detailed view of the NDJ-8S viscometer's key features, highlighting the leveling device, LCD screen, rotor types, measurement precision display, head lifting mechanism, and base adjustment knob.

Figure 2.2: Common applications for the HFBTE Rotational Viscometer, demonstrating its versatility across different liquid types and industries.
3. Standard Components and Accessories
The NDJ-8S Rotational Viscometer comes with a comprehensive set of standard components and accessories necessary for operation:
- Digital display viscometer host unit
- Rotors: #1, #2, #3, #4 (four standard rotors)
- Power adapter
- Protection frame
- Base stand
- Rise and fall pillar (support rod)
- Instruction for use manual (this document)
- Stay wrench (for assembly)
An optional #0 rotor is available for testing viscosity below 0.1~10 mPa.s, which can be purchased separately.

Figure 3.1: The NDJ-8S Viscometer main unit, stand, and carrying case with included accessories.

Figure 3.2: Components of the NDJ-8S Viscometer, including the main unit, base, support rod, power adapter, wrench, and a set of rotors.
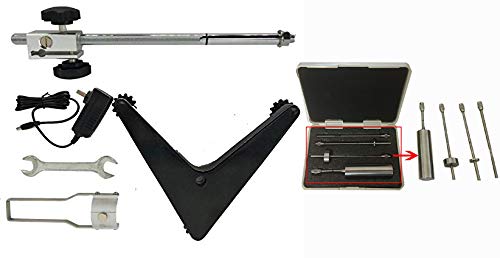
Figure 3.3: Detailed view of the viscometer's accessories, including the stand components, power supply, wrench, and the rotor set in their protective case.
4. Technical Specifications
| Parameter | Value |
|---|---|
| Measuring Range | 1 ∼ 2 × 10⁶ mPa.s |
| Standard Rotors | #1, #2, #3, #4 |
| Speed of Rotors | 0.3, 0.6, 1.5, 3, 6, 12, 30, 60 r/min |
| Automatic Selection | Automatically selects proper rotor and speed |
| Stability Reading Cursor Block | Full vertical cursor block indicates stable display |
| Measuring Precision | ±1% (Newtonian liquid) |
| Power Supply | AC 220V±10%, 50Hz±10% or 110V (country specific) |
| Working Condition Temperature | 5°C to 35°C |
| Working Condition Humidity | Relative humidity less than 80% |
| Dimensions (L×W×H) | 370 × 325 × 280 mm (14.57 x 12.8 x 11.02 inches) |
| Net Weight | 6.8 kg (14.99 Pounds) |
5. Setup and Assembly
Before operating the viscometer, ensure it is properly assembled and placed on a stable, level surface.
- Unpack Components: Carefully remove all components from the packaging, including the viscometer host, base, support pillar, rotors, and power adapter.
- Assemble the Stand:
- Attach the rise and fall pillar to the base stand using the provided screws and stay wrench. Ensure it is securely fastened.
- Place the assembled stand on a flat, vibration-free surface.
- Mount the Viscometer Host:
- Slide the viscometer host unit onto the support pillar.
- Adjust the height using the fixed handwheel to a suitable working position. Secure it firmly.
- Level the Instrument:
- Use the integrated leveling device (bubble level on top of the unit) and the adjustment knobs on the base to ensure the viscometer is perfectly level. The bubble should be centered.
- Connect Power: Plug the power adapter into the viscometer and then into a suitable power outlet (AC 220V or 110V, 50Hz, depending on your region).
- Install Protection Frame: Attach the protection frame around the rotor area to prevent accidental contact during operation.

Figure 5.1: Fully assembled NDJ-8S Viscometer, ready for operation.
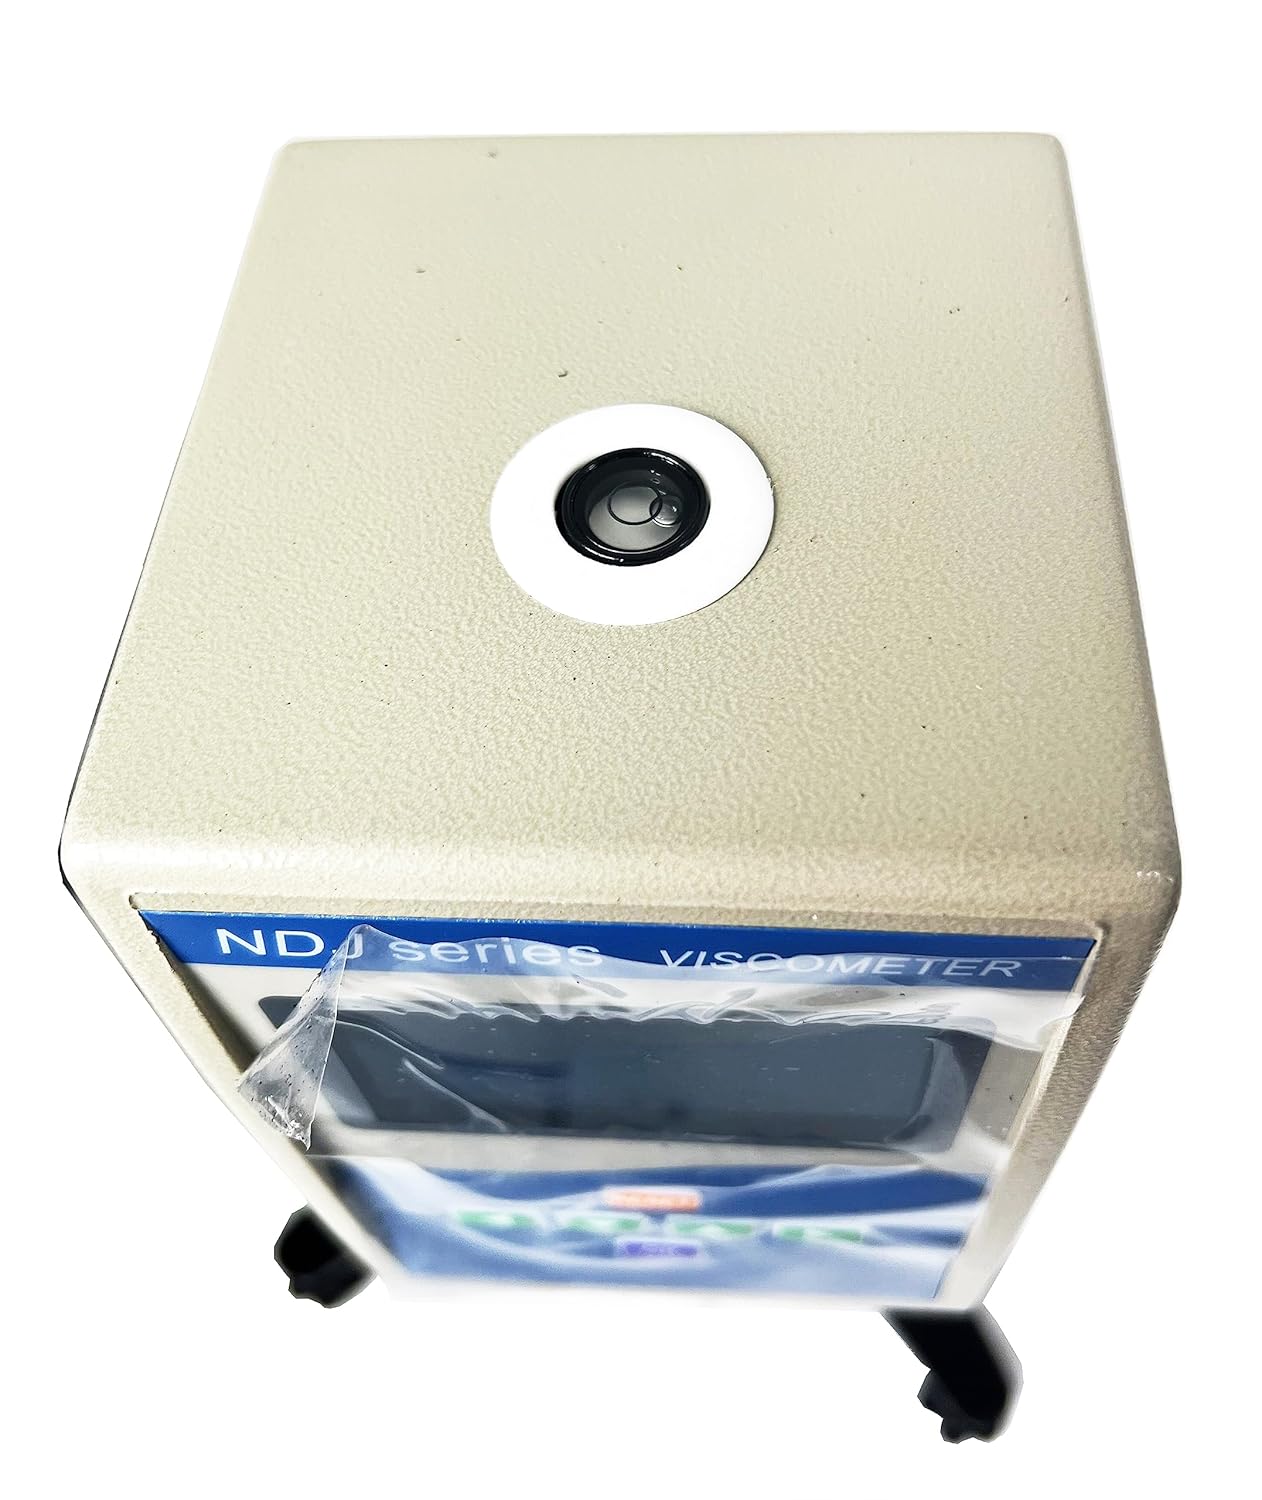
Figure 5.2: Top view of the viscometer head, showing the bubble level for ensuring proper instrument alignment.
6. Operating Instructions
Follow these steps for accurate viscosity measurements:
- Power On: Turn on the viscometer using the power switch. The LED display will illuminate.
- Select Rotor: Choose the appropriate rotor (#1, #2, #3, or #4) based on the expected viscosity range of your sample. For very low viscosity samples (below 10 mPa.s), the optional #0 rotor may be required. Carefully screw the selected rotor onto the coupling shaft at the bottom of the viscometer head.
- Prepare Sample: Pour the liquid sample into a suitable beaker or container. Ensure the sample volume is sufficient to fully immerse the rotor up to the marked line.
- Immerse Rotor: Carefully lower the viscometer head using the handwheel until the rotor is immersed in the sample liquid. Ensure the rotor is centered in the container and fully submerged to the immersion mark. Avoid air bubbles around the rotor.
- Set Speed: Select the desired rotational speed (r/min) using the control buttons on the viscometer. The instrument can automatically select a suitable speed, or you can manually choose from 0.3, 0.6, 1.5, 3, 6, 12, 30, or 60 r/min.
- Start Measurement: Press the "OK" or "START" button to begin the measurement. The rotor will start rotating.
- Read Viscosity: Observe the display. The viscometer will show the viscosity value in mPa.s. Wait for the reading to stabilize, indicated by the full vertical cursor block on the display.
- Record Data: Once the reading is stable, record the viscosity value.
- Stop Measurement: Press the "RESET" or "STOP" button to halt the rotor rotation.
- Clean Up: Carefully raise the viscometer head, unscrew the rotor, and clean both the rotor and the sample container immediately after use to prevent residue buildup.
Principle of Operation: The viscometer operates by a motor driving a rotor at a constant speed. As the rotor rotates within the fluid, the fluid's viscosity exerts a torque on the rotor. A higher liquid viscosity results in a greater viscous torque, and conversely, lower viscosity results in less torque. This viscous torque is detected by sensors, and the instrument's microcomputer calculates and displays the liquid's viscosity.
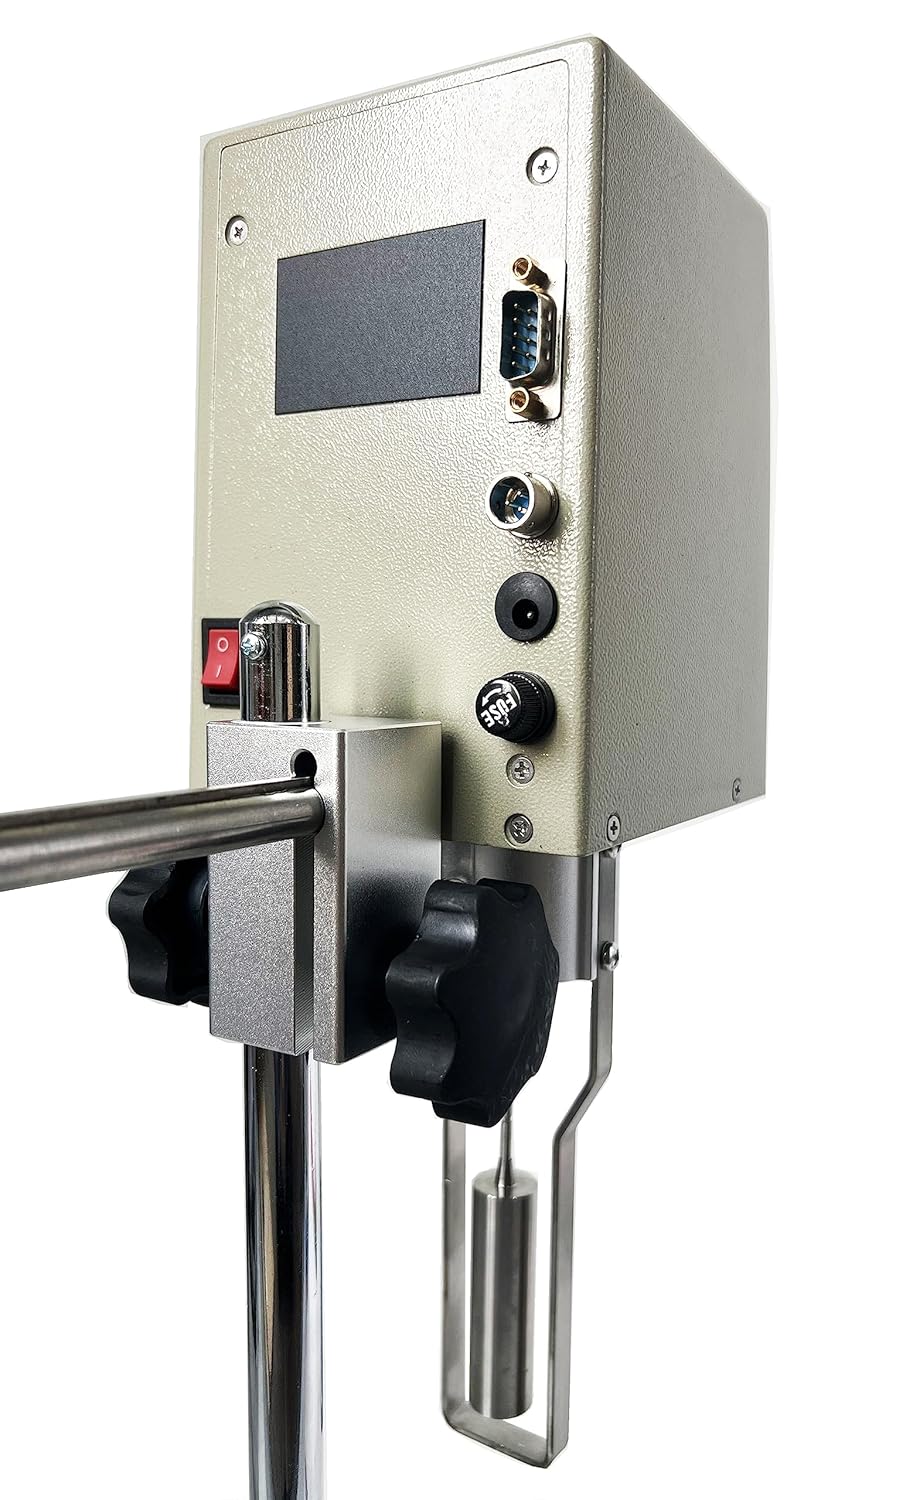
Figure 6.1: Side view of the viscometer, highlighting the control panel and the rotor attachment point.
7. Maintenance and Care
Proper maintenance ensures the longevity and accuracy of your NDJ-8S Viscometer.
- Cleaning:
- Always clean rotors and sample containers immediately after use. Use a solvent appropriate for the sample liquid.
- Wipe the main unit and stand with a soft, damp cloth. Avoid using abrasive cleaners or solvents that could damage the finish or electronic components.
- Ensure no liquid enters the internal components of the viscometer head.
- Storage:
- Store the viscometer and its accessories in a clean, dry, and dust-free environment.
- When not in use, store rotors in their protective case to prevent damage.
- Keep the instrument in its original carrying case for transport or long-term storage.
- Calibration:
- Regular calibration with certified viscosity standards is recommended to maintain measurement accuracy. Refer to a qualified technician or HFBTE support for calibration services.
- Handling:
- Handle the viscometer with care. Avoid dropping or subjecting it to strong impacts.
- Do not attempt to disassemble the main unit or perform repairs yourself, as this may void the warranty and cause further damage.
8. Troubleshooting
This section addresses common issues you might encounter with the NDJ-8S Viscometer.
| Problem | Possible Cause | Solution |
|---|---|---|
| Instrument does not power on. | No power supply; loose power cable; faulty power adapter. | Check power connection; ensure outlet is functional; try a different power adapter if available. |
| Rotor does not rotate. | Rotor not properly attached; motor malfunction; incorrect speed setting. | Ensure rotor is securely screwed on; check if the instrument is level; contact support if motor issue persists. |
| Unstable or fluctuating readings. | Instrument not level; sample not uniform; temperature fluctuations; air bubbles around rotor; external vibrations. | Re-level the instrument; ensure sample is homogeneous; control ambient temperature; remove air bubbles; place instrument on a stable surface away from vibrations. |
| Incorrect viscosity readings. | Wrong rotor selected; incorrect speed setting; rotor not fully immersed; instrument out of calibration; dirty rotor. | Verify rotor and speed selection for the sample's viscosity range; ensure rotor is immersed to the mark; clean rotor thoroughly; consider professional calibration. |
| Display shows error code. | Specific internal error. | Note the error code and refer to the full instruction manual (if available) or contact HFBTE customer support for assistance. |
If you encounter a problem not listed here or if the suggested solutions do not resolve the issue, please contact HFBTE customer support.
9. Warranty and Support
For information regarding product warranty, please refer to the warranty card included with your purchase or visit the official HFBTE website. HFBTE offers various protection plans for extended coverage, which can be found on the product's purchase page.
For technical support, troubleshooting assistance, or inquiries about spare parts and optional accessories (such as the #0 rotor), please contact HFBTE customer service through their official channels. You can often find contact information on the HFBTE store page on Amazon or their corporate website.
HFBTE Store Link: Visit the HFBTE Store on Amazon


