
PA OD1-7500D
Contents
PA Power Acoustik OD1-7500D Amplifier User Manual
Model: OD1-7500D
1. Introduction
This manual provides detailed instructions for the installation, operation, and maintenance of your PA Power Acoustik OD1-7500D 7,500 Watt Class D Monoblock Amplifier. Please read this manual thoroughly before attempting to install or operate the amplifier to ensure proper use and to prevent damage.
2. Safety Precautions
Always observe the following safety precautions when installing and operating the amplifier:
- Disconnect the vehicle's negative battery terminal before beginning any installation.
- Ensure all wiring is properly routed and secured to prevent pinching or damage.
- Use appropriate gauge wiring for power and ground connections to handle the amplifier's current draw.
- Avoid mounting the amplifier in areas exposed to direct sunlight, excessive heat, moisture, or dust.
- Do not open the amplifier casing. There are no user-serviceable parts inside. Refer all servicing to qualified personnel.
- Protect wiring from sharp edges and moving parts.
- Always use fuses of the specified rating.
3. Package Contents
Verify that all items are present in the package:
- PA Power Acoustik OD1-7500D Monoblock Amplifier
- Remote Bass Level Control
- Mounting Hardware (screws)
- User Manual (this document)

Figure 3.1: The OD1-7500D amplifier shown within its retail packaging, indicating the product as it appears when unboxed.
4. Features
The PA Power Acoustik OD1-7500D amplifier is designed for high-performance audio systems, offering:
- Class D Monoblock Design for efficient power delivery.
- Variable Low Pass Filter (LPF) for precise subwoofer integration.
- Variable Subsonic Filter to protect subwoofers from ultra-low frequencies.
- Variable Bass Boost for enhanced low-frequency response.
- Remote Bass Level Control for convenient adjustment from the driver's seat.
- Protection Circuitry against thermal overload, short circuits, and DC offset.
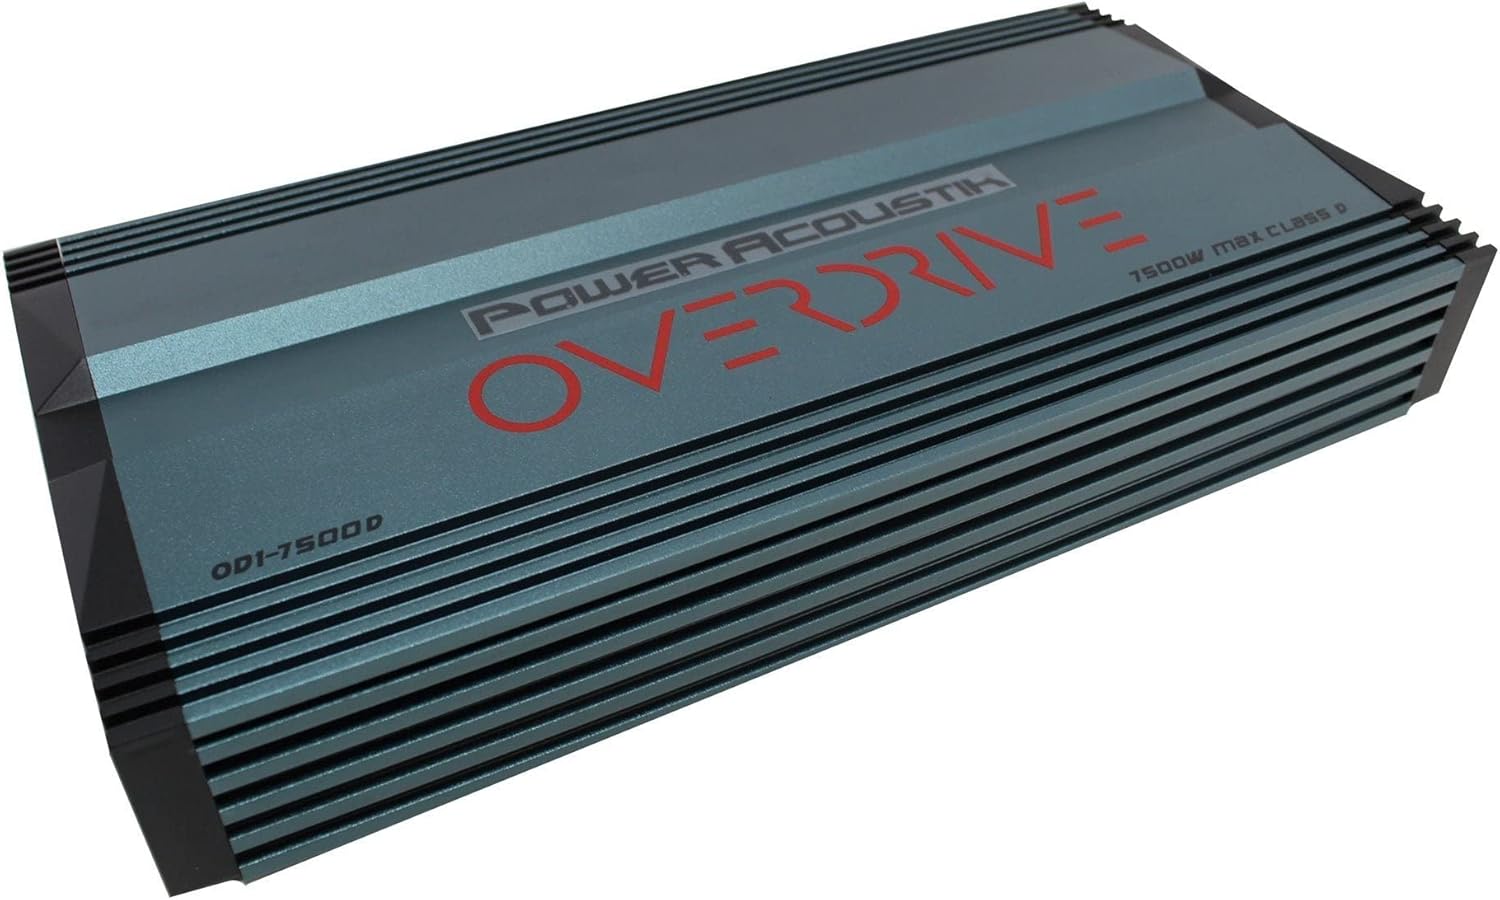
Figure 4.1: Top view of the OD1-7500D amplifier, showcasing its sleek design and branding.
5. Setup and Installation
5.1 Mounting the Amplifier
Choose a mounting location that is dry, well-ventilated, and away from direct heat sources. Ensure there is sufficient airflow around the amplifier for cooling. Secure the amplifier using the provided mounting screws.
5.2 Wiring Connections
Before making any connections, ensure the vehicle's battery negative terminal is disconnected.
Power Connections:
- +12V (Power): Connect a heavy-gauge wire (e.g., 4 AWG or larger, depending on total system power) directly from the positive terminal of the vehicle's battery to the +12V terminal on the amplifier. Install an appropriate fuse holder with a fuse (not included) within 18 inches of the battery.
- GND (Ground): Connect a heavy-gauge wire of the same size as the power wire from the GND terminal on the amplifier to a clean, unpainted metal surface of the vehicle's chassis. Ensure a good electrical connection.
- REM (Remote Turn-On): Connect a thin wire (e.g., 18 AWG) from the remote turn-on output of your head unit to the REM terminal on the amplifier. This wire turns the amplifier on and off with your head unit.
Audio Input Connections:
- RCA Input: Connect RCA cables from the subwoofer or full-range pre-out of your head unit to the INPUT R and L RCA jacks on the amplifier.
Speaker Output Connections:
- Connect your subwoofer(s) to the SPEAKER OUTPUT terminals. Ensure correct polarity (+ to + and - to -). This is a monoblock amplifier, designed for a single channel output. Refer to your subwoofer's impedance rating and the amplifier's minimum impedance capability (typically 1 Ohm for this class D amplifier) to ensure compatibility.

Figure 5.1: Close-up view of the power input (+12V, REM, GND) and speaker output terminals on the OD1-7500D amplifier.

Figure 5.2: Close-up view of the input (RCA) and control panel (GAIN, LPF, SUBSONIC, BASS BOOST) on the OD1-7500D amplifier.
6. Operating Instructions and Adjustments
6.1 Initial Power-Up
After all connections are made, reconnect the vehicle's negative battery terminal. Turn on your head unit. The amplifier's power indicator should illuminate.
6.2 Gain Adjustment (GIAN)
The GAIN control matches the amplifier's input sensitivity to the output voltage of your head unit. Start with the gain set to minimum (MIN). Play a familiar piece of music with a strong bass line at about 75% of your head unit's maximum volume. Slowly increase the amplifier's gain until you hear distortion, then back off slightly. This is the optimal setting.
6.3 Low Pass Filter (LPF)
The LPF control allows only frequencies below the set point to pass through to the subwoofer. Adjust this control (typically between 40Hz and 180Hz) to blend the subwoofer's output seamlessly with your main speakers. A common starting point is 80Hz.
6.4 Subsonic Filter
The Subsonic filter removes extremely low frequencies that are below the audible range and can cause damage to your subwoofer, especially in ported enclosures. Set this control (typically between OFF and 50Hz) slightly below your enclosure's tuning frequency or around 25-30Hz for sealed enclosures.
6.5 Bass Boost
The Bass Boost control provides an increase in output at a specific low frequency (e.g., 30Hz or 80Hz). Use this sparingly and adjust carefully to avoid distortion or damage to your subwoofer. Start at 0dB and increase only if desired, up to 12dB.
6.6 Remote Bass Level Control
Connect the remote bass level control to the "REMOTE" port on the amplifier. This allows you to conveniently adjust the bass output level from your listening position without accessing the amplifier directly.

Figure 6.1: The wired remote bass level control unit, used for convenient adjustment of bass output.
7. Maintenance
The PA Power Acoustik OD1-7500D amplifier requires minimal maintenance. Keep the amplifier clean and free of dust and debris. Periodically check all wiring connections to ensure they are secure and free from corrosion. Do not use harsh chemicals or abrasive cleaners on the amplifier's surface.
8. Troubleshooting
If you experience problems with your amplifier, refer to the following troubleshooting guide:
| Problem | Possible Cause | Solution |
|---|---|---|
| No Power / Power LED Off |
|
|
| No Sound / Protection LED On |
|
|
| Distorted Sound |
|
|
| Engine Noise (Whine) |
|
|
9. Specifications
| Feature | Specification |
|---|---|
| Model | OD1-7500D |
| Amplifier Class | Class D Monoblock |
| Output Power | 7,500 Watts (Max) |
| Number of Channels | 1 |
| Voltage | 12 Volts (DC) |
| Low Pass Filter (LPF) | Variable (40Hz - 180Hz) |
| Subsonic Filter | Variable (OFF - 50Hz) |
| Bass Boost | Variable (0dB - 12dB) |
| Mounting Type | Surface Mount |
| Operating Temperature | 85 Degrees Celsius (Max) |
| Package Dimensions | 15.55 x 10.55 x 3.58 inches |
| Item Weight | 0.01 ounces |
| Compliance | FCC |
10. Warranty and Support
PA Power Acoustik products are designed and manufactured to the highest quality standards. For specific warranty terms and conditions, please refer to the warranty card included with your product or visit the official PA Power Acoustik website. Keep your purchase receipt as proof of purchase for warranty claims.
For technical support or service inquiries, please contact PA Power Acoustik customer service through their official channels. Do not attempt to repair the unit yourself, as this will void the warranty.
Ask a question about this manual
Ask about setup, troubleshooting, compatibility, parts, safety, or missing instructions. Manuals+ will review the question and use this page’s manual context to help answer it.