Introduction
This manual provides detailed instructions for the ROOFULL External CD DVD +/-RW Drive, Model ECD829-Y-BB. This device is designed to provide CD and DVD reading, writing, and ripping capabilities for computers lacking an internal optical drive. It features USB 3.0 and USB-C connectivity for broad compatibility.
What's in the Box
- USB CD/DVD Drive for Laptop
- USB to micro-USB Power Supply Cord
- User Manual with Detailed Usage Guide (This document)
- Portable Storage Carrying Case

Setup
1. Connecting the Drive
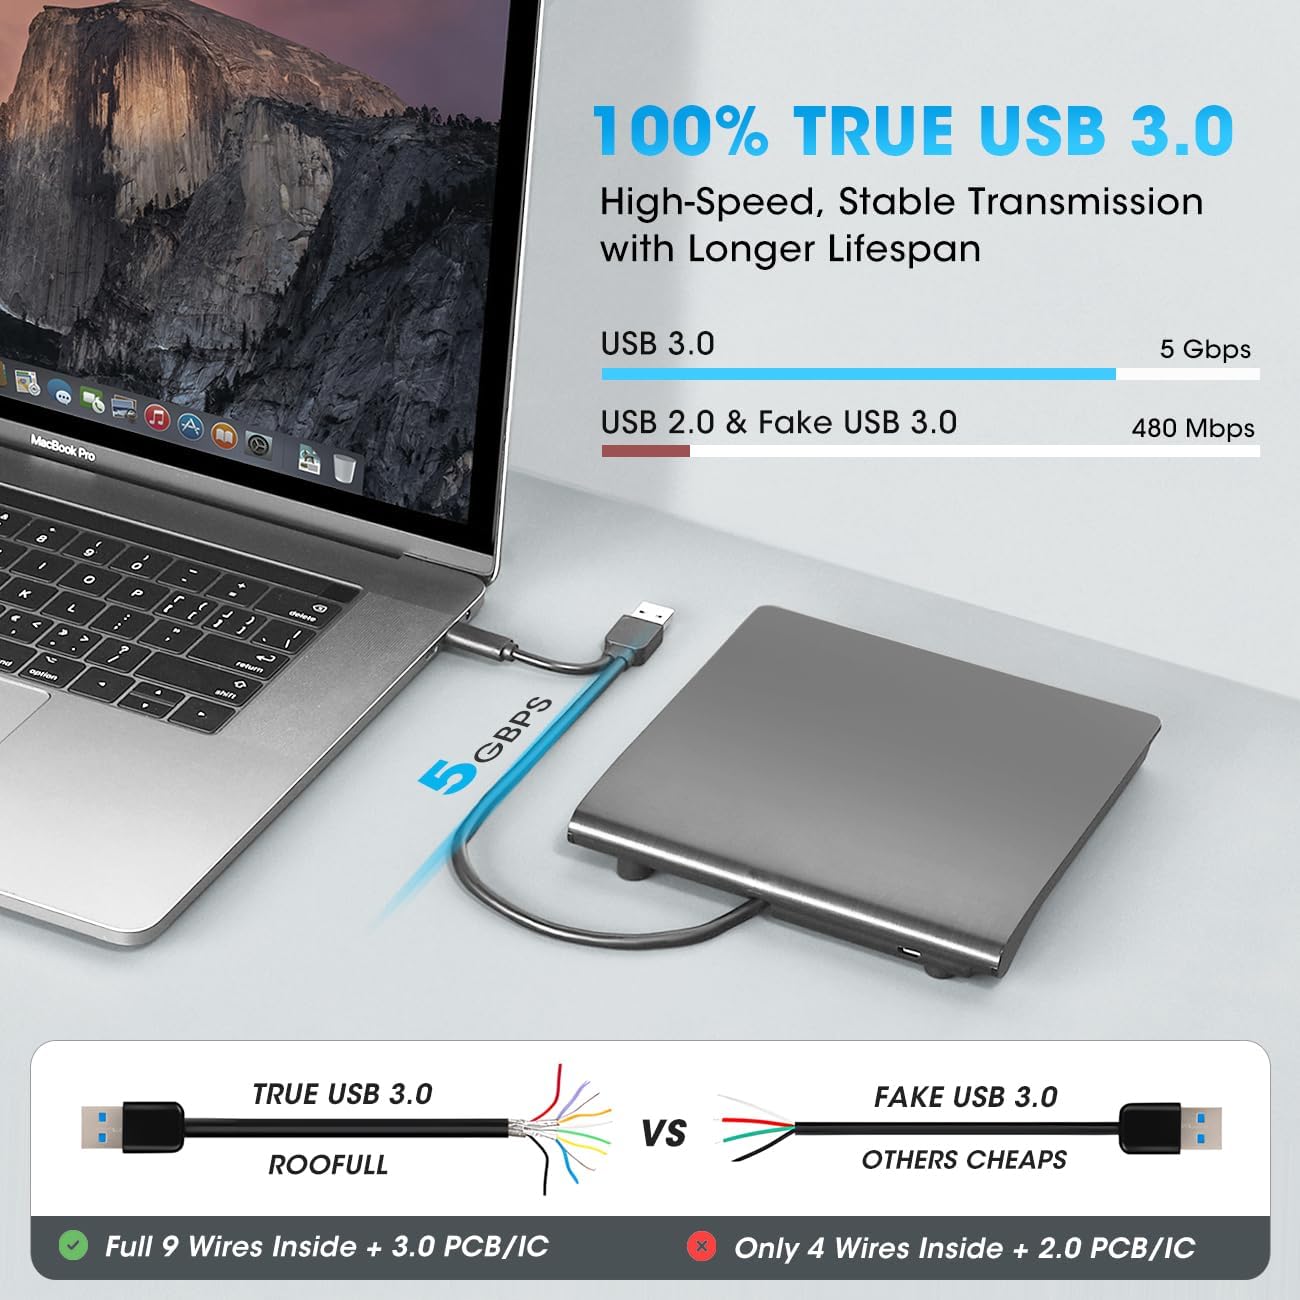
The ROOFULL External CD DVD Drive features an integrated USB 3.0 cable with both Type-A and Type-C connectors for versatile connectivity. No additional adapters or hubs are typically required.
- Locate the integrated USB 3.0 cable on the bottom of the drive.
- Connect the appropriate connector (USB Type-A or USB Type-C) directly to an available USB port on your computer.
- For desktop computers, it is recommended to connect the drive to a rear USB port to ensure stable power delivery.


2. Power Supply (Optional)
In most cases, the drive will draw sufficient power from a single USB 3.0 port. However, if your computer's USB port provides insufficient power, or if you experience unstable operation, use the included USB to micro-USB power supply cord.
- Connect the micro-USB end of the power supply cord to the micro-USB power port on the drive.
- Connect the standard USB end of the power supply cord to a powered USB port on your computer or a USB wall adapter (not included).
3. Plug & Play Operation
The drive is designed for plug-and-play functionality, meaning no driver installation is typically required. Your operating system should automatically recognize the device upon connection.
- Once connected, the drive will appear as an optical drive in your computer's file explorer (Windows) or a disc icon will appear on the desktop (macOS) when a disc is inserted.
- While no drivers are needed, you will require appropriate software to play movies, music, or burn/rip discs. Popular options include VLC Media Player for playback and ImgBurn for burning/ripping (for Windows).
4. Compatibility
The ROOFULL External CD DVD Drive is compatible with a wide range of operating systems and devices:
- Operating Systems: Windows 11/10/8.1/7/Vista/XP, most Linux systems, and macOS 10.16 or later.
- Devices: Apple MacBook, iMac, Mac mini/Studio, and most Windows laptops, desktops, or all-in-one PCs from brands like HP, Dell, Lenovo, ASUS, LG, Samsung, and Microsoft.
Incompatible Devices/Formats:
- Chromebooks (ChromeOS)
- iPads/tablets, smartphones, TVs, projectors, vehicles
- Some Surface models
- Blu-ray discs and 4K discs (The drive supports CD and DVD formats only).

Operating Instructions
1. Inserting a Disc
- Press the Ejection Button located on the front of the drive. The disc tray will open.
- Carefully place the CD or DVD onto the tray, ensuring it is centered on the spindle.
- Gently push the tray back into the drive until it clicks shut.
2. Reading Discs
Once a disc is inserted and the drive is connected, your computer's operating system should detect the disc. You can then use appropriate software to access its content:
- For Data Discs: Open File Explorer (Windows) or Finder (macOS) and navigate to the optical drive icon to browse files.
- For Movie DVDs: Use a DVD playback software (e.g., VLC Media Player, Windows Media Player, Apple DVD Player).
- For Music CDs: Use a music playback software (e.g., Windows Media Player, iTunes, VLC Media Player).
3. Burning and Ripping Discs
To burn data to a blank CD/DVD or rip content from an existing disc, you will need third-party software. The drive supports these functions, but the software handles the process.
- Burning: Use burning software (e.g., ImgBurn, Nero, Windows built-in burning utility) to write data, audio, or video files to a blank recordable CD-R, CD-RW, DVD-R, DVD+R, DVD-RW, or DVD+RW disc.
- Ripping: Use ripping software (e.g., VLC Media Player, HandBrake for DVDs, iTunes for audio CDs) to extract content from a CD or DVD and save it to your computer's hard drive.
4. Ejecting a Disc
To eject a disc, follow these steps:
- Windows: Right-click on the optical drive icon in File Explorer and select "Eject." Alternatively, press the Ejection Button on the drive.
- macOS: Due to macOS restrictions, the physical Ejection Button on the drive may not function after playing or burning. Right-click the disc icon on your desktop and select "Eject," or go to "File" > "Eject" in the application you are using.
- If the disc is still stuck, use a paperclip to gently press into the small forced ejection pinhole located near the eject button on the drive.

5. DVD Region Codes
DVDs are region-coded, meaning they will only play on DVD drives that use the same region country codes. CDs are not region-coded.
Each external optical drive allows you to change the region code a limited number of times (typically 4-5 times). Once the limit is reached, the region code becomes permanently set.
Refer to the following common DVD regions:
| Region | Geographical Area |
|---|---|
| Region 1 | Canada, the United States |
| Region 2 | Japan, Europe, South Africa, Middle East |
| Region 3 | Southeast Asia, East Asia (including Hong Kong) |
| Region 4 | Australia, New Zealand, Pacific Islands, Central America, Mexico, South America |
| Region 5 | Eastern Europe, Russia, Indian Subcontinent, Africa, North Korea, and Mongolia |
| Region 6 | China |
| Region 7 | Reserved for unspecified special use |
| Region 8 | Air and oceanic travel |

Maintenance
1. Cleaning the Drive
- Ensure the drive is disconnected from your computer before cleaning.
- Wipe the exterior of the drive with a soft, dry, lint-free cloth.
- Do not use liquid cleaners, aerosols, or solvents, as these can damage the device.
- Avoid opening the disc tray unnecessarily to prevent dust accumulation on the optical lens. If cleaning the lens is necessary, use a specialized CD/DVD lens cleaning kit.
2. Storage and Handling
- Store the drive in its included protective carrying case when not in use to guard against dust, water, and accidental drops.
- Avoid exposing the drive to extreme temperatures, direct sunlight, or high humidity.
- Handle the drive gently to prevent physical damage.
Troubleshooting
Common Issues and Solutions
- Drive Not Recognized by Computer:
- Ensure the USB data cable is securely connected to both the drive and your computer.
- Try connecting to a different USB port on your computer.
- For desktop PCs, use a rear USB port, as they often provide more stable power.
- If necessary, connect the additional USB power supply cord to ensure adequate power.
- Restart your computer and try connecting the drive again.
- Disc Not Ejecting (macOS):
- On macOS, the physical eject button on the drive may not work after playing or burning.
- Right-click the disc icon on your desktop and select "Eject."
- Alternatively, go to "File" > "Eject" within the application you are using (e.g., Finder, DVD Player).
- If the disc is still stuck, use a paperclip to gently press into the small forced ejection pinhole located near the eject button on the drive.
- Cannot Play or Burn Discs:
- Confirm that you have appropriate third-party software installed for playing (e.g., VLC Media Player) or burning/ripping (e.g., ImgBurn). The drive provides hardware functionality, but software is required for media operations.
- Ensure the disc is clean and free from scratches or damage.
- Verify the disc type is supported (CD or DVD, not Blu-ray or 4K).
- Check DVD region codes if you are trying to play a movie DVD from a different region.
- Slow Performance or Intermittent Operation:
- Ensure the drive is connected to a USB 3.0 port for optimal speed.
- Ensure sufficient power is supplied, using the additional power cable if needed.
- Avoid running multiple resource-intensive applications simultaneously.
Specifications
| Feature | Detail |
|---|---|
| Brand | ROOFULL |
| Model Number | ECD829-Y-BB |
| Hardware Platform | All in One PC, Laptop, PC |
| Operating System Compatibility | Mac, Windows 11/10/8/7, Linux |
| Item Weight | 12.3 ounces |
| Product Dimensions (LxWxH) | 5.5 x 5.5 x 0.71 inches |
| Color | Black |
| Optical Drive Type | CD-ROM, CD-R, CD+/-RW, DVD-ROM, DVD+/-R, DVD+/-RW |
| Hardware Interface | USB 3.0 Type A, USB 3.0 Type C |
| Optical Storage Write Speed | Max 24x CD / 8x DVD |
| Optical Storage Read Speed | Max 24x CD / 8x DVD |
| Special Features | Protective Carrying Case, Compact & Portable, Plug & Play, Support Reading & Burning & Ripping of CDs and DVDs, USB 3.0 Type-A & Type-C Dual Connectors |
Warranty and Support
ROOFULL provides comprehensive support for its products. Each drive is fully tested before shipment and comes with:
- Up to 2 years of service.
- Free technical support.
- Replacement unit or full compensation (no return required for eligible issues).
For technical assistance, warranty claims, or any inquiries, please contact ROOFULL customer support through the platform where you purchased the product or visit the official ROOFULL website for contact information.


