1. Introduction
This manual provides detailed instructions for the proper installation, operation, and maintenance of your DROK TDA7377 30W+30W Class AB Stereo Amplifier Module. Please read this manual thoroughly before use to ensure safe and optimal performance.
2. Product Features
- High Power Output: Delivers 30W + 30W stereo output, suitable for various audio applications.
- Class AB Design: Utilizes the TDA7377 chip for efficient and high-fidelity audio amplification.
- Wide Voltage Range: Operates on DC 12V, with a maximum supply voltage of 18V.
- Dual Audio Inputs: Features both a 3.5mm audio input jack and a 3P expansion input port for versatile connectivity.
- Premium Components: Equipped with high-quality KEMET and NICHICON capacitors, pure black pure steel terminals, multi-layer capacitors, metal film resistors, and diodes for stable performance.
- Immersion Gold PCB: Ensures excellent conductivity and durability.
- Adjustable Volume: Integrated high-grade potentiometer for precise volume control.
- Protection Features: Designed with multiple protection circuits for enhanced safety and longevity.
- Compact Design: Comes with an acrylic case for protection and easy integration into DIY projects.

Figure 1: Overview of the DROK TDA7377 Amplifier Module with key components labeled, including KEMET and NICHICON capacitors, gold-plated 3.5mm audio input, 3P expansion input, immersion gold PCB, pure black pure steel terminals, multi-layer capacitors, metal film resistors, diodes, and a high-grade potentiometer.
3. Safety Instructions
- Always use a DC power supply within the specified voltage range (12V to 18V).
- Ensure correct polarity when connecting the power supply to avoid damage to the module.
- Avoid short-circuiting the output terminals or power input.
- Do not operate the module in wet or excessively humid environments.
- Keep the module away from children and pets.
- Ensure adequate ventilation around the heatsink to prevent overheating, especially during prolonged high-power operation.
- Disconnect power before making any connections or disconnections.
4. Package Contents
Verify that all items are present in your package:
- DROK TDA7377 Amplifier Module with Heatsink
- Acrylic Case Components (top, bottom, and side panels)
- Mounting Hardware (screws, standoffs)
- Shielded 3P Audio Input Cable
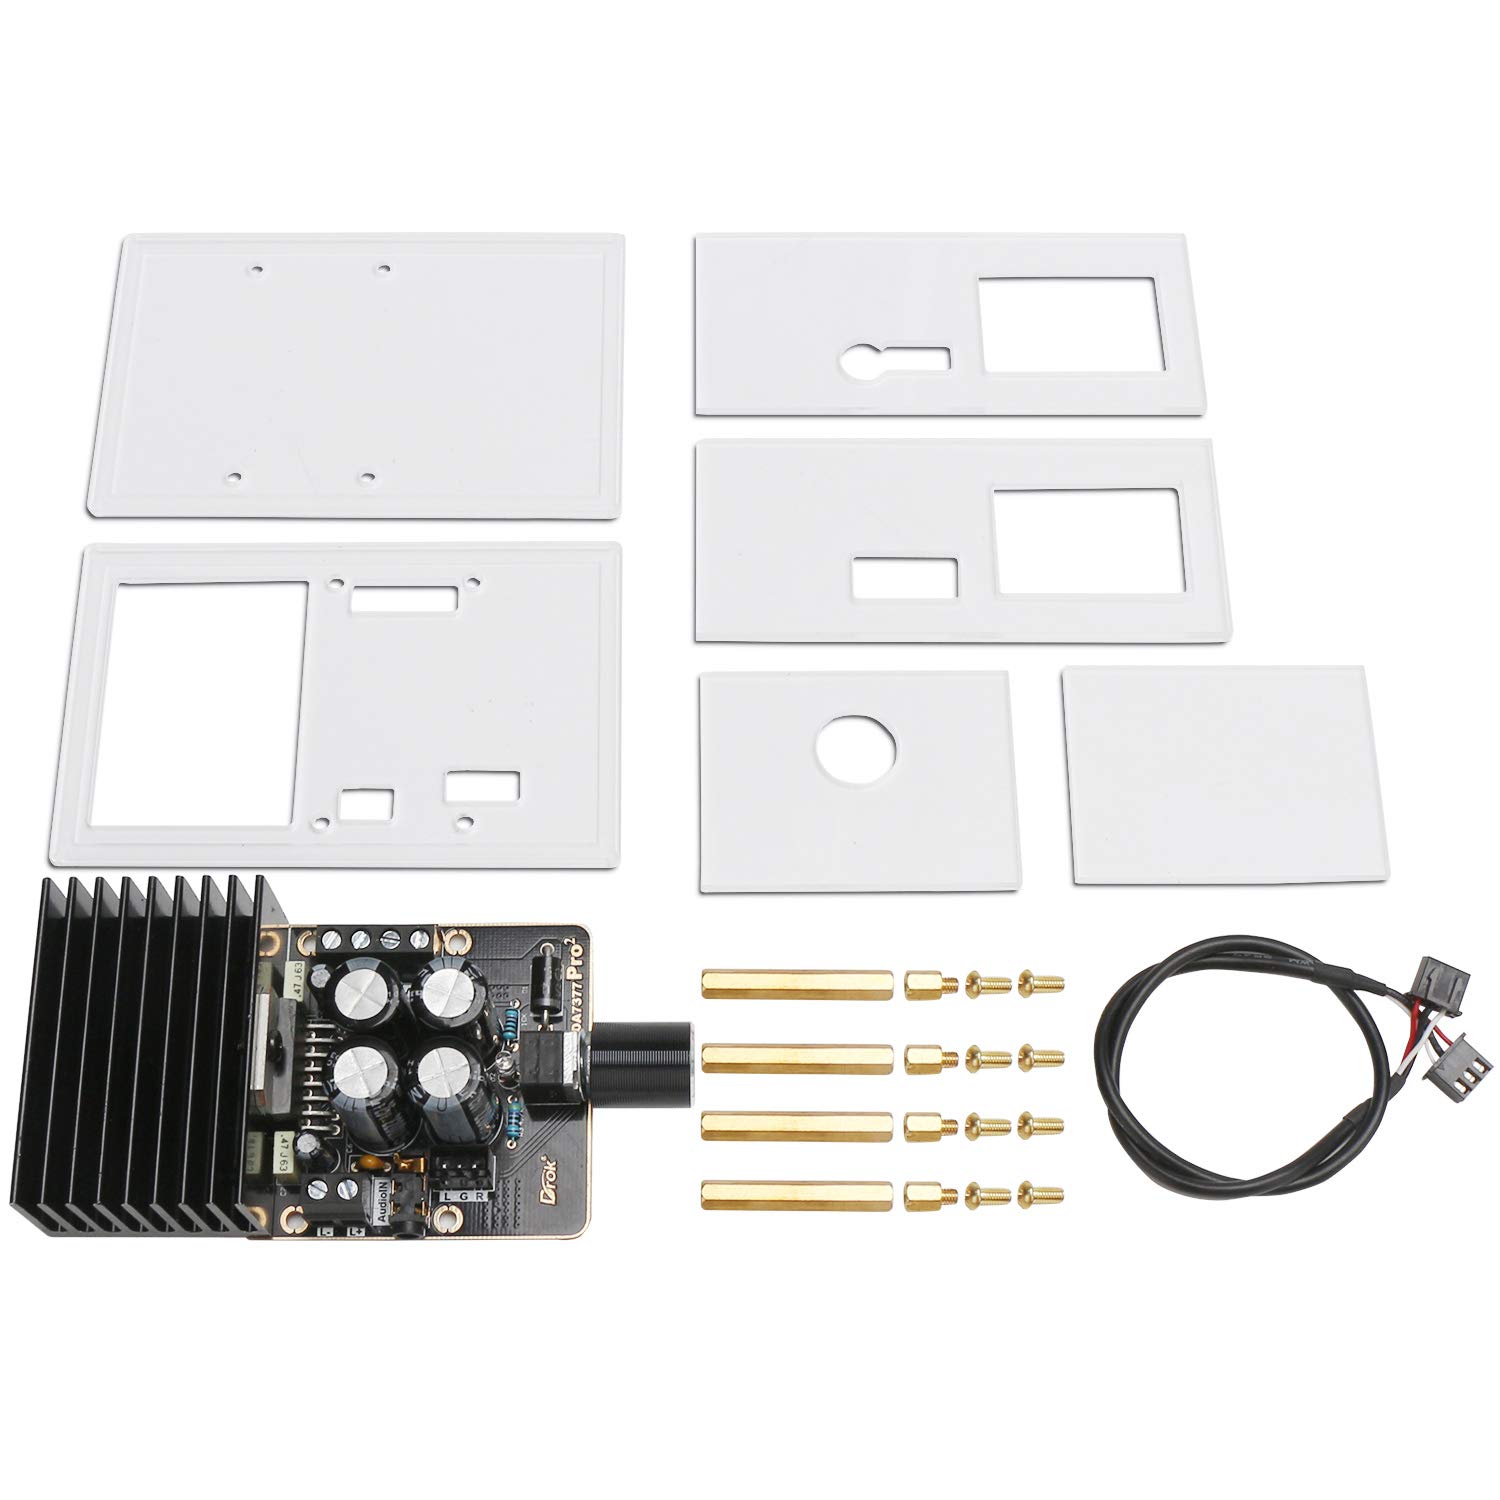
Figure 2: Contents of the DROK TDA7377 amplifier module kit, including the amplifier board, acrylic case panels, mounting hardware, and a shielded audio cable.
5. Setup Instructions
5.1. Acrylic Case Assembly
- Carefully remove the protective film from both sides of all acrylic case panels.
- Mount the amplifier board onto the bottom acrylic panel using the provided standoffs and screws.
- Assemble the side panels and top panel around the mounted board, securing them with the remaining screws. Ensure all cutouts align with the module's ports and potentiometer.
5.2. Wiring Connections
Refer to the wiring diagram below for proper connections.

Figure 3: Detailed wiring diagram showing connections for power, speakers, and audio input to the DROK TDA7377 amplifier module.
- Power Supply Connection: Connect a DC 12V power supply to the "DC 12V" terminals. Ensure the positive (+) and negative (-) terminals are connected correctly. The module supports a maximum of 18V DC.
- Speaker Connections:
- Connect the left channel speaker to the "L+" and "L-" terminals.
- Connect the right channel speaker to the "R+" and "R-" terminals.
- Ensure speakers have an impedance of 4-8 ohms.
- Audio Input Connection: Choose one of the following methods:
- Connect your audio source (e.g., smartphone, MP3 player) to the 3.5mm audio input jack.
- Alternatively, use the provided 3P shielded audio cable to connect to the 3P audio input port for custom installations.

Figure 4: Close-up view of the amplifier module highlighting the left and right channel speaker outputs, DC power input, 3.5mm audio input, 3P audio input, and the volume adjustment knob.
6. Operating Instructions
- After completing all connections, ensure the volume knob is set to a low level (fully anticlockwise).
- Apply power to the module.
- Start playing audio from your connected source.
- Slowly rotate the volume knob clockwise to increase the audio output to your desired level. Rotate anticlockwise to decrease volume.
7. Maintenance
- Keep the amplifier module clean and dry. Avoid exposure to dust, moisture, and extreme temperatures.
- Periodically check all wiring connections to ensure they are secure and free from corrosion.
- Ensure the heatsink remains free of obstructions to allow for proper heat dissipation.
- For optimal thermal performance, it is recommended to ensure thermal compound is applied between the TDA7377 IC and the heatsink. If not present, carefully apply a thin layer of high-quality thermal paste.
8. Troubleshooting
| Problem | Possible Cause | Solution |
|---|---|---|
| No sound output |
|
|
| Distorted or unclear sound |
|
|
| Module overheating |
|
|
9. Specifications
| Parameter | Value |
|---|---|
| Model | TDA7377 |
| Brand | DROK |
| Output Power | 30W + 30W (Stereo) |
| Number of Channels | 2.0 (Stereo) |
| Operating Voltage | DC 12V |
| Maximum Supply Voltage | DC 18V |
| Speaker Impedance | 4-8 Ohms (Recommended) |
| Audio Input | 3.5mm Jack, 3P Expansion Port |
| Mounting Type | Surface Mount |
| Item Weight (Board Only) | 0.01 Ounces (approx. 0.28g) |

Figure 5: Dimensions of the DROK TDA7377 amplifier module when assembled in its acrylic case, showing approximate measurements of 101mm x 64mm x 45mm.
10. Warranty and Support
DROK products are designed for reliability and performance. For technical assistance, troubleshooting, or warranty inquiries, please contact DROK customer service through the retailer's platform or the official DROK website. Please have your product model number (TDA7377) and purchase information ready when contacting support.


