Introduction
Thank you for choosing the GameMax H605 Micro ATX Gaming Tower Case. This manual provides essential information for the proper installation, operation, and maintenance of your new PC case. Please read this manual thoroughly before beginning assembly to ensure optimal performance and safety.
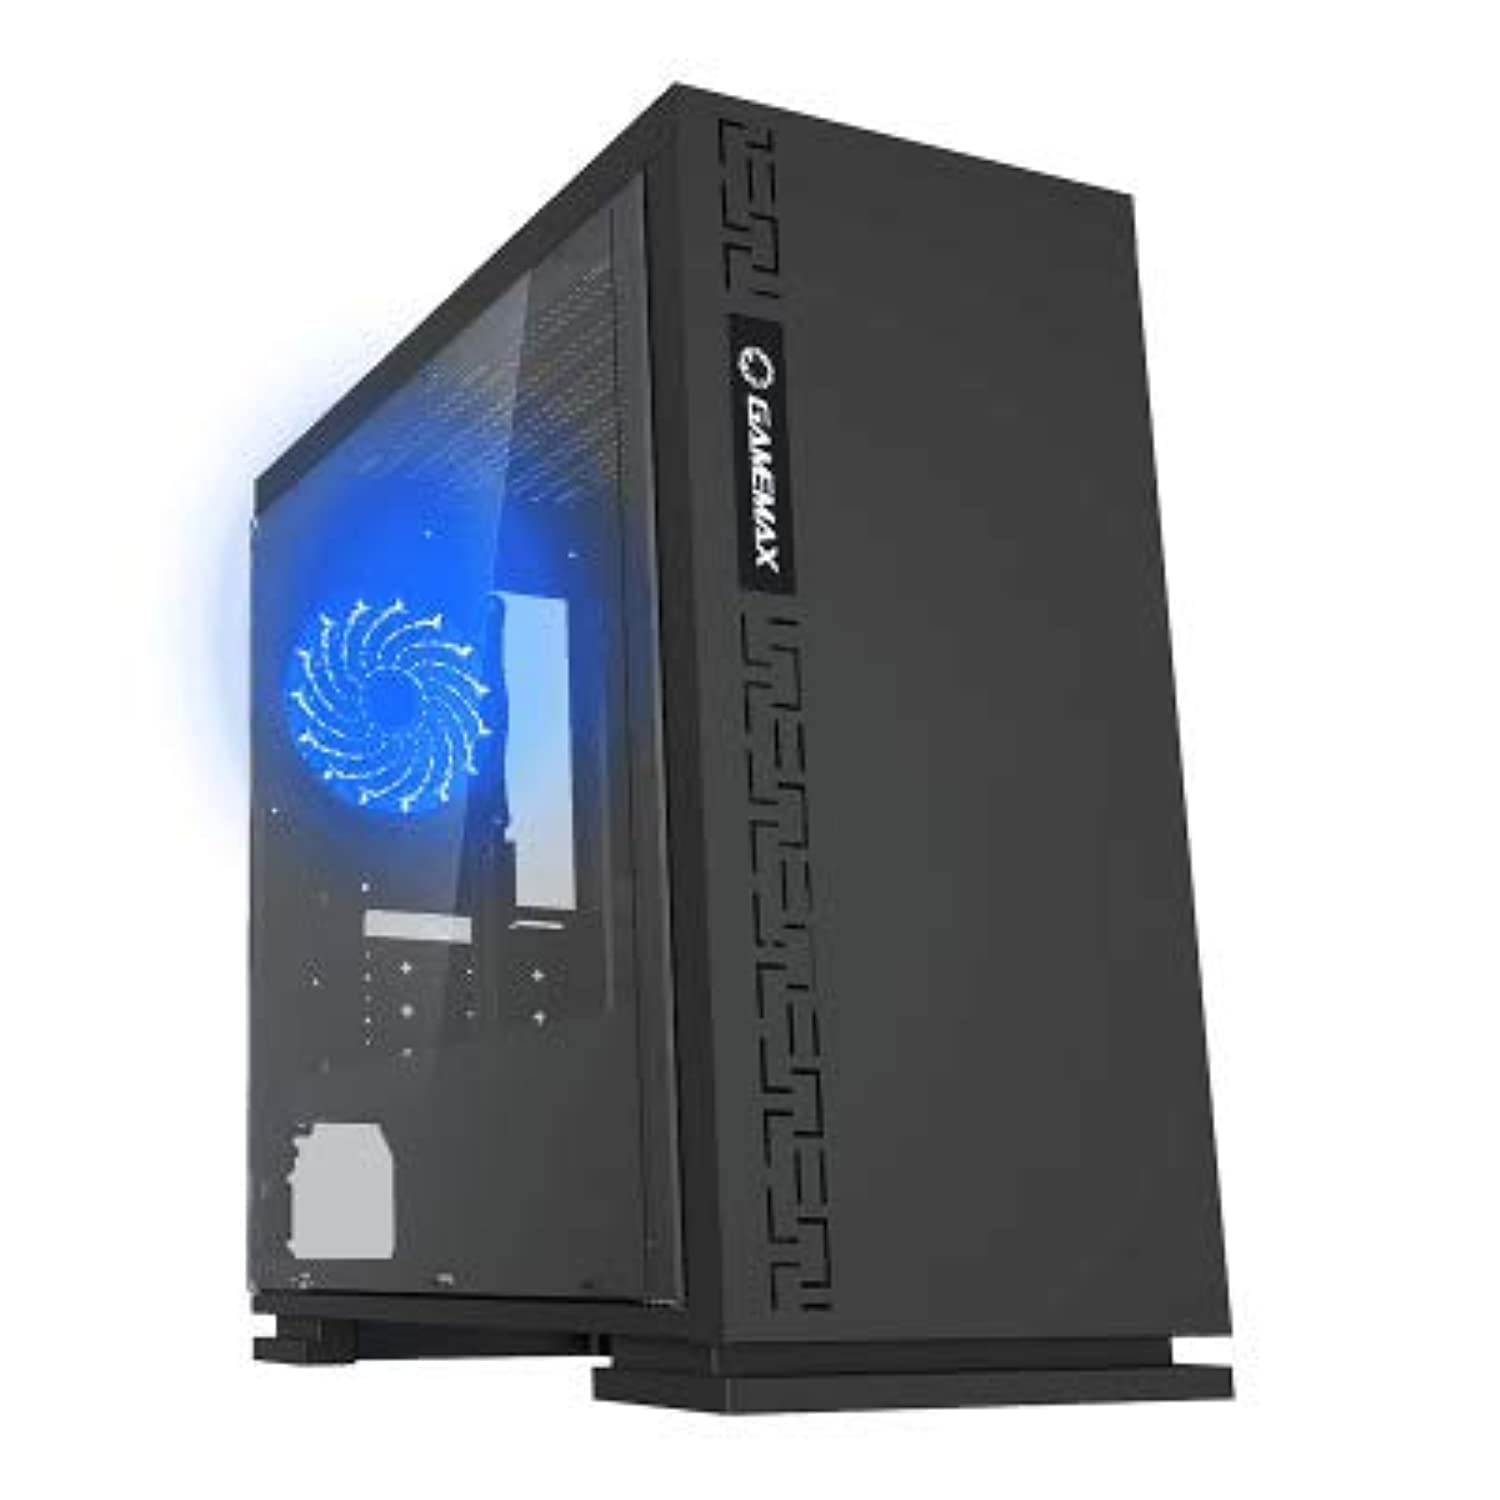
Figure 1: Front view of the GameMax H605 Micro ATX Gaming Tower Case, showcasing its sleek design and front panel.
The GameMax H605 is designed for Micro ATX motherboards and features a compact yet efficient layout for gaming components. It includes one pre-installed LED fan at the rear for immediate cooling. The case is constructed from steel and plastic, offering a balance of durability and aesthetics.
Safety Information
Please observe the following safety guidelines during installation and operation:
- Always disconnect the power supply from the wall outlet before installing or removing any components.
- Wear an anti-static wrist strap to prevent electrostatic discharge (ESD) damage to sensitive components.
- Handle components carefully to avoid physical damage.
- Keep the case away from liquids and excessive humidity.
- Ensure proper ventilation around the case to prevent overheating.
Package Contents
Verify that all the following items are present in your GameMax H605 package:
- GameMax H605 Micro ATX Gaming Tower Case
- Accessory box (screws, standoffs, cable ties)
- User Manual (this document)
If any items are missing or damaged, please contact your retailer or GameMax support.
Setup
1. Preparing the Case
- Place the case on a flat, stable surface.
- Remove the side panels by unscrewing the thumbscrews at the rear of the case and sliding the panels backward.

Figure 2: Interior view of the GameMax H605 case with the side panel removed, showing the motherboard tray and drive bays.
2. Motherboard Installation
- Install the I/O shield into the rear opening of the case.
- Align your Micro ATX motherboard with the standoffs inside the case. Ensure the standoffs match the screw holes on your motherboard.
- Secure the motherboard with the provided screws.
3. Storage Drive Installation
- For 3.5-inch HDDs, slide the drive into the designated drive cage bays and secure with screws if necessary.
- For 2.5-inch SSDs, mount them onto the dedicated SSD brackets or trays and secure with screws.
4. Power Supply Installation
- Position the power supply unit (PSU) in the bottom rear compartment of the case.
- Secure the PSU to the case using the screws provided with your power supply.
5. Graphics Card and Expansion Card Installation
- Remove the necessary expansion slot covers from the rear of the case.
- Insert your graphics card or other expansion cards into the appropriate PCIe slots on your motherboard.
- Secure the cards with screws.

Figure 3: Rear view of the GameMax H605 case, showing expansion slots and I/O shield opening.
6. Cable Management
Utilize the cable routing cutouts and tie-down points behind the motherboard tray to manage cables. This improves airflow and aesthetics.
Operating
Once all components are installed and connected, replace the side panels and connect your peripherals (monitor, keyboard, mouse) to the motherboard's I/O ports. Connect the power cable to the PSU and a wall outlet. Press the power button on the front panel to start your system.

Figure 4: Top-front view of the GameMax H605 case, highlighting the front panel I/O ports and power button.
Maintenance
Regular maintenance helps ensure the longevity and optimal performance of your PC case and components:
- Dust Cleaning: Periodically clean dust from the case interior, fans, and filters using compressed air or a soft brush. Ensure the system is powered off and unplugged before cleaning.
- Cable Management Check: Occasionally check cable routing to ensure no cables are obstructing airflow or fan operation.
- Fan Inspection: Verify that all fans are spinning freely and are free from obstructions.
Troubleshooting
If you encounter issues with your PC build, consider the following common troubleshooting steps:
- No Power: Ensure all power cables (24-pin ATX, 8-pin CPU, GPU power) are securely connected. Check if the PSU switch is in the 'ON' position.
- No Display: Verify that the monitor cable is connected to the graphics card (not the motherboard I/O) and that the monitor is powered on and set to the correct input.
- Overheating: Check fan connections and ensure they are spinning. Clean any dust buildup. Verify proper airflow within the case.
- Loose Connections: Re-seat RAM modules, graphics card, and all power/data cables to ensure they are firmly in place.
Specifications
| Feature | Detail |
|---|---|
| Brand | GameMax |
| Item Model Number | H605 BLK |
| Manufacturer | GameMax |
| Series | H605 BLK |
| Color | Black |
| Hardware Platform | Windows 7 |
| Batteries Included | No |
| Item Weight | 7.53 grams |
| Motherboard Compatibility | Micro ATX |
| Case Type | Mid Tower |
| Recommended Uses For Product | Gaming |
| Material | Solid Plastic Alloy |
| Cooling Method | Water (Implies compatibility for water cooling solutions) |
| Model Name | H605 BLK |
| Fan Size | 120 millimeters |
| Total USB Ports | 1 |
| Date First Available | July 9, 2019 |
Warranty and Support
GameMax products are designed for reliability and performance. For warranty information, please refer to the warranty card included with your purchase or visit the official GameMax website. If you require technical assistance or have questions regarding your GameMax H605 case, please contact GameMax customer support through their official channels.
Please retain your proof of purchase for warranty claims.


