
1. Introduction
This manual provides essential information for the installation, operation, and maintenance of your Waverspeed 3-inch Full Body Lift Kit. This kit is designed to increase the body height of your truck, allowing for larger tire fitment and an enhanced aesthetic. Please read all instructions carefully before beginning installation.

2. Vehicle Compatibility
This Waverspeed 3-inch Full Body Lift Kit is compatible with the following vehicle models:
- Chevrolet Silverado 1500: 2003, 2004, 2005 (2WD and 4WD models)
- GMC Sierra 1500: 2003, 2004, 2005 (2WD and 4WD models)

3. Package Contents
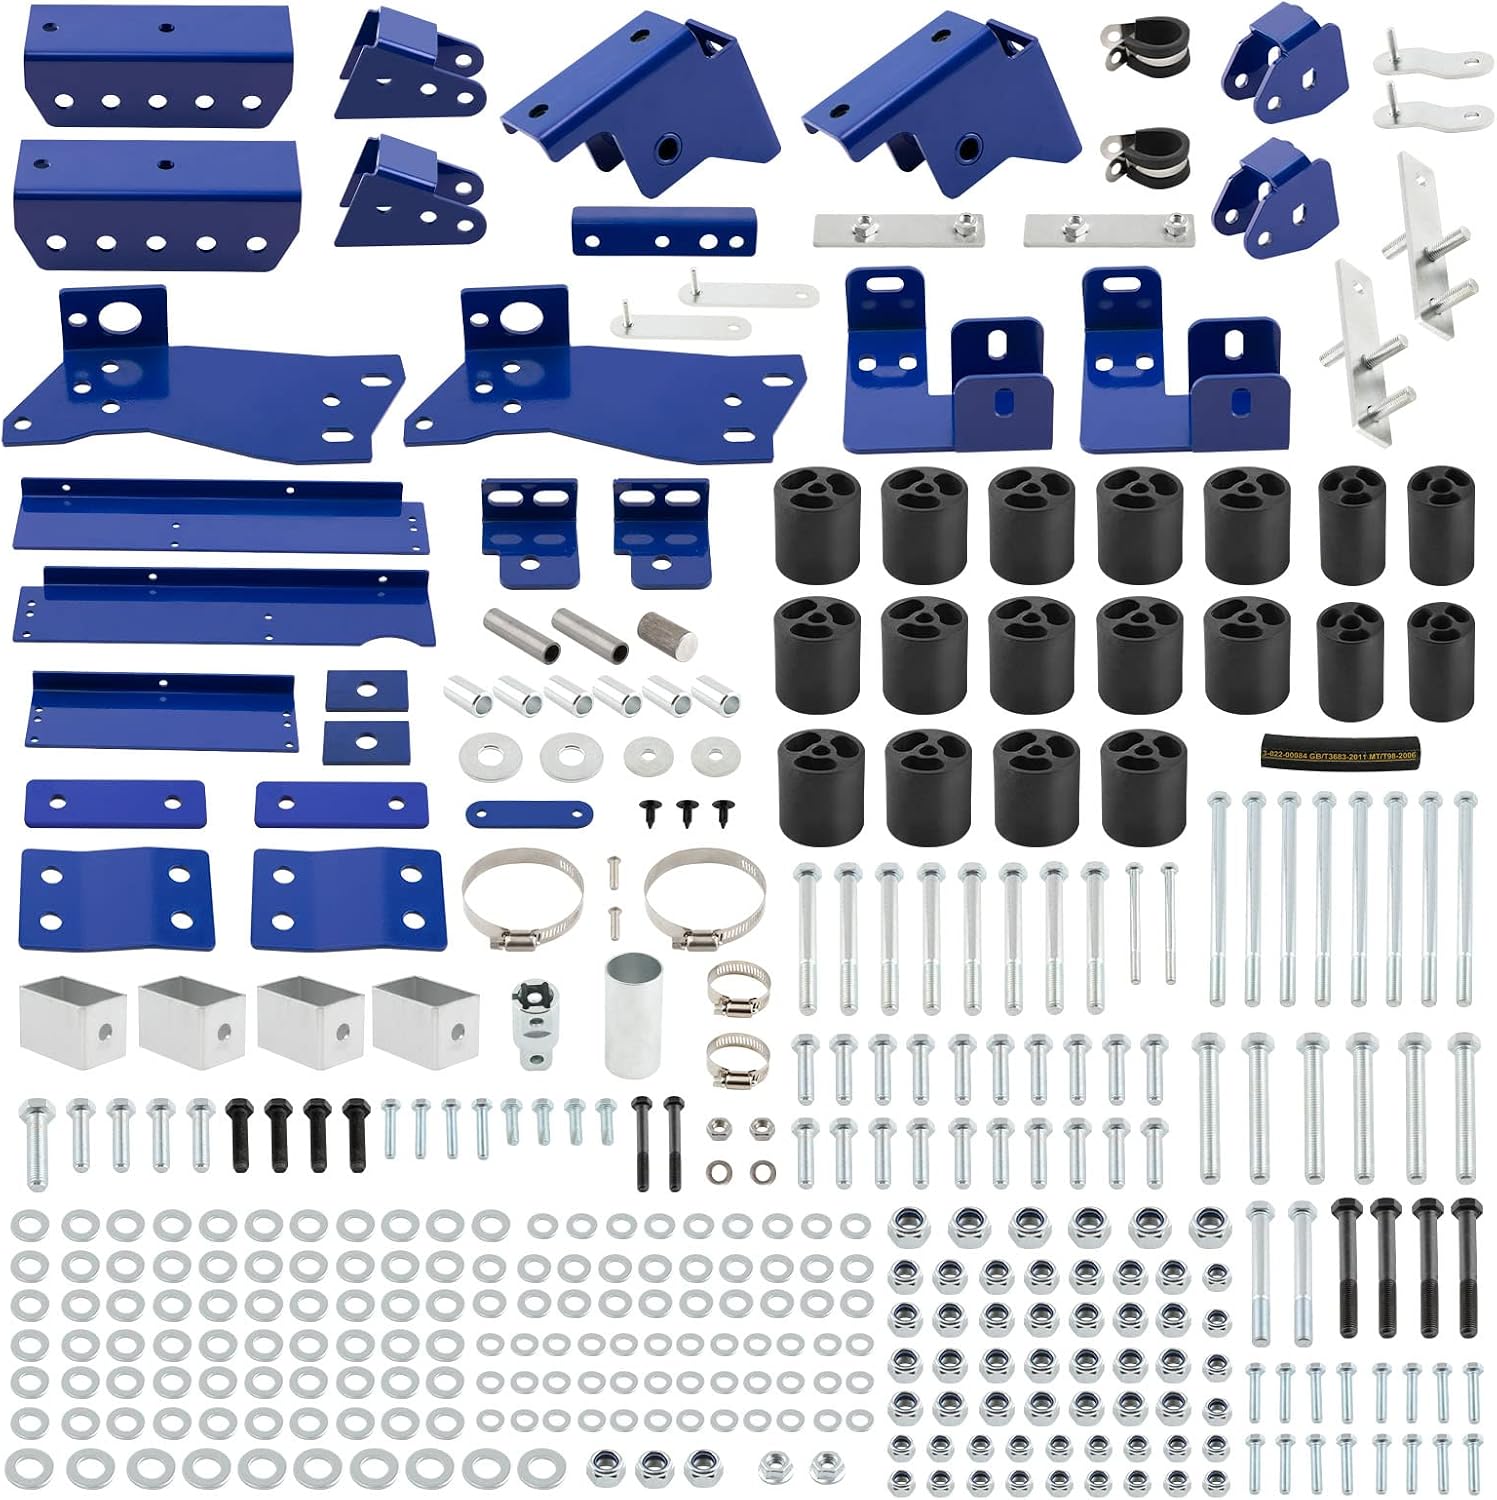
Please verify that all components listed below are present in your kit before beginning installation. If any parts are missing or damaged, contact customer support immediately.
- Body Lift Blocks
- Bumper Relocation Brackets
- Radiator Relocation Brackets
- Steering Extensions
- Square Frame Channel
- All Necessary Hardware (bolts, nuts, washers, clamps)

4. Safety Information
WARNING: Installation of this body lift kit requires advanced mechanical knowledge and specialized tools. Improper installation can lead to serious injury, vehicle damage, or loss of vehicle control. Professional installation is highly recommended.
- Always wear appropriate personal protective equipment, including safety glasses and gloves.
- Ensure the vehicle is on a level surface and properly secured with jack stands before beginning any work. Never rely solely on a jack.
- Disconnect the vehicle's battery before starting work to prevent electrical hazards.
- Exercise extreme caution when lifting the vehicle body. Ensure all lines, hoses, and wires are disconnected or extended as necessary to prevent damage.
- Refer to your vehicle's service manual for specific torque specifications and procedures where applicable.
5. Setup and Installation
Due to the complexity of a full body lift kit installation and the absence of specific step-by-step instructions, this section provides a general overview. Professional installation is strongly advised.
5.1. Required Tools (Not Included)
- Vehicle lift or heavy-duty jack and jack stands
- Standard and metric socket/wrench sets
- Torque wrench
- Cutting tools (if modifications to body mounts are needed)
- Drill and drill bits
- Pry bars, hammers, and other general shop tools
- Penetrating oil
5.2. General Installation Steps
- Preparation: Park the vehicle on a level surface, engage the parking brake, and block the wheels. Disconnect the battery.
- Access Body Mounts: Remove any components obstructing access to the body mounts (e.g., fender liners, interior trim).
- Disconnect Components: Carefully disconnect or extend all components that connect the body to the frame. This typically includes:
- Steering shaft (use steering extensions provided)
- Shifter linkages (manual and automatic)
- Brake lines and fuel lines (may require extensions or rerouting)
- Electrical wiring harnesses
- Radiator hoses and fan shroud (use radiator relocation brackets provided)
- Bumper mounts (use bumper relocation brackets provided)
- Loosen Body Mount Bolts: Loosen all body mount bolts, but do not remove them completely yet.
- Lift Vehicle Body: Using a suitable lifting device, carefully lift the vehicle body approximately 3 inches from the frame. Ensure the lift is even and stable. Monitor all disconnected lines and wires for tension.
- Install Lift Blocks: Insert the body lift blocks between the body and the frame at each body mount location.
- Install Relocation Brackets and Extensions: Install the bumper relocation brackets, radiator relocation brackets, and steering extensions as needed to accommodate the new body height.
- Secure Body Mounts: Install the longer bolts provided with the kit through the body, lift blocks, and frame. Torque all body mount bolts to the manufacturer's specifications (refer to your vehicle's service manual).
- Reconnect Components: Reconnect all steering, shifter, brake, fuel, electrical, and radiator components. Ensure all connections are secure and free from kinks or tension.
- Final Checks: Double-check all bolts for proper torque. Verify all lines, hoses, and wires have adequate slack and are not pinched. Reconnect the battery.


6. Operating Considerations After Installation
After installing the body lift kit, several aspects of your vehicle's operation may change. It is crucial to be aware of these changes for safe driving.
- Wheel Alignment: A professional wheel alignment is highly recommended after installation to ensure proper steering and tire wear.
- Tire Clearance: While the kit allows for larger tires, always verify adequate clearance during full steering lock and suspension travel.
- Center of Gravity: Raising the vehicle's body will raise its center of gravity, potentially affecting handling characteristics, especially during cornering. Drive cautiously until you are accustomed to the new feel of the vehicle.
- Brake and Fuel Lines: Periodically inspect all extended or rerouted brake and fuel lines for leaks, chafing, or tension.
7. Maintenance
Regular inspection and maintenance are essential to ensure the long-term safety and performance of your body lift kit.
- Initial Check (500 miles): After approximately 500 miles of driving, re-torque all body mount bolts and check all connections for tightness.
- Routine Checks: Periodically inspect all components of the lift kit, including body blocks, brackets, and hardware, for signs of wear, corrosion, or looseness.
- Component Integrity: Ensure that all lines, hoses, and wires remain free from tension, chafing, or damage.
8. Troubleshooting
This section addresses common issues that may arise after installing a body lift kit.
| Issue | Possible Cause | Solution |
|---|---|---|
| Vibrations or unusual noises | Loose hardware, improperly reconnected components, driveline angle issues. | Inspect all bolts and connections for tightness. Verify proper routing and connection of all lines and linkages. Consult a professional for driveline angle assessment. |
| Steering issues (e.g., loose steering, difficulty turning) | Improperly installed steering extension, misaligned steering shaft, incorrect wheel alignment. | Recheck steering extension installation. Ensure steering shaft is properly connected. Obtain a professional wheel alignment. |
| Body panel gaps or misalignment | Uneven body lift, improper body mount installation. | Verify all body blocks are correctly seated and all body mount bolts are torqued evenly. |
| Fluid leaks (brake, fuel) | Damaged or improperly extended lines. | Immediately address any leaks. Inspect lines for damage and ensure proper connections. Replace damaged components as necessary. |
9. Specifications
- Brand: Waverspeed
- Model Number: YL54@LK-CHE-0305-KIT-LC-A_B
- Maximum Lifting Height: 3 Inches
- Material: Alloy Steel
- Auto Part Position: Center
- Item Weight: Approximately 76.6 pounds
- Product Dimensions: 25.83 x 12.28 x 12.13 inches (packaging)
- Automotive Fit Type: Vehicle Specific Fit
10. Warranty and Returns
This product is subject to a 30-day return policy from the date of purchase. For specific warranty details or to initiate a return, please refer to the retailer's policy or contact Waverspeed customer service.
11. Customer Support
If you have any questions regarding the installation, operation, or troubleshooting of your Waverspeed 3-inch Full Body Lift Kit, please do not hesitate to contact our customer service team. We are available to assist you with any inquiries.
Contact Information: Refer to your purchase documentation or the Waverspeed official website for the most current customer service contact details.