Introduction
Thank you for choosing the Raynic Emergency Weather Radio, Model CR1009. This versatile device is designed to provide essential information and power during emergencies, outdoor activities, or daily use. It features multiple power sources, including solar, hand crank, and a high-capacity internal battery, along with AM/FM/SW radio bands, NOAA weather alerts, a powerful flashlight, a reading lamp, and a USB port for charging mobile devices. Please read this manual thoroughly to understand its functions and ensure safe and optimal operation.

The Raynic CR1009 Emergency Weather Radio, showcasing its compact design and charging capability.
Safety Instructions
- Do not expose the radio to extreme temperatures, direct sunlight for prolonged periods, or high humidity.
- Avoid dropping or subjecting the radio to strong impacts.
- Do not disassemble or attempt to repair the unit yourself. Refer all servicing to qualified personnel.
- Keep the radio away from water, especially the charging ports, unless specified as waterproof. This model has an IPX3 water resistance rating, meaning it is protected against spraying water.
- When using AAA batteries, ensure correct polarity (+/-) and do not mix old and new batteries or different types of batteries.
- The hand crank mechanism should be operated smoothly and not forced.
- When charging external devices, ensure the device is compatible with the radio's output specifications.
Product Overview and Components

The Raynic CR1009 package contents.
Package Contents:
- 1 x Raynic Emergency Weather Radio (with built-in Li-ion battery)
- 1 x Braided Strap
- 1 x Carabiner
- 1 x Compass
- 1 x Micro USB Charging Cable
- 1 x User Manual
Controls and Features:
- Antenna: Extendable for improved radio reception.
- Solar Panel: Located on top for solar charging.
- Hand Crank: Foldable handle for manual power generation.
- Flashlight: 3W LED light on the front.
- Reading Lamp: 2.5W light located under the handle.
- Power Button: Turns the radio on/off.
- Volume Knob: Adjusts audio output level.
- Tuning Knob: Selects radio frequencies.
- Band Selector Switch: Toggles between AM, FM, SW, and Weather Band (WB).
- SOS Alarm Button: Activates a loud siren and flashing light for emergencies.
- USB Output Port: For charging external devices.
- Micro USB Input Port: For charging the radio via external power source.
- Headphone Jack (3.5mm): For private listening.
- Battery Compartment: For optional AAA batteries.

Approximate dimensions of the radio: 7.5 inches (length) x 3.5 inches (width) x 4.7 inches (height).
Power Sources
The Raynic Emergency Weather Radio offers five distinct ways to power the unit, ensuring reliable operation in various situations:
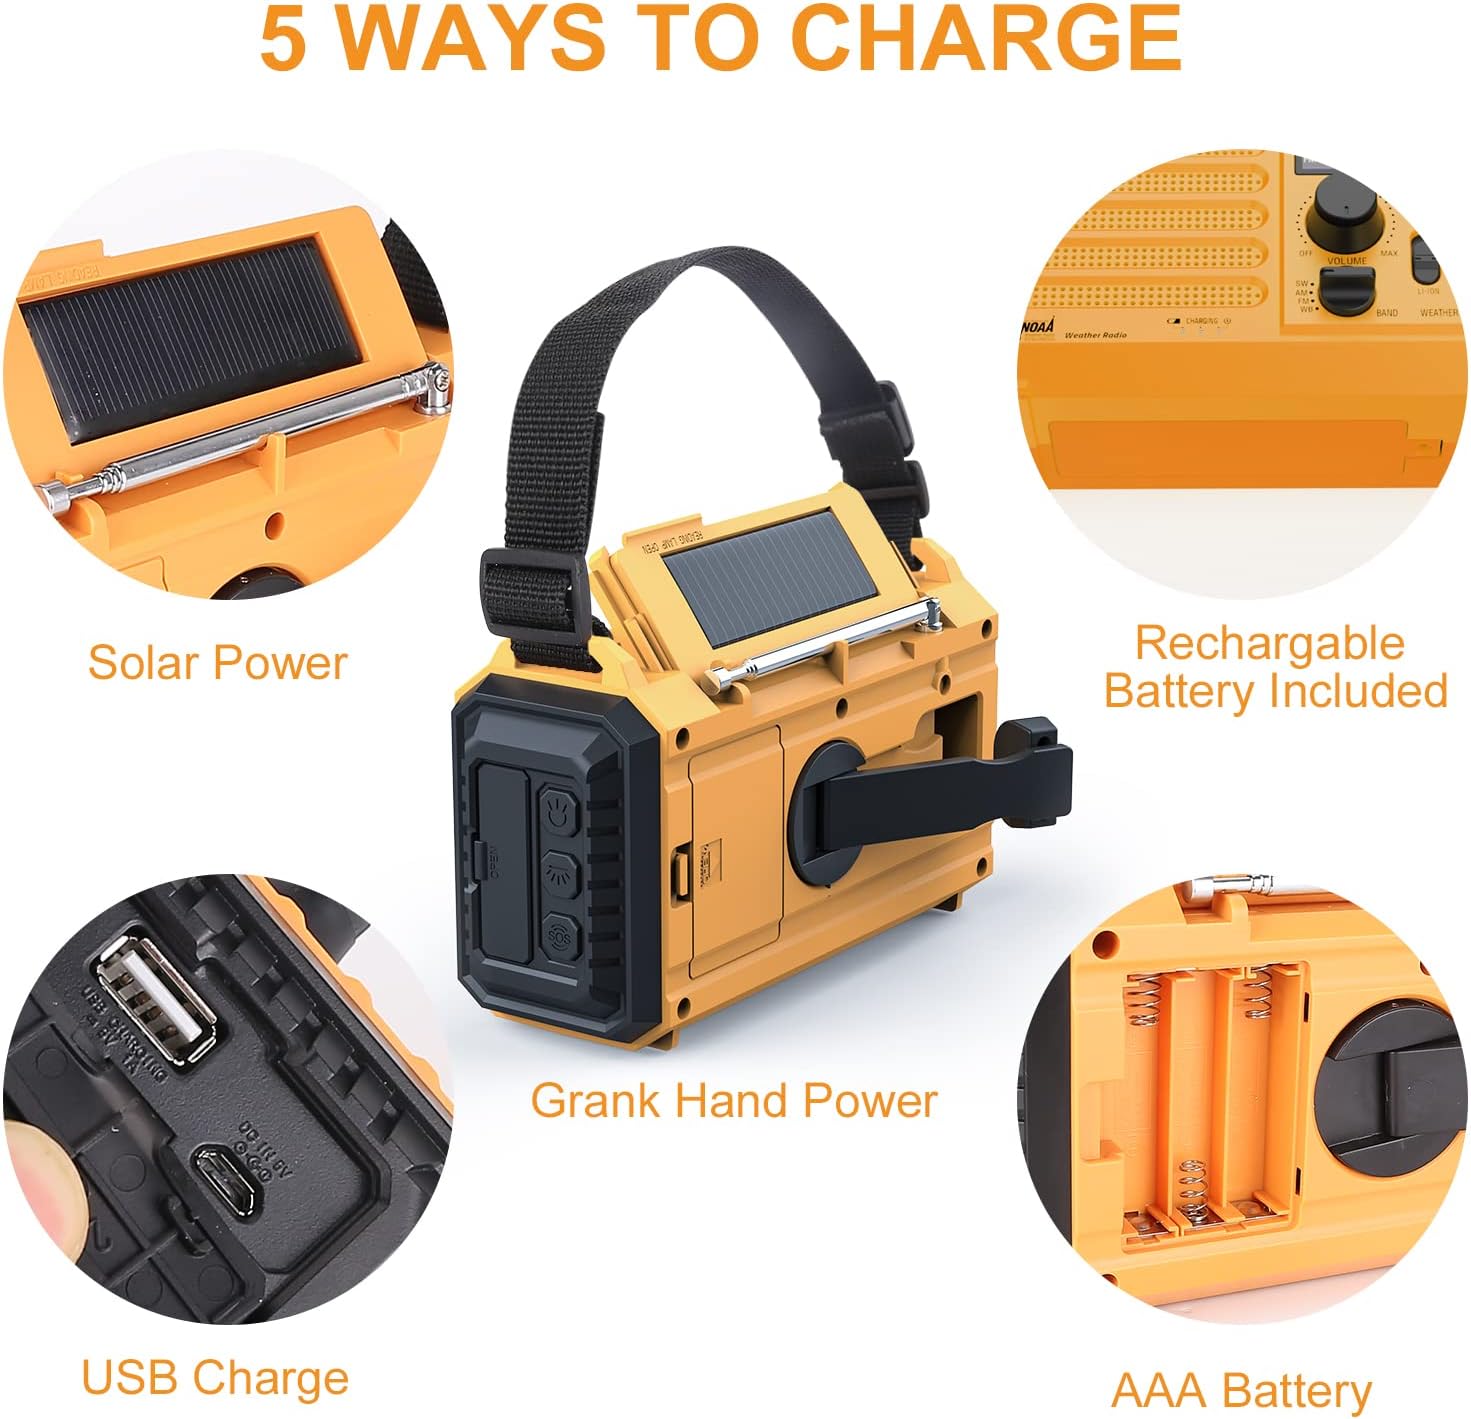
The five versatile power options for the radio.
- Hand Crank Power: Rotate the hand crank clockwise or counter-clockwise at a steady pace (approx. 130-150 RPM) for 3-5 minutes to generate power for short-term use or to trickle charge the internal battery.
- Solar Power: Place the radio with the solar panel facing direct sunlight. The solar panel charges the internal Li-ion battery. This method is primarily for maintaining battery charge or for very slow charging over extended periods.
- Built-in Li-ion Battery: The radio comes with a pre-installed 5000mAh 21700 Li-ion rechargeable battery. This is the primary power source for extended use.
- AAA Batteries (Not Included): For backup power, insert 3 x AAA 1.5V batteries into the battery compartment. Ensure correct polarity.
- Micro USB Charging: Connect the supplied Micro USB cable to the radio's Micro USB input port and to a USB power adapter (e.g., phone charger, computer USB port) for faster charging of the internal Li-ion battery. The charging indicator light will illuminate during charging and turn off when fully charged.
Setup
- Initial Battery Activation: Before first use, ensure you remove any small plastic insulating tab from the internal Li-ion battery compartment if present.
- First Charge: It is recommended to fully charge the internal Li-ion battery via the Micro USB port before initial use. Connect the radio to a USB power source using the provided cable. The charging indicator will show charging status.
- Optional AAA Batteries: If you plan to use AAA batteries as a backup, open the battery compartment and insert 3 x AAA 1.5V batteries, observing the correct polarity.
- Attach Strap and Compass: Secure the braided strap and compass to the radio for portability and navigation.
Operating Instructions
Radio Operation (AM/FM/SW/NOAA Weather Band)

Detailed view of the radio's frequency bands and NOAA weather channels.
- Power On: Turn the Power/Volume knob clockwise to power on the radio and adjust the volume.
- Select Band: Use the Band Selector switch to choose between AM, FM, SW (Shortwave), or WB (Weather Band).
- Extend Antenna: For optimal reception, fully extend the telescopic antenna, especially for FM, SW, and WB. For AM, the radio uses a built-in ferrite bar antenna, so antenna extension is less critical.
- Tune Station: Rotate the Tuning knob to scan for desired radio stations.
- NOAA Weather Alert: To receive NOAA weather alerts, switch the band to WB. Manually tune to one of the 7 NOAA weather channels (162.400 MHz, 162.425 MHz, 162.450 MHz, 162.475 MHz, 162.500 MHz, 162.525 MHz, 162.550 MHz). The radio must be powered on and tuned to a local weather station to receive alerts.
Flashlight and Reading Lamp

The radio's integrated flashlight and reading lamp in use.
- Flashlight: Press the dedicated flashlight button (usually on the front or side) to turn the 3W LED flashlight on/off.
- Reading Lamp: Lift the handle to reveal the 2.5W reading lamp. There is typically a switch or button to activate/deactivate it.
Charging External Devices
The radio can act as a power bank to charge your mobile phone or other USB-powered devices.
- Ensure the radio's internal Li-ion battery has sufficient charge.
- Connect your device's USB charging cable to the radio's USB output port.
- The radio will begin charging your device.
SOS Alarm
In an emergency, activate the SOS alarm for a loud siren and flashing light.
- Press and hold the SOS button to activate the alarm.
- Press the SOS button again to deactivate it.
Headphone Usage
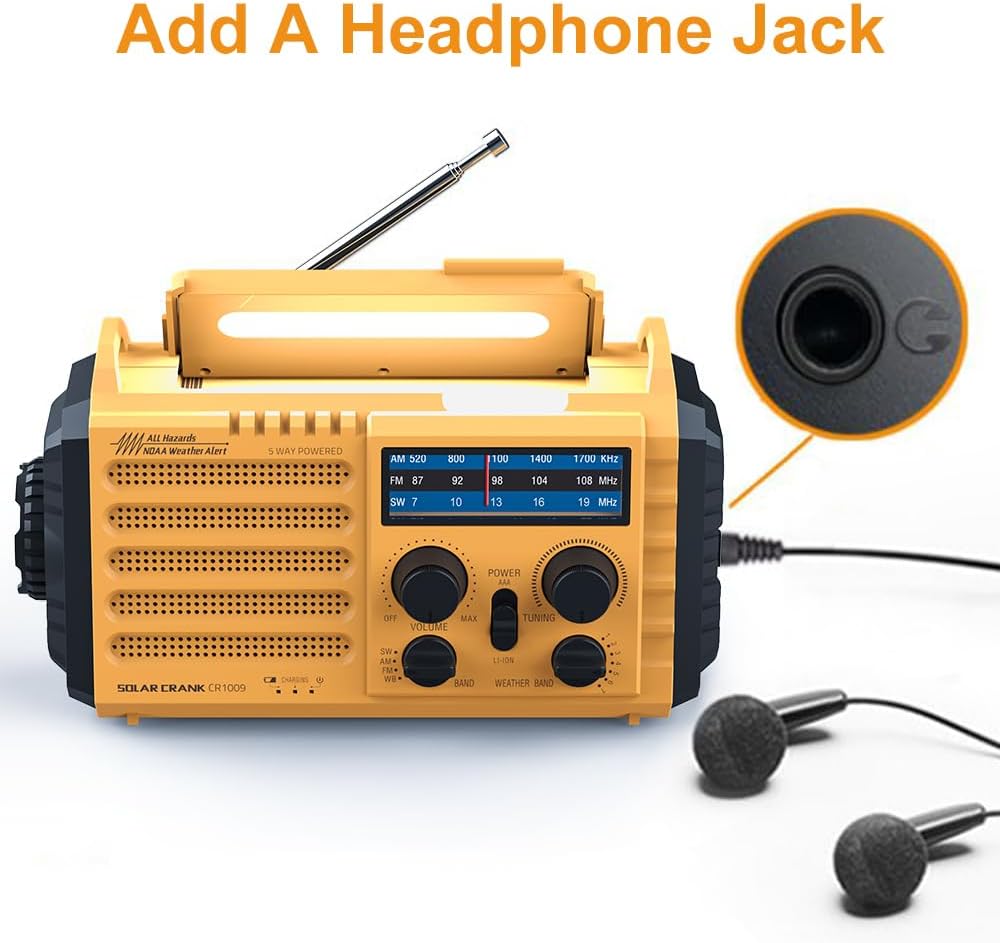
The 3.5mm headphone jack allows for private listening.
- Insert any standard 3.5mm headphones into the headphone jack for private listening.
- The internal speaker will automatically mute when headphones are connected.
Maintenance
- Cleaning: Wipe the radio with a soft, damp cloth. Do not use harsh chemicals or abrasive cleaners.
- Storage: Store the radio in a cool, dry place away from direct sunlight and extreme temperatures. If storing for an extended period, ensure the internal Li-ion battery is charged to about 50-70% and recharge it every 3-6 months to maintain battery health.
- Battery Care: If using AAA batteries, remove them if the radio will not be used for a long time to prevent leakage.
Troubleshooting
| Problem | Possible Cause | Solution |
|---|---|---|
| Radio does not turn on. | Battery is depleted; plastic tab not removed from battery. | Charge the radio via USB, hand crank, or solar. Ensure plastic tab is removed from the internal battery. Check AAA battery installation if used. |
| Poor radio reception. | Antenna not extended; weak signal area; interference. | Fully extend the telescopic antenna. Reposition the radio. Move away from electronic devices causing interference. |
| Cannot charge external devices. | Radio's internal battery is low; device not compatible. | Ensure the radio's internal battery is sufficiently charged. Verify your device's charging requirements. |
| Hand crank is stiff or not charging. | Mechanism obstructed; improper rotation. | Ensure no debris is blocking the crank. Rotate smoothly and consistently. Do not force. |
| NOAA weather alerts not received. | Not tuned to a local NOAA channel; radio not powered on. | Ensure the radio is on and the band is set to WB. Manually tune to a strong local NOAA weather channel. |
Specifications
| Feature | Specification |
|---|---|
| FM Frequency | 87 - 108 MHz |
| AM (MW) Frequency | 520 - 1710 KHz |
| SW Frequency | 2.3 - 22.00 MHz |
| NOAA Weather Band | 162.400 / 162.425 / 162.450 / 162.475 / 162.500 / 162.525 / 162.550 MHz |
| Dimensions (L x W x H) | 19.1 x 8.9 x 11.9 cm (approx. 7.5 x 3.5 x 4.7 inches) |
| Weight | 450 g (approx. 0.99 lbs) |
| LED Flashlight Power | 3W |
| Reading Lamp Power | 2.5W |
| Solar Panel Power | 45 mA |
| Hand Crank Power Output | 350 mA |
| Rechargeable Battery | 5000 mAh 21700 Li-ion battery |
| External Battery Option | 3 x AAA 1.5V batteries (not included) |
| AC Power Interface | Micro USB |
| Water Resistance Level | IPX3 (Protected against spraying water) |
Warranty and Support
Raynic products are manufactured to high-quality standards. For information regarding warranty coverage, technical support, or service inquiries, please refer to the contact information provided on the product packaging or the official Raynic website. Please retain your proof of purchase for warranty claims.