Introduction
This manual provides comprehensive instructions for the operation and maintenance of your Olympus Pearlcorder Microcassette Recorder S711. Please read this manual thoroughly before using the device to ensure proper function and longevity.
The Olympus Pearlcorder S711 is designed for portable audio recording, featuring a voice-activated system and various playback controls.
Package Contents
- Olympus Pearlcorder Microcassette Recorder S711
- 60-minute Microcassette
- 2 AA Batteries
Setup
1. Battery Installation
- Locate the battery compartment cover on the back of the recorder.
- Slide the cover open in the direction indicated by the arrow.
- Insert two AA batteries, ensuring the correct polarity (+/-) as marked inside the compartment.
- Close the battery compartment cover securely.
2. Microcassette Insertion
- Press the Eject button to open the cassette compartment.
- Insert a microcassette with the tape side facing forward and the open edge facing the recorder's head.
- Gently close the cassette compartment until it clicks into place.
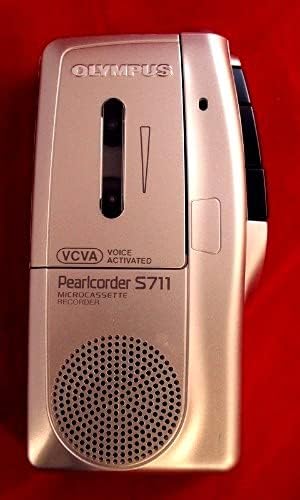
Image: Front view of the Olympus Pearlcorder S711 Microcassette Recorder, showing the speaker grille, "Pearlcorder S711" branding, and "VCVA Voice Activated" indicator.
Operating Instructions
Recording
- Standard Recording: Press the RECORD button. The recording indicator will illuminate. Speak clearly into the built-in microphone. To stop recording, press the STOP button.
- Voice Control Actuator (VCVA): To enable hands-free recording, slide the VCVA switch to the ON position. The recorder will automatically start recording when sound is detected and pause when silence occurs. Adjust the microphone sensitivity selector as needed for optimal voice activation.
- Microphone Sensitivity Selector: Use this switch to adjust the microphone's sensitivity. A higher sensitivity setting is suitable for recording distant sounds or quiet voices, while a lower setting is better for close-range recording or noisy environments.
Playback
- Basic Playback: Press the PLAY button. Adjust the volume control to your desired level. To stop playback, press the STOP button.
- Fast Play: During playback, press and hold the FAST PLAY button to increase playback speed. Release to return to normal speed.
- Cue/Review: During playback, press and hold the CUE button to fast-forward through the tape with audible sound. Press and hold the REVIEW button to rewind through the tape with audible sound.
- Quick Review: This feature allows you to quickly jump back a few seconds during playback. Consult the device's specific button layout for this function.
Other Functions
- Dual Tape Speeds: The recorder supports two tape speeds. Select the desired speed using the TAPE SPEED switch. A slower speed allows for longer recording time on a single microcassette, while a faster speed offers better audio fidelity.
- Tape Counter: The tape counter displays the tape position. Use it to locate specific sections of your recordings. Reset the counter to zero by pressing the RESET button.
- Microphone Jack: Connect an external microphone (not included) to the MIC jack for enhanced recording quality or specific recording situations.
- Headphone Jack: Connect headphones (not included) to the EAR or HEADPHONE jack for private listening during playback.
Maintenance
- Cleaning the Unit: Wipe the exterior of the recorder with a soft, dry cloth. Do not use liquid cleaners or abrasive materials.
- Cleaning the Head: Periodically clean the recording/playback head and pinch roller using a cotton swab lightly dampened with isopropyl alcohol. Ensure the unit is powered off and batteries are removed before cleaning.
- Battery Care: Remove batteries if the unit will not be used for an extended period to prevent leakage.
- Cassette Storage: Store microcassettes away from direct sunlight, high temperatures, and strong magnetic fields to preserve recording quality.
Troubleshooting
| Problem | Possible Cause | Solution |
|---|---|---|
| No power | Dead or incorrectly inserted batteries. | Replace batteries or re-insert them with correct polarity. |
| Poor recording quality | Microphone sensitivity too low/high; dirty recording head; faulty microcassette. | Adjust microphone sensitivity; clean recording head; try a new microcassette. |
| Tape does not move | Cassette not inserted correctly; tape jammed. | Re-insert cassette; gently check for tape jams. Do not force. |
| VCVA not activating | VCVA switch off; microphone sensitivity too low. | Ensure VCVA switch is ON; increase microphone sensitivity. |
Specifications
- Brand: Olympus
- Model: Pearlcorder S711
- Product Dimensions: 9.5 x 3.5 x 2 inches
- Item Weight: 9.6 ounces
- Digital Recording Time: 60 minutes (with included microcassette)
- Headphones Jack: 3.5 millimeters
- Microphone Form Factor: Built-In
- Microphone Operation Mode: Mono
- Power Source: 2 AA Batteries
Warranty and Support
For warranty information and technical support, please refer to the official Olympus website or contact their customer service department. Keep your purchase receipt as proof of purchase for warranty claims.
For further assistance, you may visit the Olympus Store on Amazon.


