1. Introduction

Figure 1: AUTOWIKI Fog Lights Lamps (Pair).
This manual provides detailed instructions for the installation, operation, and maintenance of your new AUTOWIKI Fog Lights Lamps. Designed as a direct OEM replacement, these fog lights enhance visibility and safety during adverse weather conditions.
1.1. Compatibility
These fog lights are specifically designed for the following vehicle models:
- 2006-2010 Lexus IS250
- 2006-2010 Lexus IS350
The package includes a pair of fog lights: one for the left (driver side) and one for the right (passenger side).

Figure 2: Applicable Models - AUTOWIKI Fog Lights installed on a Lexus IS sedan, highlighting compatibility.
2. Key Features
- ✔Exact OEM Fit: Direct fitment for fog lights OEM lenses with no complex modifications.
- ✔Excellent Quality: Fully sealed, waterproof, dust, and corrosion resistant construction prevents moisture and dust from entering the housing, ensuring long-lasting performance.
- ✔Bright Illumination: Includes one pair of 9006 12V 51W light bulbs (pre-installed) for enhanced visibility in foggy conditions.
- ✔Easy Installation: Designed for quick and straightforward installation.
- ✔DOT/SAE Compliance: Thoroughly tested to meet federal and international standards, making the fog lamps fully street legal.
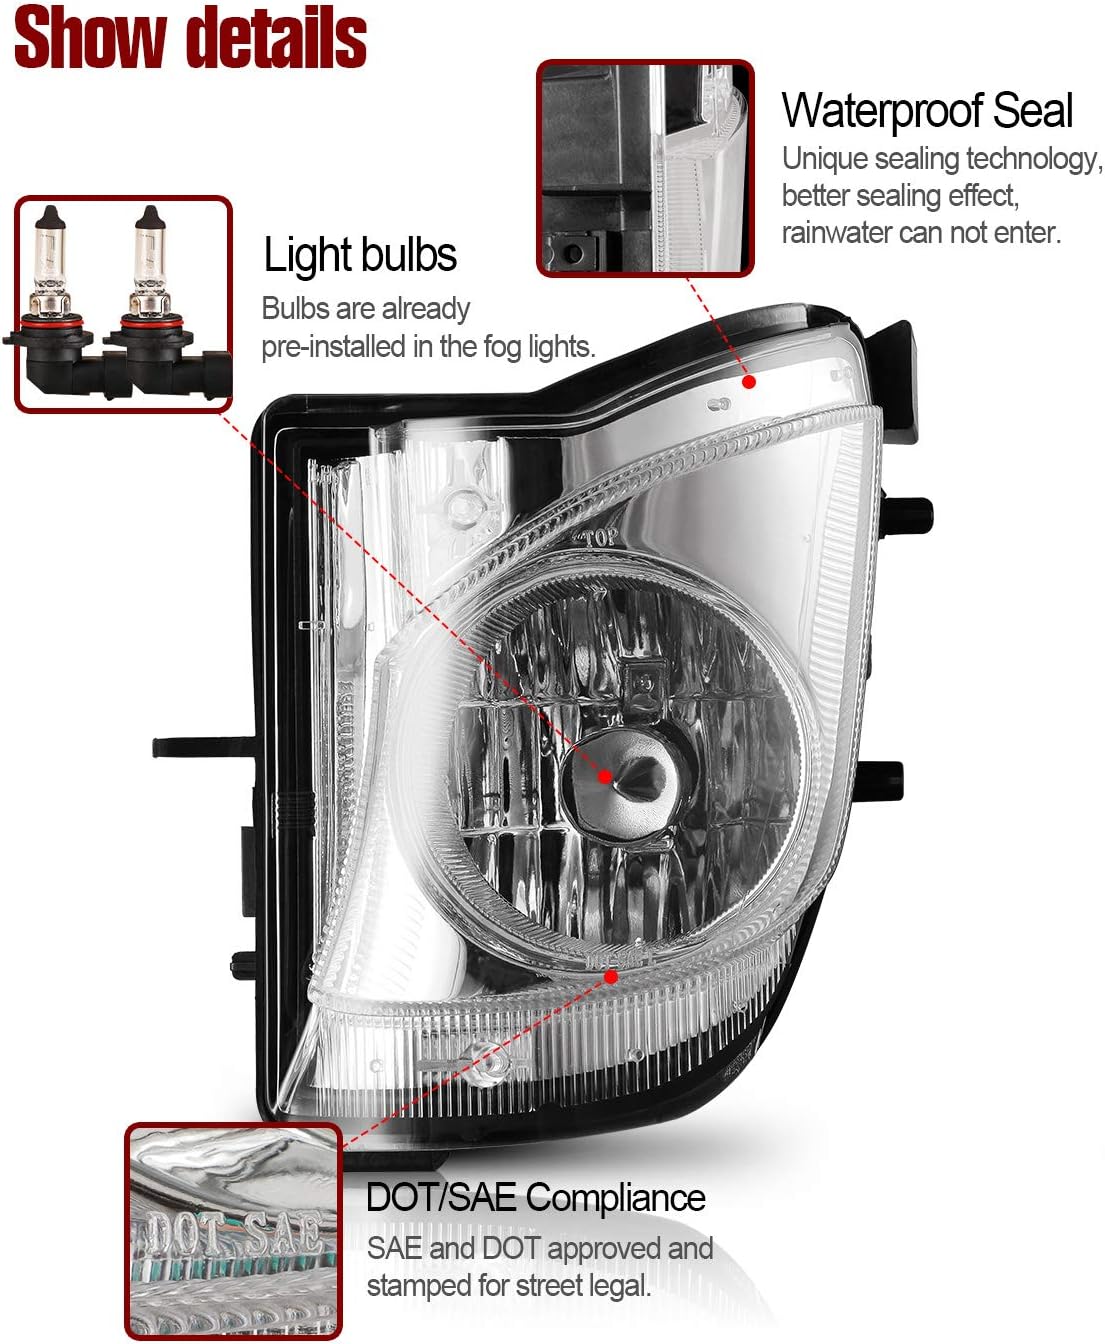
Figure 3: Detailed view of the fog light highlighting pre-installed bulbs, waterproof sealing, and DOT/SAE compliance.
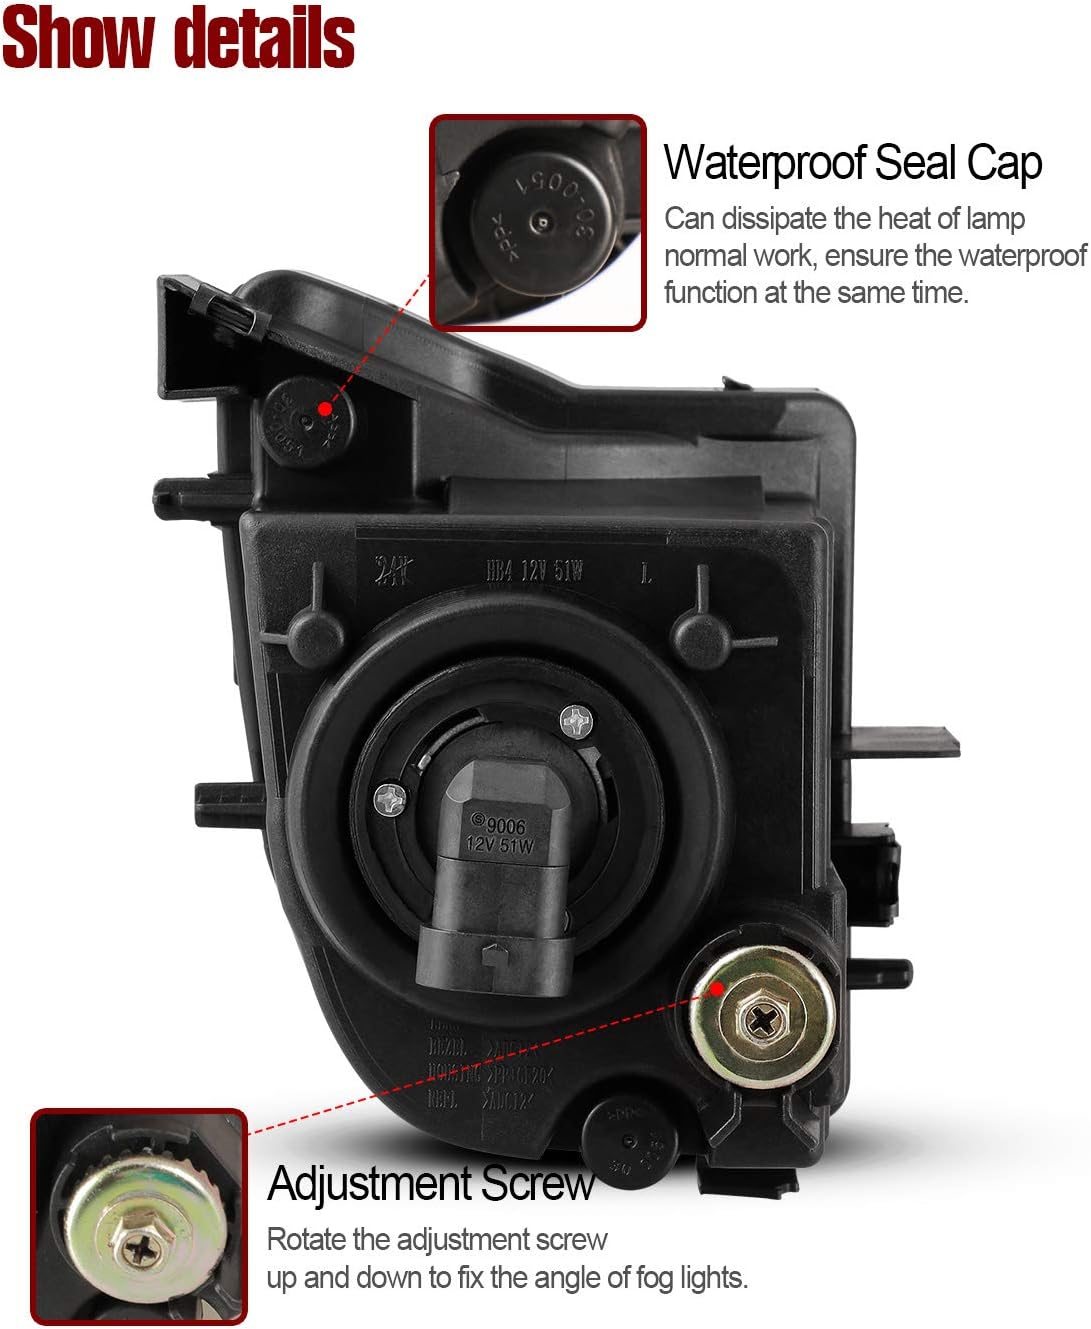
Figure 4: Rear view of the fog light, illustrating the waterproof seal cap and the adjustment screw for beam alignment.

Figure 5: The fog light's waterproof sealing, designed to prevent moisture and dust ingress.
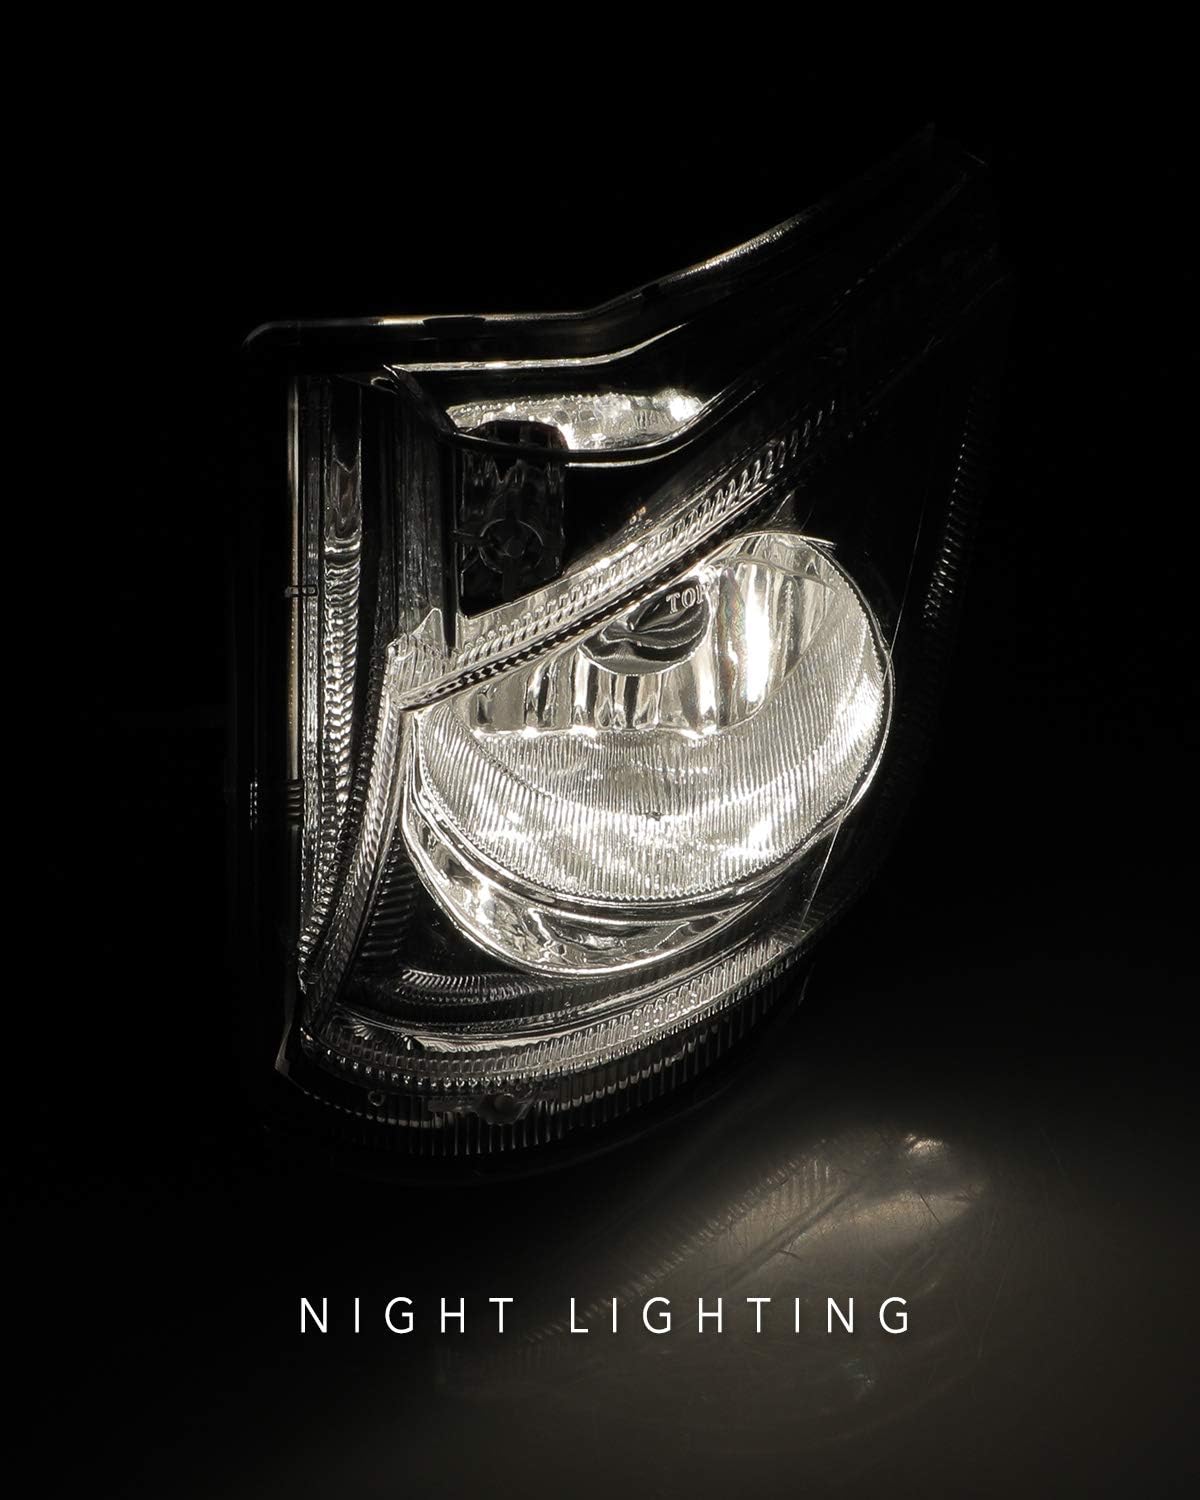
Figure 6: Night lighting performance of the AUTOWIKI Fog Light.
3. Installation Guide
The AUTOWIKI Fog Lights are designed for easy installation. Please follow these steps carefully. It is recommended to have basic automotive knowledge or seek professional assistance if unsure.
3.1. Tools Required
- Screwdriver (Phillips head recommended)
- Gloves (optional, for handling)
3.2. Installation Steps
- Unpack and Prepare: Carefully unpack the fog lights assembly and gather the necessary tools. Ensure the vehicle's engine is off and cool before beginning.
- Remove Existing Fog Light (if applicable): Depending on your vehicle model, you may need to access the fog light housing from the front bumper or wheel well. Remove any screws or clips securing the old fog light. Disconnect the electrical connector.
- Install New Fog Light: Position the new AUTOWIKI fog light into the designated opening. Align the mounting points.
- Secure Mounting Screws: Use the provided screws (or original screws if compatible) to firmly secure the fog light in place. Tighten them with a screwdriver.
- Connect Electrical Wiring: Connect the fog light's electrical connector to the vehicle's wiring harness. Ensure a secure connection.
- Test Functionality: Before reassembling any removed parts, turn on your vehicle's fog lights to ensure they illuminate correctly.
- Adjust Beam (if necessary): If the fog light beam needs adjustment, locate the adjustment screw on the back of the fog light housing (refer to Figure 4). Rotate the screw with a screwdriver to adjust the light beam vertically.
- Reassemble: Reinstall any bumper covers or other components that were removed during the installation process.
3.3. Installation Video
Video 1: Official AUTOWIKI Fog Lights Installation Guide for 2006-2010 Lexus IS250/IS350. This video demonstrates the unpacking, mounting, and adjustment of the fog lights.
4. Operating Instructions
Once installed, operating your AUTOWIKI Fog Lights is straightforward and typically controlled via your vehicle's existing light switch or stalk.
- Turn On Fog Lights: Locate your vehicle's fog light switch, usually found on the headlight stalk or dashboard. Activate the switch to turn on the fog lights. A corresponding indicator light on your dashboard may illuminate.
- Turn Off Fog Lights: Deactivate the fog light switch to turn them off.
Note: Fog lights are designed for use in conditions of reduced visibility, such as fog, heavy rain, or snow. They should be turned off when visibility improves to avoid dazzling oncoming drivers.
5. Maintenance and Care
To ensure the longevity and optimal performance of your AUTOWIKI Fog Lights, follow these maintenance guidelines:
- Regular Cleaning: Clean the fog light lenses regularly with a soft cloth and mild automotive cleaning solution to remove dirt, dust, and road grime. Avoid abrasive cleaners that could scratch the lens.
- Inspect for Damage: Periodically inspect the fog lights for any signs of damage, such as cracks in the lens, loose connections, or corrosion. Address any issues promptly.
- Bulb Replacement: While the included bulbs are durable, they may eventually require replacement. If a bulb burns out, replace it with a compatible 9006 12V 51W bulb. Refer to your vehicle's service manual for specific bulb replacement procedures if needed.
- Wiring Check: Ensure all wiring connections remain secure and free from corrosion.
6. Troubleshooting
If you encounter issues with your AUTOWIKI Fog Lights, refer to the table below for common problems and their solutions.
| Problem | Possible Cause | Solution |
|---|---|---|
| Fog lights do not turn on. |
|
|
| One fog light is not working. |
|
|
| Dim or flickering lights. |
|
|
| Moisture inside the lens. |
|
|
7. Product Specifications
| Attribute | Detail |
|---|---|
| Brand | AUTOWIKI |
| Model Number | L: LX2592106; R: LX2593106 |
| Vehicle Service Type | 2006-2010 Lexus IS250, 2006-2010 Lexus IS350 |
| Specific Uses For Product | Fog Lights |
| Wattage | 51 watts (per bulb) |
| Bulb Type | 9006 12V 51W (pre-installed) |
| Lens Color | Clear |
| Lens Material | Plastic |
| Special Feature | Waterproof |
| Safety Rating | DOT Certified, SAE Compliance |
| Item Weight | 1.08 pounds (total package) |
| Package Dimensions | 12.88 x 7.84 x 7.31 inches |
| UPC | 681013044672 |

Figure 7: Product dimensions for the AUTOWIKI Fog Light.
8. Warranty and Support
AUTOWIKI products are manufactured to high-quality standards. For specific warranty information or technical support, please refer to the warranty card included with your product or visit the official AUTOWIKI website.
You can also visit the AUTOWIKI Store on Amazon for more information and contact options.


