
1. Product Overview
This manual provides essential information for the installation and use of your new SCREENARAMA replacement LCD LED display. This screen is designed for specific laptop models, ensuring a precise fit and optimal performance. It features a Full High Definition (FHD) resolution of 1920x1080 pixels, a matte finish to reduce glare, and IPS (In-Plane Switching) technology for wide viewing angles and vibrant colors.

Image: The SCREENARAMA replacement screen, showing its FHD, 30-pin, non-touch specifications, packaged with included installation tools.
2. Important Compatibility Information
To ensure proper functionality, it is crucial that the specifications of this replacement screen match your original laptop screen. Please verify the following:
- Resolution: Must be FHD 1920x1080. This screen is not compatible with other resolutions like 1366x768, 1600x900, or 3840x2160.
- Connector Type: Must be a 30-pin connector. This screen is not compatible with 40-pin connectors.
- Touchscreen Functionality: This is an LCD screen only and does not support touchscreen functionality. If your original laptop had a touchscreen, this replacement will not provide that feature.
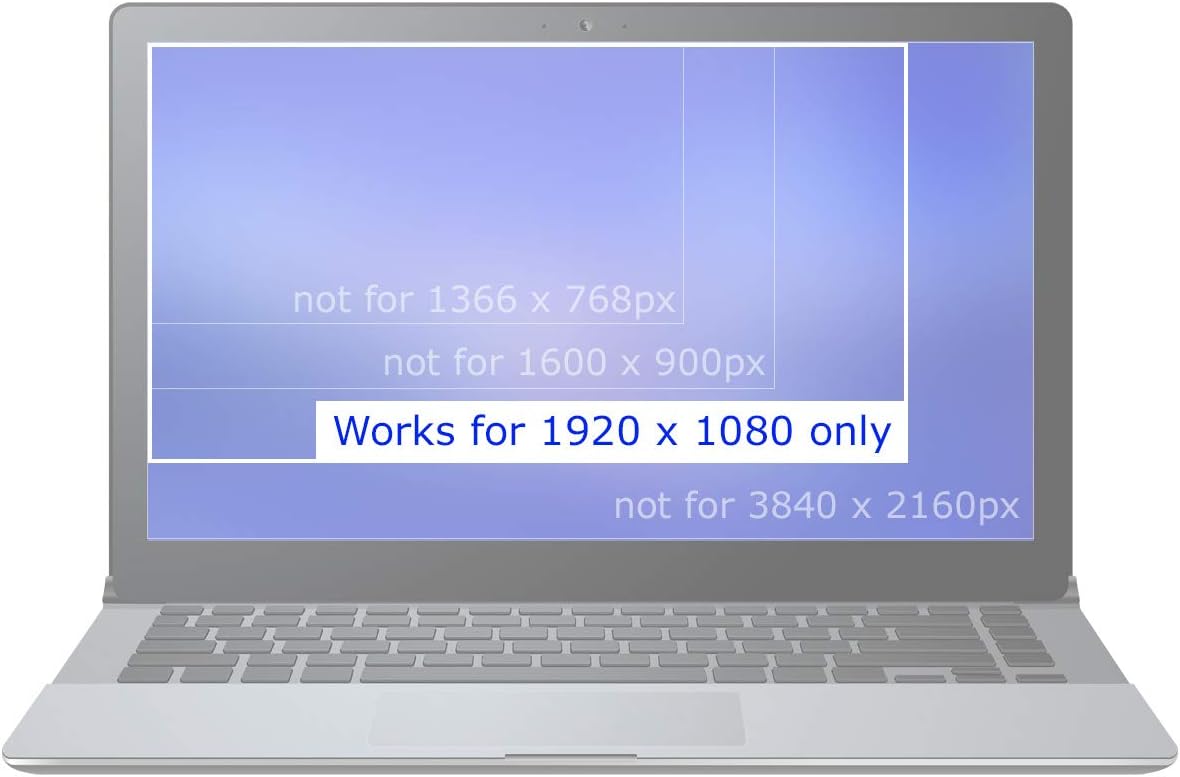
Image: A visual representation indicating that the screen is compatible only with 1920x1080 resolution displays, not other common resolutions.

Image: A close-up comparison showing the distinct appearance of a 30-pin video connector (compatible) versus a 40-pin video connector (incompatible).

Image: An illustration clarifying that the product is an LCD screen only and does not include touchscreen capabilities, contrasting it with a typical touchscreen assembly.
Video: This video provides a visual overview of the 14.0" FHD 30-pin matte screen, highlighting its non-touch functionality and the presence of mounting tabs.
3. Package Contents
Your package should contain the following items:
- 1 x SCREENARAMA 14.0" FHD 1920x1080 IPS Matte LCD LED Display
- 1 x Set of Installation Tools (typically includes screwdrivers, prying tools, and tweezers)

Image: A detailed view of the various tools provided with the screen replacement kit, designed to assist with the installation process.
4. Setup and Installation
Replacing a laptop screen requires careful handling and some technical aptitude. It is recommended to consult online resources or professional guides specific to your laptop model (Toshiba Satellite E45-B4200) for detailed step-by-step instructions. Always ensure your laptop is powered off and the battery is disconnected before beginning any installation.
- Preparation: Power off your laptop and disconnect the AC adapter. Remove the battery.
- Disassembly: Carefully remove the bezel around the screen. This may involve removing rubber screw covers and screws.
- Old Screen Removal: Gently detach the old screen from its mounting brackets. Disconnect the video cable from the back of the old screen.
- New Screen Installation: Connect the 30-pin video cable to the new SCREENARAMA display. Ensure the connection is secure.
- Mounting: Secure the new screen into the laptop's display assembly using the original mounting brackets and screws.
- Reassembly: Reattach the screen bezel and any other components removed during disassembly.
- Testing: Reconnect the battery and AC adapter. Power on the laptop to test the new screen.
For visual guidance, search for "Toshiba Satellite E45-B4200 screen replacement" on video sharing platforms. Many users find video tutorials helpful for this process.
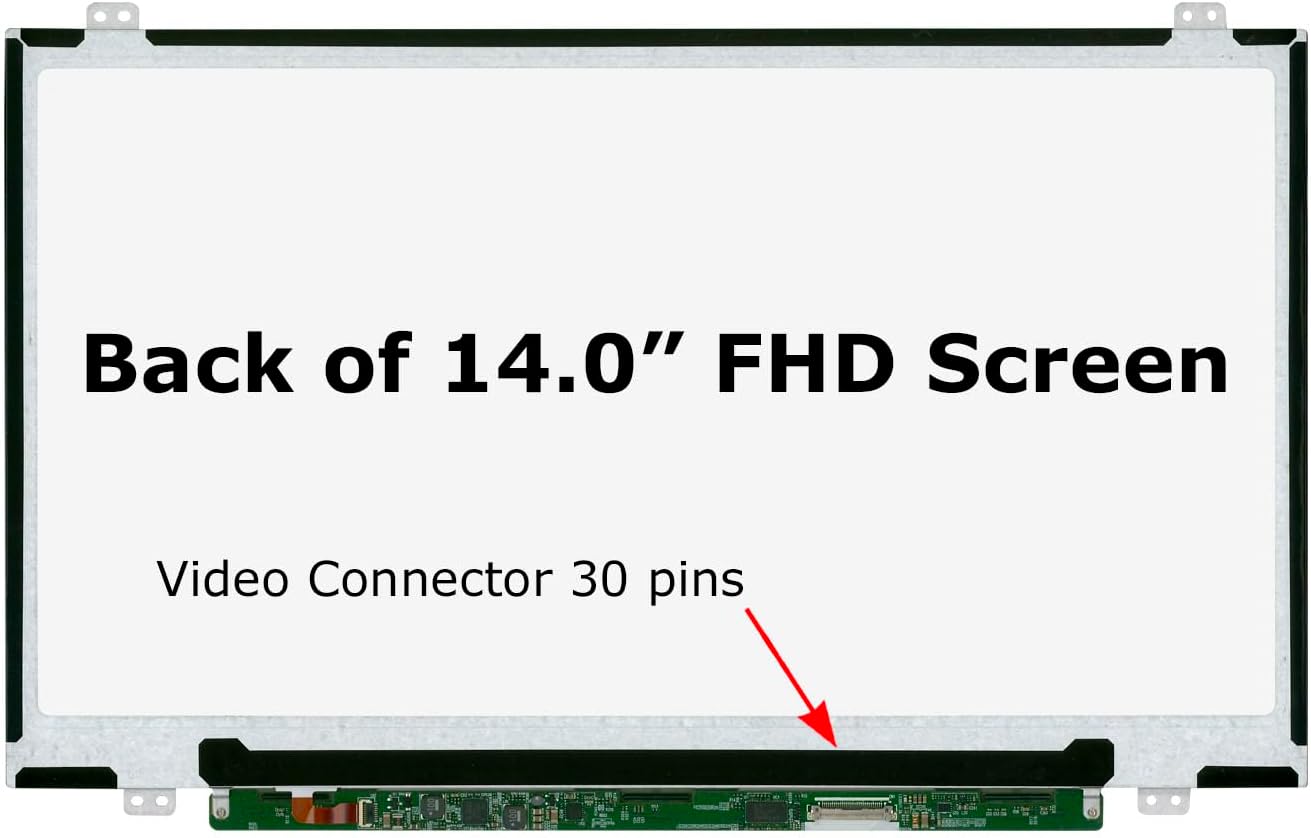
Image: The rear view of the 14.0" FHD screen, clearly indicating the location of the 30-pin video connector for proper cable attachment.
5. Operating the Display
Once installed, the SCREENARAMA display operates as a standard laptop screen. No special drivers are typically required beyond your laptop's existing display drivers. The IPS technology provides superior viewing angles and color reproduction compared to older TN panel screens.

Image: An illustration demonstrating the wider and more consistent viewing angles and vivid colors offered by an IPS screen compared to the narrower viewing angles and washed-out colors of a TN screen.
6. Maintenance
To maintain the clarity and longevity of your new screen:
- Cleaning: Use a soft, lint-free cloth specifically designed for electronics. Lightly dampen the cloth with water or a screen-cleaning solution. Avoid harsh chemicals, abrasive materials, or excessive pressure.
- Handling: Avoid touching the screen surface directly with your fingers. When closing the laptop lid, ensure no objects are left on the keyboard that could press against the screen.
- Protection: Consider using a screen protector if you frequently transport your laptop or work in environments where the screen might be exposed to scratches.
7. Troubleshooting
If you encounter issues after installing your new screen, consider the following troubleshooting steps:
- No Display / Blank Screen:
- Connect an external monitor to your laptop to verify if the laptop itself is still operational and outputting a signal.
- Ensure the video cable is securely reconnected to both the new screen and the motherboard. Sometimes, a loose connection can cause a blank display. You may need to re-open the laptop to check this.
- Verify that the number of pins on the new LCD's connector matches the original (30-pin).
- Dim Display:
- Try connecting the old LCD screen (if it was only cracked and still displayed an image) to see if it also appears dim. If both screens are dim, the issue might be with the laptop's backlight fuse, usually located near the video connector on the motherboard. This often requires professional repair.
- Check your laptop's brightness settings (function keys or display settings in the operating system).
- Image Distortions / Lines:
- Recheck the video cable connection for any bent pins or improper seating.
- If the issue persists and the old screen did not have these problems, the new screen might be defective.

Image: A visual guide outlining common troubleshooting steps for display issues, including checking external monitors, verifying pin counts, and inspecting video cable connections.
8. Specifications
| Feature | Specification |
|---|---|
| Screen Size | 14.0 inches |
| Resolution | FHD (Full High Definition) 1920x1080 pixels |
| Panel Type | IPS (In-Plane Switching) |
| Surface Type | Matte |
| Video Connector | 30 Pin |
| Touchscreen | No |
| Compatibility | Tested and guaranteed compatible with specified models (e.g., Toshiba Satellite E45-B4200) |
| Weight | Approximately 13.1 ounces |
| Package Dimensions | 12.99 x 11.42 x 0.79 inches |
9. Warranty and Support
Your SCREENARAMA replacement screen comes with a 2-year warranty, ensuring peace of mind regarding product quality and performance. For any questions, technical assistance, or warranty claims, please contact SCREENARAMA customer support. Details for support can typically be found on the product packaging or the seller's information page.
SCREENARAMA is committed to providing reliable products and support to help you get your laptop back in working order.