1. Introduction
This manual provides detailed instructions for the installation, operation, maintenance, and troubleshooting of your TMEZON 4-channel 1080P HD-TVI Digital Video Recorder (DVR) and accompanying 4-camera CCTV security system. This system is designed for both indoor and outdoor surveillance, offering high-definition video recording and remote monitoring capabilities.

Image: Comparison illustrating the enhanced clarity of 1080P resolution over 720P, highlighting the high-definition capability of the system.
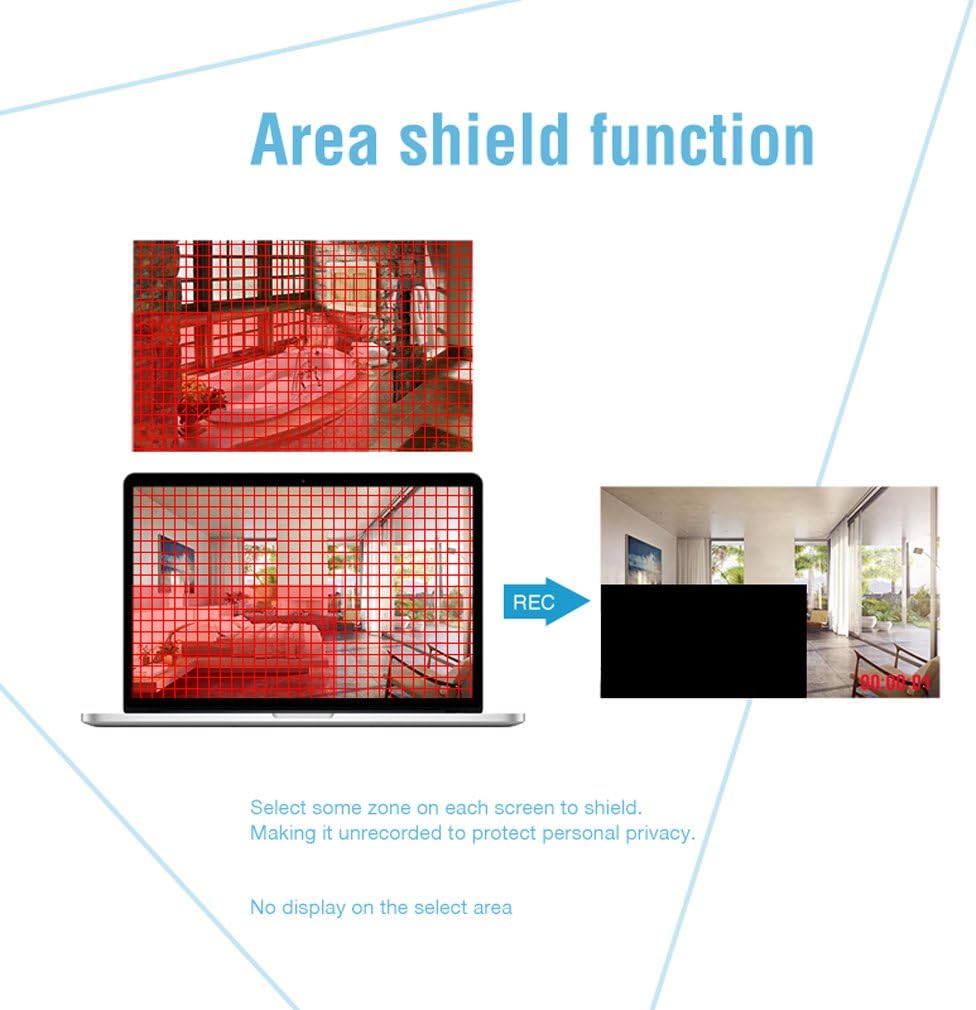
Image: An outdoor camera demonstrating its night vision and rainproof design, suitable for various weather conditions.
2. Package Contents
Verify that all items listed below are included in your package. If any items are missing or damaged, please contact customer support.
- 1 x 4-Channel HD-TVI DVR
- 4 x 1080P Weatherproof CCTV Cameras
- 4 x 18.3m BNC Cables
- 1 x USB Mouse
- 1 x 4-Way Power Splitter Cable
- 1 x Power Adapter for DVR
- Mounting Screws and Wall Plugs
- User Manual (this document)

Image: Visual representation of the complete package contents, including the DVR, cameras, cables, mouse, and power accessories.
3. Safety Information
- Read all instructions carefully before installation and operation.
- Use only the power adapters provided with the system.
- Ensure proper ventilation for the DVR to prevent overheating.
- Avoid placing the DVR in direct sunlight, near heat sources, or in areas with high humidity.
- Do not attempt to disassemble or modify the product. This will void the warranty.
- Keep cables organized and secured to prevent tripping hazards and accidental disconnections.
- For outdoor camera installation, ensure all connections are waterproofed and protected from environmental elements.
- Consult a qualified professional for complex installations or wiring.
4. Setup
4.1 Hard Disk Drive (HDD) Installation (HDD Not Included)
This system requires a 3.5-inch SATA HDD (500GB to 2TB) for video recording. Follow these steps to install the HDD:
- Unplug the DVR from the power source.
- Remove the top cover of the DVR by unscrewing the screws on the back and sides.
- Connect the SATA data cable and power cable from the DVR to the HDD.
- Secure the HDD to the bottom of the DVR casing using the provided screws.
- Replace the top cover and secure it with screws.
4.2 Connecting the DVR
Connect the DVR to your monitor, power, and network as follows:
- Video Output: Connect the DVR to a monitor or TV using an HDMI or VGA cable.
- Network: Connect the DVR to your router using an Ethernet cable for remote access.
- USB: Connect the included USB mouse to a USB port on the DVR for navigation.
- Power: Connect the power adapter to the DVR and then to a power outlet.

Image: Rear view of the DVR, detailing connection points for cameras, monitor, network, and peripherals.
4.3 Camera Installation
Mount the cameras in desired locations, ensuring optimal viewing angles and coverage. The cameras feature a 3-axis mounting bracket for flexible adjustment.
- Mounting: Cameras can be wall-mounted or ceiling-mounted. Use the provided screws and wall plugs.
- Angle Adjustment: Adjust the camera angle using the 3-axis bracket to cover the desired area. Ensure the bracket screws are tightened after adjustment to prevent movement.
- Cable Connection: Connect each camera to the DVR using the provided BNC cables. Ensure connections are secure.

Image: Examples of camera mounting options (wall and ceiling) and the flexibility of the 3-axis mounting bracket for precise positioning.
5. Operating Instructions
5.1 Initial Setup
Upon first power-on, the DVR will guide you through an initial setup wizard. This includes setting the language, date/time, and creating a password for the administrator account. It is crucial to set a strong password for security.
5.2 Live View
After initial setup, the system will display the live feed from all connected cameras on the monitor. You can switch between single-camera view and multi-camera grid view using the DVR interface.
5.3 Recording
The DVR supports various recording modes:
- Continuous Recording: Records 24/7.
- Motion Detection Recording: Records only when motion is detected.
- Scheduled Recording: Records during specific time periods.
Recording settings can be configured in the DVR's menu. The DVR can be set to automatically overwrite older footage when the HDD is full.
5.4 Motion Detection and Alerts
Configure motion detection to trigger recording and send alerts when unexpected activity occurs. You can customize detection zones to minimize false alarms.
- Customizable Zones: Define specific areas within the camera's view where motion detection is active.
- Alerts: Receive push notifications on your smartphone via the app or email alerts when motion is detected.
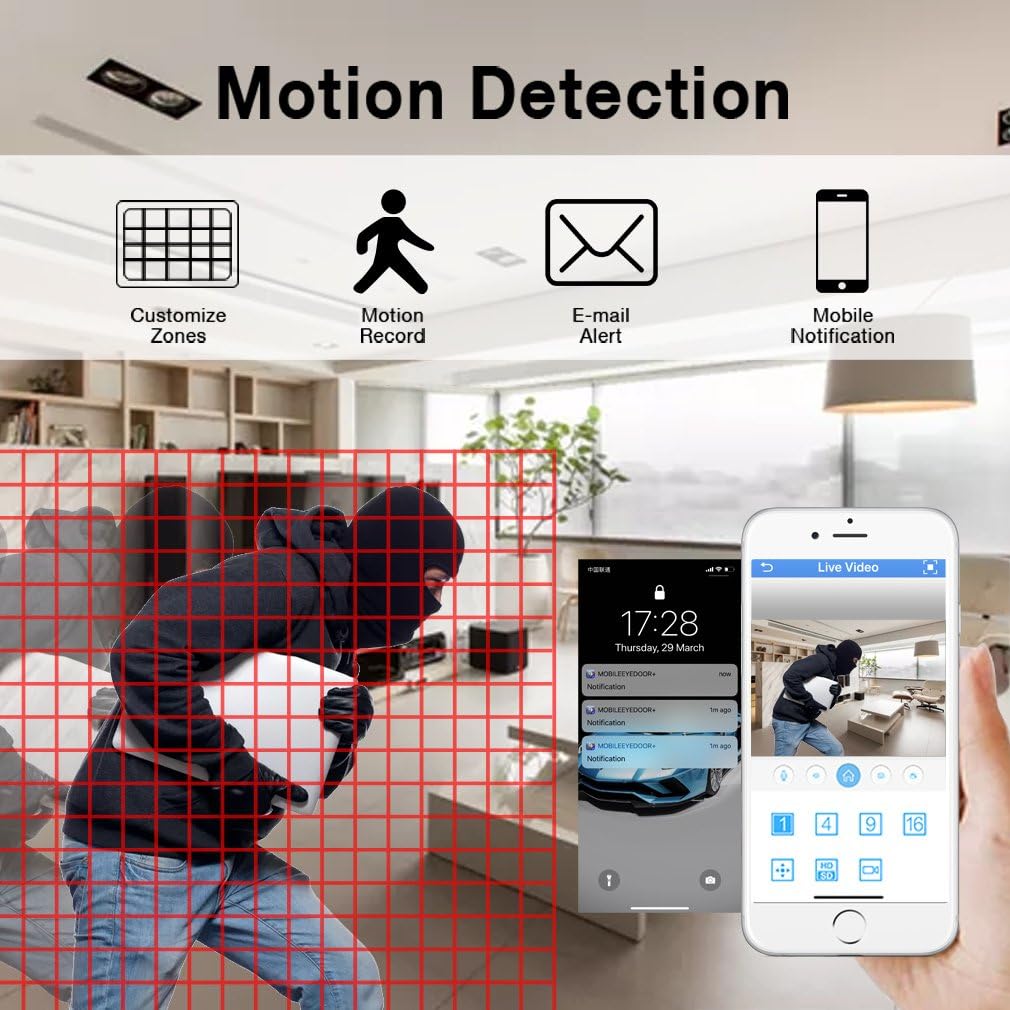
Image: Motion detection interface, demonstrating how to set custom zones and receive alerts on a mobile device.
5.5 Remote Access
Monitor your property from anywhere using the free mobile application "XMEYE" on your smartphone or tablet, or via PC software.
- Mobile App: Download the "XMEYE" app from your device's app store. Register an account and add your DVR using its unique ID.
- PC Access: Install the client software on your computer for remote viewing and management.
- Connectivity: Ensure your DVR is connected to the internet. Remote access is supported over WiFi, 2G, 3G, or 4G networks.

Image: Remote access capabilities, allowing live viewing and playback on smartphones, tablets, and personal computers.
5.6 Playback and Backup
Access recorded footage and back up important video files.
- Playback: Navigate to the playback menu on the DVR to review recorded video by date and time.
- Backup: Connect a USB memory stick or external hard drive to the DVR's USB port to transfer and back up video files.
5.7 Privacy Masking (Area Shield Function)
To protect personal privacy, you can define specific areas within the camera's view that will not be recorded or displayed.

Image: The area shield function, showing how to select and mask specific zones to ensure privacy by preventing their recording.
5.8 Day and Night Monitoring
The cameras are equipped with automatic IR-cut filters, providing clear images both day and night.

Image: Day and night monitoring, illustrating the system's ability to capture clear video in varying light conditions.
6. Maintenance
- Cleaning: Regularly clean camera lenses and DVR surfaces with a soft, dry cloth. Avoid abrasive cleaners.
- Firmware Updates: Check the TMEZON website or contact support for available firmware updates to ensure optimal performance and security.
- Cable Inspection: Periodically inspect all cables for wear, damage, or loose connections, especially for outdoor installations.
- HDD Health: Monitor the health of your installed HDD through the DVR's system settings. Replace if signs of failure appear.
7. Troubleshooting
| Problem | Possible Cause | Solution |
|---|---|---|
| No video display on monitor | Loose video cable connection; Incorrect input source on monitor; DVR not powered on. | Check HDMI/VGA cable connections; Select correct input on monitor; Ensure DVR power adapter is connected and power light is on. |
| No recording | No HDD installed; HDD full; Recording schedule not set; HDD not initialized. | Install a compatible HDD; Check HDD status and format if necessary; Configure recording schedule/mode. |
| Remote access not working | DVR not connected to network; Incorrect network settings; Firewall blocking connection; App not configured correctly. | Ensure Ethernet cable is connected to router; Check DVR network settings (DHCP enabled); Verify router firewall settings; Reconfigure app with correct DVR ID. |
| Camera angle cannot be adjusted | Mounting screws are too tight or stuck. | Loosen the adjustment screws on the 3-axis bracket. If screws are seized, apply a small amount of penetrating oil carefully. Do not force adjustment as this may damage the bracket. |
| Poor image quality | Dirty lens; Low light conditions; Cable interference. | Clean camera lens; Ensure adequate lighting or verify night vision is active; Check BNC cable connections for damage or interference. |
8. Specifications
| Feature | Detail |
|---|---|
| Brand | TMEZON |
| Model Number | MZ-HD1004M-K4 |
| DVR Channels | 4 Channels |
| Camera Resolution | 1080P (2 Megapixels) |
| Video Capture Resolution | 1080p |
| Camera Type | Outdoor/Indoor Weatherproof CCTV |
| Connectivity Technology | Wired (Cameras to DVR), Wireless (Remote Access via App) |
| Power Source | Corded Electric |
| HDD Support | 3.5-inch SATA, 500GB to 2TB (HDD not included) |
| DVR Product Dimensions | 30 x 30 x 30 cm (approximate) |
| Item Weight | 3.88 Kilograms |
| Color | Black |
| Special Features | Motion Alert, Smartphone/PC Remote Monitoring, Night Vision, Weatherproof |
9. Warranty and Support
TMEZON offers comprehensive support for its products:
- Warranty: This product comes with a 2-year warranty.
- Return Policy: A 30-day money-back guarantee is provided.
- Customer Support: For any issues or inquiries, please contact TMEZON customer service.
- Email Support: You can reach our support team at tmezoncctvsystem@yahoo.com.
- Bulk Purchase: For purchases of 2 sets or more, please contact us for special discounts.


