
1. Introduction
The OBDMONSTER N123 Inductive Ignition Timing Light is a diagnostic tool designed to accurately measure and adjust the ignition timing on 12V automotive systems. This device is compatible with most 2-stroke and 4-stroke gasoline engines found in cars, motorcycles, and marine applications. Proper ignition timing is crucial for optimal engine performance and fuel efficiency.
This manual provides detailed instructions for the safe and effective use of your timing light, including setup, operation, maintenance, and troubleshooting.
2. Safety Information
Always observe the following safety precautions to prevent personal injury or damage to the vehicle or timing light:
- Wear appropriate eye protection (safety glasses) and hand protection (gloves) when working on vehicles.
- Ensure the engine is off and cool before making any connections.
- Keep hands, tools, and clothing clear of moving engine parts (e.g., fan blades, belts) when the engine is running.
- Work in a well-ventilated area to avoid inhaling exhaust fumes.
- The timing light operates on 12V DC. Connect the power clips correctly: Red clip to positive (+) battery terminal, Black clip to negative (-) battery terminal. Incorrect connection can damage the device or vehicle electrical system.
- Ensure the inductive pickup clamp is securely attached to the spark plug wire, with the arrow pointing towards the spark plug.
- Do not use the timing light on diesel engines or 6-volt electrical systems.
- Avoid dropping the timing light or exposing it to excessive moisture.
3. Product Overview
The OBDMONSTER N123 Inductive Ignition Timing Light is designed for ease of use and durability. It features a pistol-grip design for comfortable handling and a bright xenon flash for clear visibility of timing marks.

Figure 3.1: OBDMONSTER N123 Inductive Ignition Timing Light.
Key Features:
- Strong Xenon Flash: Provides a clear, bright flash for precise timing mark visibility, even in daylight conditions.
- High-Purity Copper Alligator Clips: Ensures strong bite and excellent electrical conductivity for reliable power connection.
- Ergonomic Pistol-Grip Handle: Designed for comfortable use and reduced hand fatigue during operation.
- Overload Protection: Integrated high-quality wiring and design features enhance safety and device longevity.
- Inductive Pickup: Non-contact clamp for safe and easy connection to spark plug wires.

Figure 3.2: Detailed features of the timing light.
4. Setup
Follow these steps to prepare the timing light for use:
- Connect Power: Attach the red power clip to the positive (+) terminal of the vehicle's 12V battery and the black power clip to the negative (-) terminal. Ensure connections are secure.
- Connect Inductive Pickup: Clamp the inductive pickup onto the spark plug wire of cylinder #1. Ensure the arrow on the clamp points towards the spark plug.

Figure 4.1: Proper connection of the timing light to the vehicle's battery and spark plug wire.
5. Operating Instructions
Once the timing light is connected, proceed with the following steps to check and adjust ignition timing:
- Warm Up Engine: Start the engine and allow it to reach its normal operating temperature. This ensures accurate timing readings.
- Locate Timing Marks: Identify the timing marks on the engine's crankshaft pulley or flywheel. Consult your vehicle's service manual for the exact location and specifications.
- Check Ignition Timing: Aim the timing light at the timing marks and pull the trigger. The xenon flash will illuminate the timing marks, making them appear stationary. Compare the illuminated mark with the specified timing mark for your engine.
- Adjust Timing (if necessary): If the timing is not correct, follow your vehicle's service manual instructions to adjust the distributor or ignition system until the timing marks align correctly. Re-check with the timing light after each adjustment.

Figure 5.1: Operational steps for checking ignition timing.
6. Maintenance
To ensure the longevity and reliable performance of your timing light, follow these maintenance guidelines:
- After each use, wipe the timing light with a clean, dry cloth to remove any dirt, oil, or grease.
- Store the device in a dry, cool place, away from direct sunlight and extreme temperatures.
- Inspect the power cables and inductive clamp for any signs of damage (fraying, cracks) before each use. Do not use if damaged.
- Do not attempt to open the timing light housing, as there are no user-serviceable parts inside.
7. Troubleshooting
If the timing light does not function as expected, consider the following common issues and solutions:
Problem: Timing Light Does Not Flash
- Check Power Connections: Ensure the red clip is securely connected to the positive (+) battery terminal and the black clip to the negative (-) battery terminal. Verify the battery has sufficient charge (12V).
- Verify Inductive Clamp Placement: Ensure the inductive clamp is correctly and securely attached to the spark plug wire of cylinder #1, with the arrow pointing towards the spark plug. Sometimes, the electromagnetic pulse signal from the first cylinder may be insufficient. Try re-clamping or adjusting the position of the clamp.
- Inspect Cables: Check for any visible damage to the power cables or the inductive pickup cable.
- Engine Running: Confirm the engine is running when attempting to use the timing light.

Figure 7.1: Correct and incorrect inductive clamp placement for troubleshooting.
Problem: Timing Marks Are Difficult to See
- Lighting Conditions: While the xenon flash is bright, very strong ambient light can reduce visibility. Try to work in a shaded area if possible.
- Clean Timing Marks: Ensure the timing marks on the crankshaft pulley or flywheel are clean and free of dirt or grease. You may highlight them with chalk or white paint for better visibility.
8. Specifications
| Feature | Specification |
|---|---|
| Model | N123 |
| Brand | OBDMONSTER |
| Voltage | 12 Volts DC |
| Light Source Type | Xenon |
| Material | Acrylonitrile Butadiene Styrene (ABS) |
| Mounting Type | Handheld |
| Product Dimensions | 7.3"L x 5.7"W x 1"H (18.6cm L x 13.2cm W x 2.5cm H) |
| Item Weight | 13.1 ounces |
| Power Source | Vehicle's 12V battery |
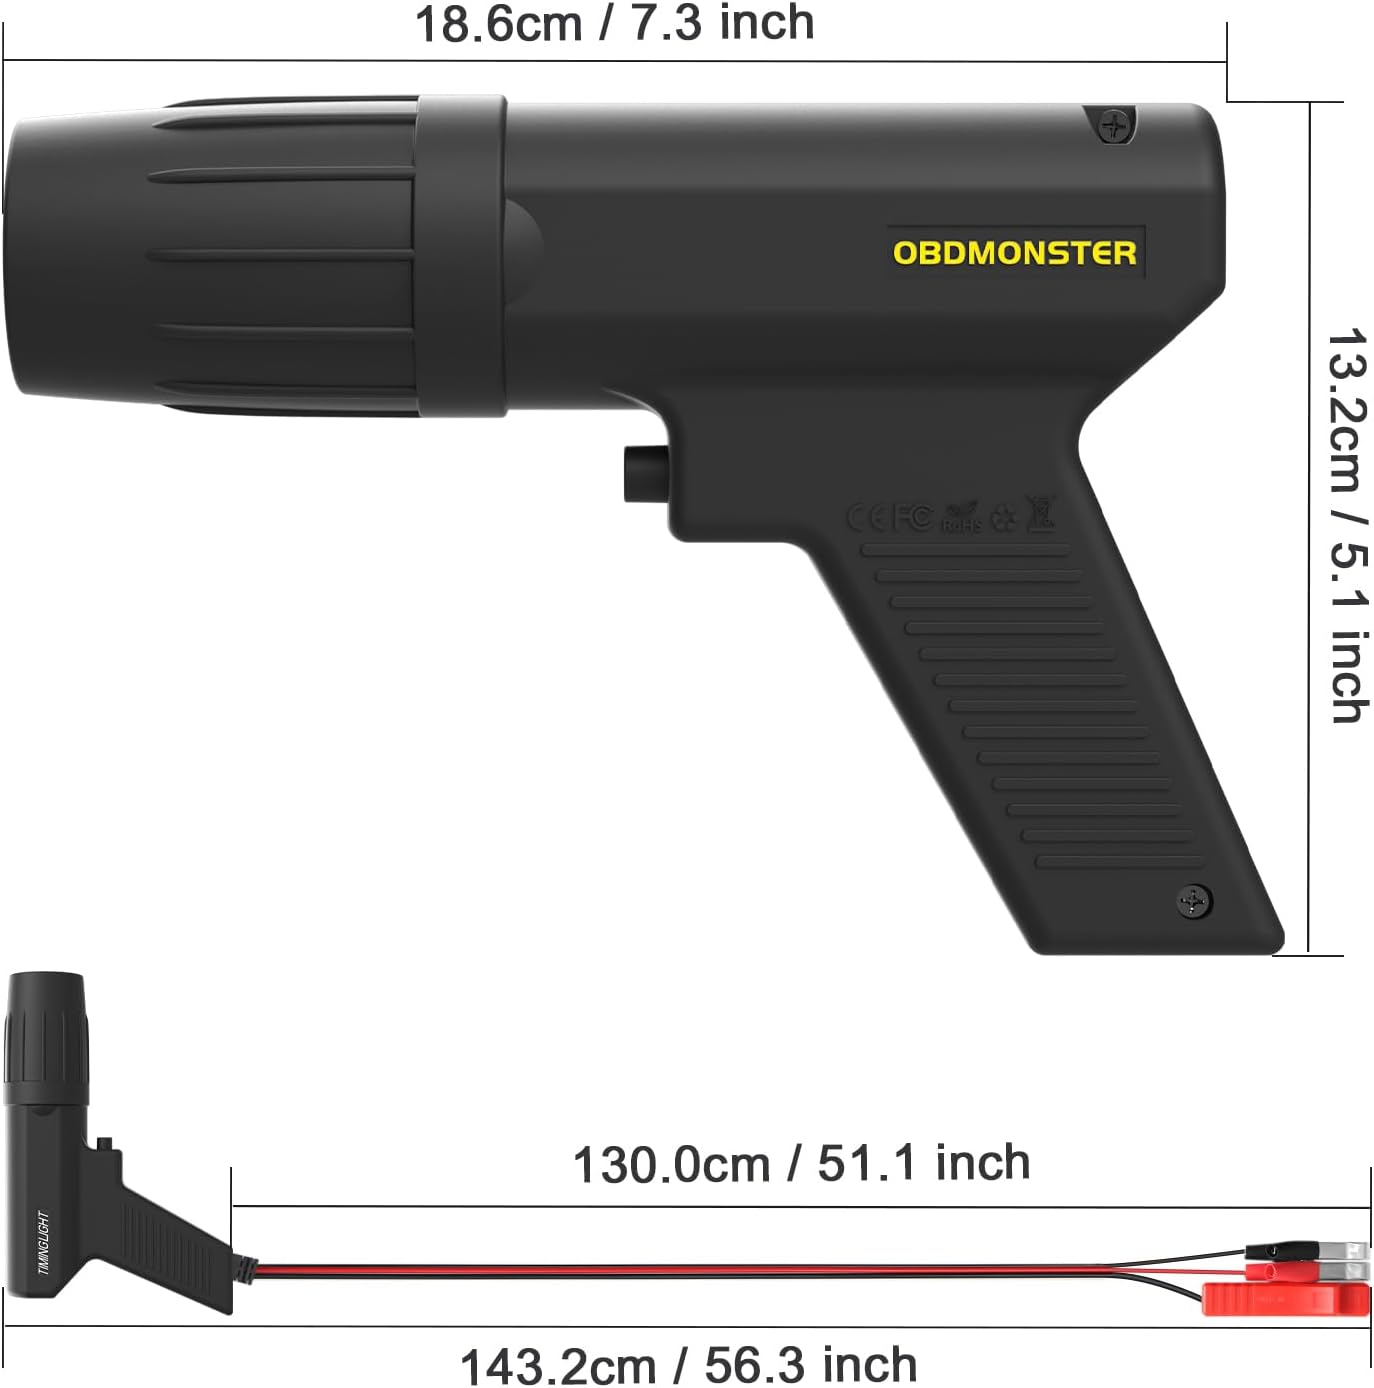
Figure 8.1: Product dimensions.
Application:
- Suitable for 2-stroke and 4-stroke gasoline engines.
- Compatible with 12V ignition systems.
- Used for cars, motorcycles, marine vehicles, trucks, and snowmobiles.

Figure 8.2: Wide application range of the timing light.
9. Warranty & Support
Warranty: The OBDMONSTER N123 Inductive Ignition Timing Light comes with a 1-year warranty from the date of purchase, covering manufacturing defects.
Customer Support: For technical assistance, troubleshooting beyond this manual, or warranty claims, please contact OBDMONSTER customer service through the retailer where the product was purchased. Please have your purchase details and product model number (N123) available when contacting support.