1. Product Overview
The vidaXL Garden Composter is designed for efficient composting of organic waste. Constructed from durable plastic, it is weather and UV resistant, suitable for outdoor use. Its design promotes optimal aeration and irrigation for effective decomposition.

Image 1.1: Front view of the vidaXL Garden Composter. This image shows the overall appearance of the assembled composter from the front.
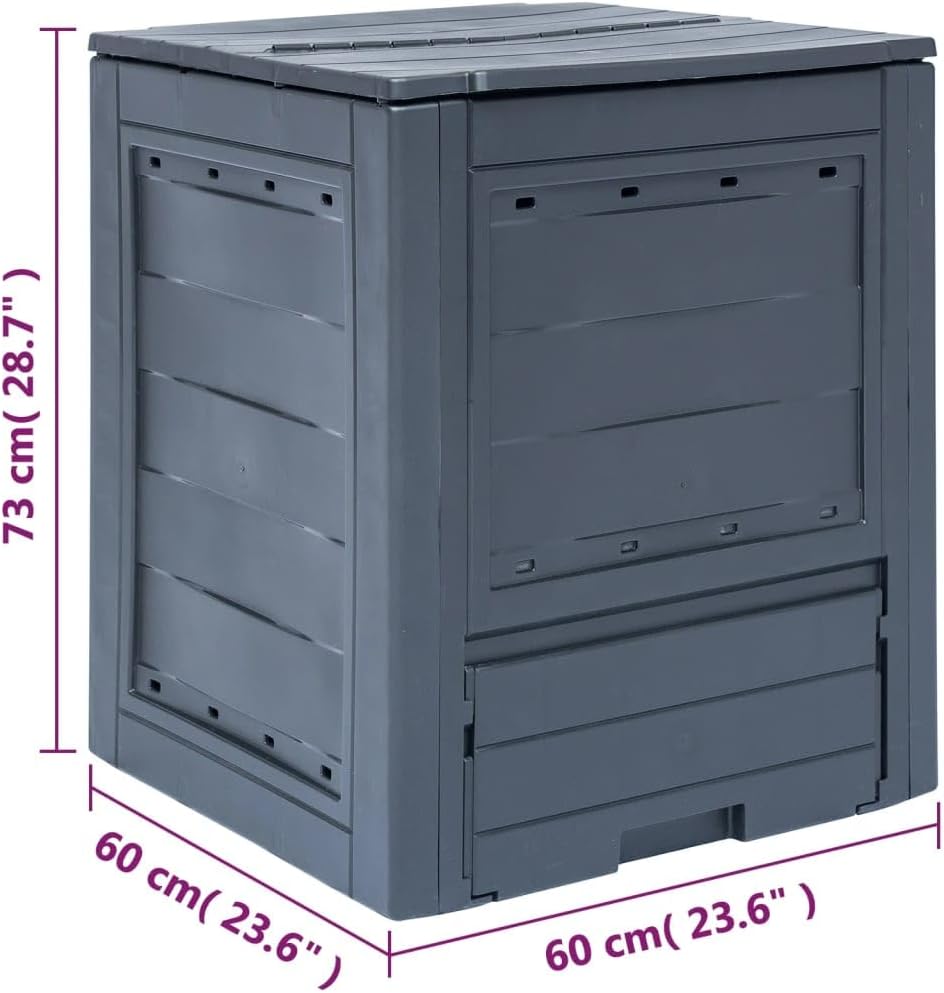
Image 1.2: The vidaXL Garden Composter displaying its dimensions: 60 cm (23.6") width, 60 cm (23.6") depth, and 73 cm (28.7") height.
2. Setup and Assembly
The vidaXL Garden Composter requires assembly. Follow these general steps for proper setup. Ensure all components are present before beginning.
2.1 Unpacking
- Carefully remove all parts from the packaging.
- Verify that all panels, the lid, and any connecting clips or pins are included. Refer to the packing list if available.
2.2 Assembly Steps
- Connect Side Panels: Interlock the plastic side panels to form the four walls of the composter. Ensure they are securely fastened.
- Attach Bottom Access Panel: Secure the removable bottom access panel at the base of one side. This panel allows for easy removal of finished compost.
- Install Lid: Place the split lid onto the top of the assembled walls. The lid sections should fit snugly and allow for easy opening and closing.

Image 2.1: This image illustrates the composter with its split lid open for adding materials and the bottom access panel removed for compost retrieval.
2.3 Placement
Choose a level, well-drained area in your garden, preferably with partial shade to prevent the compost from drying out too quickly. Ensure it is easily accessible for adding materials and turning the compost.
3. Operation
Effective composting relies on a balance of "green" (nitrogen-rich) and "brown" (carbon-rich) materials, adequate moisture, and aeration.
3.1 What to Compost
- Green Materials: Vegetable and fruit scraps, coffee grounds, tea bags, fresh grass clippings, green leaves, garden waste (non-diseased).
- Brown Materials: Dried leaves, straw, wood chips, shredded paper, cardboard (non-glossy), sawdust.
3.2 What NOT to Compost
- Meat, bones, dairy products, oily foods (attract pests).
- Diseased plants (can spread disease).
- Weeds with seeds (can germinate in your garden).
- Pet waste (may contain pathogens).
3.3 Adding Materials
Add materials in layers, alternating between green and brown. Chop larger items into smaller pieces to speed up decomposition. Use the split lid for easy access.
3.4 Moisture and Aeration
- Moisture: The compost pile should be consistently moist, like a wrung-out sponge. Water if too dry, or add more green materials if too wet. The split lid allows for optimal irrigation.
- Aeration: Turn the compost regularly (weekly or bi-weekly) with a pitchfork or aerator to introduce oxygen. The side ventilation holes also contribute to optimal composting.

Image 3.1: A close-up view of the ventilation holes on the side panel of the composter, designed to ensure proper airflow for decomposition.
4. Maintenance
Regular maintenance ensures the longevity and efficiency of your composter.
- Cleaning: Periodically clean the exterior of the composter with mild soap and water to remove dirt and debris.
- Inspection: Check for any damage to the plastic panels or lid, especially after extreme weather conditions.
- Compost Removal: Once compost is ready (dark, crumbly, earthy smell), remove it from the bottom access panel.

Image 4.1: This image provides a detailed view of the lower section of the composter, highlighting the area where the bottom access panel is located for compost retrieval.
5. Troubleshooting Common Issues
| Problem | Possible Cause | Solution |
|---|---|---|
| Compost is too wet and smelly | Too many green materials, not enough aeration. | Add more brown materials (e.g., shredded paper, dry leaves). Turn the pile more frequently to increase airflow. |
| Compost is too dry and decomposition is slow | Not enough moisture, too many brown materials. | Add water or more green materials. Turn the pile to distribute moisture. |
| Pests (e.g., rodents, insects) | Presence of meat, dairy, or oily foods; exposed food scraps. | Avoid composting prohibited items. Bury food scraps deep within the pile. Ensure the lid is securely closed. |
| Compost not heating up | Insufficient nitrogen, lack of moisture, poor aeration, pile too small. | Add more green materials. Ensure adequate moisture. Turn the pile. Consider adding more volume if possible. |
6. Product Specifications
| Feature | Detail |
|---|---|
| Brand | vidaXL |
| Model Number (ASIN) | B07TC6D945 |
| Material | Plastic |
| Color | Gray |
| Capacity | 260 Liters (68.7 Gallons) |
| Product Dimensions (L x W x H) | 23.6" x 23.6" x 28.7" (60 cm x 60 cm x 73 cm) |
| Shape | Square |
| Item Weight | 5.54 Kilograms |
| GTIN | 08719883554495 |
7. Warranty and Support
For warranty information, please refer to the documentation provided with your purchase or contact the retailer directly. Specific warranty terms may vary by region and seller.
For product support, inquiries, or to view other vidaXL products, please visit the official vidaXL store:


