Introduction
Thank you for purchasing the PRIXTON Mini Portable Sewing Machine P120. This manual provides detailed instructions for the safe and efficient operation, maintenance, and troubleshooting of your new sewing machine. Please read this manual thoroughly before first use and keep it for future reference.
The PRIXTON P120 is designed for ease of use, featuring 16 different stitch types, an integrated accessory drawer, built-in LED light, and both foot pedal and manual operation options, making it ideal for various sewing projects.
Important Safety Instructions
When using an electrical appliance, basic safety precautions should always be followed, including the following:
- Read all instructions before using this sewing machine.
- Keep fingers away from all moving parts. Special care is required around the sewing machine needle.
- Always switch the sewing machine OFF when changing the needle, threading the machine, or performing any maintenance.
- Use only accessories recommended by the manufacturer as contained in this manual.
- Never operate the sewing machine if it has a damaged cord or plug, if it is not working properly, or if it has been dropped or damaged.
- Do not use outdoors.
- Unplug the machine from the electrical outlet when not in use.
Product Overview
Familiarize yourself with the components of your PRIXTON Mini Portable Sewing Machine P120.

Figure 1: Front view of the PRIXTON Mini Portable Sewing Machine P120, showing the main body, needle, presser foot, and stitch selection dial.

Figure 2: Side view of the sewing machine, highlighting the integrated accessory drawer for storing threads and needles.

Figure 3: Close-up of the stitch pattern guide on the machine, illustrating the 16 available stitch types.

Figure 4: Detailed view of the needle and presser foot area, showing the bobbin cover and feed dogs.

Figure 5: Diagram showing various components of the PRIXTON P120, including the foot pedal input, power input, stitch selector, and speed switch.
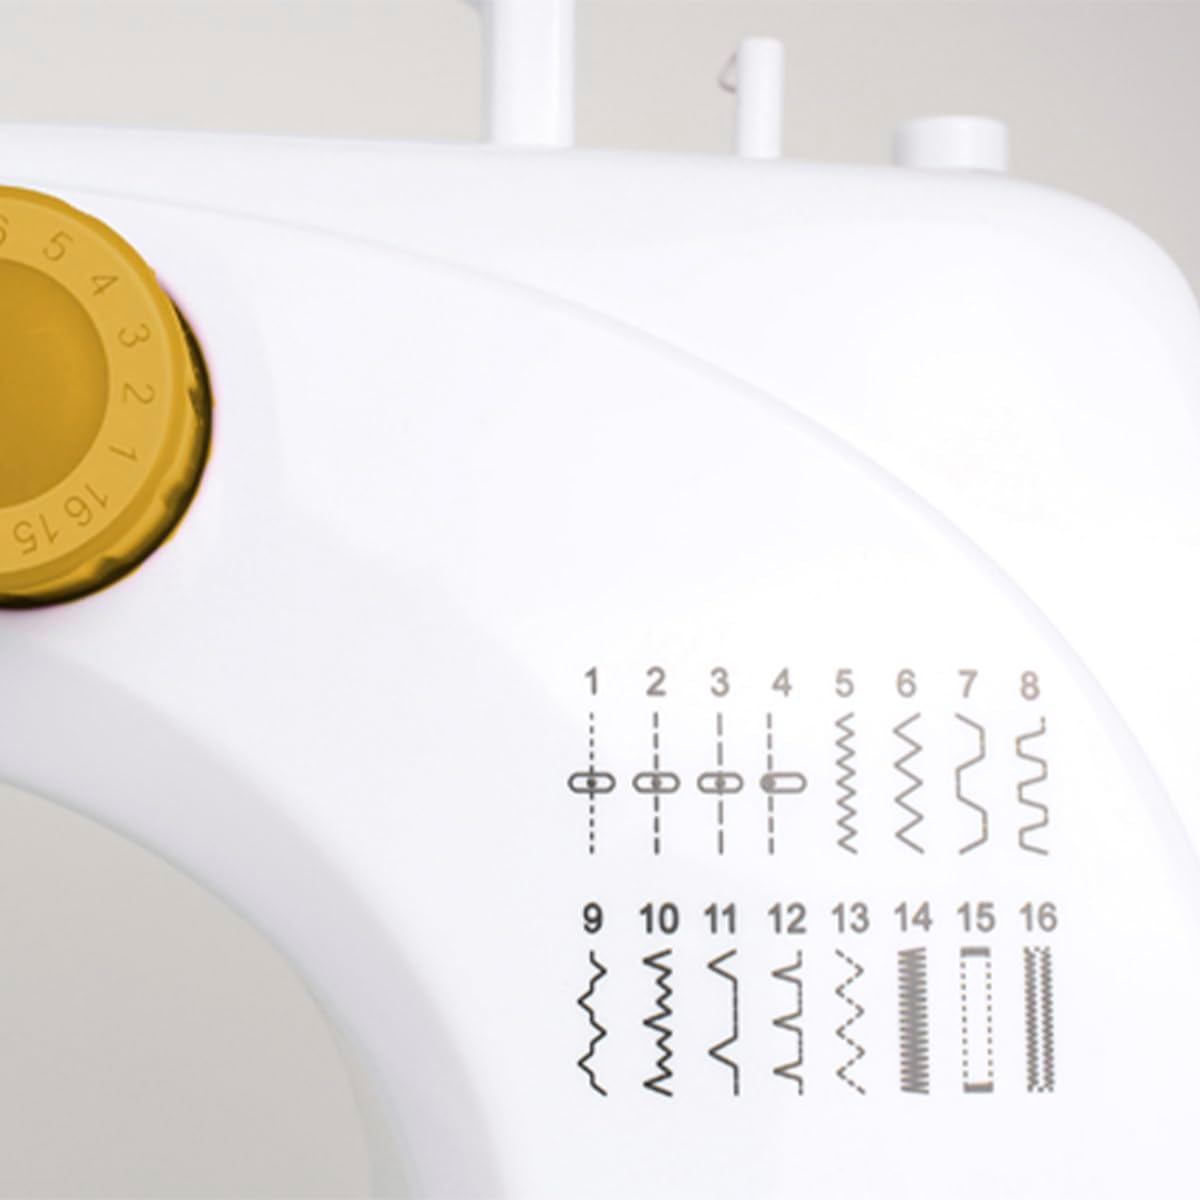
Figure 6: Back view of the sewing machine, showing the handwheel and power input port.

Figure 7: Front angle view of the sewing machine, providing a comprehensive look at its compact design.
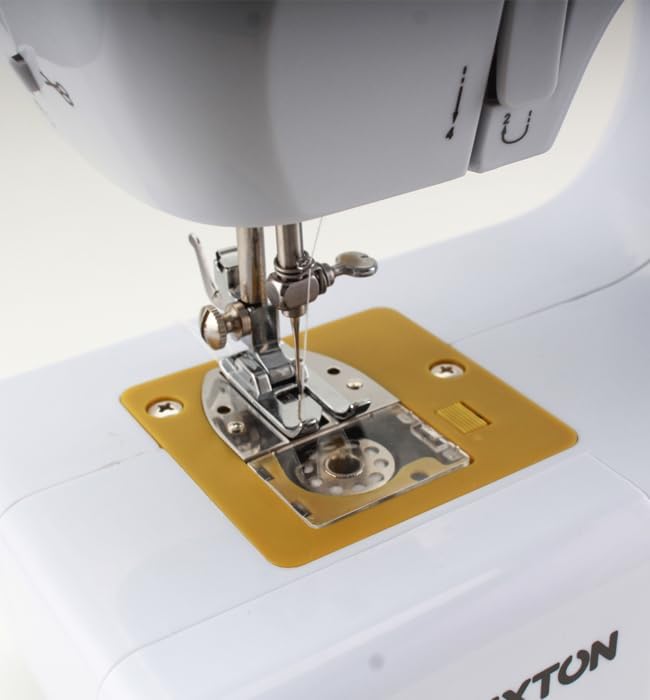
Figure 8: The accessory drawer pulled out, showing spools of thread and bobbins stored inside.
Setup
1. Power Connection
The PRIXTON P120 can be powered by the included AC adapter or by 4 AA batteries (not included).
- AC Adapter: Insert the DC plug of the adapter into the DC input jack on the back of the machine. Plug the AC adapter into a standard wall outlet.
- Batteries: Open the battery compartment cover on the bottom of the machine. Insert 4 AA batteries, ensuring correct polarity (+/-). Close the cover.
2. Bobbin Winding
- Place a spool of thread on the spool pin.
- Guide the thread through the bobbin winding tension disc.
- Wind the thread around an empty bobbin a few times, then place the bobbin onto the bobbin winder spindle.
- Push the bobbin winder spindle to the right.
- Turn on the machine (using the foot pedal or manual switch) to start winding. Stop when the bobbin is full.
- Cut the thread and remove the bobbin.
3. Threading the Machine
- Raise the needle to its highest position by turning the handwheel towards you.
- Raise the presser foot lever.
- Place a spool of thread on the spool pin.
- Guide the thread through the upper thread guide.
- Pass the thread down through the tension control dial.
- Bring the thread up and through the take-up lever from right to left.
- Guide the thread down through the needle bar thread guide.
- Thread the needle from front to back. Pull about 15 cm of thread through the needle eye.
4. Inserting the Bobbin
- Open the bobbin cover plate located on the needle plate.
- Insert the wound bobbin into the bobbin case, ensuring the thread unwinds counter-clockwise.
- Pull the thread through the tension spring slot.
- Close the bobbin cover plate.
5. Bringing Up the Bobbin Thread
- Hold the upper thread with your left hand.
- Turn the handwheel towards you, lowering the needle into the needle plate and then raising it.
- The upper thread will catch the bobbin thread, forming a loop. Pull the loop up through the needle plate.
- Pull both threads (upper and bobbin) under the presser foot and towards the back of the machine.
Operating Instructions
1. Selecting a Stitch
The PRIXTON P120 offers 16 different stitch patterns. To select a stitch, turn the stitch selection dial on the front of the machine to the desired number (1-16). Refer to the stitch pattern guide on the machine for visual reference.
2. Adjusting Stitch Length and Width
Stitch length and width are pre-set for each stitch type. For optimal results, ensure your fabric and thread are suitable for the selected stitch.
3. Adjusting Thread Tension
The thread tension dial controls the tightness of the upper thread. Adjust as needed to achieve balanced stitches. A balanced stitch will have both threads meeting evenly between the two layers of fabric.
- If the upper thread lies flat on the fabric and the bobbin thread forms loops on the top, increase the upper thread tension (turn dial to a higher number).
- If the bobbin thread lies flat on the fabric and the upper thread forms loops on the bottom, decrease the upper thread tension (turn dial to a lower number).
4. Starting to Sew
- Place the fabric under the presser foot.
- Lower the presser foot lever.
- Select your desired sewing speed using the speed switch (L for Low, H for High).
- To start sewing, you can either:
- Use the Foot Pedal: Connect the foot pedal to the machine's foot pedal jack. Press the foot pedal to start sewing. Release to stop.
- Use the Manual Switch: Slide the ON/OFF switch to the ON position. Slide it back to OFF to stop.
- Gently guide the fabric as you sew. Do not pull or push the fabric forcefully.
5. Reverse Sewing
The machine supports reverse sewing for securing stitches at the beginning and end of a seam. Press and hold the reverse lever/button (if available, not explicitly mentioned in features but common) to sew in reverse. Release to sew forward again.
6. Finishing a Seam
- Sew a few reverse stitches to secure the seam.
- Raise the needle to its highest position.
- Raise the presser foot lever.
- Pull the fabric away from the machine.
- Cut the threads using the built-in thread cutter or scissors, leaving about 15 cm of thread.
7. Integrated LED Light
The machine features an integrated LED light to illuminate the sewing area. This light turns on automatically when the machine is powered on.
Figure 9: The integrated LED light illuminating the sewing area for improved visibility.
Maintenance
Regular maintenance ensures the longevity and optimal performance of your sewing machine.
1. Cleaning
- Always unplug the machine before cleaning.
- Use a soft brush or lint brush to remove lint and dust from the bobbin area and feed dogs.
- Wipe the exterior of the machine with a soft, damp cloth. Do not use harsh chemicals or abrasive cleaners.
2. Oiling
The PRIXTON P120 is generally designed to be low-maintenance. Refer to the manufacturer's specific instructions regarding oiling. If oiling is required, use only high-quality sewing machine oil on designated points, typically around the bobbin case and needle bar.
3. Needle Replacement
- Turn off and unplug the machine.
- Loosen the needle clamp screw.
- Remove the old needle.
- Insert a new needle with the flat side facing the back of the machine, pushing it up as far as it will go.
- Tighten the needle clamp screw securely.
4. Storage
When not in use, store the machine in a dry, dust-free environment. Use a dust cover to protect it from dust and debris.
Troubleshooting
This section addresses common issues you might encounter with your sewing machine.
| Problem | Possible Cause | Solution |
|---|---|---|
| Machine not starting | No power; Foot pedal not connected; Speed switch in OFF position. | Check power adapter/batteries; Ensure foot pedal is securely plugged in; Set speed switch to L or H. |
| Skipped stitches | Needle bent or dull; Incorrect needle size for fabric; Machine incorrectly threaded. | Replace needle; Use appropriate needle for fabric type; Re-thread the machine carefully. |
| Thread breaking | Thread tension too high; Poor quality thread; Needle bent or inserted incorrectly; Machine incorrectly threaded. | Reduce upper thread tension; Use good quality thread; Replace/re-insert needle correctly; Re-thread the machine. |
| Fabric not feeding | Presser foot not lowered; Lint under needle plate/feed dogs. | Lower presser foot; Clean lint from feed dogs and bobbin area. |
| Noisy operation | Lack of lubrication; Loose parts; Lint buildup. | Oil machine if necessary (refer to manual); Check for loose screws; Clean thoroughly. |
Specifications
- Model: P120
- Brand: Prixton
- Stitch Types: 16
- Power Source: AC Adapter (Cable électrique) or 4x AA Batteries
- Material: Plastic
- Color: White
- Dimensions (L x W x H): 25.7 x 12.5 x 28.5 cm (10.1 x 4.9 x 11.2 inches)
- Weight: 3 Kilograms (6.6 lbs)
- Features: Integrated LED light, Accessory drawer, Foot pedal included
Warranty and Support
PRIXTON products are manufactured to high-quality standards. For information regarding warranty coverage, technical support, or spare parts availability, please refer to the purchase documentation or contact your retailer.
Please note that spare parts availability information is currently unavailable for this product (as per product data).
For further assistance, you may visit the official Prixton website or contact their customer service department.


