
1. Introduction
Thank you for choosing the WeChef 10-inch Commercial Meat Slicer. This manual provides essential information for the safe and efficient operation, maintenance, and troubleshooting of your new appliance. Please read all instructions carefully before use and retain this manual for future reference.
2. Important Safety Instructions
- Electrical Safety: Ensure the slicer is connected to a grounded outlet with the correct voltage (110V). Do not operate with a damaged cord or plug. Keep the power cord away from heated surfaces.
- Sharp Blade Hazard: The blade is extremely sharp. Always exercise extreme caution when handling, cleaning, or assembling components near the blade. Never touch the blade directly.
- Personal Protection: Wear appropriate protective gloves when cleaning or handling the blade. Keep hands and fingers away from the blade during operation.
- Supervision: This appliance is not intended for use by persons with reduced physical, sensory, or mental capabilities, or lack of experience and knowledge, unless they have been given supervision or instruction concerning use of the appliance by a person responsible for their safety. Children should be supervised to ensure they do not play with the appliance.
- Stable Surface: Always operate the slicer on a stable, level, and dry surface to prevent tipping or movement during use.
- Food Pusher: Always use the food pusher to guide food towards the blade. Never use your bare hands.
- Unplug Before Cleaning/Maintenance: Always unplug the slicer from the power outlet before assembling, disassembling, cleaning, or performing any maintenance.
- Intended Use: Use this appliance only for its intended purpose of slicing food items as described in this manual. Do not attempt to slice frozen foods, bones, or other non-food items.
3. Product Overview and Components
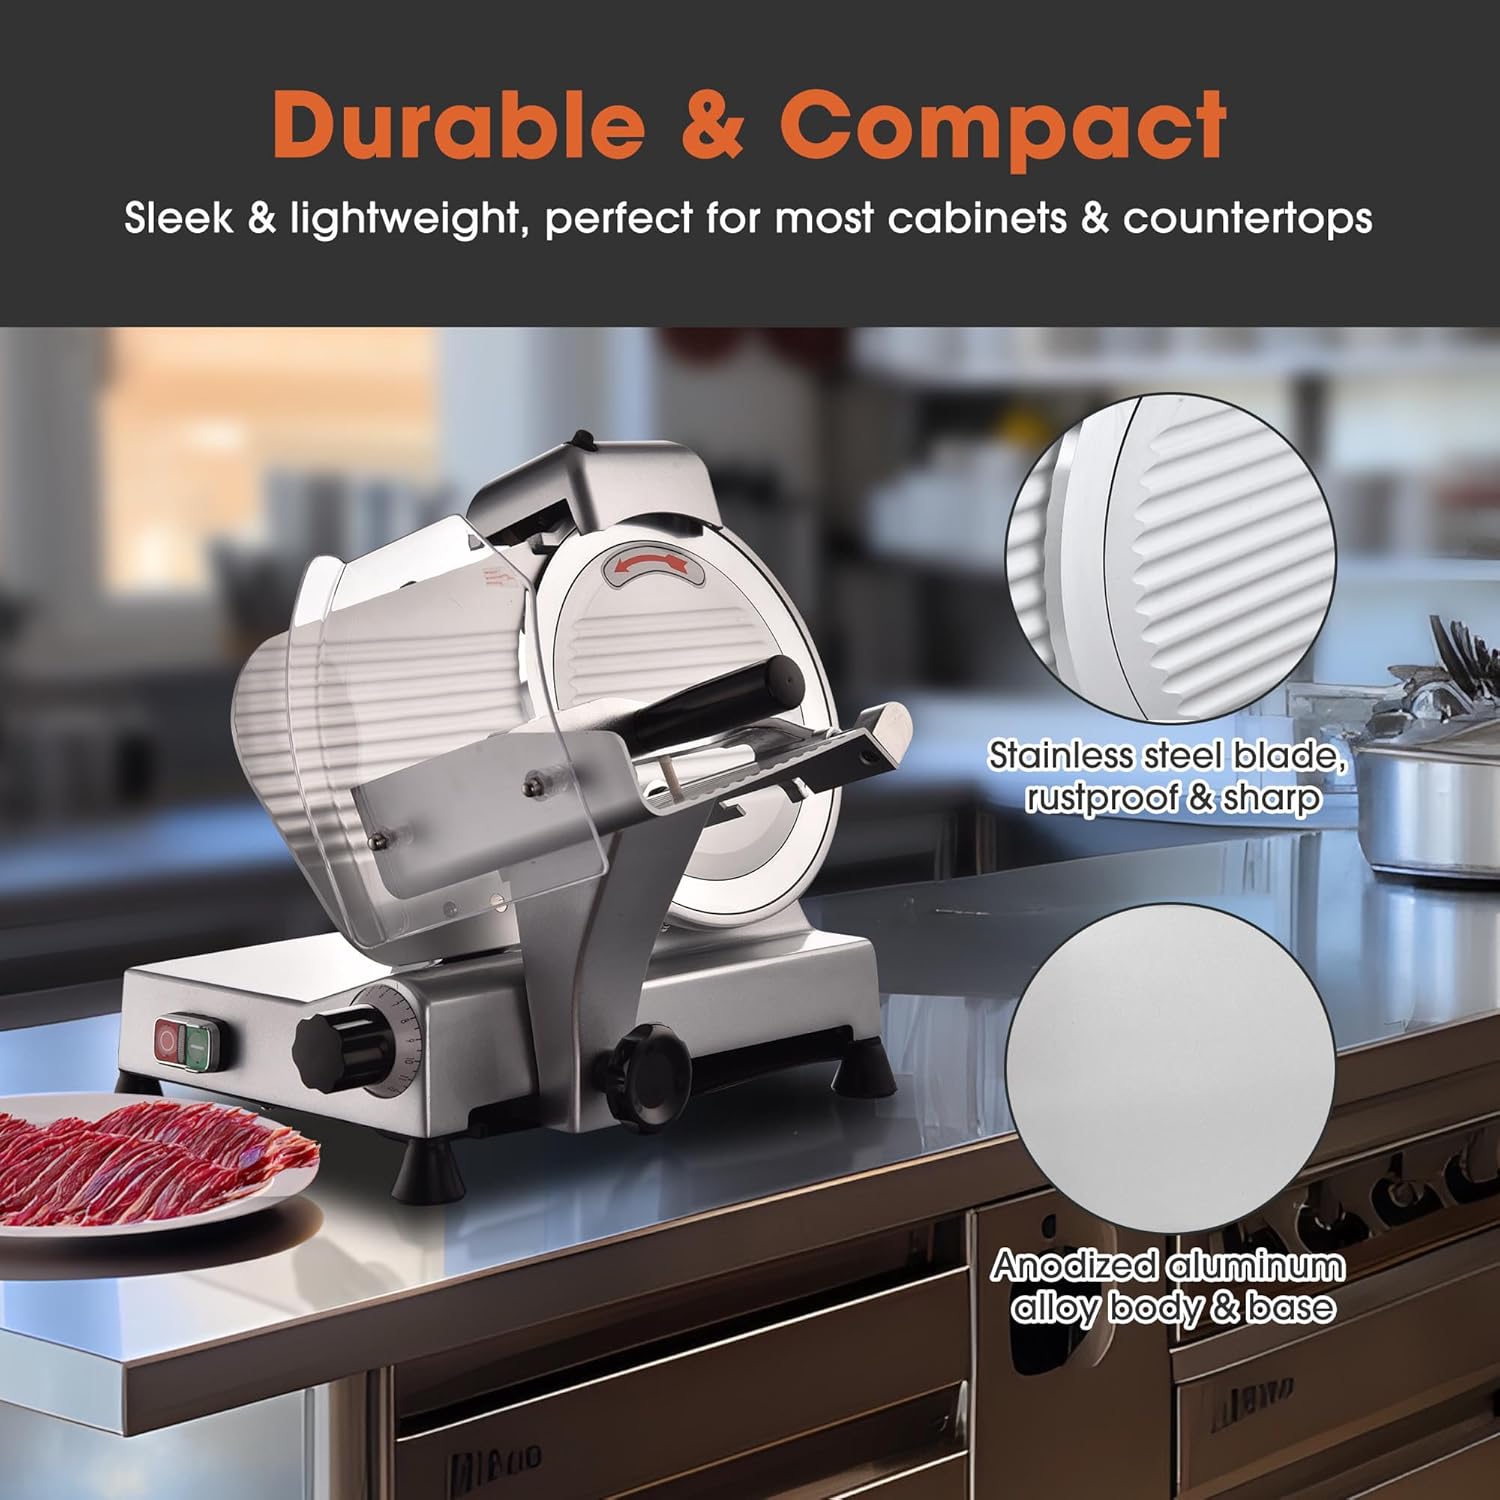
Familiarize yourself with the main parts of your WeChef meat slicer:
- Blade: The 10-inch stainless steel cutting blade.
- Blade Guard: A protective cover over the blade for safety.
- Food Carriage: The platform where food is placed for slicing.
- Food Pusher: Used to hold and guide food safely.
- Thickness Adjustment Knob: Controls the slicing thickness from 0 to 12mm (0 to 5/8 inches).
- ON/OFF Switch: Power control with a waterproof cover.
- Non-Slip Rubber Feet: Provides stability during operation.

4. Setup
- Unpacking: Carefully remove all packaging materials. Inspect the slicer for any damage.
- Placement: Place the slicer on a clean, dry, stable, and level surface. Ensure there is enough space around the unit for safe operation and cleaning.
- Initial Cleaning: Before first use, clean all parts that will come into contact with food according to the "Cleaning and Maintenance" section.
- Power Connection: Ensure the ON/OFF switch is in the "OFF" position. Plug the power cord into a standard 110V grounded electrical outlet.

5. Operation
- Adjust Thickness: Rotate the thickness adjustment knob to select your desired slice thickness. The range is from 0 to 12mm (0 to 5/8 inches).
- Place Food: Place the food item (e.g., meat, cheese, vegetables) onto the food carriage. Secure it firmly against the back plate and use the food pusher to hold it in place.
- Power On: Press the "ON" button (usually green) to start the motor and blade rotation.
- Slicing: Gently push the food carriage back and forth, guiding the food against the rotating blade using the food pusher. Apply even pressure for consistent slices.
- Power Off: Once slicing is complete, press the "OFF" button (usually red) to stop the motor and blade. Wait for the blade to come to a complete stop before removing sliced food or adjusting settings.


6. Cleaning and Maintenance
Regular cleaning is essential for hygiene and to prolong the life of your slicer. Always unplug the unit before cleaning.
- Unplug: Ensure the slicer is unplugged from the power outlet.
- Disassemble: Carefully remove the food carriage, food pusher, and blade guard. Refer to the product diagram for specific removal instructions.
- Clean Components: Hand wash all removable parts with warm, soapy water. Rinse thoroughly and dry completely.
- Clean Main Unit: Wipe down the main body of the slicer with a damp cloth. Do not immerse the motor housing in water.
- Blade Cleaning: Use extreme caution when cleaning the blade. A brush or damp cloth can be used to remove food particles. Never touch the blade edge directly with your hands.
- Reassemble: Once all parts are clean and dry, carefully reassemble the slicer.

7. Troubleshooting
| Problem | Possible Cause | Solution |
|---|---|---|
| Slicer does not turn on. | Not plugged in; power switch off; circuit breaker tripped. | Check power connection; ensure switch is ON; reset circuit breaker. |
| Uneven slices. | Food not held firmly; blade dull; incorrect thickness setting. | Ensure food is secure with pusher; sharpen or replace blade if necessary; adjust thickness setting. |
| Motor runs, but blade does not turn. | Blade not properly installed or jammed. | Unplug, check blade installation, remove any obstructions. |
| Difficulty cleaning. | Food residue dried on; parts not fully disassembled. | Clean immediately after use; ensure all removable parts are detached for thorough cleaning. |
8. Specifications
| Feature | Detail |
|---|---|
| Brand | WeChef |
| Model | 26MSC001-250-10-YS |
| Power | 110V, 240W, 1/3HP |
| Blade Diameter | 10 inches |
| Slicing Thickness | 0-12mm (0-5/8 inches) |
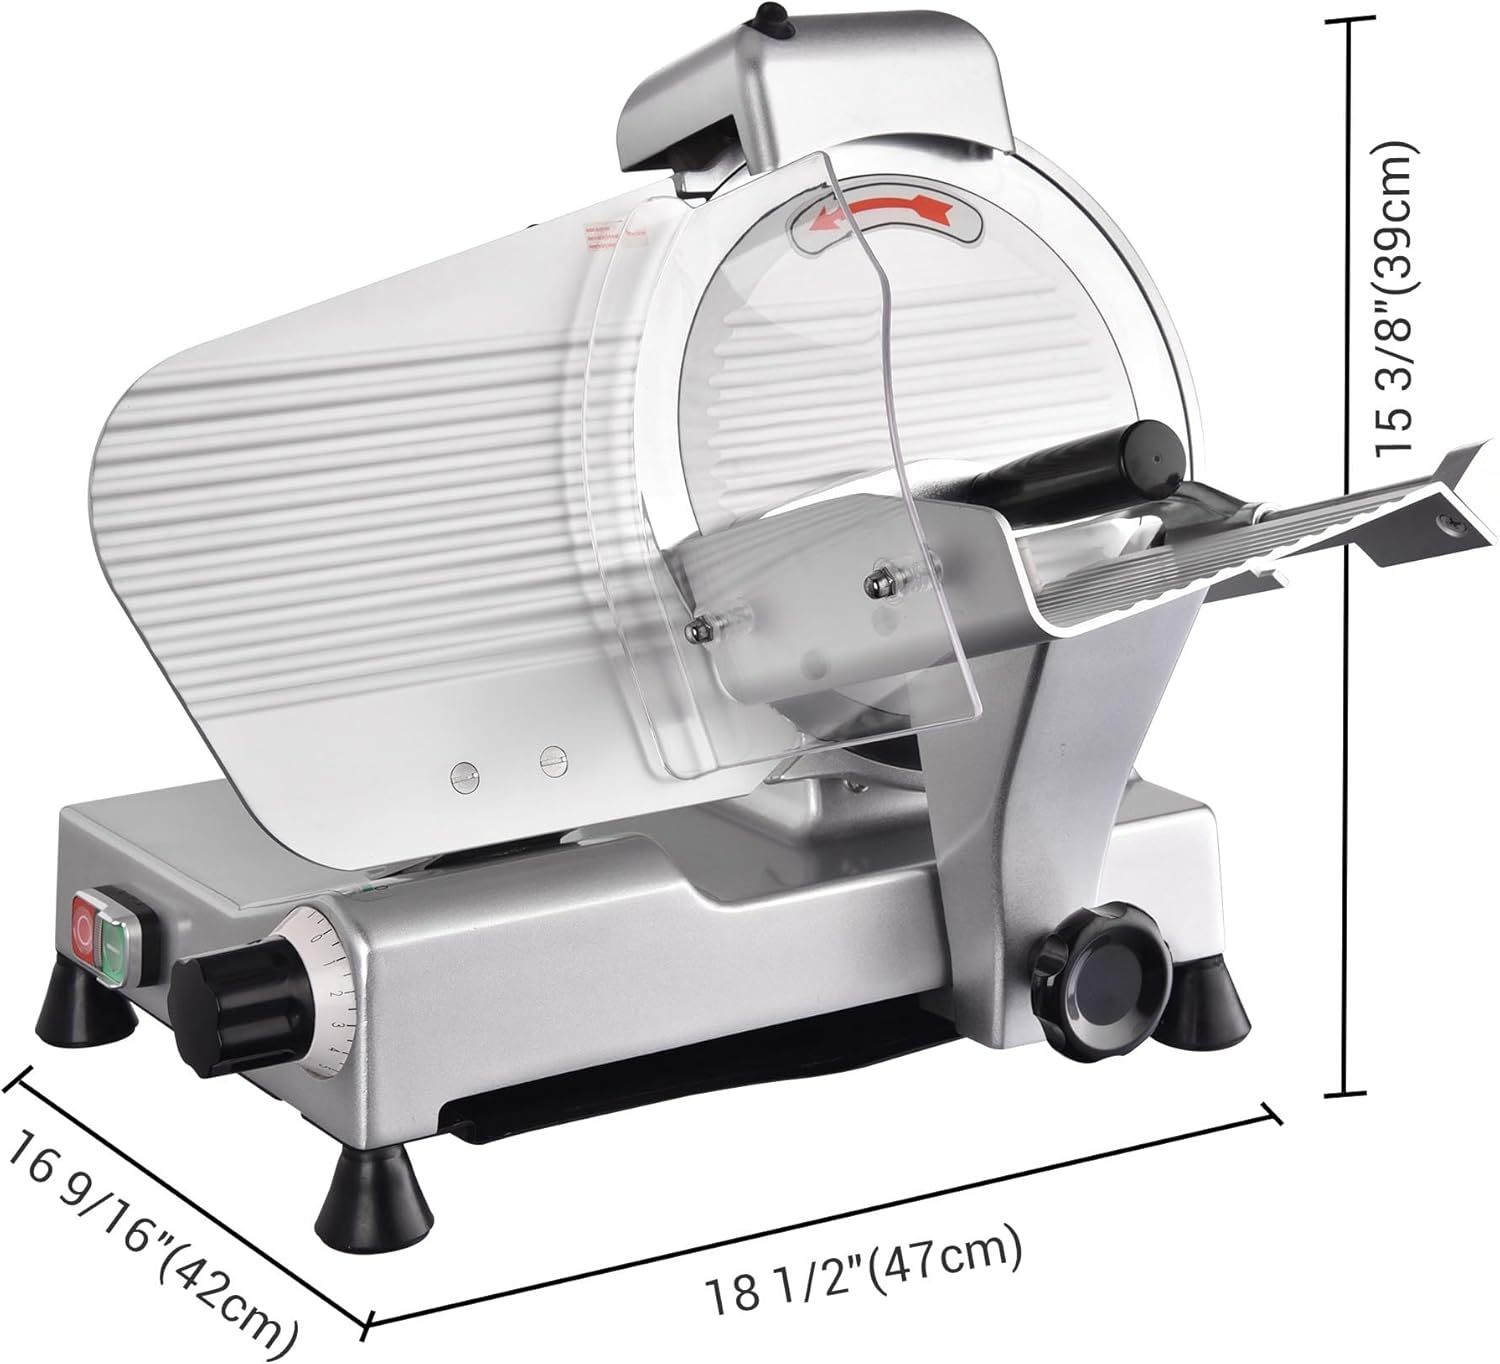
| Product Dimensions (L x W x H) | 14.57" x 20.08" x 14.57" |
| Item Weight | 36 Pounds |
| Body Material | Stainless Steel, Anodized Aluminum Alloy |
| Blade Material | Alloy Steel, Carbon Steel |
| Operation Mode | Automatic |
| Care Instructions | Hand Wash Only |
9. Warranty and Support
For warranty information or technical support, please refer to the documentation included with your purchase or contact the seller directly. Keep your purchase receipt as proof of purchase.