1. Introduction
This manual provides essential information for the proper installation, operation, and maintenance of your HONEYSEW 124-65100 2-Needle Clamp. Designed specifically for Juki MO-3300 series sewing machines, this component is crucial for achieving precise two-needle stitching. Please read these instructions thoroughly before installation and use to ensure optimal performance and longevity of the part.
2. Product Overview
The HONEYSEW 124-65100 is a replacement needle clamp designed to securely hold two needles on compatible Juki MO-3300 series industrial overlock sewing machines. This component ensures correct needle positioning and stability during high-speed sewing operations, which is vital for consistent stitch formation and preventing needle breakage.
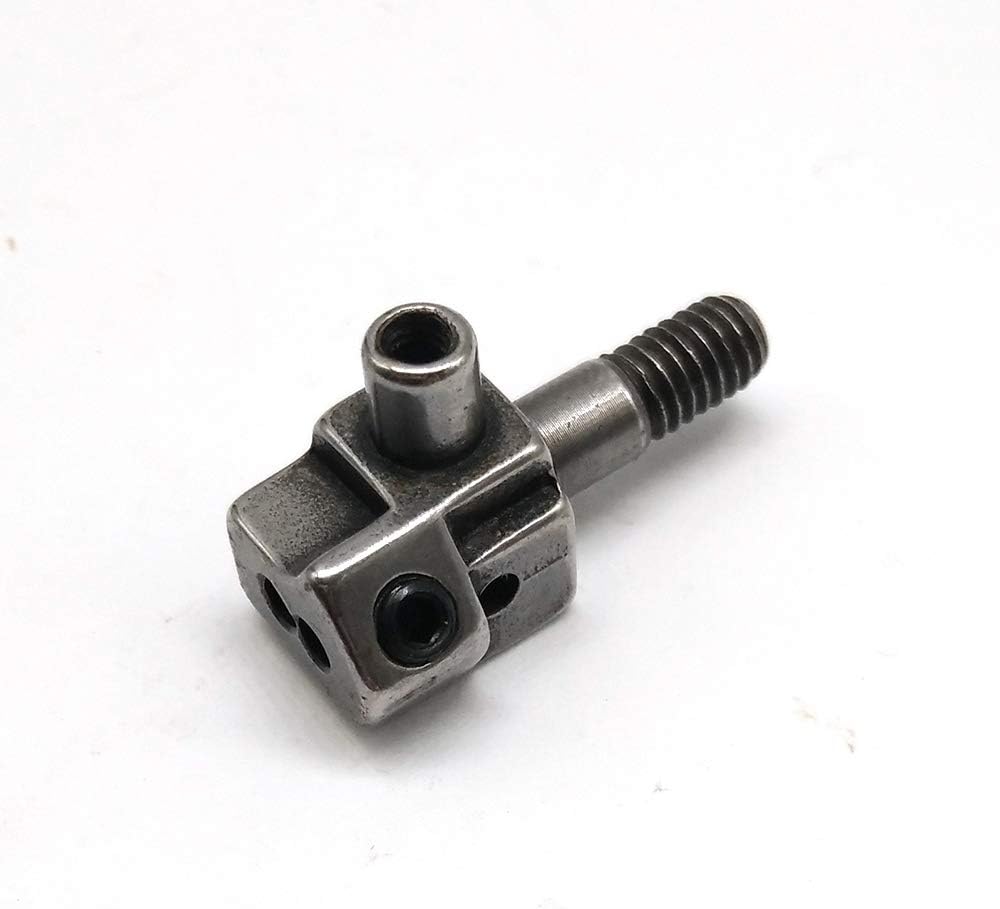
Figure 2.1: Front view of the HONEYSEW 124-65100 2-Needle Clamp, showing the two needle insertion points and the mounting screw.

Figure 2.2: Side view of the HONEYSEW 124-65100 2-Needle Clamp, highlighting the threaded shaft for attachment to the sewing machine.
3. Setup and Installation
Proper installation is critical for the functionality of the needle clamp and the sewing machine. Always ensure the machine is powered off and unplugged before beginning any installation or maintenance.
- Power Off: Turn off and unplug your Juki MO-3300 sewing machine from the power source.
- Access Needle Bar: Raise the needle bar to its highest position.
- Remove Old Clamp (if applicable): Loosen the screw(s) holding the existing needle clamp to the needle bar. Carefully remove the old clamp and any needles.
- Position New Clamp: Align the HONEYSEW 124-65100 needle clamp with the needle bar. Ensure the threaded shaft is correctly oriented to fit into the designated slot on the needle bar.
- Secure Clamp: Insert and tighten the mounting screw(s) to firmly secure the new needle clamp to the needle bar. Do not overtighten, but ensure it is snug to prevent movement during operation.
- Insert Needles: Insert two appropriate sewing machine needles into the clamp, ensuring they are fully seated and oriented correctly (flat side facing the back, if applicable). Tighten the needle set screws securely.
- Test Manually: Manually turn the machine's handwheel to ensure the needles move freely and do not strike any part of the machine.

Figure 3.1: Angled view of the HONEYSEW 124-65100 2-Needle Clamp, showing the screw holes for securing needles.
4. Operating Instructions
Once installed, the 2-needle clamp functions as an integral part of your Juki MO-3300 sewing machine. Its primary role is to hold the needles securely. The operation of the machine itself remains consistent with the Juki MO-3300's user manual.
- Needle Selection: Always use the correct type and size of needles recommended for your Juki MO-3300 and the fabric you are sewing.
- Needle Insertion: Ensure needles are inserted fully and correctly into the clamp, with the flat side (if present) facing the appropriate direction as per your machine's specifications. Tighten the needle screws firmly to prevent needles from falling out or shifting during operation.
- Thread Tension: Adjust the thread tension for both needles according to your fabric and thread type to achieve balanced and consistent stitches. Refer to your Juki MO-3300 manual for detailed tension adjustment procedures.
- Test Stitching: Before starting a project, always perform test stitches on a scrap piece of fabric to verify proper needle function and stitch quality.
5. Maintenance
Regular maintenance of the needle clamp ensures its optimal performance and extends its lifespan.
- Cleaning: Periodically clean the needle clamp to remove lint, dust, and thread residue. Use a small brush or compressed air. Ensure no debris obstructs the needle holes or screw threads.
- Inspection: Regularly inspect the clamp for any signs of wear, damage, or deformation. Check that the needle set screws are not stripped and can securely hold needles.
- Screw Tightness: Occasionally check the tightness of the clamp's mounting screw(s) to the needle bar. Loose screws can lead to vibration, poor stitch quality, or damage.
- Needle Replacement: Replace needles frequently, especially when they become dull, bent, or damaged, as this can affect the clamp and stitch quality.
6. Troubleshooting
If you encounter issues related to the needle clamp, consider the following:
- Needles Falling Out: Ensure needles are fully inserted and the needle set screws are tightened securely. Check if the screws are stripped and replace if necessary.
- Skipped Stitches or Uneven Stitching: Verify that both needles are correctly inserted and not bent. Check for any lint or debris in the clamp affecting needle movement. Ensure the clamp itself is securely mounted to the needle bar.
- Needle Breakage: This can be caused by bent needles, incorrect needle type/size, improper needle insertion, or the clamp being loose or misaligned. Inspect the clamp for damage or misalignment.
- Unusual Noise: A loose needle clamp or improperly seated needles can cause rattling or other unusual noises. Re-tighten all screws and re-seat needles.
For persistent issues, consult your Juki MO-3300 sewing machine's service manual or contact a qualified technician.
7. Specifications
| Model Number | 124-65100 |
| Brand | HONEYSEW |
| Compatibility | Juki MO-3300 Series Sewing Machines |
| Needle Capacity | 2 Needles |
| ASIN | B07T679ZP8 |
| Manufacturer | HONEYSEW |
| Date First Available | June 17, 2019 |
8. Warranty and Support
Specific warranty information for the HONEYSEW 124-65100 2-Needle Clamp is not provided within the product details. For warranty inquiries or technical support, please refer to the official HONEYSEW website or contact the seller directly through your purchase platform. Keep your proof of purchase for any warranty claims.

Figure 8.1: The HONEYSEW 124-65100 2-Needle Clamp shown in its retail packaging.


