
Introduction
This manual provides detailed instructions for the installation, operation, and maintenance of the fushionsea Wireless Motor Remote Control Switch. This 2-channel RF relay system operates on AC 85V-250V and 433MHz frequency, designed for controlling motors in applications such as roller shutters, electric curtains, and other devices requiring forward/reverse control. It offers stable and reliable performance with easy setup.
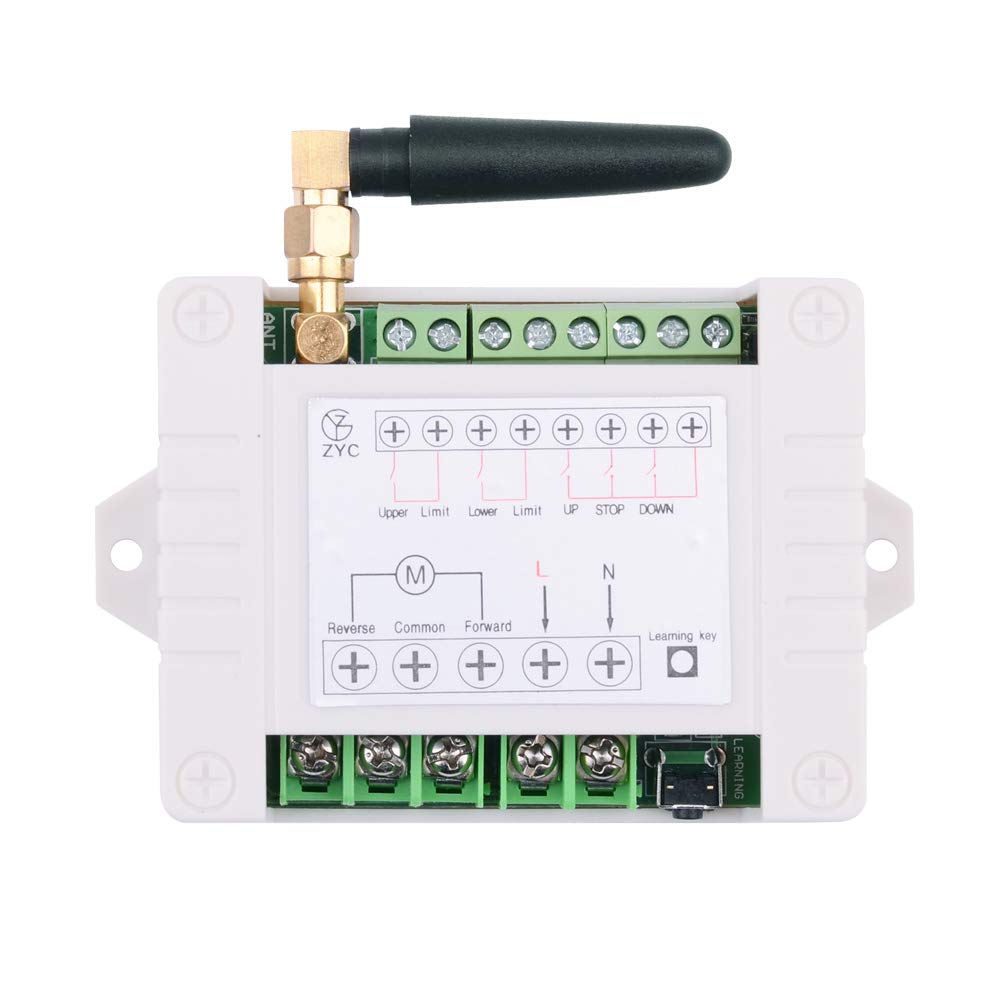
Figure 1: The fushionsea Wireless Motor Remote Control Switch receiver unit, enclosed in its protective casing, showing the antenna and terminal blocks.
Specifications
| Working Voltage | AC 85V-250V |
| Working Frequency | 433MHz |
| Max Load | 10A Relay (Recommended load less than 5A or 500W) |
| PCB Size | 75mm x 58mm x 15mm |
| Case Size | 95mm x 62mm x 29mm |
| Control Method | Wireless Remote Control (RF) |
| Output State | Momentary / Latched (Adjustable via Jumper) |
| Range | 20-100 meters (unobstructed) |
| Features | Limit switch and external button wiring ports, Power-off state retention (OFF) |
Package Contents
- 1 x Receiver Unit
- 2 x Transmitter Remote Controls (Batteries included)
Installation and Wiring
Before installation, ensure the power supply is disconnected to prevent electrical shock. The receiver unit is designed for AC 85V-250V input and provides an output voltage equal to the input. It includes dedicated ports for limit switches and external control buttons.
Important: The maximum load for the relay is 10A, but it is strongly recommended to keep the load below 5A or 500W to ensure optimal performance and longevity of the device.

Figure 2: Wiring diagram illustrating connections for power input, motor, limit switches, and external control buttons.
Wiring Instructions:
- Power Input (AC 85V-250V): Connect the Live (L) and Neutral (N) wires of your AC power supply to the corresponding 'L' and 'N' terminals on the receiver.
- Motor Connection: Connect your motor's power wires to the 'M' terminals. The diagram shows connections for forward and reverse motor operation.
- Limit Switches: Connect 'Upper Limit' and 'Lower Limit' switches to their designated terminals. These are typically used to automatically stop the motor when it reaches its maximum or minimum position.
- External Buttons: Connect 'UP', 'DOWN', and 'STOP' external buttons to their respective terminals for manual control.
Ensure all connections are secure and properly insulated. Incorrect wiring can damage the device or connected equipment.
Operating Modes
The receiver supports two operating modes: Momentary and Latched. The mode is selected by adjusting a jumper on the receiver board. The unit is typically shipped in Latched mode.
1. Momentary Mode
- Jumper Setting: Place the jumper on 1 Pin.
- Operation:
- Press and hold the "Up" button: Motor moves forward. Release the button: Motor stops.
- Press and hold the "Down" button: Motor moves reverse. Release the button: Motor stops.
2. Latched Mode
- Jumper Setting: Place the jumper on "L&S".
- Operation:
- Press the "Up" button: Motor moves forward. Press the "Stop" button: Motor stops.
- Press the "Down" button: Motor moves reverse. Press the "Stop" button: Motor stops.
- Note: In Latched mode, a 0.5-second time delay is implemented for forward and reverse transitions as a protection function.
Remote Control Pairing (Learning Code)
The transmitter and receiver units are pre-paired and tested before shipment. If you need to pair additional remotes or re-pair existing ones, follow these steps:
- Pairing "Up" (Forward) Button:
- Press the learning button on the receiver once. The learning indicator light will flash slowly.
- Immediately press the "Up" button on the transmitter. The learning indicator will flash 5 times and then turn off. This indicates successful pairing for the "Up" function.
- Pairing "Down" (Reverse) Button:
- Press the learning button on the receiver twice. The learning indicator light will flash slowly.
- Immediately press the "Down" button on the transmitter. The learning indicator will flash 5 times and then turn off. This indicates successful pairing for the "Down" function.
- Pairing "Stop" Button (for Latched Mode):
- If the jumper is set for Latched mode, the third button on the transmitter is typically defaulted for "Stop". No specific pairing step is usually required for this if the other two are paired.
Clearing Remote Codes
To clear all paired transmitter codes from the receiver's memory:
- Press and hold the learning button on the receiver for approximately 5 seconds.
- The learning indicator light will flash 3 times and then turn off. This confirms that all previously stored transmitter codes have been cleared.
Safety Precautions
- Always disconnect power before performing any installation, wiring, or maintenance.
- Do not exceed the recommended load of 5A or 500W for the relay, even though the maximum rating is 10A. Overloading can lead to device failure or fire hazards.
- Ensure proper insulation for all electrical connections.
- Install the receiver in a dry, protected location, away from direct moisture or extreme temperatures.
- In case of power interruption, the device will remain in the OFF state. Manual activation will be required once power is restored.
- This device uses radio frequency (RF) signals. While designed for interference resistance, extreme RF noise environments may affect performance.
Troubleshooting
- Device not responding:
- Check power supply to the receiver.
- Ensure remote control batteries are functional.
- Verify that the remote control is paired correctly (refer to "Remote Control Pairing" section).
- Check for any obstructions or excessive distance between the remote and receiver.
- Motor not moving:
- Confirm motor wiring is correct and secure.
- Ensure the motor itself is functional.
- Check if limit switches are engaged, preventing movement in a certain direction.
- Verify the operating mode (Momentary/Latched) is set as desired.
- Intermittent operation:
- Reduce distance between remote and receiver.
- Check for strong sources of electromagnetic interference nearby.
- Ensure the antenna on the receiver is properly connected and positioned.
Maintenance
The fushionsea Wireless Motor Remote Control Switch is designed for low maintenance. Keep the unit clean and free from dust and debris. Periodically check wiring connections for tightness and signs of wear. Replace remote control batteries as needed.
Warranty and Support
For warranty information or technical support, please refer to the product packaging or contact your retailer. Keep your purchase receipt for warranty claims.