Introduction
The DoHonest V29 Wireless Truck Backup Camera System provides enhanced visibility and safety for various vehicles, including trucks, SUVs, RVs, and trailers. Featuring a high-definition 7-inch monitor with split-screen capability, this system delivers clear, real-time visuals, making parking, reversing, and trailer hookups significantly easier and safer. Its robust design ensures reliable performance in diverse weather conditions.
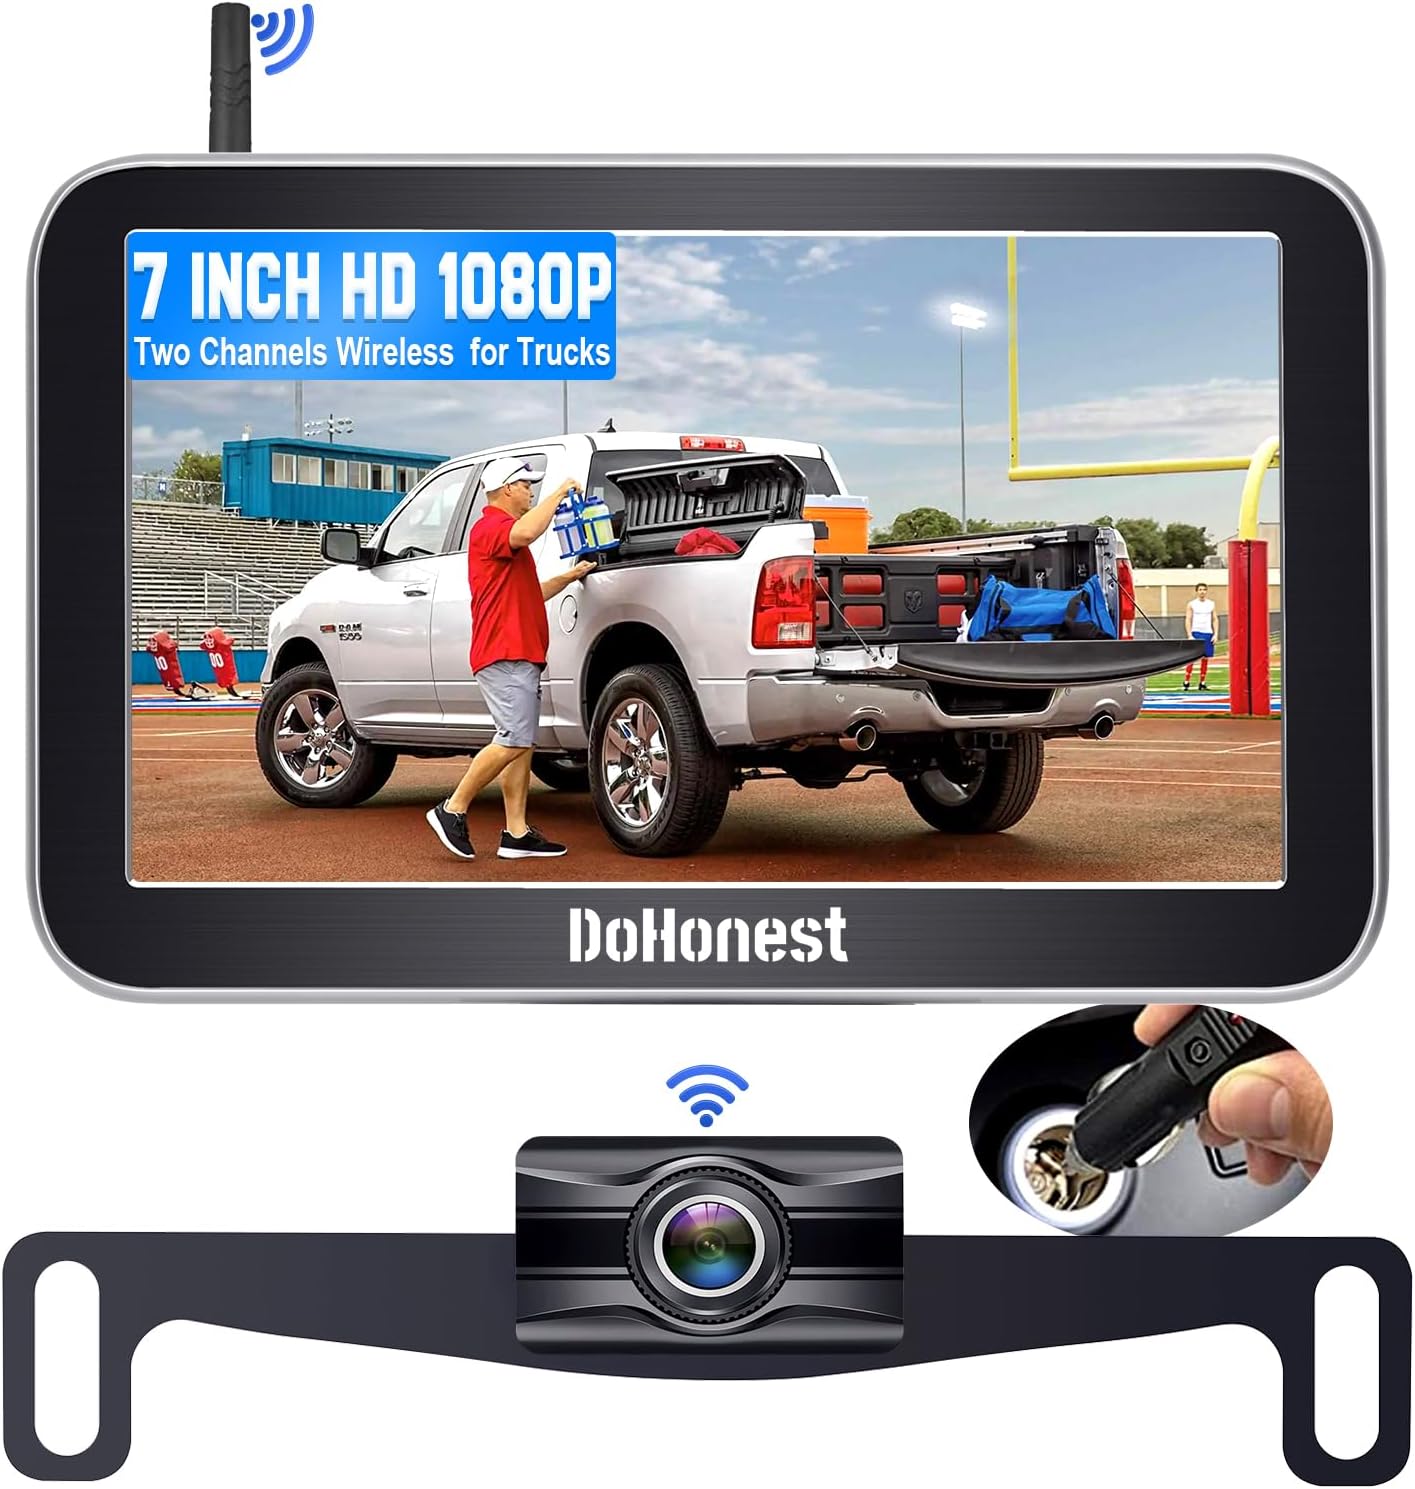
Figure 1: DoHonest V29 Wireless Truck Backup Camera System components.
Safety Information
Please read all instructions carefully before installation and operation. Failure to follow these guidelines may result in property damage or personal injury.
- Always ensure the system is securely mounted and all connections are tight before driving.
- This system is an aid to safe driving and should not replace careful observation and judgment. Always check your surroundings manually before reversing.
- Do not attempt to repair or modify the system yourself. Contact qualified personnel for service.
- Keep cables away from hot or moving parts of the vehicle.
Package Contents
Verify that all items are present in your package:

Figure 2: Complete Package and Accessories.
- 7-Inch HD Monitor
- Wireless Backup Camera (License Plate Mount)
- Monitor Mounting Bracket (Suction Cup/Dashboard)
- Cigarette Lighter Power Adapter
- Antenna
- Power Cable for Camera
- Extension Cable (if needed)
- Installation Accessories (T-taps, zip ties, etc.)
- User Manual
Setup and Installation
The DoHonest V29 system is designed for easy DIY installation, typically taking 20-30 minutes.
1. Monitor Installation
- Choose Mounting Location: The monitor can be mounted on the dashboard or windshield using the provided bracket. Select a location that does not obstruct your view or interfere with airbags.

Figure 3: Monitor mounting options and adjustable features.
- Attach Monitor to Bracket: Securely attach the 7-inch monitor to the mounting bracket.
- Mount Bracket: Clean the chosen surface (dashboard or windshield) thoroughly. Press the suction cup firmly onto the surface and engage the locking mechanism to secure it.
- Connect Power: Plug the monitor's power cable into the cigarette lighter adapter. Insert the adapter into your vehicle's 12V power outlet. The monitor can be turned on/off using the button on the adapter.

Figure 4: Monitor power connection and camera wiring overview.
2. Camera Installation
The camera is designed to be installed on the license plate frame, requiring no drilling into your vehicle's body.
- Mount Camera: Secure the wireless backup camera to your vehicle's rear license plate using the existing license plate screws. Ensure the camera lens has a clear, unobstructed view.

Figure 5: License plate camera mounting and vehicle compatibility.
- Wire Camera to Power: Connect the camera's power wire to your vehicle's reverse light circuit. This allows the camera to activate automatically when the vehicle is put into reverse. Use the provided T-taps for a secure connection. Ensure correct polarity (positive to positive, negative to negative).
Video 1: Official DoHonest V29 Backup Camera Wireless Installation Guide. This video demonstrates how to mount the monitor on the windshield and connect it to the cigarette lighter. It also shows the wiring process for the camera to the vehicle's reverse lights, and the resulting clear 1080P image on the monitor, including split-screen view and adjustable guidelines.
- Route Cables: Carefully route all cables to prevent pinching or damage. Secure them with zip ties.
Operating Instructions
1. Power On/Off
The monitor automatically powers on when the vehicle is put into reverse (if wired to reverse lights) or when the cigarette lighter adapter's button is pressed (if continuously powered).
2. Split-Screen Display
The 7-inch monitor supports dual-channel display, allowing you to view two camera feeds simultaneously. This is particularly useful for monitoring both a rear camera and a trailer camera, or for comprehensive rearview coverage.

Figure 6: HD 1080P monitor with CH1 and CH2 split-screen channels.

Figure 7: Split-screen functionality for multiple camera views.
3. Adjustable Parking Guidelines
The system features adjustable parking guidelines that can be customized to fit your vehicle and parking preferences. You can turn them on/off, adjust their height/width, and move them left or right for precise guidance.

Figure 8: Customizable parking guidelines.

Figure 9: Guidelines On/Off feature for parking assistance.
4. Image Adjustment and Flip
You can adjust the brightness, contrast, and saturation of the display. The system also supports image flip functionality, allowing you to switch between normal, mirror, inverted front, and inverted mirror views as needed.

Figure 10: Image flip options for versatile viewing.
5. Night Vision and Wide View
Equipped with advanced infrared technology, the camera provides superior night vision for clear visuals in low-light conditions. The 150° wide viewing angle minimizes blind spots, enhancing overall safety.

Figure 11: Key features including Super Night Vision and 150° Wide View.

Figure 12: Enhanced night vision for safe driving in the dark.
Maintenance
- Cleaning: Regularly clean the camera lens and monitor screen with a soft, damp cloth. Avoid abrasive cleaners or solvents.
- Connections: Periodically check all cable connections to ensure they are secure and free from corrosion.
- Weather Resistance: The camera is IP69 waterproof and designed to withstand extreme temperatures (-20°F to 176°F). However, avoid prolonged submersion or direct high-pressure water jets.

Figure 13: Durability features: temperature resistance and IP69K waterproof rating.
Troubleshooting
| Problem | Possible Cause | Solution |
|---|---|---|
| No image on monitor |
|
|
| Image flickering or unstable |
|
|
| Parking lines incorrect |
|
|
Specifications
| Feature | Detail |
|---|---|
| Model Number | V29 |
| Screen Size | 7 Inches |
| Display Technology | LCD |
| Video Capture Resolution | 1080p, 720p |
| Viewing Angle | 150° Wide Angle |
| Waterproof Rating | IP69 |
| Operating Temperature | -20°F to 176°F (-28°C to 80°C) |
| Voltage | 12 Volts (Supports 12-24V pulsed voltage) |
| Wireless Frequency | Upgraded 2.4G |
| Optical Sensor Technology | CCD |
| Item Weight | 1.59 pounds |
| Product Dimensions | 7.09 x 0.79 x 4.72 inches |
Warranty and Support
DoHonest provides a 24-month replacement quality assurance for the V29 Wireless Truck Backup Camera System. For technical support, warranty claims, or any questions regarding your product, please contact DoHonest customer service through the retailer's platform or visit the official DoHonest website.
For more information and support, visit the DoHonest Store on Amazon.


