
Introduction
This manual provides detailed instructions for the setup, operation, and maintenance of your ASUS ROG Strix Helios GX601 RGB Mid-Tower Computer Case. Please read this manual thoroughly before beginning installation to ensure proper assembly and optimal performance.
Product Overview
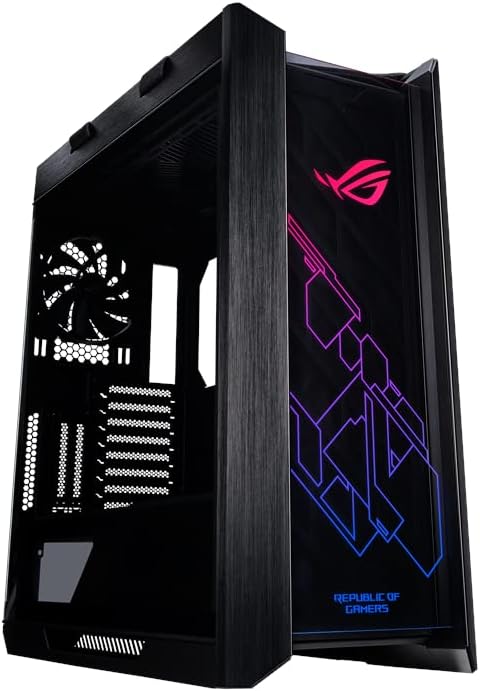
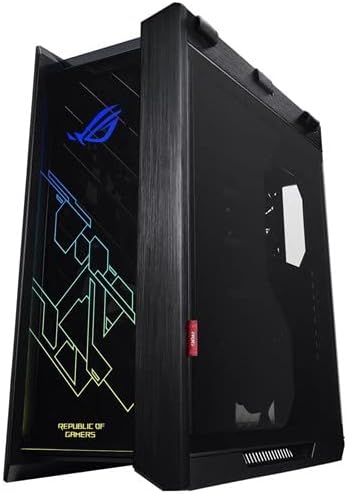
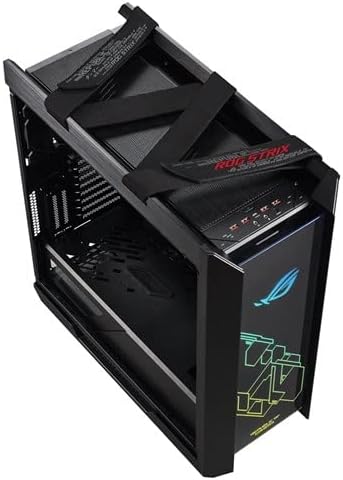
The ASUS ROG Strix Helios GX601 is a premium mid-tower chassis designed for high-performance PC builds. It features robust construction, extensive cooling options, and advanced cable management solutions.
Key Features:
- Mid-tower design supporting EATX motherboards.
- Durable metal chassis with 4mm-thick smoked, tempered-glass side panels.
- Three easy-to-clean dust filters for enhanced system longevity.
- Ample space for up to 9 storage drives.
- Premium cable management with a translucent rear panel and adjustable multi-function cover.
- Integrated GPU support brackets.
- Pre-routed chassis cables for simplified assembly.
- Built-in fan hub and four pre-installed 140mm fans.
- Support for up to seven optional fan-mounting points.
- Custom liquid cooling readiness, including a water pump/reservoir mounting bracket.
- Radiator support up to 420mm in length and 90mm thick (with fans).
- Flexible graphics card mounting options: up to 2x vertically mounted or 3x horizontally mounted using 7 expansion slots.
Visual Guide:



Product Video:
Setup and Installation
Follow these steps to install your components into the ASUS ROG Strix Helios GX601 case.
1. Preparing the Case:
- Carefully remove the tempered glass side panels. These are typically secured with thumb screws or a latch mechanism. Refer to the quick start guide for specific instructions.
- Lay the case on its side on a flat, stable surface to facilitate component installation.
2. Motherboard Installation:
- Ensure the correct standoffs are installed for your motherboard form factor (EATX, ATX, Micro ATX, Mini ITX). The GX601 supports EATX motherboards.
- Gently place your motherboard onto the standoffs, aligning the screw holes.
- Secure the motherboard with the provided screws.
3. Power Supply Unit (PSU) Installation:
- The case supports bottom-mount PSUs. Slide your PSU into the designated compartment at the bottom rear of the case.
- Secure the PSU with screws from the rear of the case.
- Connect the necessary modular cables to your PSU before securing it fully, if applicable, to simplify cable management.
4. Graphics Card (GPU) Installation:
- The GX601 offers flexible GPU mounting. For horizontal mounting, insert the GPU into the appropriate PCIe slot on your motherboard and secure it with the expansion slot screws.
- For vertical mounting, use the dedicated vertical GPU mount (sold separately or included with specific bundles) and a PCIe riser cable.
- Utilize the integrated GPU support brackets to prevent sag, especially for larger graphics cards.
5. Storage Drive Installation:
- The case provides space for up to 9 storage drives. Locate the drive bays/mounts, typically behind the motherboard tray or in the PSU shroud area.
- Install your 2.5-inch SSDs or 3.5-inch HDDs into the appropriate trays or mounts and secure them.
6. Cooling System Installation:
- The case comes with four pre-installed 140mm fans. Connect these to the built-in fan hub or directly to your motherboard fan headers.
- For additional fans, the case supports up to seven optional fan-mounting points.
- For liquid cooling, install your radiator (up to 420mm) and water pump/reservoir using the provided mounting points.
7. Cable Management:
- Utilize the translucent rear panel and adjustable multi-function cover to route and hide cables effectively.
- Connect all power cables from the PSU to your components (motherboard, GPU, drives, fans).
- Connect front panel I/O cables (USB, audio, power/reset buttons) to the corresponding headers on your motherboard.
Operating Instructions
Once your system is fully assembled, you can begin operating your ASUS ROG Strix Helios GX601.
1. Front Panel Controls:
- Power Button: Press to turn on/off your system.
- Reset Button: Press to restart your system.
- USB 3.1 Ports: Connect high-speed USB devices.
- USB 2.0 Ports: Connect standard USB devices.
- Audio Jacks: Connect headphones and microphones.
2. RGB Lighting (Aura Sync):
- The case features integrated RGB lighting compatible with ASUS Aura Sync.
- Connect the case's RGB header to a compatible motherboard header.
- Use the ASUS Aura Sync software (downloadable from the ASUS website) to customize lighting effects, colors, and synchronize with other Aura Sync-compatible components.
Maintenance
Regular maintenance ensures the longevity and optimal performance of your computer case.
1. Dust Filter Cleaning:
- The ASUS ROG Strix Helios GX601 includes three easy-to-clean dust filters (typically located at the front, top, and bottom).
- Periodically remove these filters and clean them using compressed air or by rinsing with water. Ensure they are completely dry before re-installing.
2. Tempered Glass Care:
- Clean the tempered glass panels with a soft, lint-free cloth and a non-abrasive glass cleaner.
- Avoid using harsh chemicals or abrasive materials that could scratch or damage the glass.
3. General Cleaning:
- Use compressed air to remove dust from internal components and fan blades.
- Ensure the system is powered off and unplugged before performing any internal cleaning.
Troubleshooting
This section addresses common issues you might encounter with your computer case.
1. System Not Powering On:
- Check all power connections from the PSU to the motherboard and components.
- Ensure the front panel power button cable is correctly connected to the motherboard's front panel header.
- Verify the PSU switch is in the 'ON' position and the power cable is securely plugged into both the PSU and the wall outlet.
2. Overheating Issues:
- Ensure all case fans are spinning correctly and are oriented for optimal airflow (intake from front/bottom, exhaust from rear/top).
- Clean all dust filters and internal components to prevent dust buildup restricting airflow.
- Verify that CPU and GPU coolers are properly seated and functioning.
3. RGB Lighting Not Working:
- Check that the case's RGB cable is securely connected to a compatible RGB header on your motherboard.
- Ensure ASUS Aura Sync software is installed and updated.
- Verify that the RGB components are enabled and configured within the software.
Specifications
| Feature | Detail |
|---|---|
| Brand | ASUS |
| Model Name | GX601 ROG STRIX HELIOS CASE/BK/AL/WITH HANDLE |
| Item Model Number | 90DC0020-B39000 |
| Case Type | Mid Tower |
| Motherboard Compatibility | Extended ATX |
| Material | Alloy Steel, Aluminum |
| Color | Helios GX601|Black |
| Item Weight | 39.7 pounds |
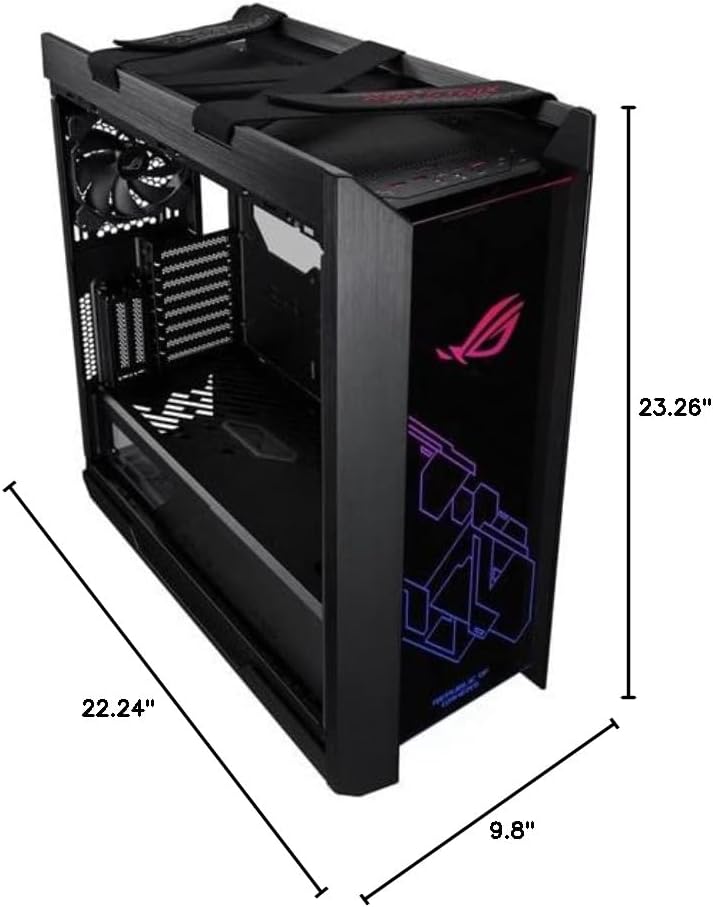
| Product Dimensions (LxWxH) | 22.24 x 9.8 x 23.26 inches |
| Number of USB 3.0 Ports | 3 |
| Number of USB 2.0 Ports | 2 |
| Cooling Method | Air |
| Fan Size | 140 Millimeters |
| Power Supply Mounting Type | Bottom Mount |
Warranty and Support
Your ASUS ROG Strix Helios GX601 computer case is covered by a manufacturer's warranty. For detailed warranty information, please refer to the warranty card included with your product or visit the official ASUS support website.
Contacting Support:
- For technical assistance, troubleshooting, or service inquiries, please visit the ASUS Support Website.
- You may also find additional resources, FAQs, and driver downloads on the support page.