1. Introduction
Thank you for choosing the HOTECHE Electric Drain Cleaner P802203A. This manual provides essential information for the safe and effective operation, maintenance, and troubleshooting of your new drain cleaner. Please read this manual thoroughly before initial use and retain it for future reference. This tool is designed for clearing clogs in drain lines ranging from 3/4 inch to 1-1/2 inches in diameter, utilizing a flexible cable with a bulb auger.
2. Safety Information
WARNING: Read all safety warnings, instructions, illustrations, and specifications provided with this power tool. Failure to follow all instructions listed below may result in electric shock, fire, and/or serious injury.
- Always wear appropriate personal protective equipment, including safety glasses, gloves, and non-slip footwear.
- Ensure the work area is well-lit and free from obstructions. Keep children and bystanders away while operating the tool.
- Do not operate the drain cleaner in wet or damp conditions, or in the presence of flammable liquids or gases.
- Always unplug the tool from the power source before making any adjustments, changing accessories, or storing it.
- Inspect the power cord and plug for damage before each use. Do not use if damaged.
- Never force the cable. Allow the motor to do the work. Excessive force can damage the cable or the drain.
- Be aware of rotating parts. Keep hands, hair, and loose clothing away from the rotating cable and drum.
- Do not use the tool if the switch does not turn it on and off. Any tool that cannot be controlled with the switch is dangerous and must be repaired.
- Use only replacement parts specified by the manufacturer.
3. Product Overview
The HOTECHE Electric Drain Cleaner P802203A is a compact and portable tool designed for clearing common household drain clogs. It features an auto-feed mechanism, an LED work light, and a flexible cable with a bulb auger.
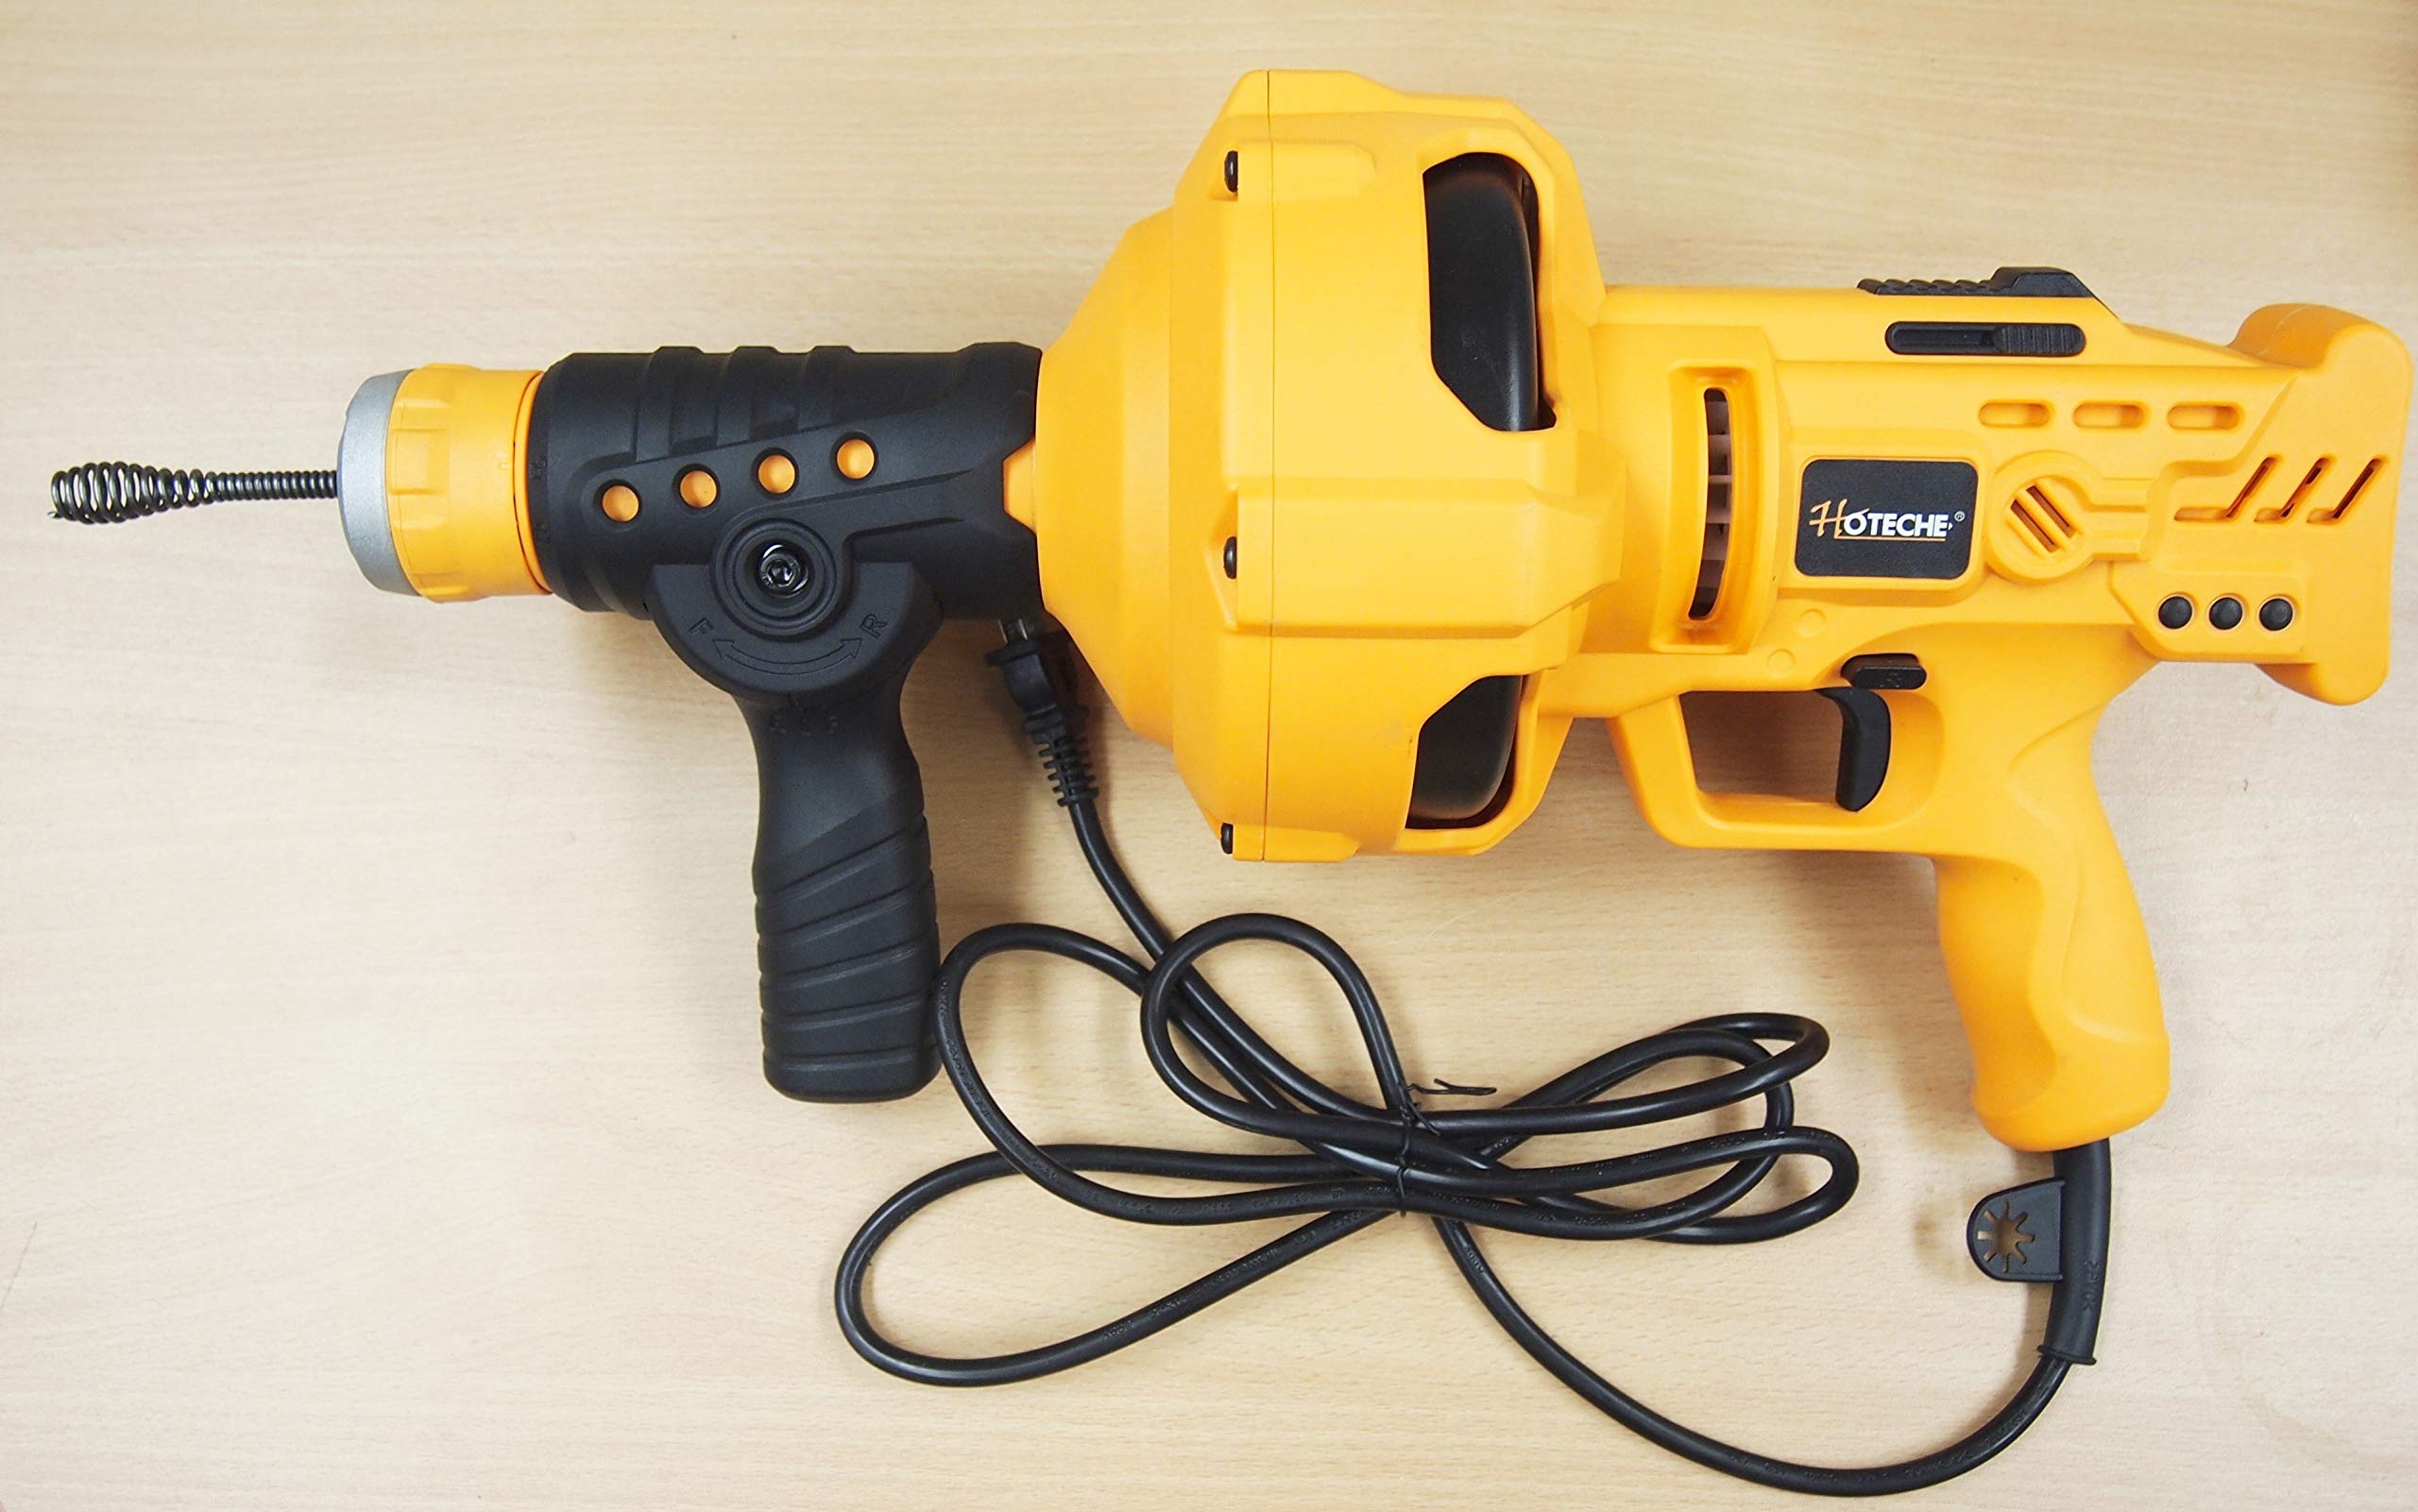
Figure 3.1: Overall view of the HOTECHE Electric Drain Cleaner P802203A. This image displays the complete drain cleaner unit, including its orange and black housing, power cord, and a measuring tape indicating its approximate length of 18 inches. The tool features an ergonomic handle and a fully enclosed drum.

Figure 3.2: Close-up of the flexible cable and bulb auger. This image shows the front section of the drain cleaner, highlighting the flexible 1/4-inch cable extending from the unit, terminating in a bulb-shaped auger head designed to grip and clear clogs.

Figure 3.3: Auto-feed mechanism and ergonomic handle. This view focuses on the handle and the control knob for the auto-feed mechanism, which allows for easy switching between forward and reverse cable directions. The handle is designed for comfortable grip during operation.

Figure 3.4: Top view of the drain cleaner. This image provides a top-down perspective of the tool, showcasing the main body, the HOTECHE branding, and the trigger mechanism for variable speed control.

Figure 3.5: Side view of the drain cleaner. This image shows a side profile of the drain cleaner, emphasizing its compact design and the integrated power cord. The fully enclosed drum is visible, which helps contain the cable and prevent water buildup.
Key Components:
- Ergonomic Handle: For comfortable and secure grip.
- Variable Speed Trigger: Controls the rotation speed of the cable (0-560 RPM).
- Forward/Reverse Mechanism: Lever to switch cable direction.
- Auto-Feed Mechanism: Automatically feeds and retracts the cable.
- LED Work Light: Illuminates the work area.
- Fully Enclosed Drum: Contains the 1/4 inch x 23 ft. flexible cable.
- Bulb Auger: Cable attachment for clearing clogs.
- Rear Drain Port: Prevents water buildup in the drum.
4. Setup
- Inspect the Unit: Before each use, visually inspect the drain cleaner for any signs of damage, especially the power cord, plug, and cable. Ensure all components are securely fastened.
- Prepare the Work Area: Clear the area around the drain of any obstacles. Ensure adequate lighting. Place towels or a bucket to catch any water or debris that may come out of the drain.
- Connect to Power: Plug the drain cleaner into a standard 110-120V/60Hz grounded electrical outlet. Ensure the outlet is protected by a Ground Fault Circuit Interrupter (GFCI) for added safety, especially in wet environments.
- Position the Tool: Place the drain cleaner as close to the drain opening as possible.
5. Operating Instructions
Follow these steps for safe and effective drain cleaning:
- Feed the Cable:
- Set the forward/reverse mechanism to the 'Forward' (F) position.
- Loosen the twist-to-lock chuck by turning it counter-clockwise.
- Manually feed the cable into the drain opening until it meets resistance.
- Tighten the twist-to-lock chuck by turning it clockwise to secure the cable.
- Engage the Auto-Feed:
- Press the auto-feed lever to engage the mechanism.
- Gently squeeze the variable speed trigger to start the cable rotating and feeding into the drain.
- Maintain a steady, slow pace. Do not force the cable. Allow the rotating auger to work through the clog.
- If the cable stops or binds, release the trigger immediately.
- Clearing the Clog:
- Once the auger reaches the clog, apply gentle pressure while the cable rotates. The auger will break up or hook onto the obstruction.
- If the clog is stubborn, you may need to retract the cable slightly and then re-engage, repeating the process.
- Retracting the Cable:
- Once the clog is cleared (water begins to drain), release the trigger.
- Set the forward/reverse mechanism to the 'Reverse' (R) position.
- Engage the auto-feed lever and gently squeeze the trigger to retract the cable from the drain.
- As the cable retracts, guide it back into the drum.
- Final Steps:
- Once the cable is fully retracted, release the trigger and unplug the tool from the power source.
- Run water down the drain to flush away any remaining debris.
6. Maintenance
Regular maintenance ensures the longevity and optimal performance of your drain cleaner.
- Cleaning: After each use, wipe down the exterior of the tool with a damp cloth. Clean any debris from the cable and the drum. The rear drain port allows for water to exit the drum, preventing buildup.
- Cable Inspection: Regularly inspect the flexible cable for kinks, fraying, or damage. A damaged cable should be replaced immediately to prevent injury or further damage to the tool.
- Storage: Store the drain cleaner in a dry, secure location, out of reach of children. Ensure the cable is fully retracted into the drum before storage.
- Carbon Brushes: The motor uses carbon brushes. If the tool experiences reduced power or intermittent operation, the carbon brushes may need inspection or replacement. Refer to the included carbon brush replacement instructions or consult a qualified service technician.
7. Troubleshooting
| Problem | Possible Cause | Solution |
|---|---|---|
| Tool does not turn on. | No power supply; Damaged power cord/plug; Faulty switch. | Check power outlet and circuit breaker. Inspect cord/plug for damage. If damaged, do not use. Contact service. |
| Cable does not feed or retract. | Chuck not tightened/loosened; Auto-feed lever not engaged; Cable kinked or jammed. | Ensure chuck is correctly tightened for feeding or loosened for manual adjustment. Engage auto-feed lever. Inspect cable for obstructions. |
| Cable gets stuck in drain. | Severe clog; Cable kinked; Incorrect operation. | Release trigger immediately. Try reversing the cable slowly. If still stuck, do not force. Consider professional help. |
| Reduced power or intermittent operation. | Worn carbon brushes; Motor issue. | Inspect carbon brushes and replace if worn. If problem persists, contact service. |
8. Specifications
| Feature | Specification |
|---|---|
| Model Number | P802203A |
| Voltage | 110-120 V / 60 Hz |
| Input Power | 260W (2.5 amps) |
| No Load Speed | 0-560 RPM |
| Flexible Shaft Cable | 1/4 inch (D) x 23 ft. (L) |
| Drain Line Capacity | 3/4 inch to 1-1/2 inches |
| Power Cord Length | 77 inches (6 ft. 5 inches), 18AWGx2C, UL/CUL |
| Net Weight | 9 Lbs |
| Overall Size | 18 x 10 x 7 inches |
9. Warranty and Support
For warranty information, please refer to the warranty card included with your product packaging or contact HOTECHE customer support. If you require assistance with operation, maintenance, or troubleshooting beyond the scope of this manual, please contact our customer service department. Keep your purchase receipt as proof of purchase.
Customer Support: Please visit the official HOTECHE website or contact your retailer for support information.

