

Introduction
This manual provides detailed instructions for the safe installation, operation, and maintenance of your Kichler Basics Pro Select 52" Convertible Ceiling Fan (Model: 330017SNB). Please read all instructions carefully before beginning installation and retain this manual for future reference.
The Kichler Basics Pro Select ceiling fan features a 52-inch blade span, a Satin Natural Bronze finish, and an integrated LED light kit with an etched-glass bowl shade. It is designed for indoor use and offers both fan and light control via pull chains.
Safety Information
WARNING: To reduce the risk of fire, electric shock, or personal injury, always follow these basic precautions:
- Read all instructions before installing the fan.
- Ensure the installation site is suitable for a ceiling fan and can support the fan's weight (approximately 19.7 lbs).
- All wiring must be in accordance with national and local electrical codes. If you are unfamiliar with wiring, consult a qualified electrician.
- Turn off power at the circuit breaker or fuse box before beginning installation to prevent electrical shock.
- Do not operate the fan with damaged power cords or plugs.
- Do not insert objects into the fan blades while the fan is operating.
- Ensure the fan is securely mounted to a ceiling joist or a suitable fan-rated outlet box.
- This fan is designed for indoor use only.
Package Contents
Verify that all components listed below are included in your package before beginning installation. If any parts are missing or damaged, contact Kichler customer support.
- Fan Motor Assembly
- Fan Blades (5)
- Blade Brackets (5)
- Downrod (4-inch included)
- Canopy and Mounting Bracket
- Light Kit Assembly
- Etched-Glass Bowl Shade
- LED Bulbs (3, GU10 base, 4 watts each)
- Hardware Pack (screws, washers, wire nuts)
- Pull Chains (2, for fan and light)
Setup and Installation
Important: Before starting, ensure power is OFF at the circuit breaker.
1. Mounting the Fan
- Attach the mounting bracket to the ceiling outlet box. Ensure the outlet box is securely fastened to the building structure and can support the fan's weight.
- Insert the downrod through the canopy and then into the fan motor assembly. Secure with the provided pin and screw.
- Carefully lift the fan assembly and hang it on the mounting bracket hook.
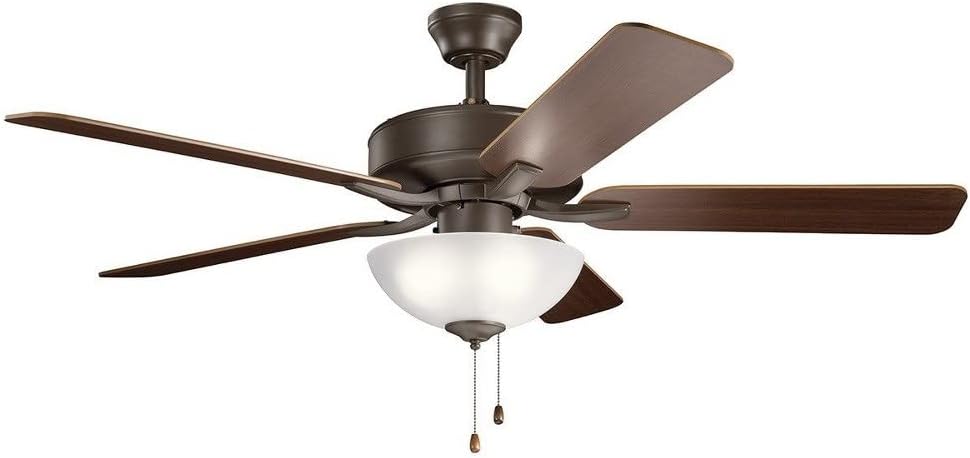
Image: View of the fan's light kit and pull chains, relevant for light kit installation and operation.
2. Electrical Wiring
- Connect the fan's electrical wires to the household wiring according to the wiring diagram provided in the full instruction manual (not included here for brevity). Typically, this involves connecting ground to ground, neutral to neutral, and live to live.
- Secure all wire connections with the provided wire nuts.
- Tuck the wires neatly into the outlet box.
3. Attaching Fan Blades
- Attach each blade to a blade bracket using the screws provided. Ensure they are securely tightened.
- Attach the blade assemblies to the fan motor housing.
4. Installing the Light Kit
- Connect the light kit wires to the corresponding wires from the fan motor assembly.
- Secure the light kit assembly to the bottom of the fan motor housing.
- Install the three GU10 LED bulbs into the sockets.
- Attach the etched-glass bowl shade by twisting it into place or securing it with the retaining screws, depending on the design.
Operation
Your Kichler Basics Pro Select ceiling fan is controlled by two pull chains located at the bottom of the light kit.
- Fan Speed Control: One pull chain controls the fan speed. Pull the chain repeatedly to cycle through speeds: High, Medium, Low, Off.
- Light Control: The other pull chain controls the integrated LED light. Pull the chain to turn the light On or Off.
Ensure the pull chains are freely accessible and do not interfere with the fan blades.
Maintenance
Regular maintenance will ensure the longevity and optimal performance of your ceiling fan.
- Cleaning: To clean the fan, wipe with a soft, damp cloth. Do not use abrasive cleaners or solvents as they may damage the finish or electrical components. Ensure power is off before cleaning.
- Bulb Replacement: The fan uses three GU10 LED bulbs. To replace, ensure power is off, allow bulbs to cool, then carefully remove the glass shade and replace the bulbs. Use only GU10 LED bulbs of the specified wattage (4 watts per bulb).
- Tightening Screws: Periodically check all screws on the fan motor housing and blade attachments to ensure they are tight. Loose screws can cause noise or wobble.
Troubleshooting
If you experience issues with your ceiling fan, refer to the common problems and solutions below. If the problem persists, contact Kichler customer support.
| Problem | Possible Cause | Solution |
|---|---|---|
| Fan does not start | No power to the fan; Loose wire connections; Motor issue. | Check circuit breaker/fuse; Verify all wire connections are secure; Contact customer support if motor is faulty. |
| Fan wobbles | Loose blade screws; Unbalanced blades; Loose mounting bracket. | Tighten all blade screws; Check blade balance (use a balancing kit if necessary); Ensure mounting bracket is secure. |
| Light does not work | Bulbs are faulty; Loose wire connection in light kit; Light pull chain is off. | Replace bulbs; Check light kit wiring; Pull the light chain to turn on. |
| Noisy operation | Loose screws; Motor hum; Blades hitting an obstruction. | Tighten all screws; Ensure no wires are rubbing; Check for obstructions near blades. |
Specifications
| Brand | Kichler |
| Model Number | 330017SNB |
| Style | Basics Pro Select |
| Finish Color | Satin Natural Bronze |
| Blade Span | 52 inches |
| Number of Blades | 5 |
| Material | Alloy Steel (Fan Body), Glass (Shade) |
| Light Source Type | LED |
| Wattage | 4 watts (per bulb) |
| Voltage | 120 Volts |
| Control Method | Pull Chain |
| Indoor/Outdoor Usage | Indoor |
| Item Weight | 19.71 pounds |
| Product Dimensions | 52 x 52 x 17.5 inches |
| Air Flow Capacity | 4200 Cubic Feet Per Minute |
Warranty Information
All Kichler products purchased have a 30-day replacement parts policy to ensure a fully working item. All products are covered under a 1-year warranty when purchased on Amazon. The warranty period begins on the day the product is originally shipped. The warranty covers all of the items and conditions identified in the original manufacturer's warranty.
Items specifically not covered by the warranty include loss and theft, water damage, customer abuse, and finish deterioration due to UV or coastal exposure.
Customer Support
For further assistance, missing parts, or warranty claims, please contact Kichler customer support. You can find more information and contact details by visiting the official Kichler store on Amazon: