
GIGABYTE X570 AORUS ELITE
Contents
GIGABYTE X570 AORUS Elite Gaming Motherboard User Manual
Model: X570 AORUS ELITE
Introduction
This manual provides comprehensive instructions for the installation, operation, and maintenance of your GIGABYTE X570 AORUS Elite Gaming Motherboard. This motherboard is designed to support AMD 3rd Gen Ryzen and 2nd Gen Ryzen processors, featuring a robust 12+2 phases digital VRM, PCIe 4.0 support, dual NVMe M.2 slots with thermal guards, and advanced audio solutions. Please read this manual thoroughly before proceeding with installation.
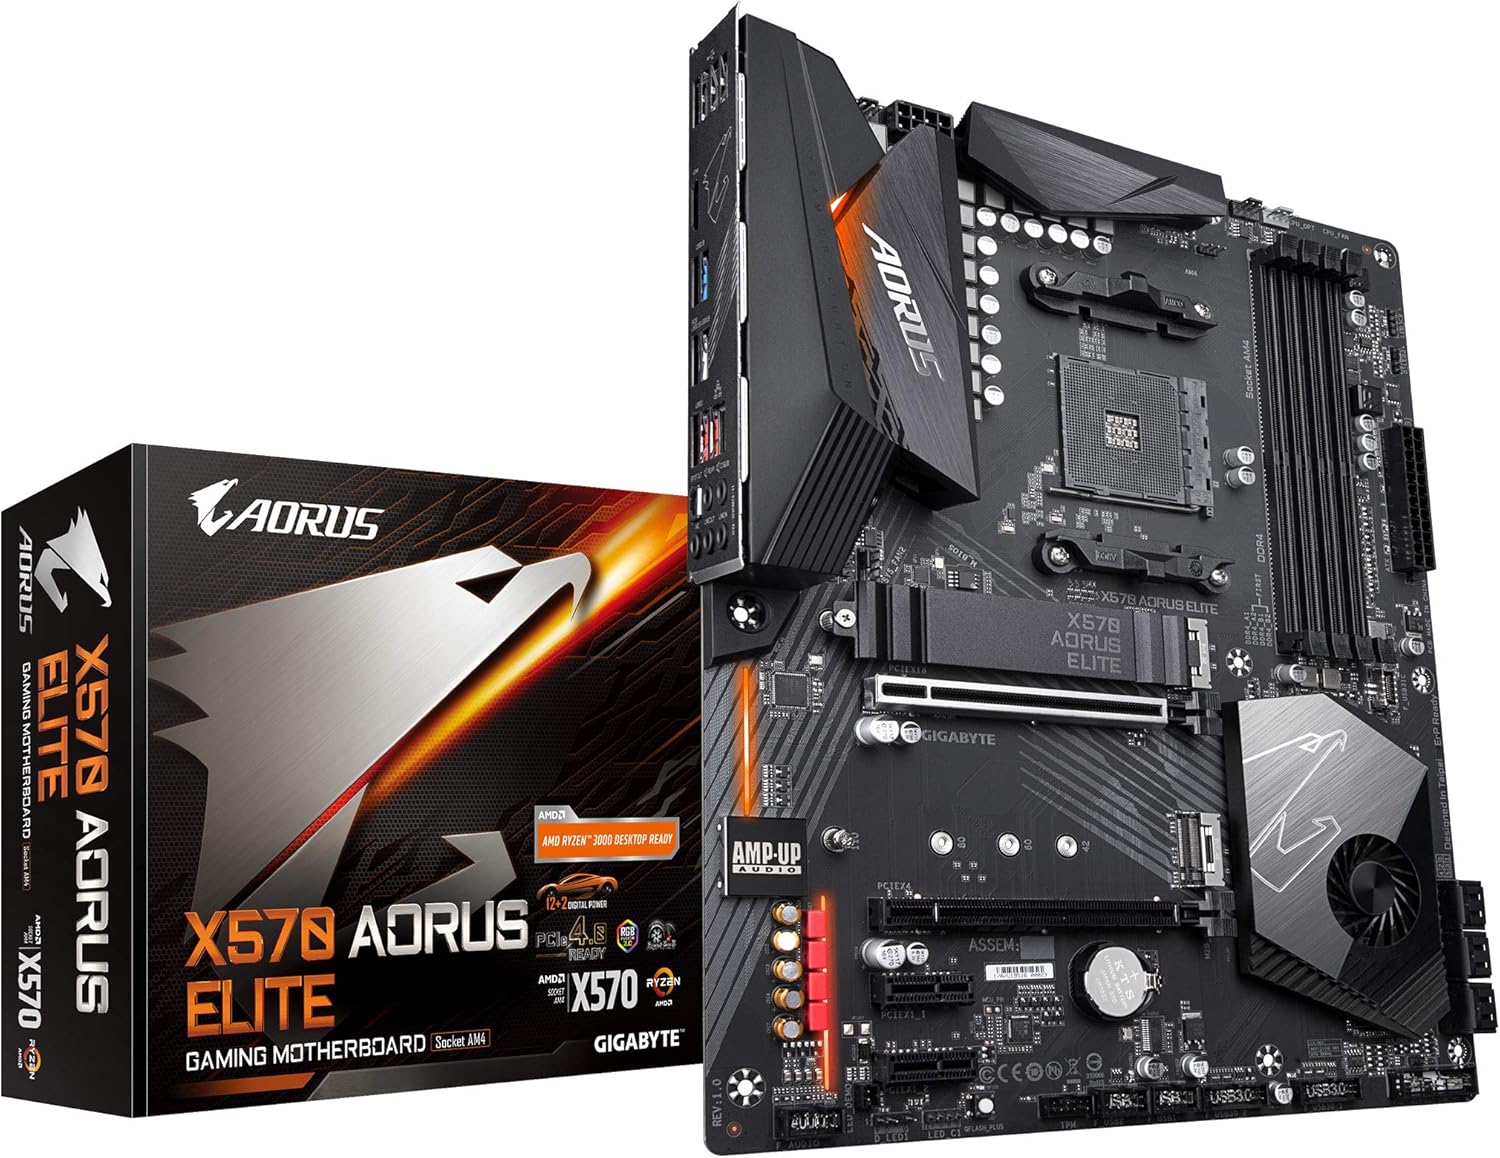
Figure 1: GIGABYTE X570 AORUS Elite Motherboard and Retail Packaging.
Setup and Installation
Proper installation is crucial for optimal performance and stability. Ensure your system components are compatible with the X570 AORUS Elite motherboard.
1. Processor (CPU) Installation
This motherboard supports AMD Ryzen 3rd Gen and 2nd Gen processors with an AM4 socket. Carefully align the CPU with the socket triangle marker and gently place it into the socket. Do not force the CPU into the socket.

Figure 2: Top-down view of the motherboard, highlighting the CPU socket (AM4) and DDR4 DIMM slots.
2. Memory (RAM) Installation
The motherboard features four DDR4 DIMM slots, supporting dual-channel ECC/non-ECC unbuffered memory. Install memory modules into the corresponding slots, ensuring they are fully seated until the clips lock into place.
3. Storage (M.2 SSD) Installation
The X570 AORUS Elite includes dual ultra-fast NVMe PCIe 4.0/3.0 x4 M.2 connectors, each equipped with a thermal guard. Remove the thermal guard, insert the M.2 SSD, and then reattach the thermal guard for optimal cooling.

Figure 3: Angled view of the motherboard, illustrating the M.2 slots with their integrated thermal guards.
4. Power Connections
Connect the 24-pin ATX power connector and the 8-pin CPU power connector from your power supply unit to the motherboard. Ensure all connections are secure.
5. Integrated I/O Shield and Rear Panel Connections
The motherboard features an integrated I/O shield for ease of installation. Connect your peripherals to the appropriate ports on the rear I/O panel, including USB 3.1 Gen2 Type-C, USB 3.0, USB 2.0, HDMI, Ethernet, and audio jacks.

Figure 4: Detailed view of the integrated rear I/O panel, showing various connectivity options.
Operating the Motherboard
Once all components are installed and connected, you can power on your system. The motherboard's BIOS (Basic Input/Output System) provides essential settings for system configuration.
BIOS Configuration
To enter the BIOS setup, press the DEL key during system startup. Here you can configure boot order, system clock, fan speeds, and other advanced settings. Refer to the full user manual for detailed BIOS options.
RGB Fusion 2.0
The X570 AORUS Elite features RGB Fusion 2.0, allowing customization of lighting effects. This can be controlled via GIGABYTE's software utility within your operating system. The motherboard includes addressable LED headers for additional RGB strips.
Network and Audio
The integrated Intel GbE LAN with cFosSpeed software provides a stable and optimized network connection. The Realtek ALC1200 audio codec with high-quality WIMA and Nichicon audio capacitors delivers an enhanced audio experience.
Maintenance
Regular maintenance helps ensure the longevity and performance of your motherboard.
- Dust Removal: Periodically clean dust from the motherboard and components using compressed air. Ensure the system is powered off and unplugged before cleaning.
- Thermal Management: Ensure proper airflow within your PC case. The extended VRM heatsink and M.2 thermal guards are designed to dissipate heat effectively.
- BIOS Updates: Keep your BIOS updated to the latest version for improved compatibility and performance. Use the Q-Flash Plus feature for convenient updates without a CPU or RAM installed.
Troubleshooting
If you encounter issues, consider the following common troubleshooting steps:
- No Power/No Boot:
- Verify all power cables (24-pin ATX, 8-pin CPU) are securely connected.
- Check the power supply unit (PSU) and its connections.
- Ensure the front panel power button connector is correctly installed on the motherboard.
- No Display:
- Ensure the monitor cable is connected to the graphics card (if dedicated) or the motherboard's HDMI port (if using integrated graphics, requires compatible CPU).
- Reseat the graphics card and RAM modules.
- Test with a single RAM stick in different slots.
- System Instability/Crashes:
- Check CPU and GPU temperatures.
- Ensure all drivers are up to date.
- Run memory diagnostic tools.
- BIOS Update Issues:
If a BIOS update fails or causes issues, utilize the Q-Flash Plus feature. This allows you to update the BIOS using a USB flash drive without needing a CPU, memory, or graphics card installed. Refer to the GIGABYTE website for detailed Q-Flash Plus instructions.

Figure 5: Annotated diagram of the motherboard, detailing key components and features for reference.
Specifications
| Feature | Detail |
|---|---|
| Brand | GIGABYTE |
| Model Name | X570 AORUS ELITE |
| CPU Socket | Socket AM4 |
| Compatible Processors | AMD 2nd Generation Ryzen, AMD 3rd Generation Ryzen |
| Chipset Type | AMD 570X |
| RAM Memory Technology | DDR4 |
| Memory Clock Speed | 2133 MHz (up to 4000+ MHz OC) |
| Memory Storage Capacity (Max) | 128 GB |
| Number of USB 2.0 Ports | 2 (rear) |
| Product Dimensions | 13.18 x 10.62 x 3.14 inches (ATX Form Factor) |
| Item Weight | 3 pounds |
| Wireless Type | Bluetooth |
| Operating System Support | Windows 10 64-bit, Windows 11 64-bit |
Warranty and Support
For warranty information and technical support, please refer to the official GIGABYTE website or contact their customer service. Keep your proof of purchase for warranty claims.
An official User Manual in PDF format is available for more detailed information:
Visit the GIGABYTE official store for additional products and support resources: GIGABYTE Store on Amazon
Ask a question about this manual
Ask about setup, troubleshooting, compatibility, parts, safety, or missing instructions. Manuals+ will review the question and use this page’s manual context to help answer it.