1. Introduction
This manual provides essential instructions for the safe operation, maintenance, and troubleshooting of your Calphalon Temp iQ Espresso Machine with Integrated Grinder. Please read this manual thoroughly before first use and retain it for future reference.
The Calphalon Temp iQ Espresso Machine is designed to deliver high-quality espresso beverages at home. It features an integrated conical burr grinder, a 15-bar Italian pump, Temp iQ thermoblock heating technology with PID temperature control, and a powerful steam wand for milk frothing.
2. Important Safety Instructions
WARNING: To reduce the risk of fire, electric shock, or injury, always follow basic safety precautions when using electrical appliances.
- Read all instructions before operating the appliance.
- Do not touch hot surfaces. Use handles or knobs.
- To protect against electric shock, do not immerse cord, plugs, or the appliance in water or other liquid.
- Close supervision is necessary when any appliance is used by or near children.
- Unplug from outlet when not in use and before cleaning. Allow to cool before putting on or taking off parts, and before cleaning the appliance.
- Do not operate any appliance with a damaged cord or plug, or after the appliance malfunctions or has been damaged in any manner. Return appliance to the nearest authorized service facility for examination, repair, or adjustment.
- The use of accessory attachments not recommended by the appliance manufacturer may result in fire, electric shock, or injury to persons.
- Do not use outdoors.
- Do not let cord hang over edge of table or counter, or touch hot surfaces.
- Do not place on or near a hot gas or electric burner, or in a heated oven.
- Always attach plug to appliance first, then plug cord into the wall outlet. To disconnect, turn any control to "off", then remove plug from wall outlet.
- Do not use appliance for other than intended use.
- Scalding may occur if the water reservoir lid is removed during the brewing cycle.
- This appliance is for household use only.
3. Product Components
Familiarize yourself with the various parts of your Calphalon Temp iQ Espresso Machine.
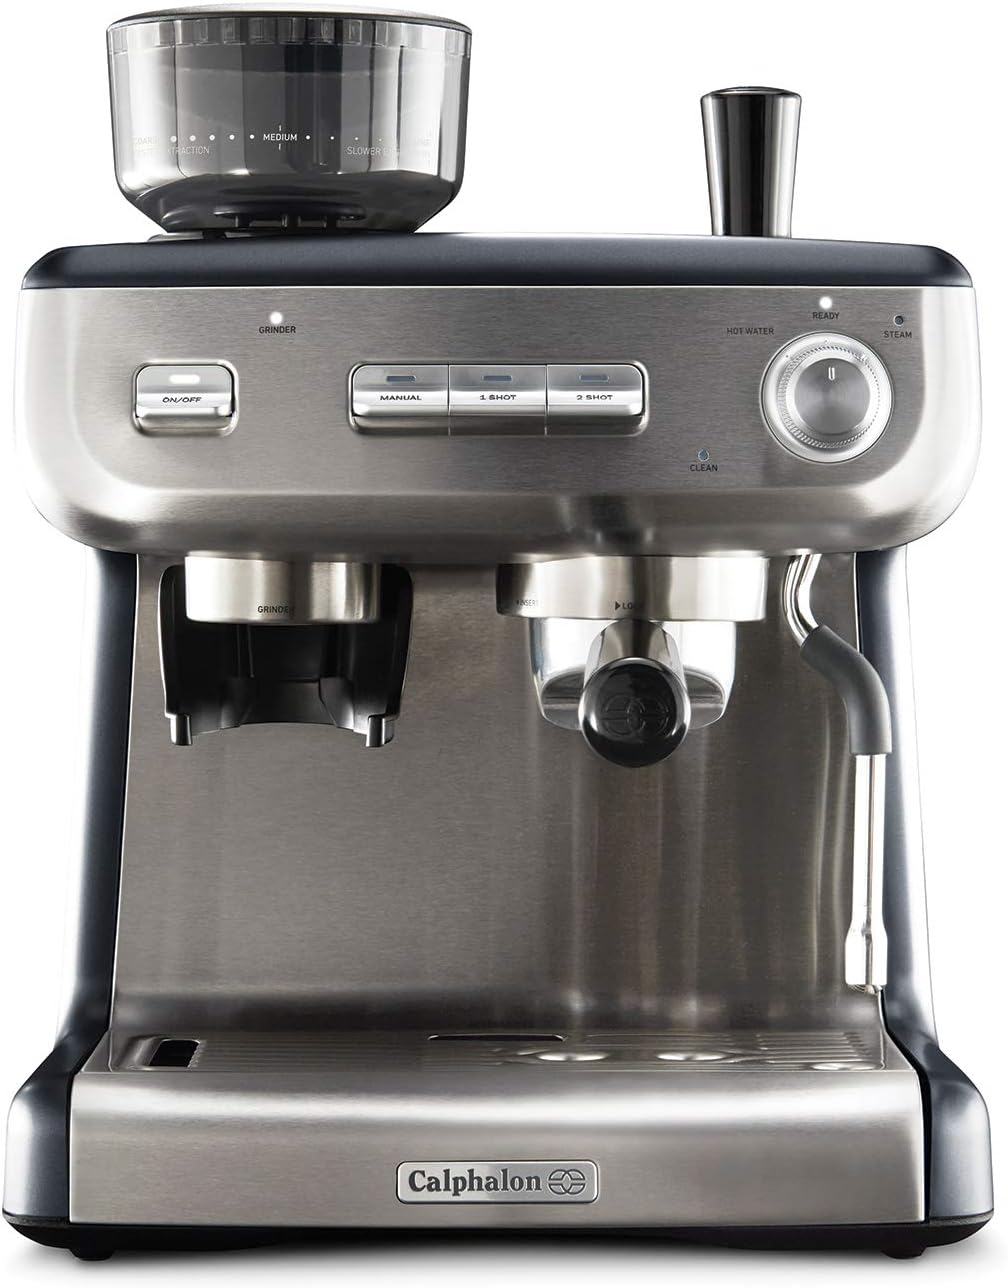
Image 3.1: Front view of the Calphalon Temp iQ Espresso Machine, showing the integrated grinder, control panel, portafilter holders, and steam wand.
- Integrated Conical Burr Grinder: For fresh grinding of coffee beans.
- Bean Hopper: Holds whole coffee beans for grinding.
- Control Panel: Features On/Off button, Manual brew, 1 Shot, 2 Shot buttons, Hot Water/Steam dial, and Clean indicator.
- Portafilter: Holds ground coffee for brewing.
- 58mm Portafilter Holder: Designed for even water dispersion.
- Steam Wand: For frothing milk and dispensing hot water.
- Drip Tray: Collects excess liquids and removable for cleaning.
- Water Reservoir: Removable 2.8-liter tank for water supply.
- Cup Warming Tray: Located on top, gently warms espresso cups.
- Accessories: Includes single- and double-shot single wall filter baskets, milk frothing pitcher, and tamper.
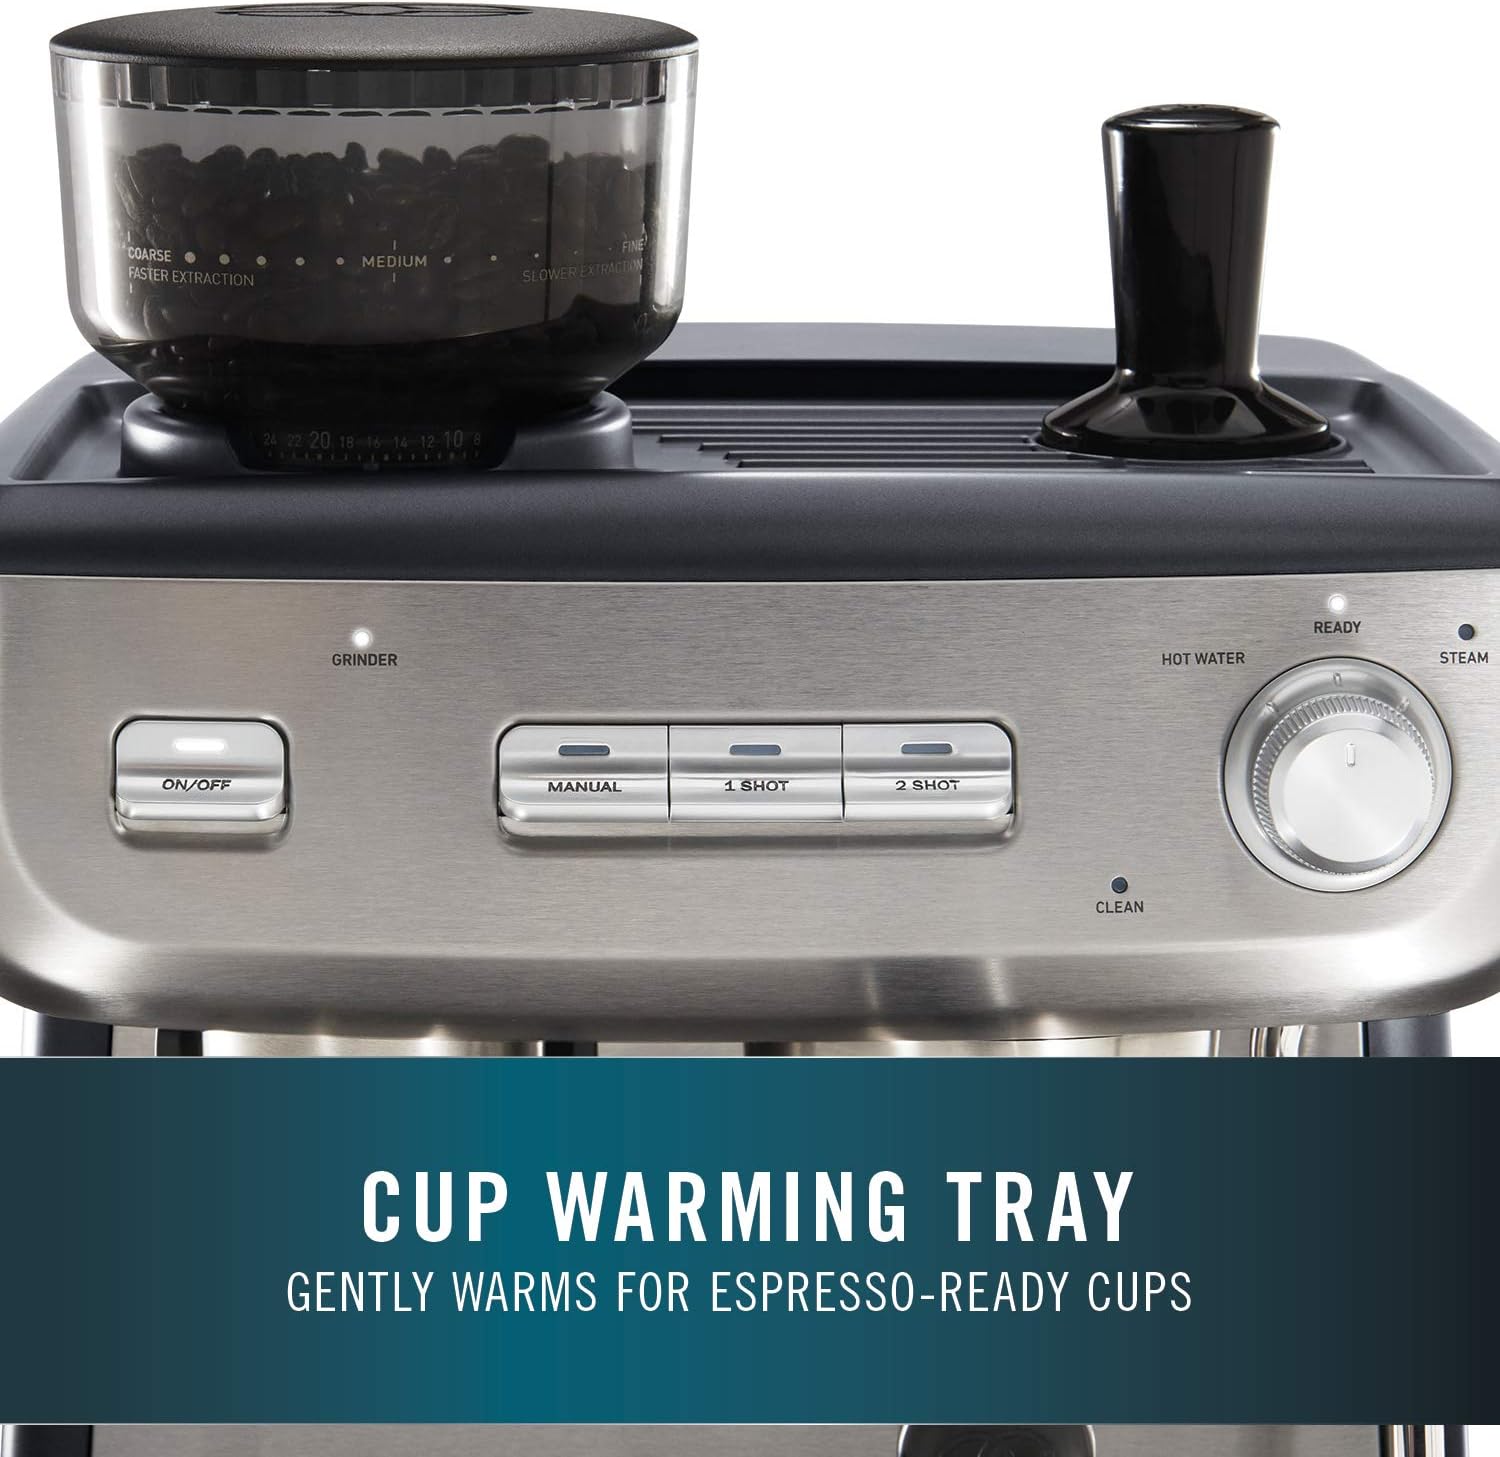
Image 3.2: Close-up of the top of the espresso machine, highlighting the cup warming tray and the bean hopper for the integrated grinder.
4. Setup
- Unpacking: Carefully remove all packaging materials and ensure all components are present.
- Initial Cleaning: Wash the water reservoir, portafilter, filter baskets, milk pitcher, and drip tray with warm soapy water. Rinse thoroughly and dry. Wipe the exterior of the machine with a damp cloth.
- Positioning: Place the machine on a flat, stable, heat-resistant surface, away from walls to allow for proper ventilation.
- Fill Water Reservoir: Open the hinged lid of the 2.8-liter water reservoir, remove it, and fill with fresh, cold filtered water. Do not exceed the MAX fill line. Replace the reservoir securely.
- First Use Cycle: Before brewing, perform a rinse cycle.
- Ensure the water reservoir is filled.
- Place an empty cup under the portafilter and steam wand.
- Press the "On/Off" button. The machine will heat up.
- Once heated, press the "1 Shot" or "2 Shot" button to run water through the portafilter.
- Turn the Hot Water/Steam dial to the "Hot Water" position to dispense hot water through the steam wand.
- Repeat until the water reservoir is nearly empty. This primes the pump and cleans internal components.
5. Operation
5.1 Grinding Coffee Beans

Image 5.1: Close-up of the integrated conical burr grinder with coffee beans in the hopper, showing the grind setting dial.
- Add Beans: Fill the bean hopper with fresh, whole coffee beans.
- Select Grind Setting: Use the grind setting dial to choose your desired fineness. The machine offers 30 adjustable settings. For espresso, a fine grind is typically required. Experiment to find the optimal setting for your beans.
- Grind: Place the portafilter under the grinder outlet. The machine will automatically grind the selected amount for a single or double shot.
Note: Too coarse a grind, too little coffee, or insufficiently tamping the grounds can lead to inadequate pressure for proper brewing. Adjust grind size and amount as needed.
5.2 Brewing Espresso
- Prepare Portafilter: After grinding, ensure the ground coffee is evenly distributed in the filter basket. Use the tamper to press the coffee firmly and evenly.
- Attach Portafilter: Insert the portafilter into the group head and twist firmly to lock it into place.
- Place Cups: Position one or two espresso cups on the drip tray directly under the portafilter spouts.
- Select Shot: Press the "1 Shot" or "2 Shot" button for pre-programmed single or double espresso. For manual control, press the "Manual" button to start and press again to stop.
- Extraction: The machine will pre-infuse the coffee grounds, then extract the espresso. Observe the flow for optimal extraction (a steady, honey-like stream).

Image 5.2: Two streams of freshly brewed espresso pouring into double-walled glass cups, demonstrating the brewing process.
5.3 Frothing Milk
- Prepare Milk: Fill the milk frothing pitcher with cold milk (dairy or non-dairy) to just below the spout.
- Position Steam Wand: Turn the Hot Water/Steam dial to the "Steam" position. Wait for the steam light to indicate readiness. Purge any condensed water from the steam wand into the drip tray by briefly opening the steam valve.
- Froth Milk: Immerse the steam wand tip just below the surface of the milk. Turn the steam valve fully open. Angle the pitcher to create a swirling motion. As the milk expands, lower the pitcher slightly to keep the tip just below the surface.
- Heat Milk: Once desired foam is achieved, immerse the wand deeper into the milk to heat it to the desired temperature (typically 140-150°F / 60-65°C).
- Clean Wand: Immediately after frothing, turn off the steam, wipe the steam wand with a damp cloth, and briefly purge steam to clear any milk residue.

Image 5.3: A stainless steel pitcher with milk being frothed by the steam wand, illustrating the process of creating creamy microfoam.
5.4 Hot Water Function
To dispense hot water for tea or Americanos:
- Ensure the machine is heated.
- Place a cup under the steam wand.
- Turn the Hot Water/Steam dial to the "Hot Water" position.
- Turn the steam valve open to dispense hot water. Close the valve when done.
6. Maintenance
6.1 Daily Cleaning
- Drip Tray: Empty and clean the drip tray daily.
- Portafilter & Filter Baskets: After each use, remove spent coffee grounds and rinse the portafilter and filter baskets under hot water.
- Steam Wand: Always wipe the steam wand immediately after frothing milk and purge steam to prevent milk residue buildup.
- Group Head: Use a damp cloth to wipe the group head screen and gasket.
- Exterior: Wipe the exterior of the machine with a soft, damp cloth.
6.2 Descaling
Regular descaling is crucial to prevent mineral buildup and maintain machine performance. The frequency depends on water hardness and usage, but generally every 2-3 months or when the "Clean" indicator illuminates.
- Prepare Descaling Solution: Mix a descaling solution according to the manufacturer's instructions (e.g., white vinegar and water, or a commercial descaler).
- Fill Reservoir: Pour the descaling solution into the water reservoir.
- Run Cycle: Place a large container under the group head and steam wand. Initiate a descaling cycle (refer to your machine's specific instructions for activating the "Clean" function, often by holding the "Clean" button).
- Rinse: After the descaling cycle, rinse the reservoir thoroughly and fill with fresh water. Run several full cycles with fresh water to flush out any remaining descaling solution.
Caution: Always use descaling solutions specifically designed for espresso machines or follow recommended household solutions like white vinegar. Avoid harsh chemicals.
6.3 Grinder Cleaning
Periodically clean the burr grinder to ensure optimal performance and prevent old coffee oil buildup.
- Empty the bean hopper.
- Remove the upper burr (refer to specific instructions for removal).
- Use a brush to clean the burrs and the grinding chamber.
- Replace the upper burr and bean hopper.
7. Troubleshooting
| Problem | Possible Cause | Solution |
|---|---|---|
| No water flow / Machine not brewing |
|
|
| Espresso extracts too slowly or not at all |
|
|
| Espresso extracts too quickly / Weak espresso |
|
|
| Steam wand not producing steam |
|
|
| "Clean" indicator light on | Machine requires descaling. | Perform a descaling cycle as per maintenance instructions. |
8. Specifications
- Brand: Calphalon
- Model Name: Temp iQ
- Model Number: BVCLECMPBM1
- Dimensions: 14.5"D x 15.6"W x 17.3"H
- Weight: 21.8 pounds
- Pump Pressure: 15 Bar Italian Pump
- Grinder: Integrated Conical Burr Mill Grinder with 30 settings
- Water Reservoir Capacity: 2.8 Liters
- Voltage: 110 Volts
- Special Features: Auto-shot volumetric control, removable water tank, milk jug, 1 and 2 cup Dual Wall Filters, Thermoblock heating technology, PID temperature control, Pre-infusion.
- Material: Stainless Steel, Plastic
9. Warranty and Support
Calphalon products are manufactured to high-quality standards. For specific warranty details, please refer to the warranty card included with your product or visit the official Calphalon website. Typically, espresso machines come with a limited warranty covering manufacturing defects.
For technical support, replacement parts, or service inquiries, please contact Calphalon Customer Service. Contact information can usually be found on the Calphalon website or in the product packaging.
When contacting support, please have your model number (BVCLECMPBM1) and proof of purchase readily available.


