
Hima 7-TYPE-C01
Hima USB 3.0/3.1 Front Panel Hub (Model 7-TYPE-C01) User Manual
Enhance your PC's connectivity with convenient front panel access.
1. Introduction
This user manual provides detailed instructions for the installation, operation, and maintenance of the Hima USB 3.0/3.1 Front Panel Hub. This device is designed to expand the connectivity options of your desktop computer by providing easily accessible USB 3.0, USB 2.0, USB Type-C, and HD audio ports in a standard 5.25-inch drive bay.
2. Product Overview
The Hima Front Panel Hub integrates multiple essential ports into a single unit for convenient front-facing access. It features high-speed data transfer capabilities and audio input/output for a comprehensive connectivity solution.

Figure 2.1: Front view of the Hima USB 3.0/3.1 Front Panel Hub, showcasing its various ports.
2.1 Key Features
- Multi-Port Connectivity: Includes 2x USB 3.0 ports, 2x USB 2.0 ports, 1x USB Type-C port, 1x HD audio output, and 1x microphone input.
- Standard Bay Fit: Designed to fit into a standard 5.25-inch optical drive bay.
- High-Speed Data: USB 3.0 and USB Type-C ports support high-speed data transfer.
- Durable Construction: Features a 0.6mm thick galvanized sheet bracket for secure mounting.

Figure 2.2: Detailed view of the front panel ports, including USB 2.0, Type-C, microphone, audio out, and USB 3.0.
3. Package Contents
Please verify that all items listed below are included in your package:
- Hima USB 3.0/3.1 Front Panel Hub
- Internal connection cables (USB 3.0, USB 2.0, USB 3.1 Type-E, HD Audio)
- Mounting screws (silver and black options may be included)

Figure 3.1: The Hima Front Panel Hub with its pre-attached cables and a bag of mounting screws.
4. Setup and Installation
Before beginning installation, ensure your computer is powered off and unplugged from the wall outlet. It is recommended to wear an anti-static wrist strap to prevent damage to components.
4.1 Identifying a 5.25-inch Drive Bay
Locate an available 5.25-inch drive bay on the front of your computer case. Remove any cover plates or existing devices from the bay.
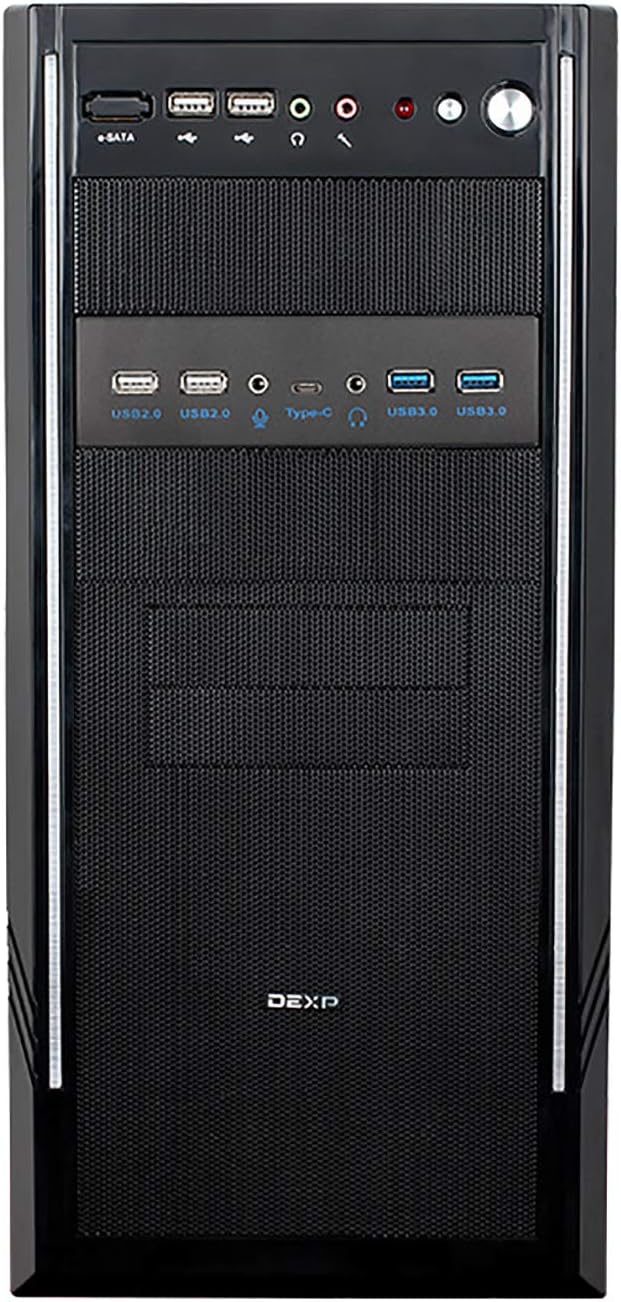
Figure 4.1: Example of the Hima Front Panel Hub installed in a desktop computer's 5.25-inch drive bay.
4.2 Mounting the Front Panel Hub
- Slide the Hima Front Panel Hub into the chosen 5.25-inch drive bay from the front of the case.
- Align the mounting holes on the sides of the hub with the screw holes in the drive bay.
- Secure the hub using the provided mounting screws. Ensure it is firmly seated to prevent movement. Note: Some cases may require slight adjustment or filing of the bay's metal slots for a perfect fit.
4.3 Connecting to the Motherboard
The hub comes with pre-attached cables designed to connect to specific headers on your motherboard. The cable length is approximately 0.8 meters (31.5 inches).
- USB 3.0 Ports: Connect the USB 3.0 cable (typically a blue connector with 20 pins) from the hub to an available USB 3.0 header on your motherboard.
- USB 2.0 Ports: Connect the USB 2.0 cable (typically a black connector with 9 or 10 pins) from the hub to an available USB 2.0 header on your motherboard.
- USB Type-C Port: Connect the USB 3.1 Type-E (Key-A) cable from the hub to the corresponding USB 3.1 Type-E header on your motherboard. This header is often labeled "USB3.1_E1" or similar.
- HD Audio Ports: Connect the HD Audio cable (typically a black connector with 9 or 10 pins) from the hub to the "HD AUDIO" or "AAFP" header on your motherboard. Ensure correct pin alignment.

Figure 4.2: The data cable from the hub connected to the USB 3.1 Type-E header on a motherboard.
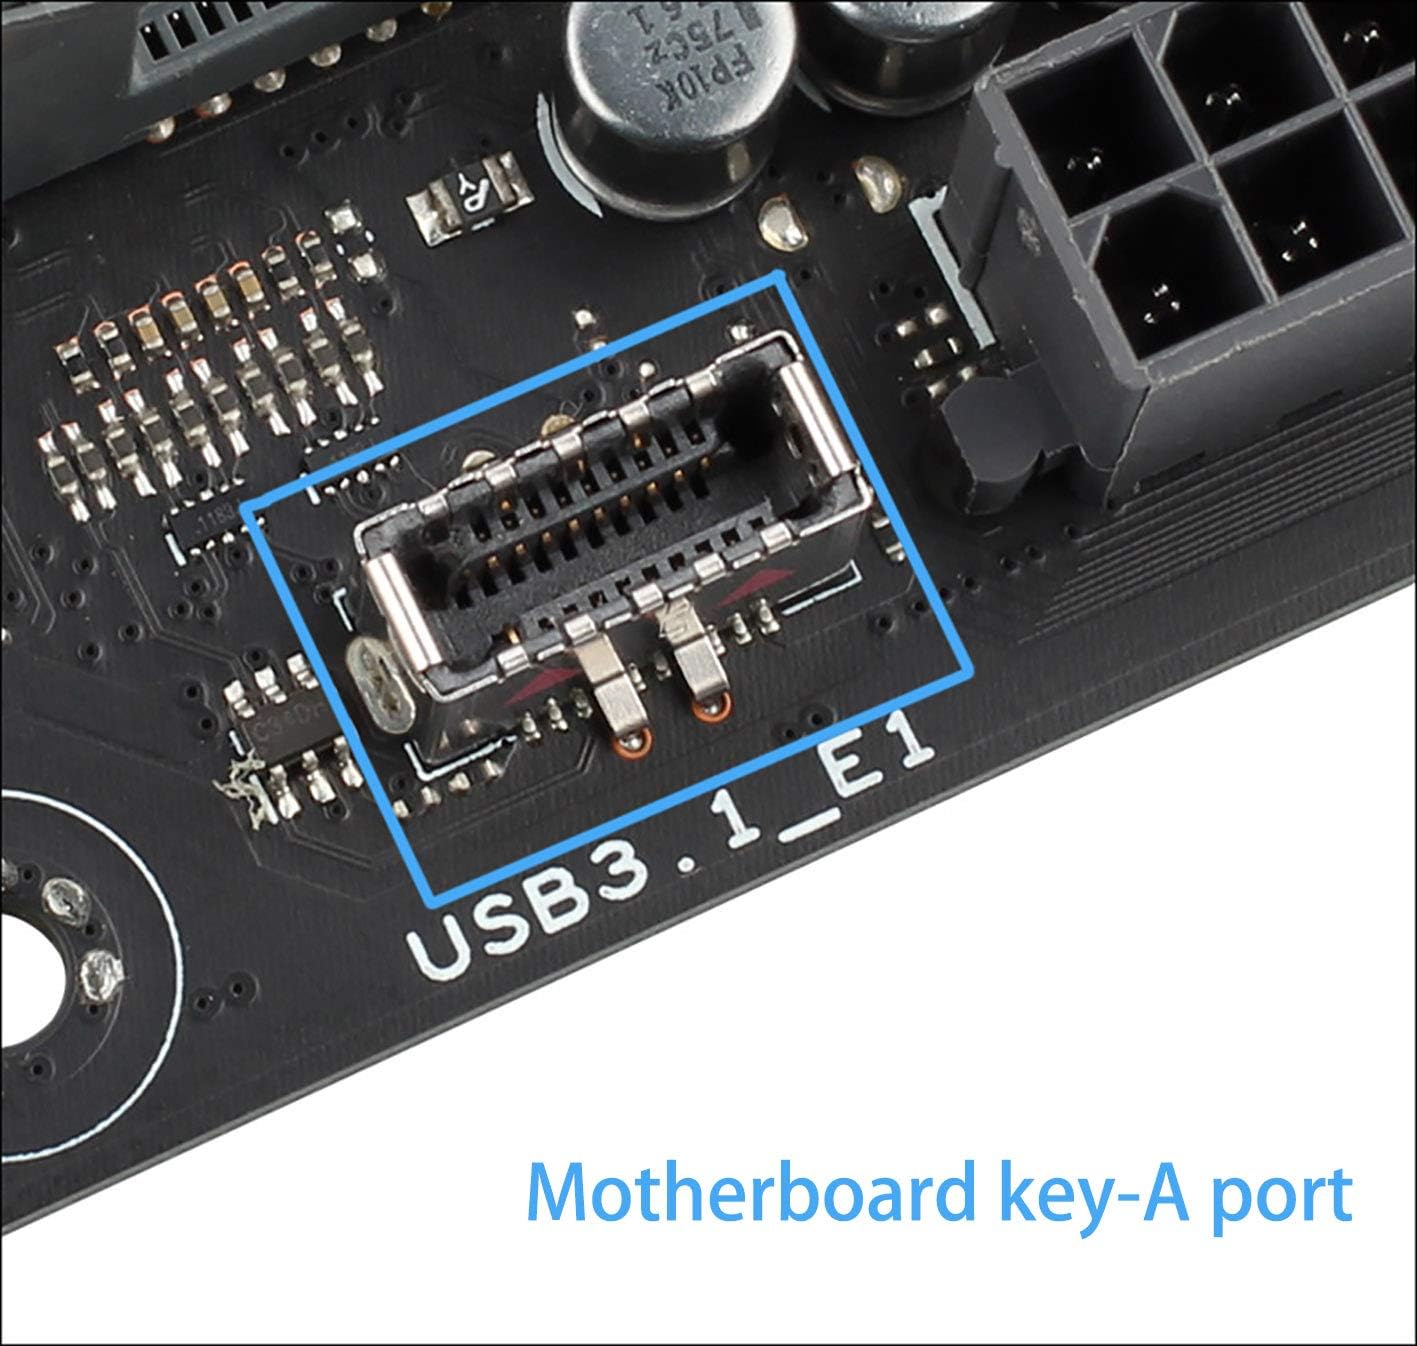
Figure 4.3: A close-up view of a motherboard's USB 3.1 Key-A port, where the Type-C cable connects.
After all connections are made, carefully close your computer case and reconnect the power cable.
5. Operation
Once installed and connected, the Hima Front Panel Hub operates automatically. Simply plug your USB devices or audio peripherals into the corresponding front panel ports.
- USB Ports (USB 3.0, USB 2.0, Type-C): Use these ports to connect external storage devices, keyboards, mice, webcams, and other USB-compatible peripherals.
- HD Audio Output: Connect headphones or speakers for audio playback.
- Microphone Input: Connect a microphone for audio recording or voice communication.
For optimal performance, ensure your operating system has the latest drivers for your motherboard's USB and audio controllers.
6. Troubleshooting
If you encounter issues with your Hima Front Panel Hub, please refer to the following common troubleshooting steps:
- Ports Not Functioning:
- Verify all internal cables (USB 3.0, USB 2.0, USB 3.1 Type-E, HD Audio) are securely connected to the correct headers on your motherboard.
- Ensure your computer is powered on and the operating system has loaded.
- Check your motherboard's BIOS/UEFI settings to ensure USB and audio headers are enabled.
- Install or update your motherboard's chipset and USB drivers from the manufacturer's website.
- Test the ports with different devices to rule out device-specific issues.
- Loose Fit in Drive Bay:
- Ensure the mounting screws are tightened securely.
- If the hub feels loose, some computer cases may require minor modification (e.g., filing the drive bay's metal slots) for a tighter fit, as bay dimensions can vary.
- Slow USB Speeds:
- Ensure you are using the correct USB 3.0 or Type-C ports for high-speed devices. USB 2.0 ports will operate at slower speeds.
- Verify that the USB 3.0 and USB 3.1 Type-E cables are connected to their respective high-speed headers on the motherboard, not USB 2.0 headers.
- Check device compatibility and ensure the connected device supports the expected USB speed.
- Audio Issues:
- Confirm the HD Audio cable is correctly connected to the motherboard's HD Audio header.
- Check your operating system's sound settings to ensure the correct audio output/input device is selected.
- Test with different headphones/speakers/microphones.
7. Specifications
| Feature | Detail |
|---|---|
| Model Number | 7-TYPE-C01 |
| Interfaces | 2x USB 3.0, 2x USB 2.0, 1x USB Type-C (USB 3.1), 1x HD Audio Output, 1x Microphone Input |
| Cable Length | 0.8 meters (approx. 31.5 inches) |
| Wire Gauge | 24+28 AWG |
| Dimensions (LxWxH) | 148 x 99 x 42 mm (5.83 x 3.9 x 1.65 inches) |
| Net Weight | 350g (12.35 oz) |
| Bracket Material | 0.6mm thick galvanized sheet |
| Compatible Operating Systems | Windows XP, Linux (and newer versions) |
8. Warranty and Support
The Hima USB 3.0/3.1 Front Panel Hub comes with a one-year warranty from the date of purchase. This warranty covers manufacturing defects and material flaws under normal use. For warranty claims or technical support, please contact your retailer or the manufacturer directly with your purchase details.
Please retain your proof of purchase for warranty validation.
Ask a question about this manual
Ask about setup, troubleshooting, compatibility, parts, safety, or missing instructions. Manuals+ will review the question and use this page’s manual context to help answer it.