
Introduction
This manual provides detailed instructions for the proper setup, operation, and maintenance of your ALINCO DX-10 10-Meter Multi-Mode Emitter. Please read this manual thoroughly before using the device to ensure optimal performance and safety. Retain this manual for future reference.
Package Contents
Verify that all items listed below are present in your package:
- CB Radio
- Microphone
- Microphone Holder
- Mounting Support for CB Radio
- Power Cord

Image: The ALINCO DX-10 radio, microphone, and its packaging box, illustrating the items included in the product package.
Product Features
The ALINCO DX-10 is a versatile 10-meter multi-mode emitter designed for reliable communication. Key features include:
- Multi-mode Operation: Supports LSB, USB, AM, FM, and CW modes.
- Frequency Range: 28,000-29,700 MHz (Programmable).
- Channels: 40 programmable channels per band.
- Power Output: 1-12 W (FM/AM/CW) and 0-25 W (USB/LSB) adjustable.
- Frequency Jumps: 10Hz, 100Hz, 1kHz, and 10kHz.
- Display: Large backlit display with 7 selectable colors.
- Functions: Dual Watch, Scan, RF Gain, Mic Gain, NB (Noise Blanker), ANL (Automatic Noise Limiter), Roger Beep, Clarifier, Squelch (SQ), RF PWR, SWR meter, S-meter, TOT (Time Out Timer), Echo function, and emergency channel (9/19) button.
- Connectivity: 6-pin microphone connector, additional external speaker jack (3.5 mm), CW connection.

Image: Front panel of the ALINCO DX-10, highlighting the multi-color display, channel selector, mode switch, and various control knobs and buttons.
Setup Instructions
- Power Connection: Connect the supplied power cord to the 13.8 VDC power source, ensuring correct polarity. The radio requires 13.8 VDC +/-15%.
- Antenna Connection: Connect a suitable 10-meter antenna to the antenna connector on the rear panel of the radio. Ensure the antenna is properly tuned for the 10-meter band to prevent damage to the transceiver.
- Microphone Connection: Plug the 6-pin microphone connector into the microphone jack on the front panel.
- Mounting: Use the provided mounting support to securely install the CB radio in your desired location (e.g., vehicle or base station).
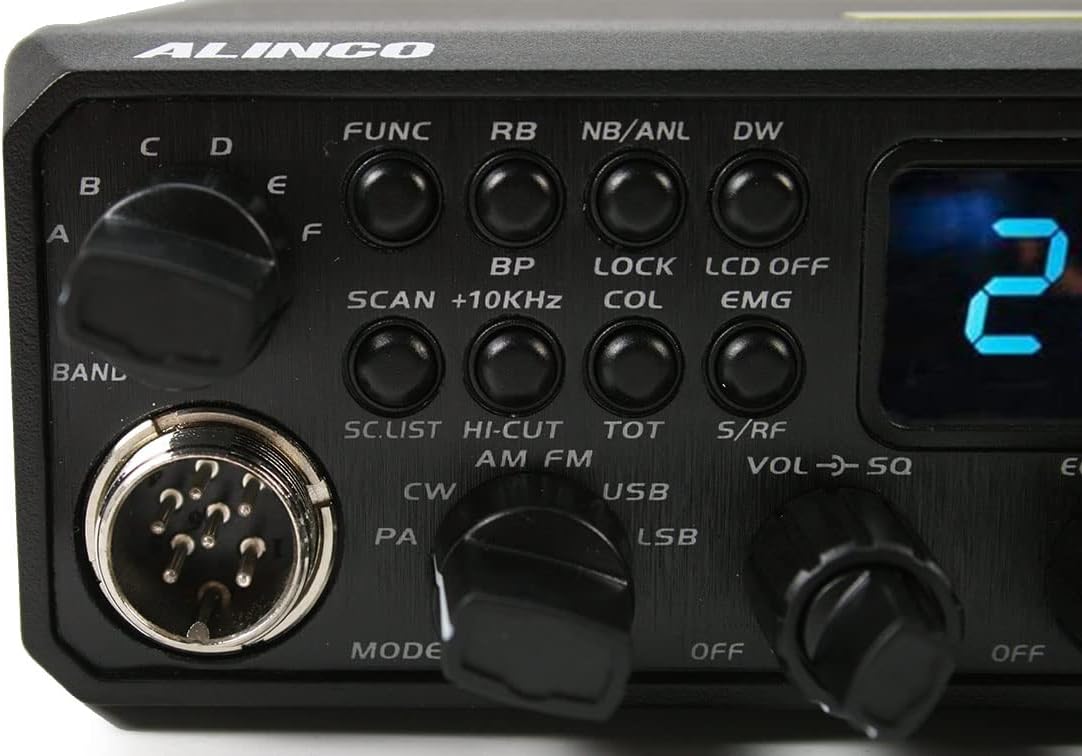
Image: Rear panel of the ALINCO DX-10, displaying the antenna connector, power input, and other rear panel connections.
Operating Instructions
Basic Operation
- Power On/Off: Turn the VOL/SQ knob clockwise to power on the unit. Turn counter-clockwise until it clicks to power off.
- Volume Adjustment: Rotate the outer ring of the VOL/SQ knob to adjust the audio output volume.
- Squelch Adjustment: Rotate the inner knob of VOL/SQ to adjust the squelch level. Adjust until background noise disappears, but signals are still received clearly.
- Channel Selection: Use the CHANNEL knob on the right side of the front panel to select your desired operating channel.
- Mode Selection: Use the MODE switch (AM/FM/USB/LSB/CW/PA) to select the desired modulation mode.
- Frequency Adjustment (Clarifier): Use the CLARIFIER knob for fine-tuning the receive frequency, especially in SSB modes (USB/LSB), to ensure clear audio.
Advanced Functions
- FUNC Button: Press the FUNC button to access secondary functions indicated above the primary buttons.
- Dual Watch (DW): Activates monitoring of two channels simultaneously.
- Scan: Initiates scanning through active channels.
- Noise Blanker (NB) / Automatic Noise Limiter (ANL): Press NB/ANL to reduce impulse noise.
- Roger Beep (RB): Activates an audible tone at the end of your transmission.
- Echo Function: Engages the echo effect for transmissions.
- RF Gain: Adjusts the sensitivity of the receiver.
- Mic Gain: Adjusts the microphone input sensitivity.
- Emergency Channel (EMG): Quickly switches to emergency channels 9 or 19.
- Display Color (COL): Changes the backlight color of the display.

Image: Detailed view of the ALINCO DX-10 control panel, showing the mode selector, function buttons, and various adjustment knobs for fine-tuning operation.
Maintenance
Proper maintenance ensures the longevity and optimal performance of your ALINCO DX-10.
- Cleaning: Use a soft, dry cloth to clean the exterior of the radio. Do not use abrasive cleaners, solvents, or harsh chemicals.
- Ventilation: Ensure the ventilation fins on the side and rear of the unit are clear of obstructions to prevent overheating during operation.
- Power Supply: Always use a stable 13.8 VDC power supply within the specified tolerance. Unstable power can damage the unit.
- Antenna: Regularly inspect your antenna and coaxial cable for any signs of damage or corrosion. Ensure all connections are secure.
Troubleshooting
If you encounter issues with your ALINCO DX-10, refer to the following common problems and solutions:
- No Power: Check the power cord connection and the power supply voltage. Ensure the power switch (VOL/SQ knob) is turned on.
- No Audio: Adjust the volume knob. Check squelch setting; if set too high, it may block weak signals. Ensure the microphone is properly connected.
- Poor Transmission/Reception: Verify antenna connection and ensure the antenna is properly tuned for the operating frequency. Check the selected mode (AM/FM/SSB). Adjust RF Gain and Mic Gain.
- Distorted Audio: Adjust Clarifier for SSB modes. Check Mic Gain setting. Ensure the microphone is not damaged.
For persistent issues not resolved by these steps, contact ALINCO customer support or a qualified service technician.
Specifications
| Feature | Specification |
|---|---|
| Frequency Range | 28,000-29,700 MHz (Programmable) |
| Modulation Modes | AM, FM, LSB, USB, CW |
| Channels | 40 programmable channels per band |
| Power Supply | 13.8 VDC +/-15% |
| Transmission Power (FM/AM/CW) | 1-12 W adjustable |
| Transmission Power (USB/LSB) | 0-25 W adjustable |
| Absorbed Current | 6A max |
| Audio Power Speaker | 3 W |
| Microphone Type | 6 pins |
| Dimensions (W x H x D) | 238 x 173 x 51 mm (9.37 x 6.81 x 2.01 inches) |
| Weight | 1687 g (3.72 lbs) |
| Impedance | 50 ohms |

Image: Top-down view of the ALINCO DX-10 radio with its physical dimensions (length, width, height) indicated in centimeters.
Warranty and Support
For warranty information and technical support, please refer to the official ALINCO website or contact your authorized ALINCO dealer. Keep your purchase receipt as proof of purchase.
Online Resources: For additional information, firmware updates, and frequently asked questions, visit the official ALINCO support page.


