Important Safety Instructions
When using electrical appliances, basic safety precautions should be followed, including the following:
- Read all instructions before using the appliance.
- Do not operate the oven if it has a damaged cord or plug, if it is not working properly, or if it has been damaged or dropped.
- Do not heat liquids or other foods in sealed containers as they are liable to explode.
- Do not use corrosive chemicals or vapors in this appliance.
- Always ensure the turntable and roller ring are correctly positioned before operation.
- Do not attempt to operate this oven with the door open as this can result in harmful exposure to microwave energy.
- This appliance must be grounded. Connect only to a properly grounded outlet.
Product Overview
The Sharp SMC1662DS is a 1.6 cubic foot, 1100-watt countertop microwave oven designed for efficient and convenient food preparation. It features a stainless steel exterior and a user-friendly control panel.

Figure 1: Front view of the Sharp SMC1662DS microwave oven, showing the door, control panel, and digital display.
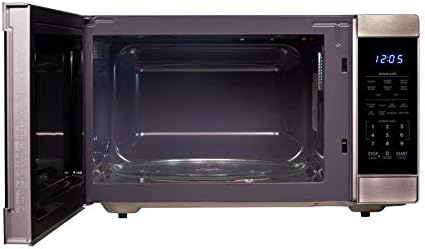
Figure 2: Interior view of the Sharp SMC1662DS microwave oven with the door open, revealing the glass turntable and oven cavity.
Key Features:
- Capacity: Large 1.6 cubic foot interior.
- Power: 1100 Watts for efficient cooking.
- Sensor Technology: Precise Cook Sensor Technology automatically adjusts cooking time.
- Auto Defrost: Simplifies thawing of various foods.
- Instant Start: Convenient "+30 seconds" key for quick heating.
- Turntable System: Carousel turntable ensures even cooking.
Setup and Installation
Unpacking:
- Carefully remove the microwave oven from its carton.
- Remove all packing materials, including the plastic film covering the door and control panel.
- Inspect the oven for any damage, such as dents or a misaligned door. Do not operate if damaged.
- Ensure all accessories, including the glass turntable and roller ring, are present.
Placement:
- Place the microwave oven on a flat, stable surface strong enough to support its weight.
- Ensure adequate ventilation by leaving at least 4 inches (10 cm) of space around the sides, back, and top of the oven.
- Do not block the air vents located on the back or sides of the oven.
- Keep the oven away from heat sources like stoves or radiators.
Electrical Connection:
- Plug the power cord into a standard 3-prong, 120V AC, 60Hz grounded electrical outlet.
- Do not use an extension cord or adapter.
- Ensure the electrical circuit is dedicated to the microwave oven to prevent overloading.
Operating Instructions
Setting the Clock:
- Press the "CLOCK" button.
- Enter the current time using the number pad.
- Press the "CLOCK" button again to confirm.
Time Cooking:
- Place food in a microwave-safe container on the turntable.
- Close the oven door.
- Enter the desired cooking time using the number pad.
- Press the "POWER LEVEL" button if you wish to adjust the power (default is 100%). Use the number pad to select a power level from 1 to 10.
- Press "START" to begin cooking.
Sensor Cooking:
The Sensor Cook feature automatically detects humidity released from food and adjusts cooking time for optimal results. Refer to the control panel for specific sensor cook options like "Popcorn" or "Beverage".
- Place food in the oven.
- Press the desired Sensor Cook button (e.g., "POPCORN").
- Press "START". The oven will automatically determine the cooking time.
Auto Defrost:
This feature allows for quick and accurate thawing of various foods by weight.
- Place frozen food on the turntable.
- Press the "AUTO DEFROST" button.
- Enter the weight of the food using the number pad.
- Press "START". The oven will calculate and display the defrosting time.
+30 Seconds Key:
For quick heating or to add extra cooking time during operation:
- Press the "+30 SEC" button to start the oven for 30 seconds at full power.
- During cooking, press "+30 SEC" to add 30 seconds to the current cooking cycle.
Maintenance and Cleaning
Regular cleaning helps maintain the performance and longevity of your microwave oven.
Exterior Cleaning:
- Wipe the exterior with a damp cloth and mild soap.
- Avoid abrasive cleaners or scouring pads, which can scratch the stainless steel finish.
- Dry thoroughly with a soft cloth.
Interior Cleaning:
- For light spills, wipe with a damp cloth immediately.
- For stubborn food residue, place a bowl of water with a few lemon slices inside the oven and heat for 2-3 minutes. The steam will loosen the residue, making it easier to wipe clean.
- Ensure the interior is dry before closing the door.
Turntable and Roller Ring:
- The glass turntable and roller ring can be removed for cleaning.
- Wash them in warm, soapy water or in the top rack of a dishwasher.
- Ensure they are completely dry and correctly re-positioned before using the oven.
Troubleshooting
Before contacting customer service, please refer to the following common issues and solutions:
| Problem | Possible Cause | Solution |
|---|---|---|
| Oven does not start. | Power cord not plugged in; Door not closed properly; Blown fuse or tripped circuit breaker. | Ensure cord is securely plugged in; Close door firmly; Check household fuse/circuit breaker. |
| Food not heating. | Incorrect cooking time/power level set; Door not closed properly. | Adjust cooking time/power level; Ensure door is securely latched. |
| Turntable not rotating. | Turntable or roller ring not positioned correctly; Obstruction under turntable. | Remove and re-position turntable and roller ring; Check for food debris or obstructions. |
| Light inside oven not working. | Bulb needs replacement. | Contact qualified service personnel for bulb replacement. Do not attempt to replace yourself. |
Specifications
| Feature | Specification |
|---|---|
| Model Number | SMC1662DS |
| Capacity | 1.6 Cubic Feet |
| Output Power | 1100 Watts |
| Installation Type | Countertop |
| Color | Stainless Steel |
| Special Features | Defrost, Turntable, Sensor Cooking |
| Voltage | 120V AC, 60Hz |
| Material | Stainless Steel (Exterior and Interior) |
| Included Components | Glass Turntable, Roller Ring |
Warranty and Support
This Sharp microwave oven is covered by a limited manufacturer's warranty. Please refer to the warranty card included with your product for specific terms and conditions.
For technical assistance, service, or to order replacement parts, please contact Sharp customer support. Contact information can typically be found on the Sharp official website or in the documentation provided with your purchase.
Online Support: www.sharpusa.com/support


