Introduction
This manual provides essential information for the safe and effective use of your EVH 5150III Micro Stack. This compact guitar amplifier features 1 watt of power, a single 3-inch speaker, a 1/4-inch stereo headphone output, and a convenient tilt-back kickstand. It operates on an included 9V battery or an optional external power supply.
Safety Instructions
- Read all instructions before operating the amplifier.
- Do not expose the unit to rain or moisture to prevent fire or shock hazards.
- Do not open the amplifier casing. There are no user-serviceable parts inside. Refer all servicing to qualified service personnel.
- Use only the specified power supply (9V DC, center negative, not included) if not using battery power.
- Ensure proper battery polarity when installing. Remove batteries if the unit will not be used for an extended period.
- Avoid listening at high volume levels for prolonged periods to prevent hearing damage.
Package Contents
Please check that your package contains the following items:
- EVH 5150III Micro Stack Amplifier
- 9V Battery (pre-installed or included separately)
- Instruction Manual (this document)
Controls and Features
Familiarize yourself with the controls and connections on your EVH 5150III Micro Stack.

Figure 1: Front Panel Controls. This image displays the front of the EVH 5150III Micro Stack, highlighting the 1/4-inch input jack, Gain knob, Volume knob, Tone knob, and Power switch.
- INPUT: Connect your guitar cable here.
- GAIN: Adjusts the amount of overdrive/distortion. Higher settings produce more aggressive tones.
- VOLUME: Controls the overall output level of the amplifier.
- TONE: Adjusts the treble response, allowing you to brighten or darken your sound.
- POWER: On/Off switch for the amplifier.
Setup
Battery Installation
The EVH 5150III Micro Stack operates on a single 9V battery, which is included. To install or replace the battery:

Figure 2: Rear Panel and Battery Compartment. This image shows the back of the amplifier, indicating the location of the battery compartment cover and the DC IN jack.
- Locate the battery compartment cover on the rear of the amplifier.
- Slide the cover open.
- Connect a 9V alkaline battery to the battery clip, ensuring correct polarity (+ to + and - to -).
- Place the battery inside the compartment and close the cover securely.
Connecting Your Guitar
Insert a standard 1/4-inch instrument cable from your guitar into the INPUT jack on the front panel of the amplifier.
Headphone Use
For silent practice, connect a 1/4-inch stereo headphone jack into the PHONES output located on the rear panel. This will mute the internal speaker.
External Power Supply (Optional)
The amplifier can also be powered by an optional 9V DC, center-negative power adapter (not included). Connect the adapter to the DC IN jack on the rear panel. Using an external power supply will bypass the internal battery.
Using the Tilt-Back Kickstand
The EVH 5150III Micro Stack features a built-in kickstand to angle the amplifier upwards for better sound projection during practice.
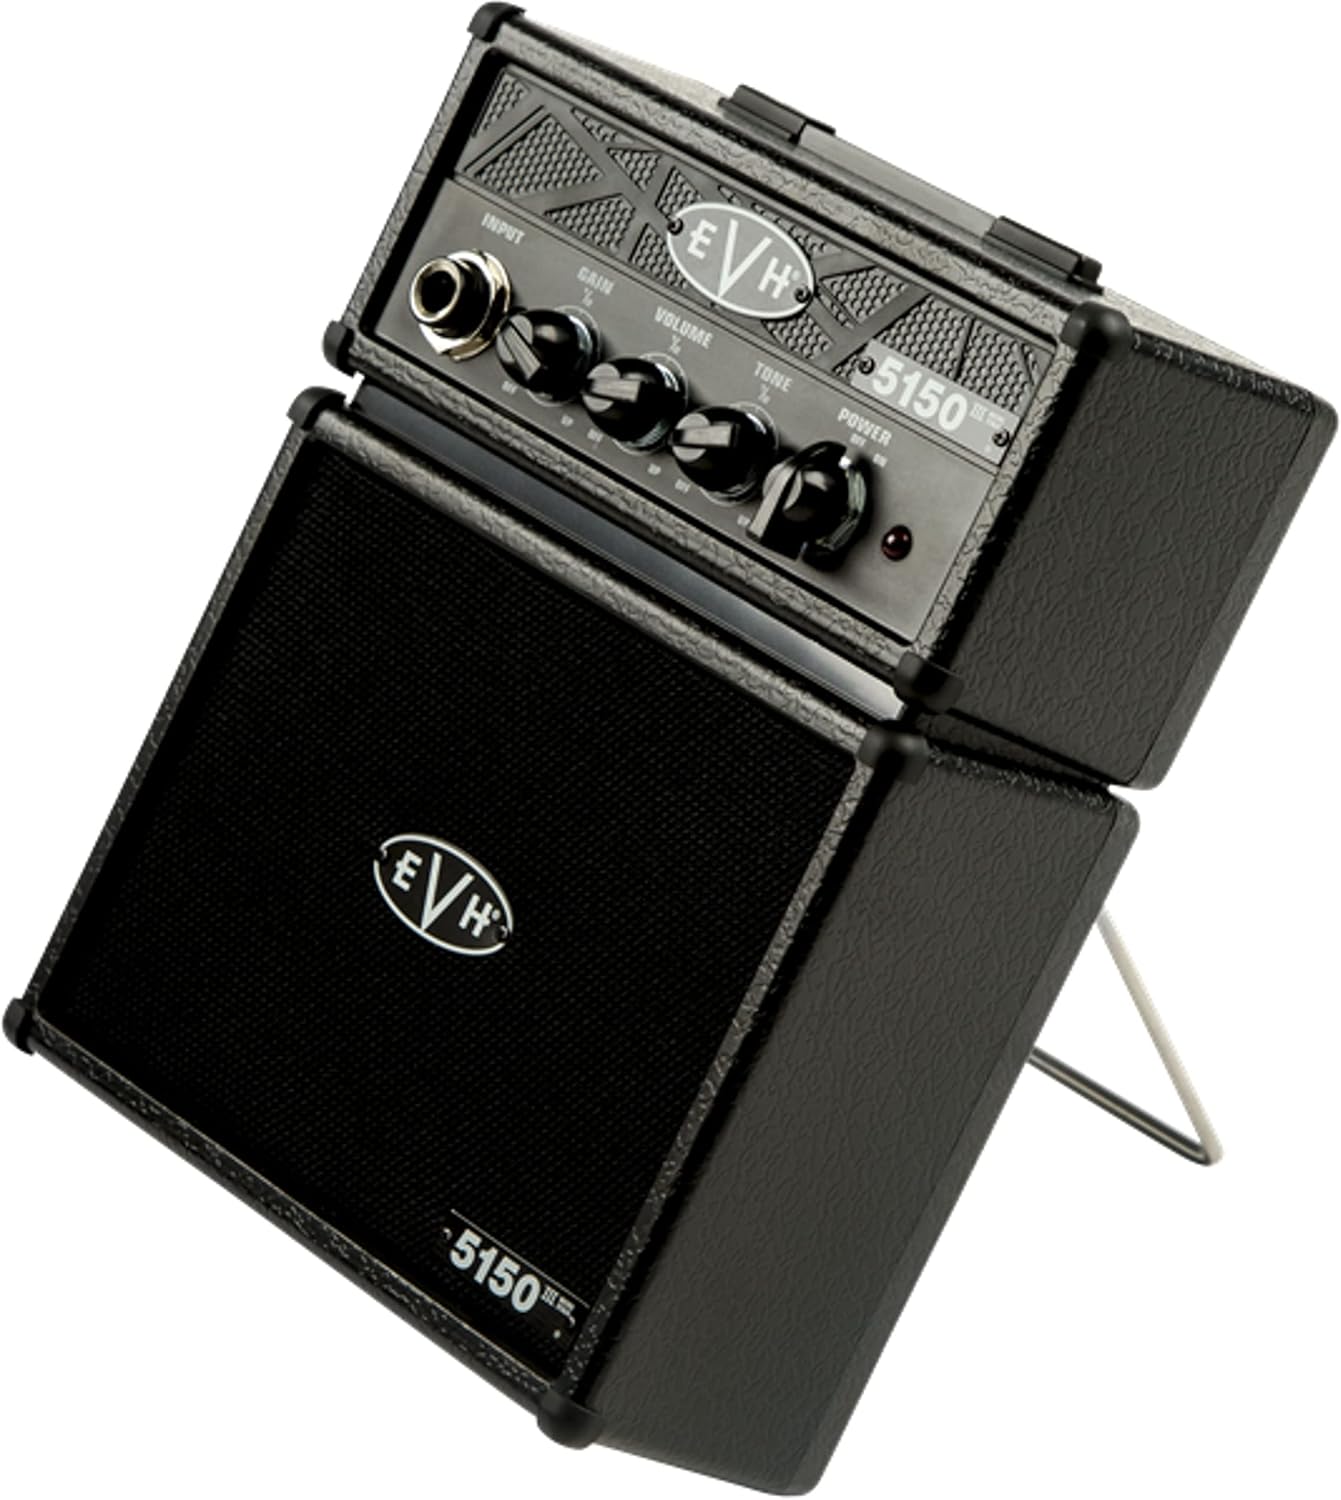
Figure 3: Amplifier with Tilt-Back Kickstand Engaged. This image shows the amplifier angled upwards, demonstrating the use of the integrated kickstand for improved sound projection.
To engage the kickstand, simply pull it out from the rear bottom of the amplifier until it locks into position. To retract, push it back into its housing.
Operation
- Ensure your guitar is connected and the battery is installed or an external power supply is connected.
- Turn the VOLUME and GAIN knobs to their minimum settings.
- Flip the POWER switch to the "ON" position.
- Slowly increase the VOLUME to your desired listening level.
- Adjust the GAIN knob to achieve the desired amount of overdrive or distortion.
- Use the TONE knob to fine-tune the brightness of your sound.
- When finished, turn the VOLUME and GAIN knobs down, then flip the POWER switch to "OFF".
Maintenance
Cleaning
Wipe the amplifier with a soft, dry cloth. Do not use liquid cleaners or abrasive materials, as they may damage the finish or internal components.
Battery Care
If the amplifier will not be used for an extended period, remove the 9V battery to prevent leakage and potential damage to the unit.
Storage
Store the amplifier in a cool, dry place away from direct sunlight and extreme temperatures.
Troubleshooting
- No Power:
- Check if the 9V battery is correctly installed and not depleted.
- If using an external power supply, ensure it is the correct voltage (9V DC, center negative) and properly connected.
- Verify the POWER switch is in the "ON" position.
- No Sound:
- Ensure your guitar cable is securely connected to both the guitar and the amplifier's INPUT jack.
- Check that the VOLUME knob is turned up.
- If headphones are connected, disconnect them to enable the internal speaker.
- Test with a different guitar cable or guitar to rule out external equipment issues.
- Distorted or Weak Sound:
- Adjust the GAIN and VOLUME knobs. High GAIN settings will naturally produce distortion.
- Replace the 9V battery if the sound is weak or distorted at lower GAIN settings, as this can indicate a low battery.
- Ensure the guitar's volume knob is turned up.
Specifications
| Feature | Detail |
|---|---|
| Brand | EVH |
| Model Number | 221005100 |
| Output Wattage | 1 Watt |
| Speaker Size | 3 inches |
| Power Source | 9V Battery (included) or 9V DC External Power Supply (not included) |
| Battery Type | Alkaline |
| Compatible Devices | Guitar |
| Connector Type | 6.35mm Jack (Input, Headphone Out) |
| Color | Black |
| Item Weight | 1.21 pounds (0.55 kg) |
| Product Dimensions (L x W x H) | 3.15 x 5.91 x 7.87 inches (8 x 15 x 20 cm) |
Warranty and Support
EVH products are designed for reliability and performance. For specific warranty information, please refer to the warranty card included with your purchase or visit the official EVH website. For technical support or service inquiries, please contact EVH customer service through their official channels.
Note: Keep your proof of purchase for warranty claims.


