
1. Introduction
The NZXT H510i is a compact ATX mid-tower PC gaming case designed for builders seeking a streamlined and feature-rich enclosure. It incorporates modern design elements with practical functionalities to enhance the PC building experience and system performance. This manual provides essential information for setting up, operating, and maintaining your NZXT H510i case.

Figure 1: Front view of the NZXT H510i PC case, showcasing its clean white exterior and the illuminated interior visible through the tempered glass side panel.
2. Key Features
The NZXT H510i case is equipped with several features designed to optimize performance, aesthetics, and ease of use:
- Front I/O USB Type-C Port: Provides high-speed connectivity for modern devices, supporting USB 3.1 Gen 2.
- Vertical GPU Mount: Allows for vertical installation of your graphics card to showcase its design (PCIe riser card not included).
- Tempered Glass Side Panel: A durable, clear side panel that installs with a single thumbscrew for easy access and an unobstructed view of internal components.
- Upgraded Smart Device V2: Features a faster microprocessor for integrated control of two HUE 2 RGB lighting channels and three fan channels, compatible with both voltage-regulated and PWM fans.
- Enhanced Cable Management: Patented cable routing kit with pre-installed channels and straps simplifies wiring, ensuring a clean build.
- Water-Cooling Ready: Designed to accommodate various liquid cooling solutions, including radiators.
- Motherboard Support: Compatible with Mini-ITX, MicroATX, and ATX motherboards.
3. Setup Guide
Follow these steps to set up your NZXT H510i PC case and install your components.
3.1 Preparing the Case
- Unpack the Case: Carefully remove the case from its packaging.
- Remove Side Panels: Locate the thumbscrew on the tempered glass side panel and unscrew it to remove the panel. The opposite steel panel can also be removed for easier access to cable management areas.
- Accessory Box: Locate the accessory box inside the case, which contains screws, zip ties, and other necessary hardware.

Figure 2: Rear view of the NZXT H510i, showing the open tempered glass side panel for easy access to the interior for component installation.
3.2 Component Installation
- Motherboard Installation: Install the motherboard standoffs if not pre-installed. Carefully align your ATX, MicroATX, or Mini-ITX motherboard with the standoffs and secure it with screws.
- Power Supply Unit (PSU) Installation: Install your PSU into the dedicated compartment at the bottom of the case. Secure it with screws from the rear.
- Storage Drive Installation:
- 2.5" Drives: Mount SSDs or 2.5" HDDs onto the dedicated trays located behind the motherboard tray or near the PSU shroud.
- 3.5" Drives: Install 3.5" HDDs into the drive cage located under the PSU shroud.
- Graphics Card (GPU) Installation: Insert your graphics card into the appropriate PCIe slot on your motherboard. Secure it with the retention clip and screw. For vertical GPU mounting, a separate PCIe riser cable (not included) is required.
- Cooling System Installation: Install CPU coolers, case fans, or liquid cooling radiators as per their respective manuals. The H510i supports various fan and radiator configurations.
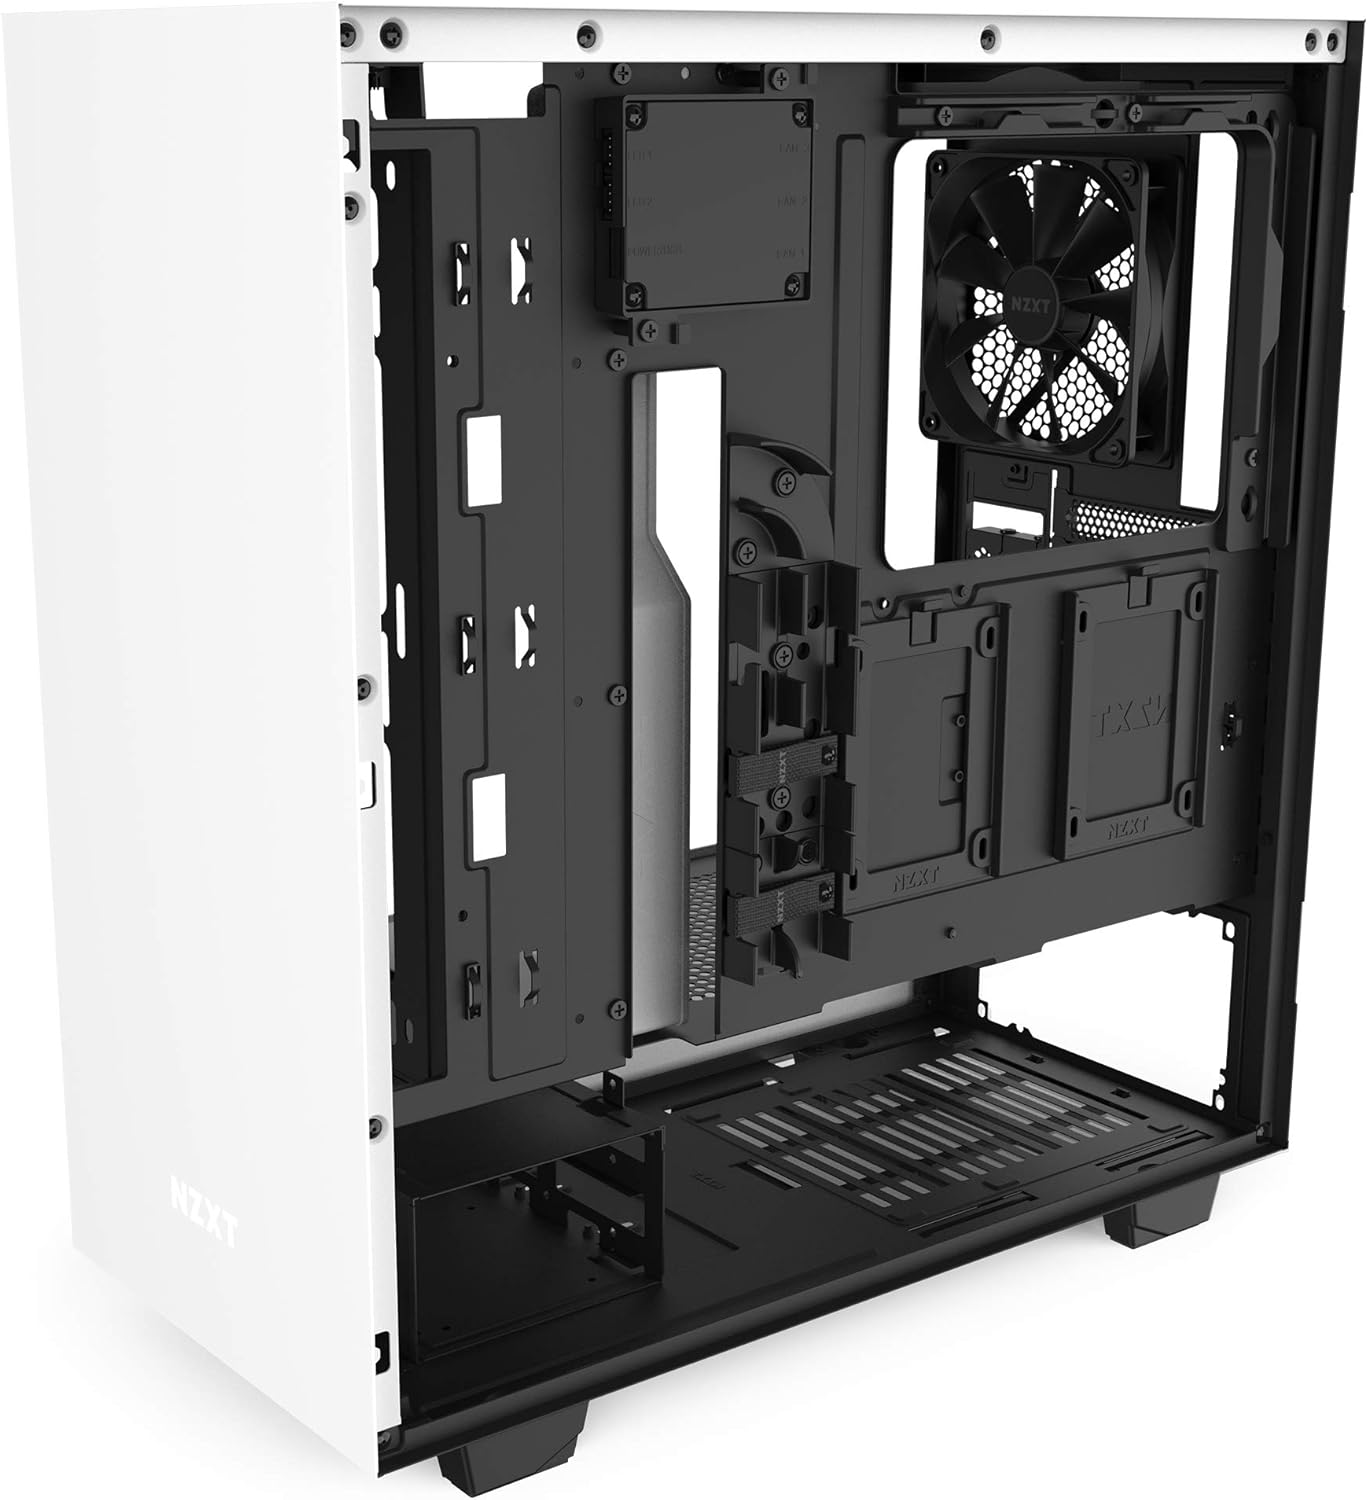
Figure 3: Internal layout of the NZXT H510i, highlighting the cable management bar and various mounting points for components and cooling solutions.
3.3 Cable Management
Utilize the pre-installed cable routing channels and straps behind the motherboard tray to organize and hide cables. Connect all necessary power cables from the PSU to the motherboard, GPU, and storage drives. Connect front panel I/O cables (USB 3.1 Gen 2 Type-C, USB 3.0, audio, power/reset switches, LEDs) to their respective headers on the motherboard.
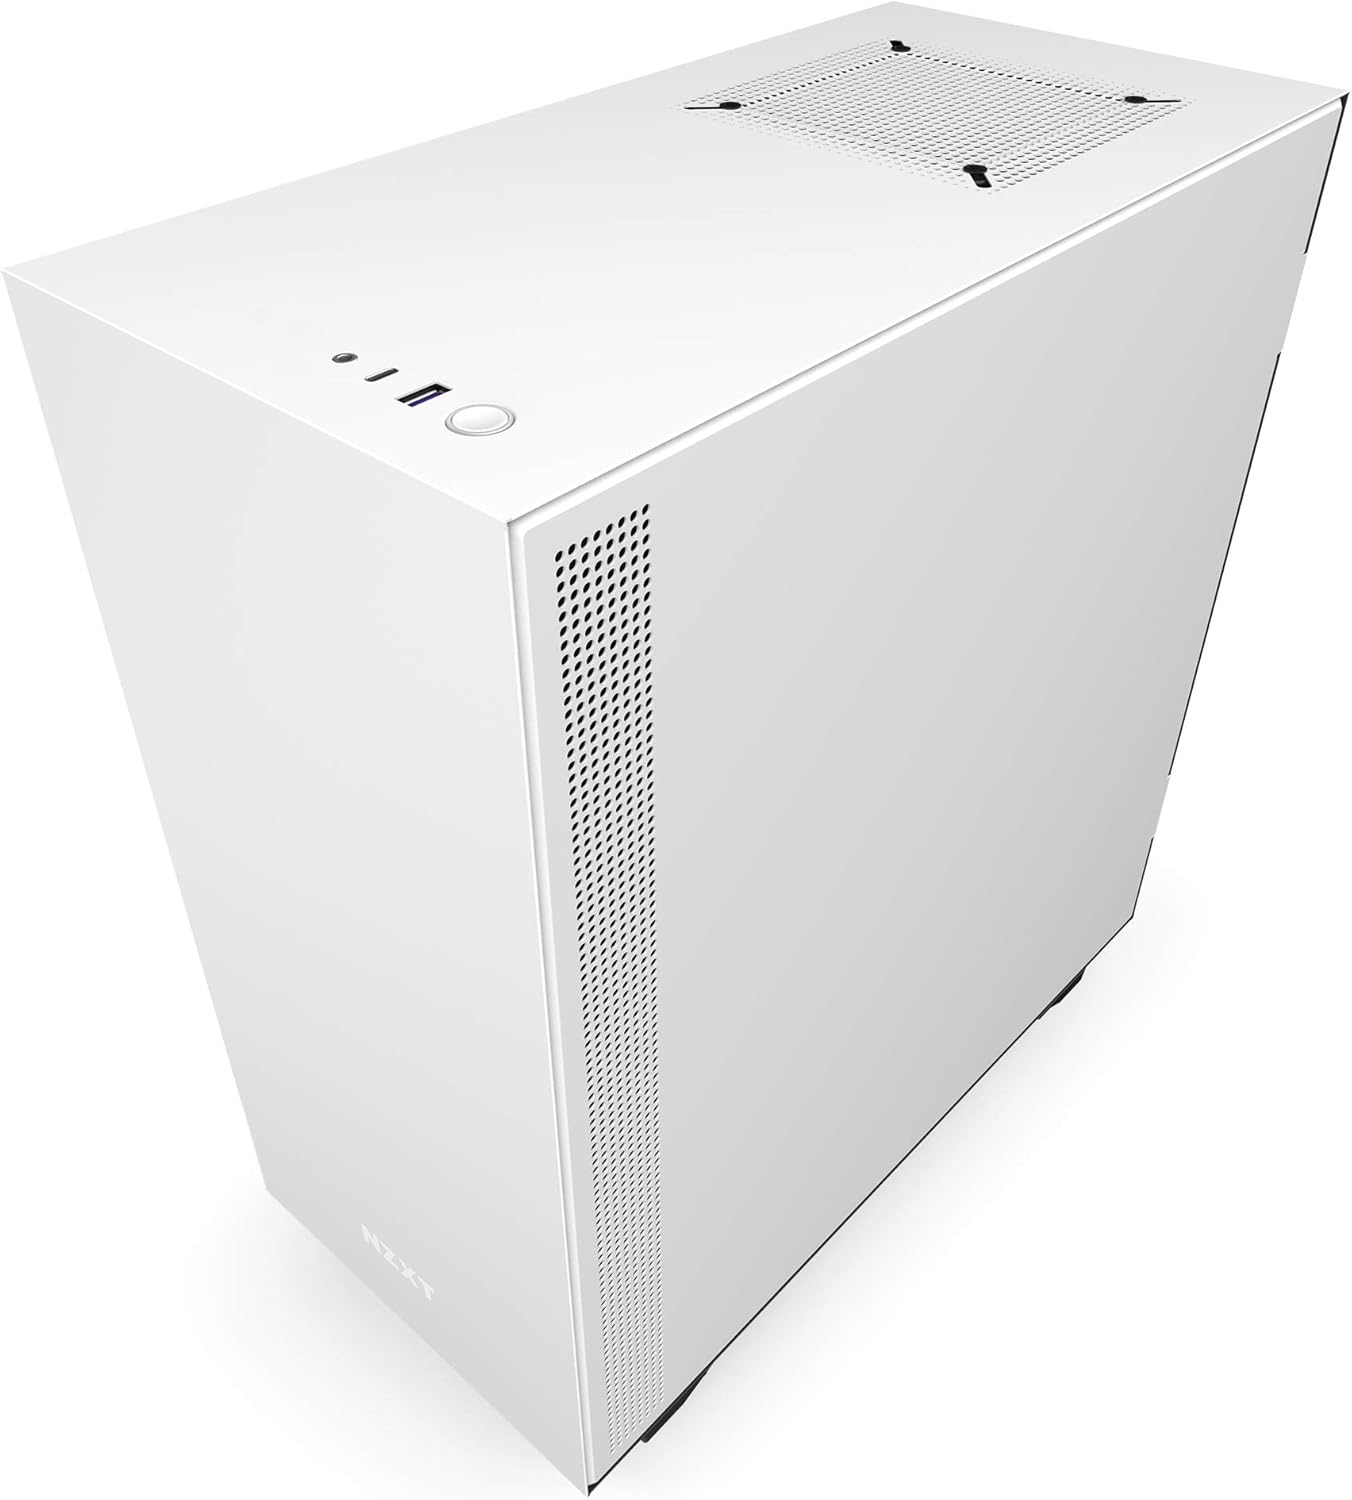
Figure 4: Top-down view of the NZXT H510i, illustrating the accessible front I/O ports including the USB Type-C connector.
4. Operating the Smart Device V2
The NZXT H510i features an integrated Smart Device V2, which allows for intelligent control of RGB lighting and fan speeds through the NZXT CAM software.
- NZXT CAM Software: Download and install the NZXT CAM software from the official NZXT website. This software provides a user-friendly interface to monitor system performance, customize RGB lighting effects, and adjust fan curves.
- RGB Lighting Control: Connect compatible NZXT HUE 2 RGB accessories to the Smart Device V2's RGB channels. Use NZXT CAM to select from various lighting modes, colors, and effects.
- Fan Control: Connect your case fans to the Smart Device V2's fan channels. Within NZXT CAM, you can create custom fan profiles based on temperature, noise levels, or fixed speeds to optimize cooling performance.
5. Maintenance
Regular maintenance helps ensure optimal performance and longevity of your PC components.
- Dust Filter Cleaning: The H510i includes removable dust filters at the front, top, and bottom (for the PSU intake). Periodically remove and clean these filters with compressed air or water (ensure they are completely dry before re-installation) to prevent dust buildup inside the case.
- Interior Cleaning: Use compressed air to blow dust out of internal components like fans, heatsinks, and the motherboard. Ensure the system is powered off and unplugged before cleaning.
- Exterior Cleaning: Wipe the exterior surfaces with a soft, damp cloth. Avoid abrasive cleaners.
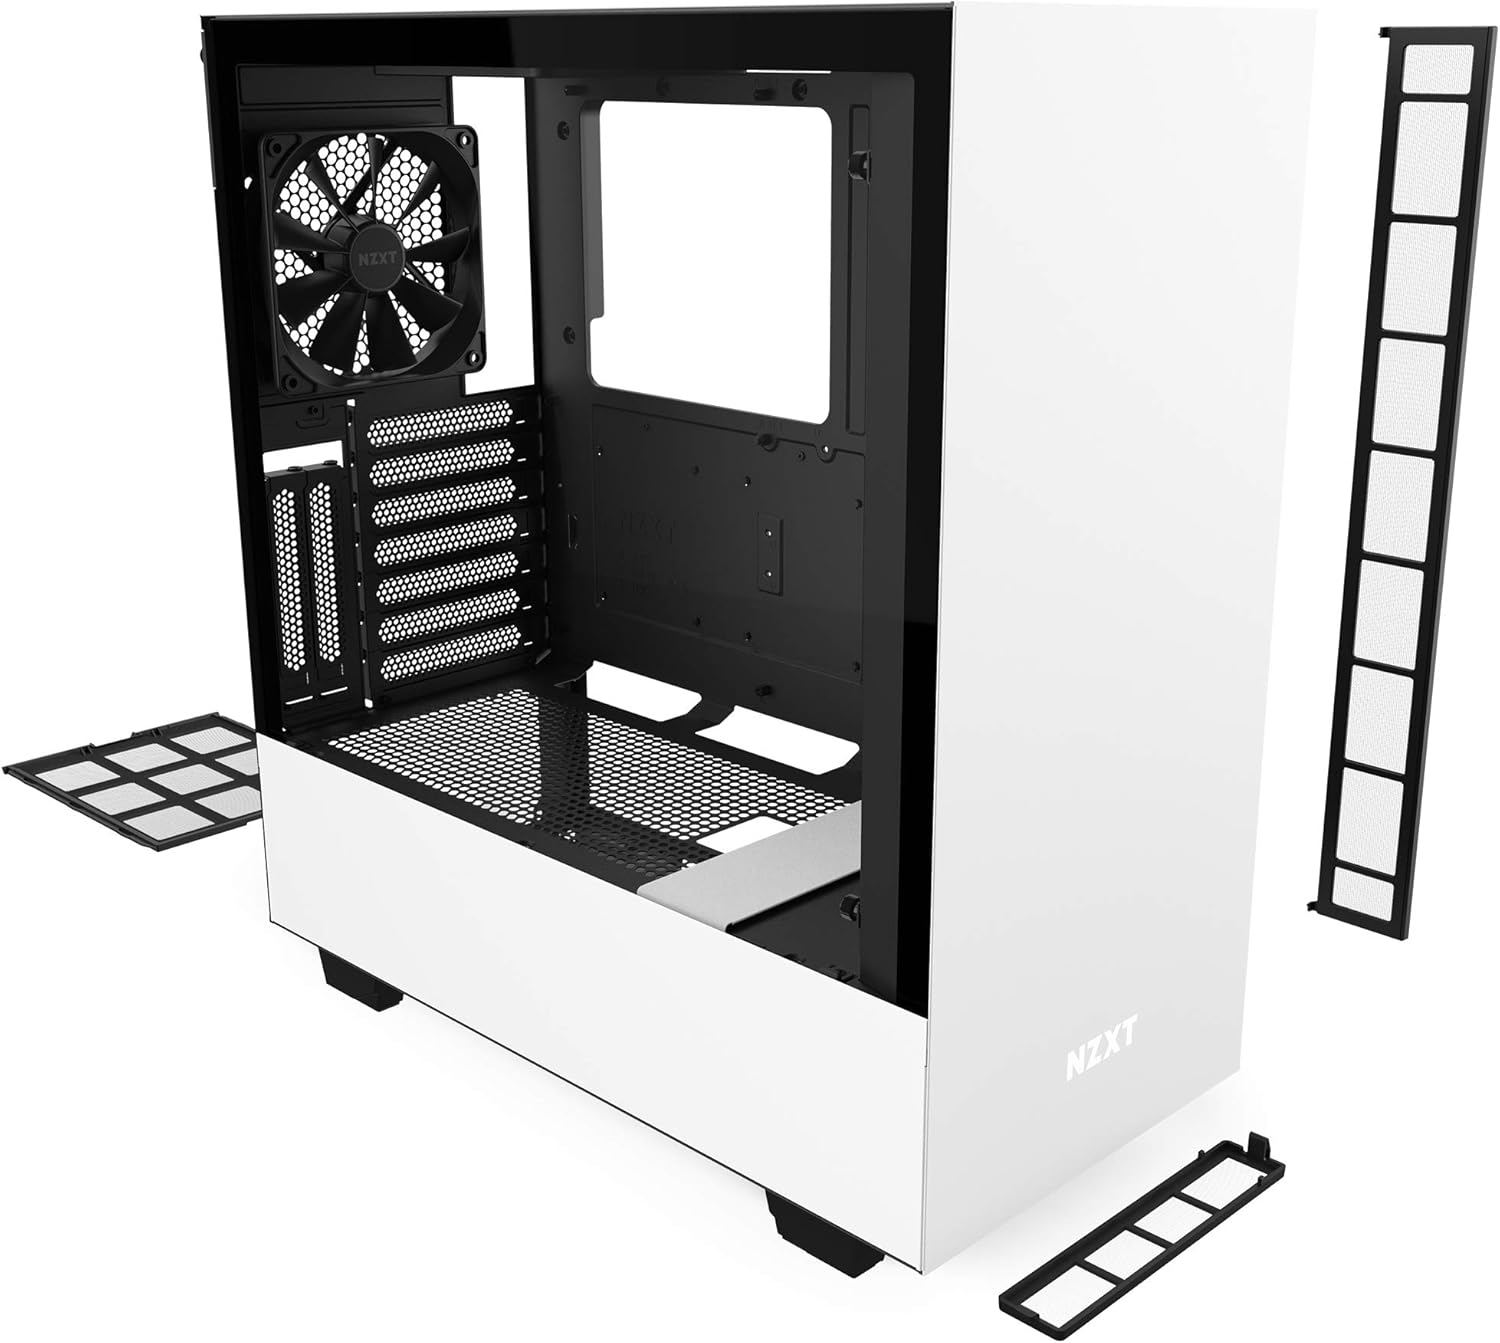
Figure 5: An exploded view of the NZXT H510i, demonstrating the removable dust filters and panels for easy cleaning and maintenance.
6. Troubleshooting
This section addresses common issues you might encounter with your PC case.
- No Power:
- Ensure the PSU is properly connected to the wall outlet and the power switch on the PSU is in the 'ON' position.
- Verify that the front panel power switch cable is correctly connected to the motherboard's F_PANEL header.
- Check all internal power connections (24-pin ATX, 8-pin CPU, PCIe, SATA).
- Fans Not Spinning / RGB Not Lighting Up:
- Confirm that fans and RGB accessories are correctly connected to the Smart Device V2.
- Ensure the Smart Device V2 is powered via SATA power and connected to a USB 2.0 header on the motherboard.
- Check NZXT CAM software for fan and RGB settings. Ensure they are not set to 'off' or a very low speed/brightness.
- Front I/O Ports Not Working:
- Verify that the USB 3.0, USB Type-C, and audio cables from the front panel are securely connected to their respective headers on the motherboard.
- Check motherboard BIOS settings to ensure USB ports are enabled.
7. Specifications
Detailed technical specifications for the NZXT H510i PC Gaming Case.
| Feature | Detail |
|---|---|
| Model Number | CA-H510i-W1 |
| Case Type | Mid Tower |
| Motherboard Compatibility | Mini-ITX, MicroATX, ATX |
| Material | Tempered Glass, Steel |
| Dimensions (LxWxH) | 16.85 x 8.27 x 18.11 inches (428 x 210 x 460 mm) |
| Item Weight | 14.96 pounds (6.79 kg) |
| Front I/O Ports | 1x USB 3.1 Gen 2 Type-C, 1x USB 3.0 Type-A, 1x Headset Audio Jack |
| Smart Device V2 | 2x RGB LED Ports, 3x Fan Channels (10W max per channel) |
| Drive Bays | 2.5": 2+1, 3.5": 2+1 |
| Expansion Slots | 7 |
| Radiator Support | Front: Up to 280mm, Rear: 120mm |
| Fan Support | Front: 2x 120mm or 2x 140mm, Top: 1x 120mm or 1x 140mm, Rear: 1x 120mm |
| Included Fans | 1x Aer F120 (Rear), 1x Aer F120 (Top) |
| Clearance - CPU Cooler | Up to 165mm |
| Clearance - GPU | Up to 381mm |
| Clearance - Front Radiator | 60mm |
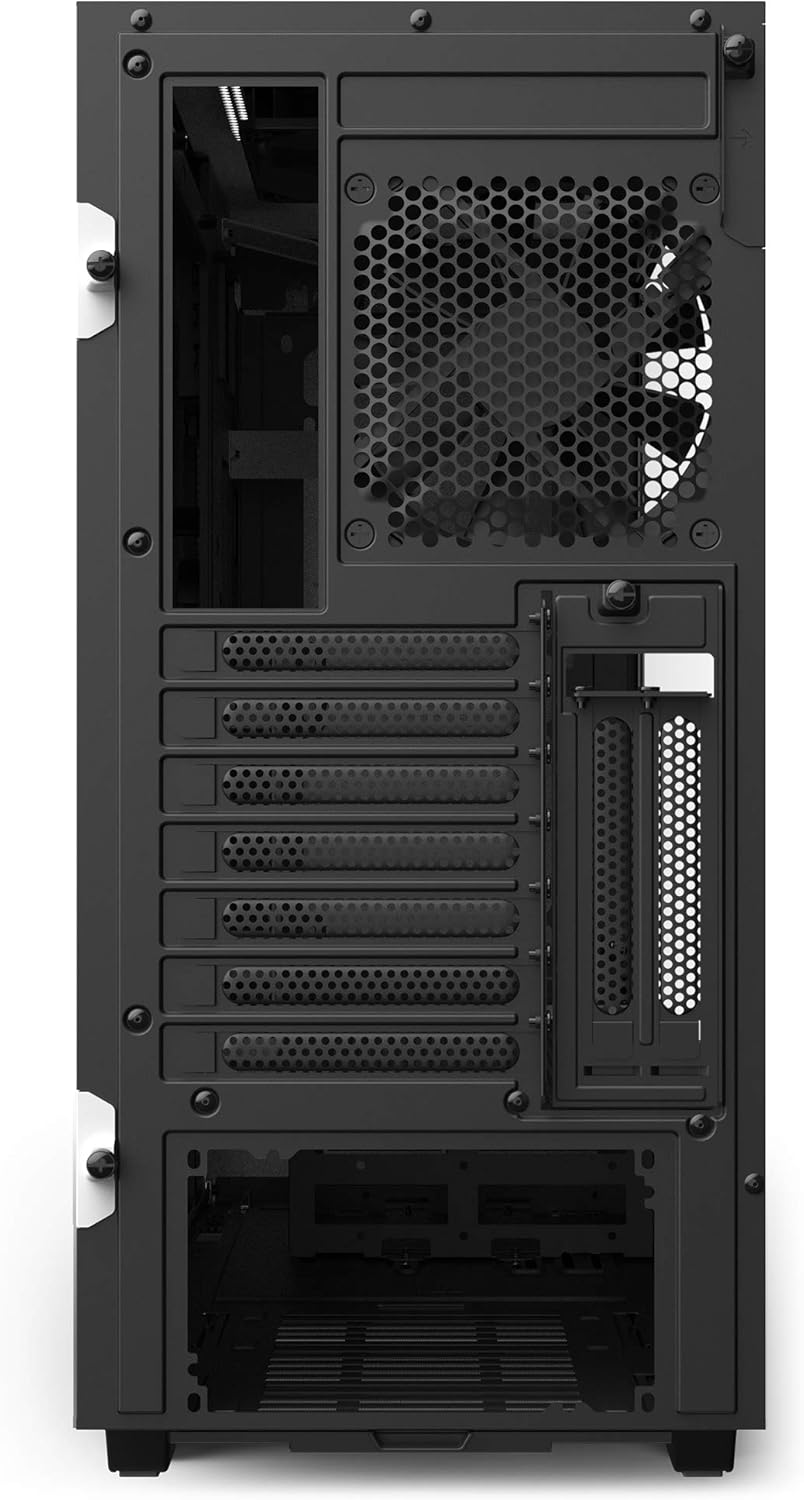
Figure 6: Rear view of the NZXT H510i, detailing the expansion slots, rear fan mount, and PSU cutout.
8. Warranty and Support
For warranty information and technical support, please refer to the official NZXT website or contact NZXT customer service directly. Keep your proof of purchase for warranty claims.
NZXT Official Website: www.nzxt.com