
SHOPPINGALL SA-GM224U+D15
SHOPPINGALL Dual Gas Spring Monitor and Laptop Mount Stand
Model: SA-GM224U+D15
1. Introduction
This manual provides comprehensive instructions for the installation, operation, and maintenance of your SHOPPINGALL Dual Gas Spring Monitor and Laptop Mount Stand. This versatile mount is designed to enhance your workspace ergonomics and efficiency.
Product Overview
The SHOPPINGALL SA-GM224U+D15 is a fully adjustable dual gas spring mount that can support either one monitor and one laptop, or two monitors. It features integrated USB 3.0 and audio ports for convenient connectivity. The mount offers flexible positioning options, including tilt, swivel, and rotation, to achieve optimal viewing angles and reduce strain.

Image 1.1: The SHOPPINGALL Dual Gas Spring Monitor and Laptop Mount Stand, showcasing a monitor on the left arm and a laptop on the right arm, both elevated above a desk surface.
Key Features
- Versatile Compatibility: Supports one 15"-32" monitor and one 12"-17" laptop, or two 15"-32" monitors. Each arm holds up to 17.6 lbs (8 kg).
- VESA Standard: Compatible with 75mm x 75mm or 100mm x 100mm VESA mounting patterns.
- Full Motion Adjustment: Gas spring system allows for +90° to -85° tilt, ±90° swivel, and 360° rotation for optimal viewing.
- Integrated Connectivity: Features two USB 3.0 ports and audio ports conveniently located on the base.
- Cable Management: Built-in clips keep cables organized and out of sight.
- Dual Mounting Options: Can be installed using a C-clamp (max thickness 3.35"/85mm) or grommet mount (max thickness 2.36"/60mm).
- Tool-Free Installation: Designed for easy assembly with all necessary tools included.

Image 1.2: Diagram illustrating the wide compatibility of the mount, showing supported monitor sizes (15"-32"), laptop screen sizes (10"-17"), VESA patterns (75x75mm & 100x100mm), and maximum load capacity (0-8kg/0-17.6lbs).
2. Setup and Installation
Before beginning installation, ensure all components are present and your desk meets the thickness requirements for either C-clamp or grommet mounting. All necessary tools are included.
2.1 Package Contents
Please verify that all parts are included in your package:
- Dual Gas Spring Arm Assembly
- Desk Clamp Base
- Grommet Mount Components
- VESA Plates (2x)
- Laptop Tray (1x, detachable)
- Hardware Kit (screws, washers, spacers)
- Hex Keys for adjustment
- Instruction Manual
2.2 Choosing a Mounting Method
The mount offers two installation methods:
- C-Clamp: Suitable for desk thicknesses up to 3.35 inches (85mm). This method does not require drilling.
- Grommet Mount: Suitable for desk thicknesses up to 2.36 inches (60mm) and requires an existing grommet hole or drilling a hole in your desk.


Image 2.1: Diagrams showing the dimensions and maximum desk thickness for C-clamp (left) and grommet mount (right) installation methods.
2.3 Installation Steps (General)
- Assemble the Base: Attach the chosen mounting base (C-clamp or grommet) to the main pole. Secure it firmly to your desk.
- Attach Arms: Slide the gas spring arms onto the main pole.
- Install VESA Plates: Attach the VESA plates to the back of your monitor(s) using the provided screws. If using a laptop, attach the laptop tray to one of the VESA plates.
- Mount Monitor/Laptop: Slide the VESA plate with the monitor or laptop tray onto the arm's mounting head. Ensure it clicks securely into place.
- Connect Cables: Route monitor cables through the integrated cable management clips on the arms. Connect the USB and audio cables from the mount's base to your computer.

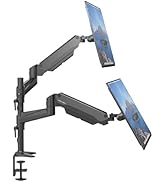
Image 2.2: Illustration of attaching the VESA plate to the monitor arm (left) and a monitor securely mounted (right).


Image 2.3: The detachable laptop tray (left) and a close-up of the USB 3.0 and audio ports on the mount's base (right).
3. Operating Instructions
The gas spring arms allow for smooth and effortless adjustment of your monitor and laptop positions. Always support your devices when making adjustments.
3.1 Gas Spring Tension Adjustment
The gas spring tension needs to be adjusted to match the weight of your monitor(s) and laptop. If the arm sags, increase tension. If it floats up, decrease tension.
- Locate the tension adjustment screw on the arm (usually near the joint).
- Use the provided hex key to turn the screw:
- Turn clockwise (+) to increase tension (for heavier devices).
- Turn counter-clockwise (-) to decrease tension (for lighter devices).
- Adjust gradually until the arm holds its position freely.

Image 3.1: Close-up view of the gas spring tension adjustment point on the arm, indicating directions to increase or reduce tension with a hex key.
3.2 Positioning Your Devices
The mount offers extensive flexibility:
- Height Adjustment: Move the arms up or down along the main pole, or use the gas spring mechanism for vertical positioning.
- Tilt: Adjust the monitor/laptop screen vertically from +90° to -85°.
- Swivel: Rotate the monitor/laptop horizontally up to ±90° at the arm joints.
- Rotation: Rotate the screen 360° to switch between landscape and portrait orientations.

Image 3.2: Diagrams illustrating the various adjustment capabilities including ±90° rotation, ±180° swivel, and +90°/-45° tilt, along with maximum height and extension.

Image 3.3: Examples of flexible monitor positioning, including back-to-back, landscape and portrait, both portrait, and widescreen configurations.
3.3 Using USB and Audio Ports
The integrated USB 3.0 and audio ports provide convenient access for peripherals and headphones. Ensure the corresponding cables from the mount's base are connected to your computer's USB and audio output ports.
4. Maintenance
Regular maintenance ensures the longevity and safe operation of your monitor mount.
- Cleaning: Wipe the mount surfaces with a soft, damp cloth. Avoid abrasive cleaners or solvents.
- Check Connections: Periodically check all screws and mounting points to ensure they remain tight and secure.
- Gas Spring Functionality: If the gas spring performance changes, re-adjust the tension as described in Section 3.1.
- Cable Management: Ensure cables are not pinched or excessively strained within the cable management clips.
5. Troubleshooting
This section addresses common issues you might encounter with your monitor mount.
5.1 Arm Sags or Floats
- Issue: The monitor arm does not stay in position; it either sags down or floats upwards.
- Solution: Adjust the gas spring tension. Refer to Section 3.1 for detailed instructions. Increase tension for sagging arms, decrease for floating arms.
5.2 Monitor Not Level
- Issue: The mounted monitor appears tilted or not perfectly horizontal.
- Solution: Check the VESA plate attachment to the monitor and the arm. Ensure all screws are tightened evenly. Some VESA plates allow for minor rotational adjustment; consult the specific VESA plate instructions if applicable.
5.3 USB/Audio Ports Not Functioning
- Issue: Devices connected to the mount's USB or audio ports are not recognized or do not work.
- Solution: Verify that the USB and audio cables extending from the mount's base are securely connected to the corresponding ports on your computer. Try connecting the devices directly to your computer to rule out device issues.
5.4 Mount Feels Unstable
- Issue: The entire mount or individual arms feel wobbly or unstable.
- Solution: Re-check the desk clamp or grommet mount installation. Ensure it is tightened securely to the desk. Verify that the arms are fully seated on the main pole and all connecting screws are tight. Ensure the desk itself is stable.
6. Specifications
| Model Number | SA-GM224U+D15 |
| Compatible Monitor Size | 15" - 32" |
| Compatible Laptop Size | 12" - 17" |
| Weight Capacity (per arm) | 17.6 lbs (8 kg) |
| VESA Compatibility | 75mm x 75mm, 100mm x 100mm |
| Tilt Range | +90° to -85° |
| Swivel Range | ±90° |
| Rotation | 360° |
| Mounting Options | C-Clamp (max 3.35"/85mm desk thickness), Grommet (max 2.36"/60mm desk thickness) |
| Integrated Ports | 2x USB 3.0, Audio In/Out |
| Material | Metal |
| Product Dimensions | 78.5 x 25 x 14.7 cm (30.9 x 9.8 x 5.8 inches) |
| Item Weight | 6.55 kg (14.44 lbs) |
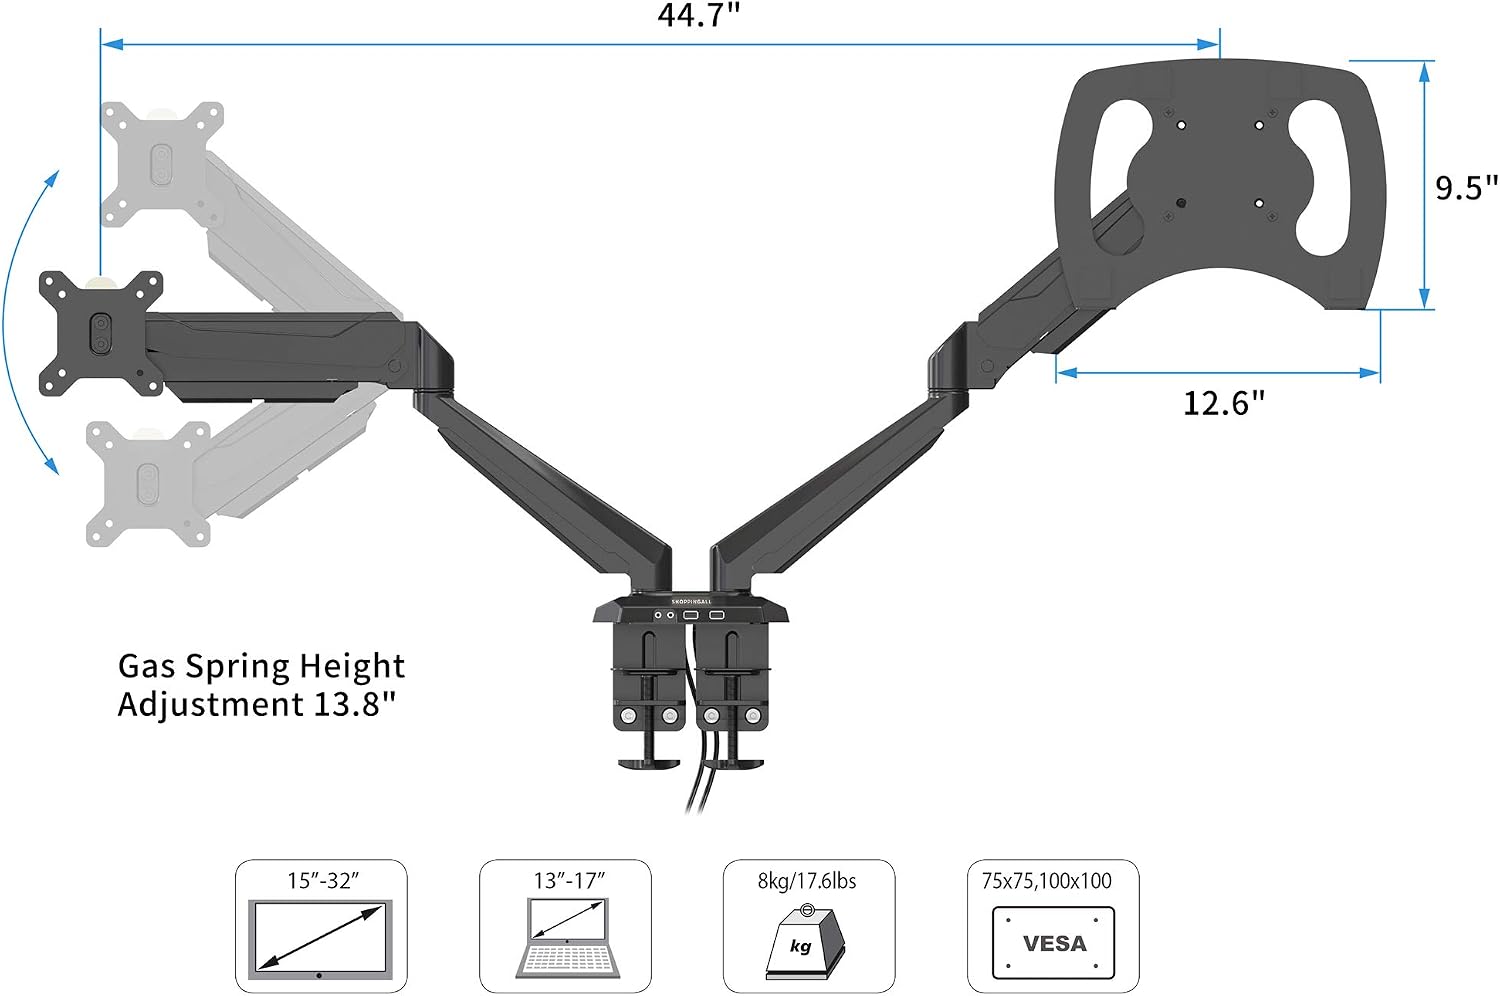
Image 6.1: Technical drawing with key dimensions including total width (44.7"), laptop tray width (12.6"), VESA plate height (9.5"), and gas spring height adjustment range (13.8").
7. Warranty and Support
SHOPPINGALL is committed to providing quality products and customer satisfaction. For any questions, concerns, or support needs, please contact us using the information below.
- Email Support: Support@ShoppingAll.com
- Toll-Free Phone: +1 (855) 266-9166
- Business Address: West Vancouver, British Columbia V7V 1A8, CA
Please refer to your product packaging or the official SHOPPINGALL website for specific warranty details and terms.
Related documentsSA-GM224U+D15

Ask a question about this manual
Ask about setup, troubleshooting, compatibility, parts, safety, or missing instructions. Manuals+ will review the question and use this page’s manual context to help answer it.