1. Introduction
The MULTIREX PowerJet 2 is a powerful 12V electric sprayer designed for efficient application of various liquids, including moss removers for roofs and facades, herbicides, and other garden treatments. Its key features include a 10-meter spray range, a 5.5 bar pump with automatic pressure switch, a 1.5-meter carbon lance, and a 5-hour battery life. This manual provides essential information for the safe and effective use, maintenance, and troubleshooting of your PowerJet 2 sprayer.
2. Safety Instructions
Important: Read all safety instructions before operating the sprayer. Failure to follow these instructions may result in injury or damage to the product.
- Always wear appropriate protective clothing, eye protection, and face protection when handling corrosive or chemical substances.
- Never point the spray nozzle at people, animals, or electrical equipment.
- Keep the sprayer away from heat sources, open flames, and flammable materials.
- Never leave the sprayer unattended during operation or when connected to a power source.
- Ensure all connections are secure before use to prevent leaks.
- Only use liquids compatible with the sprayer's Viton membrane, which is resistant to chlorine, diluted acids, and hydrocarbons.
- Always comply with local regulations for the disposal of the used sprayer and its contents.
- Keep out of reach of children.
3. Package Contents
Verify that all items listed below are included in your package:
- MULTIREX PowerJet 2 Electric Sprayer unit (10-liter tank)
- 12V Rechargeable Battery (pre-installed or separate)
- Battery Charger
- 3 Carbon Fiber Lances (modular, total length up to 1.5m)
- 7 Adaptable Nozzles for various treatments (e.g., straight jet, long-range, mist, facade, weeding)
- 6.5m Hose
- 2m Hose (for external suction)
- User Manual
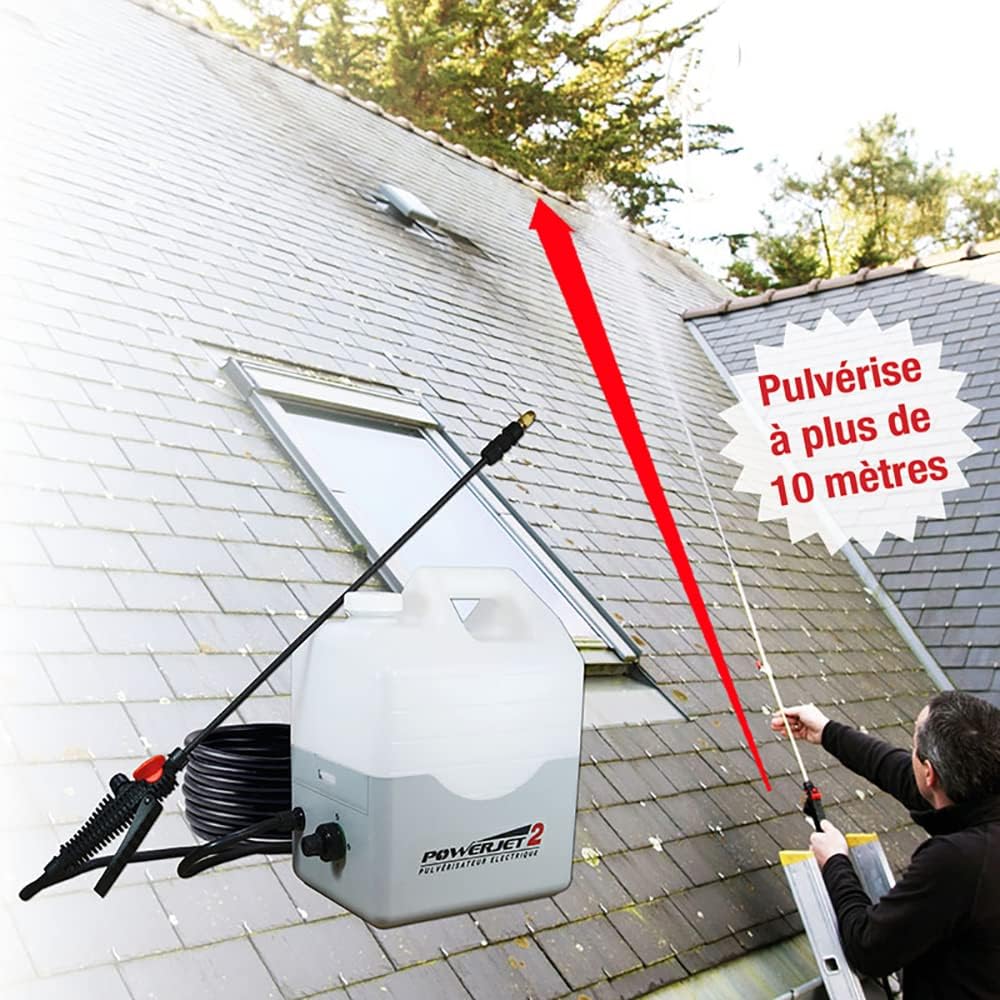
Image: Overview of the Multirex PowerJet 2 electric sprayer and its included components.
4. Setup
4.1. Battery Charging
- Ensure the sprayer is turned off.
- Connect the charger to the battery port on the sprayer unit.
- Plug the charger into a standard electrical outlet.
- Allow the battery to charge fully before first use. The charging indicator light will change color or turn off when charging is complete.
4.2. Assembling the Lance and Hose
- Attach the desired number of carbon fiber lance sections together by screwing them clockwise until secure. The lance is modular, allowing for adjustable length up to 1.5 meters.
- Select the appropriate nozzle for your application and screw it onto the end of the lance.
- Connect the 6.5m hose to the sprayer unit's outlet port and to the handle of the lance. Ensure all connections are hand-tight to prevent leaks.
4.3. External Suction Setup (Optional)
For larger volumes of liquid, the PowerJet 2 can draw directly from an external jerrycan or tank.
- Ensure the sprayer's internal tank is empty or not in use.
- Connect the 2m external suction hose to the designated external suction port on the sprayer unit.
- Place the other end of the suction hose into your external liquid container (e.g., a 10-liter jerrycan).
- Ensure the external container is placed on a stable, level surface, preferably at the same level or slightly below the sprayer unit for optimal suction.

Image: The PowerJet 2 sprayer connected to an external blue jerrycan via the suction hose, demonstrating the external suction capability.
5. Operating Instructions
5.1. Filling the Tank
- Ensure the sprayer is turned off and disconnected from any power source.
- Unscrew the cap of the 10-liter internal tank.
- Carefully pour the desired liquid into the tank, observing the maximum fill line. Avoid overfilling.
- Securely screw the cap back onto the tank.
5.2. Selecting Nozzles
The PowerJet 2 comes with 7 different nozzles for various applications:
- Straight Jet Nozzle: For long-range spraying, such as reaching high roofs or distant areas.
- Mist Nozzle: For fine, even coverage on delicate plants or when a broad, light application is needed.
- Facade Nozzle: Designed for cleaning or treating vertical surfaces like walls and facades.
- Weeding Nozzle: For targeted application of herbicides to specific areas.
- Other nozzles are included for specialized tasks. Refer to the nozzle guide for specific details.
5.3. Spraying Techniques
Turn on the sprayer using the power switch. The 5.5 bar pump with pressure switch ensures a powerful and consistent spray, automatically starting and stopping as needed.
5.3.1. Roof Moss Removal
Utilize the straight jet or long-range nozzle with the extended carbon lance to achieve a 10-meter reach from the ground. This allows for safe application without the need for ladders in many cases.

Image: A user operating the PowerJet 2 to spray a roof, illustrating the product's ability to reach over 10 meters from the ground.

Image: A user spraying the roof of a house from ground level using the PowerJet 2, highlighting its extended reach.
5.3.2. Facade Cleaning
For facades, select the facade nozzle or a mist nozzle for even coverage. Hold the lance at an appropriate distance to ensure uniform application.

Image: A user applying liquid to a house facade with the PowerJet 2, demonstrating its use for vertical surfaces.
5.3.3. General Garden Treatments
Use the appropriate nozzle for weeding, pest control, or fertilizing. The 5-hour battery life allows for extensive treatment of large garden areas without interruption.
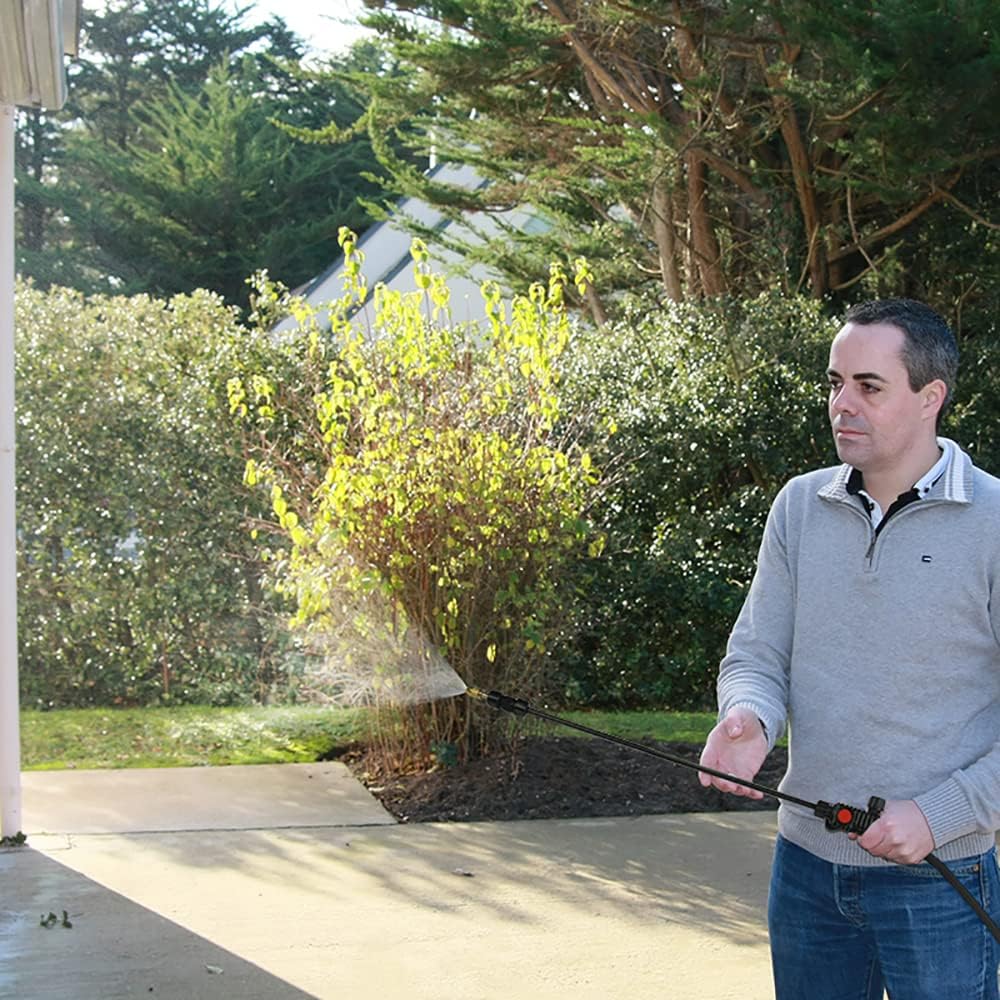
Image: A user spraying a paved area, demonstrating the PowerJet 2's versatility for ground-level applications.

Image: A user spraying a hedge with the PowerJet 2, suitable for applying treatments to shrubs and plants.
6. Maintenance
6.1. Cleaning After Use
Proper cleaning after each use is crucial for the longevity of your sprayer.
- Empty any remaining liquid from the tank.
- Fill the tank with clean water.
- Operate the sprayer, spraying clean water through the lance and nozzle for several minutes until the tank is empty. Repeat this process 3-4 times to thoroughly flush the system.
- Clean the exterior of the sprayer with a damp cloth.
- Remove and clean nozzles separately to prevent clogging.
6.2. Battery Care
To maintain battery health, it is recommended to operate the sprayer at least once every 1.5 months, even if just with water, to keep the battery active.
6.3. Storage
Store the sprayer in a cool, dry place, away from direct sunlight and extreme temperatures. Ensure the tank is empty and clean before storage.
7. Troubleshooting
If you encounter issues with your PowerJet 2 sprayer, refer to the following common troubleshooting steps:
- No Spray or Weak Pressure:
- Check if the battery is charged.
- Ensure all hose connections are tight and there are no leaks.
- Verify that the tank contains sufficient liquid or that the external suction hose is properly submerged.
- Clean the nozzle for any blockages.
- Inspect the filter at the bottom of the tank or suction hose for debris.
- Leaks from Connections:
- Tighten all connections by hand. Avoid overtightening plastic components.
- Check O-rings and gaskets for wear or damage and replace if necessary.
- Sprayer Not Turning On:
- Confirm the battery is charged.
- Ensure the power switch is in the 'ON' position.
If problems persist after following these steps, please contact customer support.
8. Specifications
| Feature | Specification |
|---|---|
| Model Name | PowerJet 2 |
| Brand | MULTIREX |
| Reference | 480200 |
| Power Source | Battery Powered (12V) |
| Battery Included | Yes, 1 x 12V |
| Battery Life | Up to 5 hours |
| Maximum Pressure | 5.5 Bar (550,000 Pascal) |
| Tank Volume | 10 Liters |
| Spray Range | Up to 10 meters |
| Lance Length | 1.5 meters (carbon fiber, modular) |
| Hose Lengths | 6.5m (main), 2m (external suction) |
| Nozzles Included | 7 adaptable nozzles |
| Material | Polypropylene (PP) |
| Color | White & Grey |
| Item Weight | 6.7 Kilograms |
| Package Dimensions | 52.4 x 40.8 x 28.2 cm |
| Spare Parts Availability | 10 Years |
9. Warranty and Support
For warranty information, technical support, or to order spare parts, please refer to the contact details provided with your purchase documentation or visit the official MULTIREX website. Keep your proof of purchase for warranty claims.


