1. Product Overview
The Electrolux EEG48200L is an integrated dishwasher designed for efficient and quiet dishwashing. This appliance features a capacity of 14 place settings and operates at a low noise level of 44 decibels. It includes multiple wash programs and convenient loading options such as a cutlery drawer and a cutlery basket.
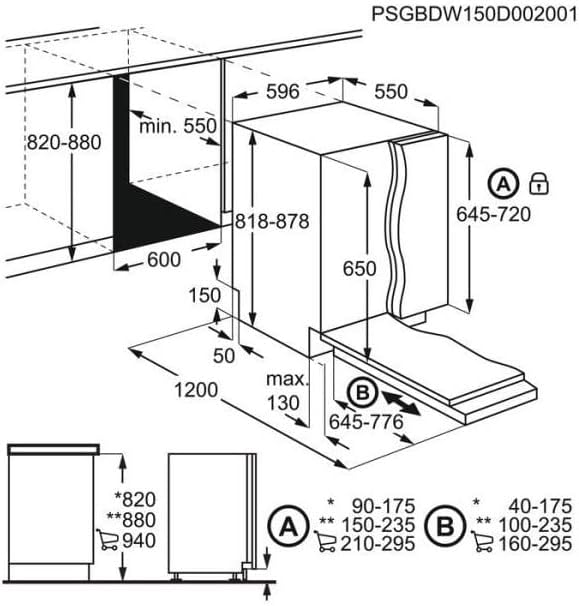
Figure 1: Electrolux EEG48200L Integrated Dishwasher. This image shows the front view of the dishwasher, typically installed within kitchen cabinetry.
Key Features:
- Capacity: 14 place settings
- Noise Level: 44 Decibels
- Control Type: Fully integrated controls
- Installation Type: Integrated / Built-in
- Included Components: Cutlery basket, cutlery drawer
- Cycle Options: 8 wash programs
2. Installation and Setup
Proper installation is crucial for the safe and efficient operation of your Electrolux EEG48200L dishwasher. Ensure all connections are secure and meet local regulations.
2.1. Dimensions and Cabinetry Requirements
Refer to the diagram below for detailed dimensions and cabinetry requirements for integrating your dishwasher.
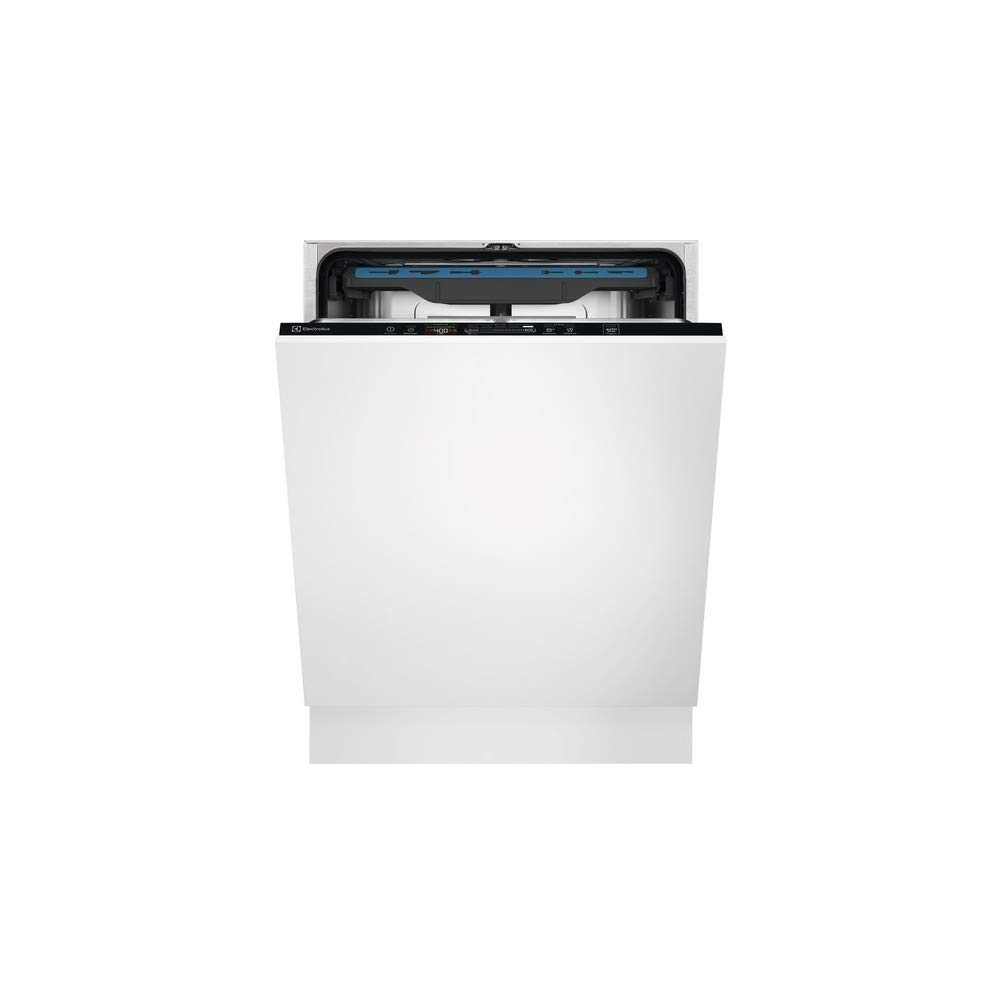
Figure 2: Installation dimensions for the Electrolux EEG48200L dishwasher. This diagram illustrates the required cabinet opening dimensions (width 600mm, height 820-880mm), dishwasher unit dimensions (width 596mm, height 818-878mm), and panel dimensions (height 645-720mm for panel A, 645-776mm for panel B). It also shows the adjustable feet and minimum clearances.
- Cabinet Opening Width: 600 mm
- Cabinet Opening Height: 820 - 880 mm
- Dishwasher Unit Dimensions (W x H): Approximately 596 mm x 818-878 mm
- Depth: Minimum 550 mm for the cabinet.
- Front Panel Dimensions:
- Panel A (top): 645 - 720 mm height
- Panel B (bottom): 645 - 776 mm height
- Adjustable Feet: Allows for height adjustment.
2.2. Water and Electrical Connections
Connect the water inlet hose to a cold or hot water supply (max 60°C) and the drain hose to a suitable drain. Ensure the electrical connection is properly grounded and matches the appliance's power requirements. Consult a qualified technician for installation if you are unsure.
3. Operating Instructions
Follow these steps for optimal performance and cleaning results.
3.1. Loading the Dishwasher
- Scrape off large food particles from dishes before loading.
- Place larger items in the lower basket and smaller, delicate items in the upper basket.
- Utilize the dedicated cutlery drawer or basket for forks, knives, and spoons, ensuring they do not nest together.
- Ensure spray arms can rotate freely and are not blocked by dishes.
3.2. Adding Detergent and Rinse Aid
- Fill the detergent dispenser with the appropriate amount of dishwasher detergent according to the program selected and water hardness.
- Check the rinse aid indicator and refill the rinse aid dispenser when necessary to ensure streak-free drying.
- If your water is hard, ensure the salt reservoir is filled with dishwasher salt to prevent limescale buildup.
3.3. Selecting and Starting a Wash Program
- Close the dishwasher door.
- Select the desired wash program using the control panel. The dishwasher offers 8 cycle options.
- Press the Start button to begin the cycle.
- A light indicator on the floor may signal that the dishwasher is in operation.
- The dishwasher may automatically open its door at the end of the cycle to assist with drying.
4. Maintenance and Care
Regular maintenance ensures the longevity and efficiency of your dishwasher.
4.1. Cleaning Filters
- Periodically check and clean the coarse and fine filters located at the bottom of the dishwasher tub.
- Remove any food debris to prevent blockages and ensure proper drainage.
4.2. Cleaning the Interior and Exterior
- Wipe the interior with a damp cloth to remove any residue.
- Clean the exterior control panel and door with a soft, damp cloth. Avoid abrasive cleaners.
4.3. Winterization (if applicable)
If the dishwasher is in an unheated area and there is a risk of freezing, drain all water from the appliance and disconnect the water supply. Consult the full manual for detailed winterization procedures.
5. Troubleshooting
Before contacting customer service, refer to the following common issues and solutions.
5.1. Dishwasher Does Not Start
- Ensure the door is fully closed and latched.
- Check if the power cord is securely plugged into the outlet.
- Verify that the circuit breaker has not tripped.
- Confirm that a wash program has been selected and the Start button pressed.
5.2. Poor Cleaning Results
- Check if the spray arms are blocked or clogged.
- Ensure dishes are loaded correctly, allowing water to reach all surfaces.
- Verify that the detergent dispenser was filled correctly and the detergent is fresh.
- Clean the filters.
- Check rinse aid and salt levels.
5.3. Water Not Draining
- Inspect the drain hose for kinks or blockages.
- Clean the filters to ensure no debris is obstructing the drain pump.
For more complex issues or persistent problems, please contact Electrolux customer service.
6. Specifications
Detailed technical specifications for the Electrolux EEG48200L dishwasher.
| Feature | Specification |
|---|---|
| Model Name | EEG48200L |
| Brand | Electrolux |
| Installation Type | Integrated |
| Capacity | 14 Place Settings |
| Noise Level | 44 Decibels |
| Product Dimensions (L x W x H) | 54.99 x 59.59 x 81.79 cm (approx. 55 x 59.6 x 81.8 cm) |
| Item Weight | 37.08 Kilograms (approx. 37.1 kg) |
| Number of Cycle Options | 8 |
| Display Type | LED |
| Control Type | Fully Integrated |
| Color | White |
| Included Components | Cutlery basket, cutlery drawer |
| Finish Type | Glossy |
7. Warranty and Support
For detailed warranty information, please refer to the warranty card included with your product or visit the official Electrolux website. Warranty terms and conditions may vary by region.
For technical assistance, spare parts, or customer service inquiries, please contact your local Electrolux customer support. Have your model number (EEG48200L) and serial number ready when contacting support.