1. Introduction
This manual provides instructions for the setup, operation, and maintenance of your BALDR Wireless Indoor/Outdoor Thermometer and Hygrometer. This device is designed to monitor indoor and outdoor temperature and humidity, offering a clear display and wireless sensor connectivity.
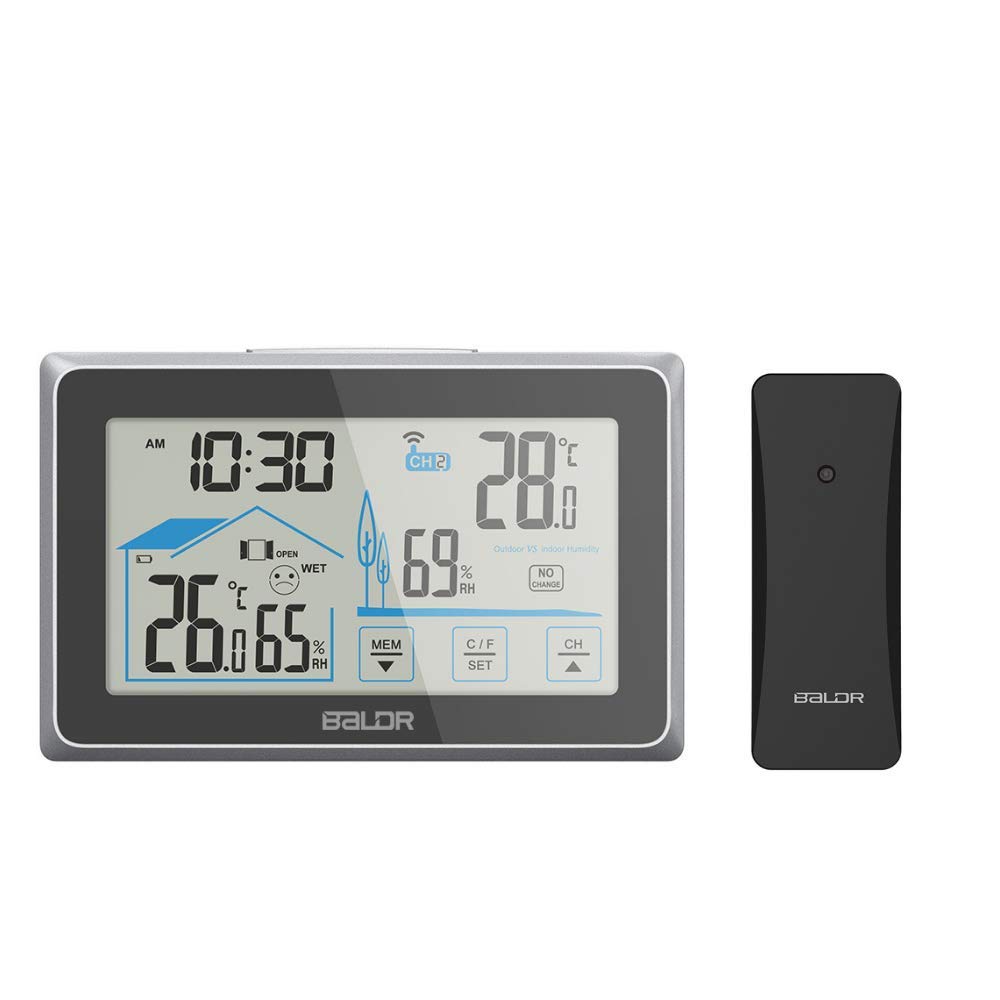
Figure 1.1: Main display unit and remote sensor.
2. Product Overview
2.1 Components
- Main Display Unit (Indoor Receiver)
- Wireless Remote Sensor (Outdoor Sensor)
- Instruction Manual
2.2 Main Display Unit Features
- Large 4-inch touch screen LCD with backlight.
- Displays current time, indoor temperature & humidity, and outdoor temperature & humidity.
- Comfort level indicator.
- Window open/close suggestion indicator.
- Touch buttons for MEM (Memory), C/F SET (Celsius/Fahrenheit & Settings), and CH (Channel).
- Integrated kickstand for freestanding use and wall-mount hole.

Figure 2.1: Labeled features of the main display unit.
2.3 Wireless Remote Sensor Features
- Transmits temperature and humidity data wirelessly to the main unit.
- Maximum transmission range of 100 meters (328 feet) in open air.
- Supports up to 3 remote sensors (additional sensors sold separately).

Figure 2.2: Wireless remote sensor and its communication with the main unit.
3. Setup
3.1 Battery Installation
- Main Display Unit: Open the battery compartment cover on the back of the main unit. Insert 3 AAA batteries, ensuring correct polarity (+/-). Close the cover.
- Wireless Remote Sensor: Open the battery compartment cover on the back of the remote sensor. Insert 2 AA batteries, ensuring correct polarity (+/-). Close the cover.

Figure 3.1: Battery compartment on the main unit.
3.2 Sensor Pairing
After installing batteries in both units, the main display unit will automatically search for the remote sensor signal. The outdoor temperature and humidity will appear on the display once connected. If the connection is not established within 3 minutes, or if you are adding additional sensors:
- Press and hold the 'CH' button on the main unit for 3 seconds to initiate a manual search for the remote sensor(s).
- Ensure the remote sensor is within range and has fresh batteries.
3.3 Placement
- Main Display Unit: Can be placed on a flat surface using its integrated kickstand or mounted on a wall using the hanging hole. Position it in a central location indoors, away from direct sunlight or heat sources that could affect indoor readings.
- Wireless Remote Sensor: Place the remote sensor outdoors in a shaded, dry location, protected from direct rain and sunlight. Ensure it is within the 100-meter (328-foot) transmission range of the main unit. Avoid placing it near large metal objects or electronic devices that could interfere with the wireless signal.

Figure 3.2: Example of remote sensor outdoor placement.
4. Operating Instructions
4.1 Backlight Function
Press the light button located on the top of the main unit to activate the backlight. The backlight will illuminate for 20 seconds, improving visibility in low-light conditions.
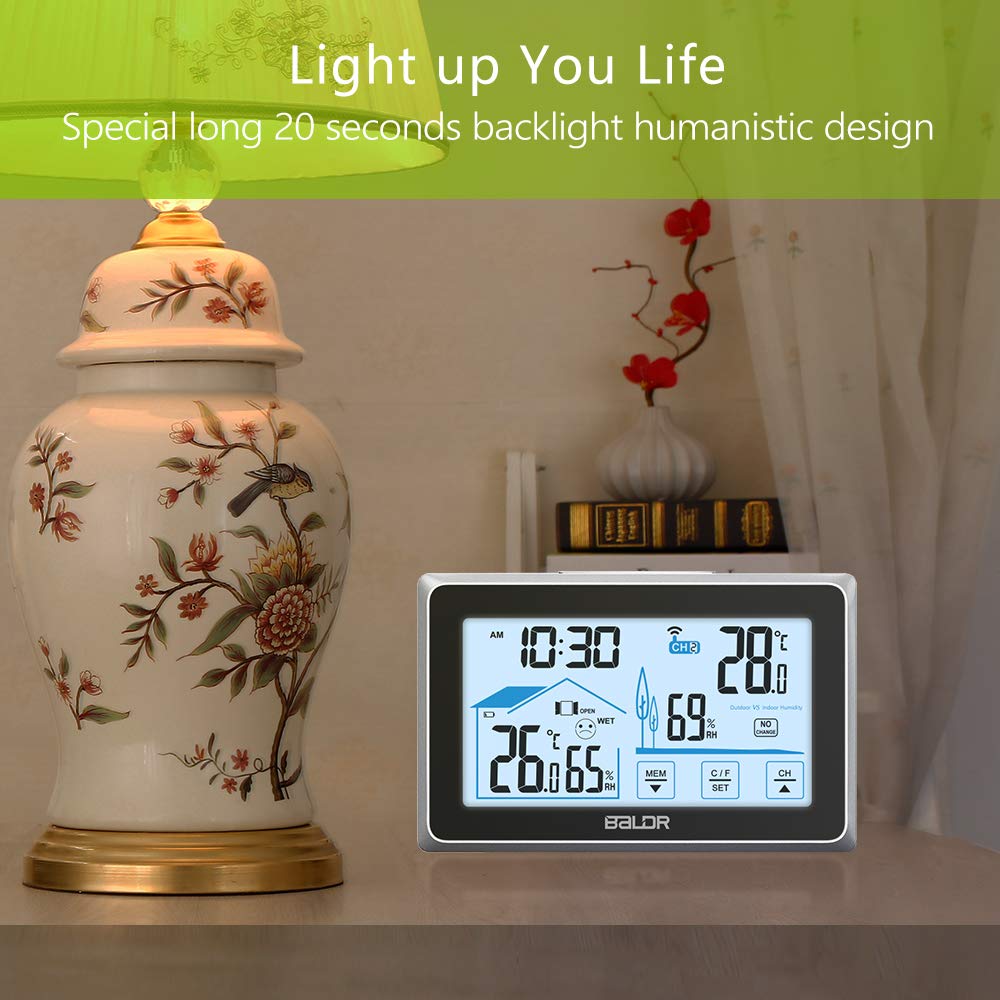
Figure 4.1: Location of the backlight button.
4.2 Setting Time and Temperature Unit
- Press and hold the 'C/F SET' button for 3 seconds to enter time setting mode. The hour digit will flash.
- Use the 'MEM' and 'CH' buttons to adjust the hour.
- Press 'C/F SET' again to confirm the hour and move to setting the minute. Repeat the adjustment process.
- Continue pressing 'C/F SET' to cycle through 12/24 hour format, and then Celsius (°C) or Fahrenheit (°F) temperature units. Use 'MEM' and 'CH' to select your preference.
- Press 'C/F SET' one last time to exit the setting mode.
4.3 Viewing Min/Max Records
Press the 'MEM' button to view the maximum recorded indoor/outdoor temperature and humidity. Press 'MEM' again to view the minimum records. To clear the min/max records, press and hold the 'MEM' button for 3 seconds while viewing the records.
4.4 Channel Selection (Multiple Sensors)
If you have multiple remote sensors, press the 'CH' button to cycle through the channels (CH1, CH2, CH3). The display will show the readings for the selected channel. You can also set it to automatically cycle through all active channels.
4.5 Comfort Level Indicator
The comfort level indicator (a face icon) provides a quick visual reference for indoor comfort based on temperature and humidity levels. This helps in adjusting thermostats, humidifiers, or dehumidifiers.
4.6 Window Indicator
A small window icon on the display provides suggestions to open or close windows based on the comparison of indoor and outdoor temperature and humidity data, aiding in energy efficiency and comfort.
5. Maintenance
5.1 Battery Replacement
When the battery indicator appears on the display, replace the batteries in the respective unit (main unit or remote sensor) with new ones, following the instructions in Section 3.1. Always replace all batteries in a unit at the same time.
5.2 Cleaning
Clean the display unit and remote sensor with a soft, damp cloth. Do not use abrasive cleaners or solvents, as these may damage the plastic components or the screen. Ensure no moisture enters the battery compartments or sensitive areas.
5.3 Storage
If the device will not be used for an extended period, remove all batteries from both the main unit and the remote sensor to prevent leakage and corrosion. Store the units in a cool, dry place.
6. Troubleshooting
- No Display / Unit Not Powering On:
Ensure batteries are installed correctly with proper polarity. Replace old or depleted batteries with new ones. - Outdoor Readings Not Displaying / Sensor Not Connecting:
Check the remote sensor's batteries. Ensure the remote sensor is within the 100-meter (328-foot) range of the main unit. Avoid obstructions like thick walls or large metal objects. Press and hold the 'CH' button on the main unit for 3 seconds to manually search for the sensor signal. - Inaccurate Readings:
Ensure both the main unit and remote sensor are placed away from direct sunlight, heat sources, or strong drafts that could affect readings. Allow units to stabilize for 15-30 minutes after initial setup or relocation. - Display Appears 'Wonky' or Garbled:
This can sometimes be resolved by removing and reinserting the batteries in the main unit to perform a soft reset. Ensure the unit is not subjected to physical shock. - Cannot Change Temperature Unit (C/F):
Ensure you are in the correct setting mode by pressing and holding the 'C/F SET' button as described in Section 4.2.
7. Specifications
| Model Number | WS0340BL1 |
| Product Dimensions (Main Unit) | 5.39"W x 0.83"D x 3.39"H (137 x 21 x 86 mm) |
| Power Source (Main Unit) | 3 x AAA batteries (not included) |
| Power Source (Remote Sensor) | 2 x AA batteries (not included) |
| Connectivity Technology | Radio Frequency (433MHz) |
| Wireless Range | Up to 100 meters (328 feet) in open air |
| Special Features | Humidity Monitor, Hygrometer, Thermometer, Backlit Display, Touch Screen |
| Material | Plastic |
8. Warranty and Support
For warranty information and technical support, please refer to the documentation included with your product or visit the official BALDR website. Contact information for customer service is typically provided on the manufacturer's website or product packaging.