1. Introduction
This manual provides detailed instructions for the installation, setup, and operation of your TREATLIFE Smart Wi-Fi Light Switch. This device allows you to control your lighting remotely via a smartphone app, voice commands through Amazon Alexa or Google Assistant, and set automated schedules for enhanced convenience and energy efficiency.
2. Important Safety Information
WARNING: RISK OF ELECTRIC SHOCK.
- Installation must be performed by a qualified electrician or a person with electrical knowledge.
- Disconnect power at the circuit breaker before installing or servicing the switch.
- A neutral wire is required for this device to function. If your electrical box does not have a neutral wire, this switch is not compatible.
- This switch is for single-pole applications only and is not compatible with 3-way or multi-way switch setups.
- Do not use with dimmable lights or as a dimmer switch. This is an ON-OFF switch.
- Ensure the maximum power rating of 1250W and output current of 10A are not exceeded.

Figure 2.1: Incompatible Switch Setups. This image illustrates scenarios where the TREATLIFE Smart Wi-Fi Light Switch cannot be used, such as in older homes lacking a neutral wire, with dimmable lights, or in 3-way/multi-way switch configurations.
3. Package Contents
- TREATLIFE Smart Wi-Fi Light Switch (2-Pack)
- Screwless Snap-On Wall Plate
- Wire Nuts
- Mounting Screws
- User Manual

Figure 3.1: TREATLIFE Smart Wi-Fi Light Switch (2-Pack). This image displays the two smart light switches and their retail packaging, indicating a 2-pack.
4. Product Features
- Easy and Safe Installation: Requires a neutral wire. Step-by-step instructions are provided. Standard size with a screwless snap-on wall plate. No hub required. Operates on 2.4G Wi-Fi only (not 5G). Max Power: 1250W. Output Current: 10A. FCC Certified.
- Voice Control: Compatible with Amazon Alexa and Google Assistant for hands-free operation.
- Remote Control: Manage lights from anywhere using the Smart Life app on your smartphone. Features include creating schedules, monitoring real-time light status, device sharing, and group control.
- Automated Schedules: Set timers or countdowns to automatically turn lights on and off based on routines or to simulate occupancy for security.

Figure 4.1: Smart Light Switch Features. This image highlights key features of the smart light switch, including no hub requirement, standard size, ease of installation, and built-in overload protection.
5. Installation Guide
5.1 Pre-installation Check
Before beginning installation, ensure your electrical box meets the following requirements:
- Neutral Wire: A neutral wire (typically white) is essential. It may be bundled at the back of your electrical box.
- Single-Pole Setup: This switch is designed for single-pole configurations where one switch controls one light.
- 2.4GHz Wi-Fi: The switch requires a 2.4GHz Wi-Fi network for connectivity.

Figure 5.1: Identifying the Neutral Wire. This diagram shows a typical electrical box with a neutral wire (white) bundled, which is required for the smart switch installation.
5.2 Wiring Instructions
Follow these steps carefully. If you are unsure about any part of the process, consult a qualified electrician.
- Turn Off Power: Locate your circuit breaker and turn off the power to the switch you are replacing. Verify power is off using a voltage tester.
- Identify Wires: Carefully remove your existing switch. Identify the following wires:
- Line Wire: (Live/Hot) Carries power from the circuit breaker.
- Load Wire: Carries power to the light fixture.
- Neutral Wire: (Typically white) Completes the circuit.
- Ground Wire: (Typically green or bare copper) For safety.
- Connect Wires: Use the provided wire nuts to connect the TREATLIFE Smart Wi-Fi Light Switch wires to your house wires according to the diagram below. Match colors:
- Red wire from switch to Line wire from wall.
- Black wire from switch to Load wire from wall.
- White wire from switch to Neutral wire from wall.
- Green wire from switch to Ground wire from wall.
- Secure Connections: Ensure all wire connections are secure.
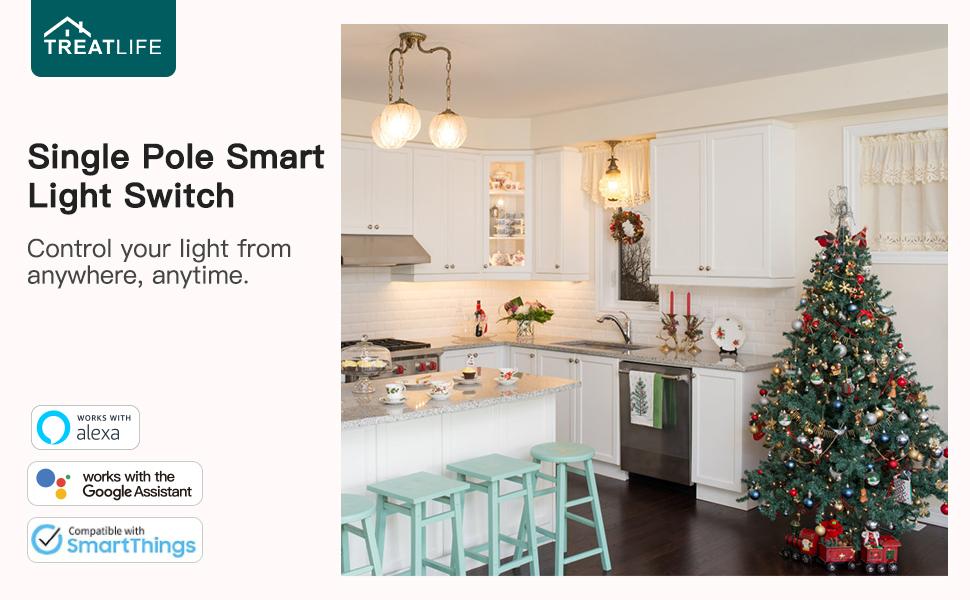
Figure 5.2: Wiring Guide. This diagram illustrates the correct wiring connections for the smart light switch, detailing how to connect the Load, Line, Neutral, and Ground wires.
5.3 Physical Installation
- Gently push all wires back into the electrical box.
- Mount the smart switch into the electrical box using the provided screws.
- Attach the screwless snap-on wall plate over the switch.
- Restore power at the circuit breaker. The indicator light on the switch should illuminate.
6. App Setup & Pairing
To control your TREATLIFE Smart Wi-Fi Light Switch, you need to download and set up the Smart Life app.
- Download the App: Search for "Smart Life" in your smartphone's app store (iOS or Android) and download it.
- Register/Log In: Open the app and register for a new account or log in if you already have one.
- Enter Pairing Mode: On your TREATLIFE Smart Wi-Fi Light Switch, press and hold the main button for approximately 5 seconds until the indicator light rapidly blinks. This indicates the switch is in pairing mode.
- Add Device in App: In the Smart Life app, tap the "+" icon (usually in the top right corner) to add a new device. Select "Switch" from the device list.
- Confirm Indicator: Confirm that the indicator light on your switch is rapidly blinking within the app.
- Connect to Wi-Fi: Enter your 2.4GHz Wi-Fi network name and password when prompted. The app will then connect to the switch.
- Rename Device: Once connected, you can rename your switch (e.g., "Living Room Light", "Kitchen Counter").
Video 6.1: App Pairing Demonstration. This video demonstrates the unboxing of the smart switch and the process of pairing it with the Smart Life mobile application.
7. Voice Control Integration
Your TREATLIFE Smart Wi-Fi Light Switch can be controlled using voice commands through Amazon Alexa or Google Assistant.
- Link Smart Life Account: Open your Amazon Alexa or Google Home app. Navigate to the "Skills" or "Works with Google" section and search for "Smart Life". Enable the skill/service and link your Smart Life account using your login credentials.
- Discover Devices: Once linked, ask Alexa or Google Assistant to "Discover devices" or manually initiate device discovery in their respective apps.
- Voice Commands: You can now use voice commands to control your lights. Examples:
- "Alexa, turn on [Device Name]"
- "Hey Google, turn off [Device Name]"
- "Alexa, set [Device Name] to 50%" (Note: This switch is ON/OFF only, percentage commands will not dim but may turn on/off depending on the smart assistant's interpretation).
Video 7.1: Voice Control Demonstration. This video showcases the smart light switch being controlled using voice commands via Amazon Alexa, demonstrating its hands-free operation.

Figure 7.2: Hands-free Voice Control. This image illustrates the convenience of controlling lights with voice commands, showing a person interacting with a smart assistant.
8. Advanced Features
8.1 Automated Schedules
Create custom schedules to automate your lighting based on your daily routines or for security purposes.
- Timer: Set lights to turn on or off at specific times.
- Countdown: Set a countdown for lights to turn off after a set duration.
- Simulate Occupancy: Program lights to turn on and off randomly while you're away to deter potential intruders.

Figure 8.1: Light Scheduling. This image displays the light scheduling feature, allowing users to set timers and countdowns for automated light operation.
8.2 Remote Control
Control your lights from anywhere in the world using the Smart Life app, as long as your smartphone has an internet connection.

Figure 8.2: App Remote Control. This image shows a user controlling a light remotely via a smartphone app, highlighting features like scheduling and device sharing.
8.3 Group Control
Combine multiple TREATLIFE smart switches into groups within the Smart Life app to control several lights simultaneously with a single command.

Figure 8.3: Group Control. This image displays a smartphone interface for grouping multiple smart light switches, enabling synchronized control.
8.4 Device Sharing
Share control of your smart switches with family members or trusted individuals through the Smart Life app, allowing everyone in the household to manage the lighting.
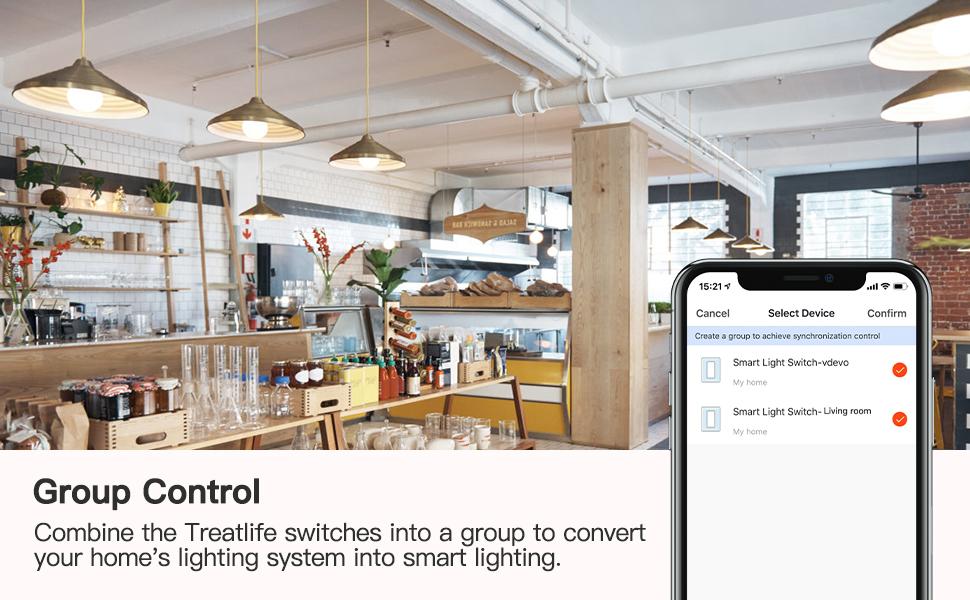
Figure 8.4: Device Sharing. This image illustrates the device sharing feature, allowing multiple users to control the smart switch from their respective smartphones.
9. Troubleshooting
- Switch Not Responding: Ensure power is on at the circuit breaker. Check wiring connections. If the indicator light is off, the switch may not be receiving power.
- Cannot Connect to Wi-Fi: Ensure your Wi-Fi network is 2.4GHz. Check your Wi-Fi password. Move the switch closer to your router if signal is weak. Reset the switch by holding the button for 5 seconds until it rapidly blinks, then try pairing again.
- Voice Control Issues: Verify your Smart Life account is correctly linked to Amazon Alexa or Google Assistant. Ensure device names are clear and consistent.
- Lights Flicker/Don't Turn On: Confirm the switch is not used with a dimmable bulb or fixture. Ensure the load does not exceed 1250W.
10. Specifications
| Specification | Value |
|---|---|
| Model Number | SS01S-2V |
| Operation Mode | ON-OFF |
| Current Rating | 10 Amps |
| Operating Voltage | 120 Volts |
| Contact Type | Normally Closed |
| Connector Type | Plug In |
| Terminal | Spst |
| Item Dimensions L x W x H | 4 x 5 x 6 inches |
| Circuit Type | 1-way |
| Mounting Type | Wall Mount |
| Actuator Type | Push Button |
| Contact Material | Metal |
| International Protection Rating | IP20 |
| Number of Positions | 2 |
| Upper Temperature Rating | 45 Degrees Celsius |
| Controller Type | Amazon Alexa, Google Assistant, IFTTT |
| Control Method | App, Remote, Touch, Voice |
| Connectivity Protocol | Wi-Fi (2.4GHz) |
| Color | White |
| Wattage | 1250 watts |
| Unit Count | 2.0 Count |
| Item Weight | 12 ounces |
| Manufacturer | Treatlife |
11. Warranty and Support
The TREATLIFE Smart Wi-Fi Light Switch comes with a 2-year warranty.
For technical support or warranty claims, please contact TREATLIFE customer service:
- Address: 1220 3rd St, Las Cruces, New Mexico, 88005, USA
- Phone: 575-555-8828
- Email: Support@Treatlife.Tech


