1. Introduction
This manual provides essential instructions for the safe and effective use of your Mopar TCBOX624 Luggage Carrier. Please read this manual thoroughly before installation and operation to ensure proper handling, maintenance, and to prevent damage or injury.
The Mopar TCBOX624 is an OEM part designed to fit specific vehicles, providing additional storage capacity for your travels.
2. Safety Information
- Always adhere to your vehicle's manufacturer guidelines regarding roof load capacity.
- Ensure the luggage carrier is securely mounted before driving. Regularly check all fasteners.
- Distribute cargo evenly inside the carrier and secure it to prevent shifting during transit.
- Do not exceed the maximum load capacity of the carrier or your vehicle's roof rack system.
- Be aware of increased vehicle height and width when the carrier is installed, especially when entering garages, car washes, or low-clearance areas.
- Adjust driving speed according to road conditions and wind, as the carrier can affect vehicle handling.
3. Setup and Installation
The Mopar TCBOX624 Luggage Carrier is designed for installation on existing vehicle roof rack systems. Ensure your vehicle is equipped with a compatible roof rack before proceeding.
3.1 Unpacking
Carefully remove all components from the packaging. Verify that all parts listed in the packing list (if provided with the physical product) are present. The package typically includes the cargo box, mounting hardware, and keys.
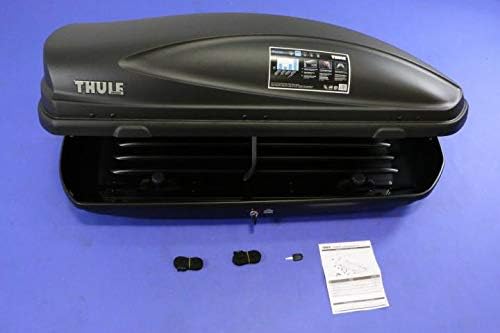
Figure 1: This image shows a cargo box open, revealing its interior, alongside mounting straps, keys, and a small instruction booklet.
3.2 Mounting to Roof Rack
- Position the Carrier: Carefully lift the luggage carrier onto your vehicle's roof rack. Center it both front-to-back and side-to-side for optimal weight distribution and aerodynamics.
- Attach Mounting Hardware: Open the carrier lid. Locate the pre-drilled holes or mounting channels inside the carrier. Align these with your roof rack crossbars.
- Secure Fasteners: Use the provided mounting hardware (e.g., U-bolts, clamps, or quick-release mechanisms) to firmly attach the carrier to the roof rack crossbars. Ensure all fasteners are tightened according to the specific instructions provided with the hardware. Do not overtighten, but ensure there is no movement.
- Verify Security: After installation, gently shake the carrier to confirm it is securely attached and does not wobble. Re-check all connections after driving a short distance (e.g., 5-10 miles) and periodically thereafter.

Figure 2: This image shows a black cargo box mounted on a red car's roof, demonstrating its position and secure attachment to the roof bars.
4. Operating Instructions
4.1 Opening and Closing the Carrier
- Unlocking: Insert the key into the lock mechanism (visible in Figure 3) and turn to the unlock position.
- Opening: Lift the lid of the carrier. Some models may feature a spring-assisted or strut-assisted opening mechanism.
- Closing: Gently lower the lid until it fully engages with the base. Ensure all latches are properly aligned and closed.
- Locking: Turn the key to the lock position and remove it. Always ensure the carrier is locked before driving.

Figure 3: This close-up highlights the keyhole and surrounding area on the side of the cargo box.
4.2 Loading the Carrier
- Weight Distribution: Place heavier items towards the center of the carrier, directly over the roof rack crossbars.
- Secure Cargo: Use internal straps or nets (if provided or purchased separately) to prevent items from shifting during transit. Shifting cargo can affect vehicle stability and potentially damage the carrier.
- Avoid Overloading: Do not exceed the maximum weight capacity specified for the carrier (refer to Section 7: Specifications) or your vehicle's roof load limit.
- Close Properly: Ensure the lid can close completely and latch securely without forcing it.
5. Maintenance
- Cleaning: Clean the carrier with mild soap and water. Avoid abrasive cleaners or solvents that could damage the finish.
- Lubrication: Periodically lubricate the lock mechanism and hinges with a silicone-based lubricant to ensure smooth operation.
- Fastener Checks: Regularly inspect all mounting hardware for tightness, especially after long trips or rough roads.
- Storage: When not in use, store the carrier in a dry, protected area, ideally indoors, to prolong its lifespan.
6. Troubleshooting
| Problem | Possible Cause | Solution |
|---|---|---|
| Carrier wobbles or moves | Loose mounting hardware. | Tighten all mounting clamps/bolts securely. Re-check after a short drive. |
| Lid difficult to open/close | Lock mechanism stiff; cargo obstructing closure. | Lubricate lock and hinges. Re-arrange cargo to ensure clear closure path. |
| Excessive wind noise | Improper positioning; loose components. | Ensure carrier is centered and all parts are tight. Consider repositioning slightly. |
| Water leakage | Seal damage; improper closure. | Inspect rubber seals around the lid for damage. Ensure lid is fully closed and latched. |
7. Specifications
| Feature | Detail |
|---|---|
| Brand | Mopar |
| Model Number | TCBOX624 |
| Product Dimensions | 65 x 34.5 x 16 inches |
| Item Weight | 1 pounds (Note: This is likely the shipping weight, actual product weight may vary slightly or be higher for a cargo box of this size. Always refer to product labeling for precise weight.) |
| Exterior Finish | Machined |
| Manufacturer Part Number | TCBOX624 |
Note: Specifications are subject to change without notice. Always refer to the product label for the most current information.
8. Warranty and Support
For warranty information, please refer to the specific warranty documentation included with your purchase or visit the official Mopar website. Mopar OEM parts are typically covered by a manufacturer's warranty against defects in materials and workmanship.
For technical support, replacement parts, or further assistance, please contact your authorized Mopar dealer or Mopar customer service. Contact details can usually be found on the official Mopar website or in your vehicle's owner's manual.
Online Resources: For additional information and support, you may visit the Mopar Store on Amazon.


