
1. Introduction
Thank you for choosing the Cooler Master MWE 500 White 230V V2 Power Supply Unit. This manual provides essential information for the safe installation, operation, maintenance, and troubleshooting of your new power supply. Please read this manual thoroughly before installation and keep it for future reference.
2. Safety Information
Please observe the following safety guidelines to prevent damage to the power supply, other components, and personal injury:
- Electrical Shock Hazard: Do not open the power supply unit. High voltages are present inside, even when the unit is unplugged. There are no user-serviceable parts inside.
- Proper Grounding: Ensure your computer system is properly grounded. Use only the provided power cord or a certified replacement.
- Ventilation: Do not block any ventilation openings of the power supply. Ensure adequate airflow around the unit to prevent overheating.
- Moisture and Liquids: Keep the power supply away from water, humidity, and other liquids.
- Power Source: Connect the power supply only to a power outlet with the correct voltage and frequency as indicated on the unit's label.
- Installation: Install the power supply in a well-ventilated computer case. Ensure all cables are connected securely and correctly.
- Children: Keep the power supply and its components out of reach of children.
3. Package Contents
Please check the contents of your package. If any items are missing or damaged, contact your retailer.
- Cooler Master MWE 500 White 230V V2 Power Supply Unit
- AC Power Cord (EU Plug)
- Mounting Screws
- User Manual
4. Product Overview
Familiarize yourself with the components and features of your Cooler Master MWE 500 White 230V V2 Power Supply Unit.

Figure 4.1: Overall view of the Cooler Master MWE 500 White 230V V2 Power Supply Unit. This image shows the top-down perspective, highlighting the fan grille and the main body of the PSU.

Figure 4.2: Top view of the power supply unit, focusing on the 120mm HDB fan and its protective grille. This fan provides efficient cooling while maintaining low noise levels.
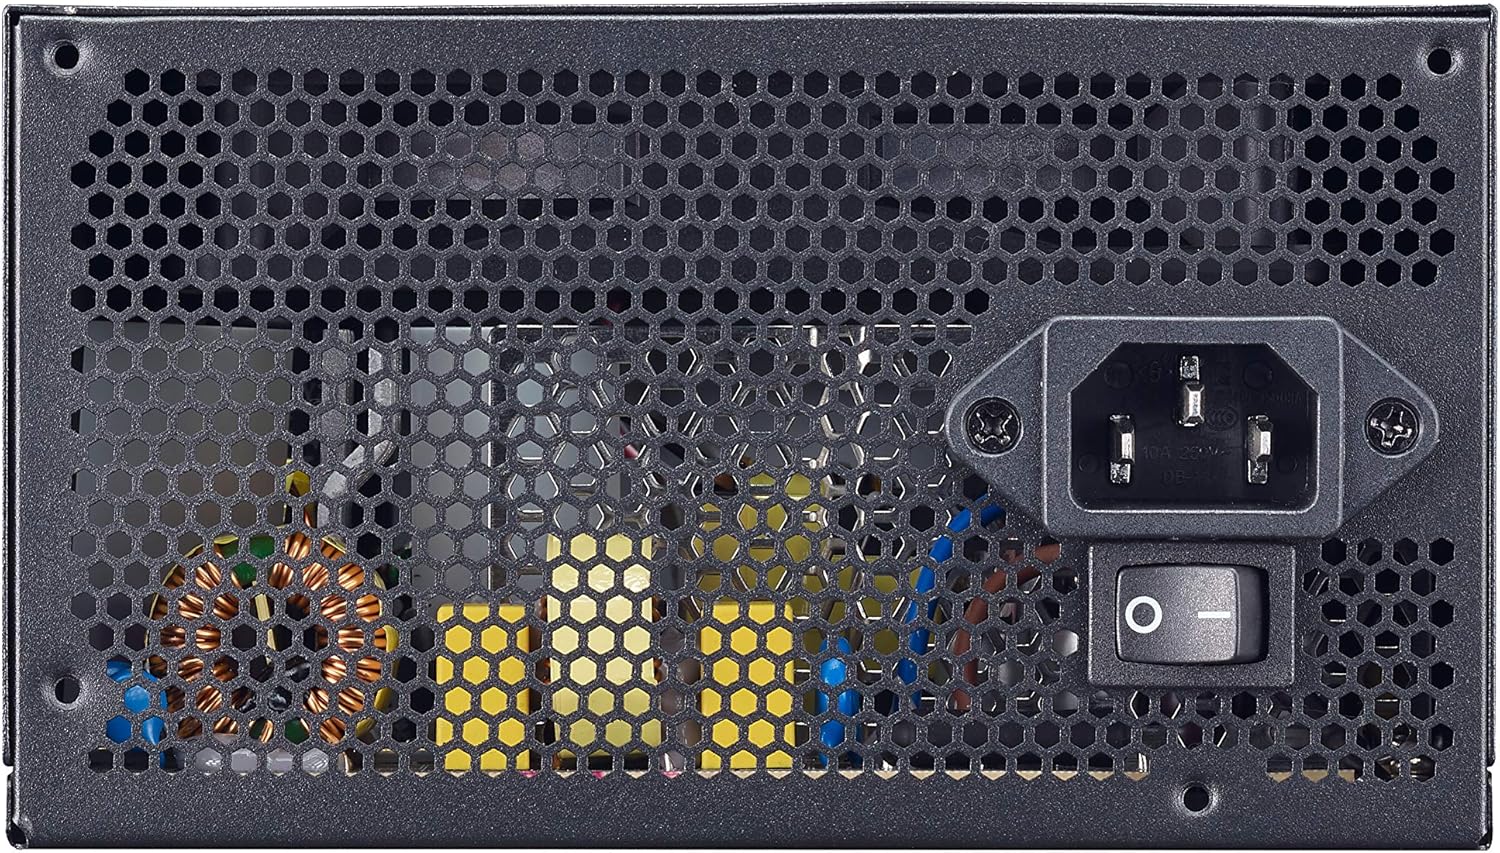
Figure 4.3: Rear panel of the power supply, showing the AC power input socket and the main power ON/OFF switch. The honeycomb ventilation pattern is also visible.

Figure 4.4: Side view of the power supply unit, displaying the Cooler Master logo and the MWE 500 230V branding. This side is typically visible when installed in a case with a PSU shroud cutout.

Figure 4.5: Close-up of the power supply's specification label, detailing AC input, DC output voltages and amperages, total power, model number (MPE-5001-ACABW), and safety certifications.

Figure 4.6: Exploded view of the power supply, illustrating the internal layout including the PCB, capacitors, transformers, and the cooling fan. This shows the non-modular design with fixed cables.

Figure 4.7: Efficiency graph demonstrating the 80 PLUS 230V EU Standard certification, indicating high power efficiency across various load levels.

Figure 4.8: Illustration highlighting the DC-to-DC + LLC circuit design, which provides stable voltage outputs and improved efficiency.

Figure 4.9: Visual representation of the single +12V rail design, ensuring consistent and powerful delivery to critical components like the CPU and GPU.

Figure 4.10: Image showcasing the flat black cables, designed for easier cable management and improved aesthetics within a PC build.

Figure 4.11: Close-up of the quiet Hydro-Dynamic Bearing (HDB) fan, which provides silent operation and extended lifespan.

Figure 4.12: Detailed table of AC input and DC output specifications for the MWE 500 White 230V V2, including voltage, amperage, and wattage for each rail.
5. Setup and Installation
Follow these steps to properly install your power supply unit into your computer system.
5.1 Pre-Installation Checks
- Ensure your computer case is compatible with ATX power supplies.
- Turn off and unplug your computer from the wall outlet.
- Open your computer case to access the PSU mounting area.
5.2 Mounting the PSU
- Carefully place the power supply into the designated PSU bay in your computer case. Ensure the fan is oriented correctly (usually facing down if there's a bottom vent, or up if there isn't).
- Align the screw holes on the PSU with those on the case.
- Secure the PSU to the case using the provided mounting screws. Do not overtighten.
5.3 Connecting Cables
Connect the power cables to your motherboard and other components. Ensure each connector is fully seated and latched.
- 24-pin ATX Motherboard Power: Connect the large 24-pin connector to the corresponding socket on your motherboard.
- CPU Power (EPS 4+4 pin): Connect the 4+4 pin CPU power connector to the 8-pin or 4-pin CPU power socket on your motherboard.
- PCIe Power (6+2 pin): If you have a dedicated graphics card, connect the 6+2 pin PCIe power connector(s) to your GPU.
- SATA Power: Connect SATA power connectors to your SSDs, HDDs, and optical drives.
- Peripheral Power (Molex): Connect Molex connectors to any peripherals that require them (e.g., case fans, older drives).
After connecting all necessary cables, organize them for better airflow and aesthetics using cable ties if available. Close your computer case.
6. Operating Instructions
Once the power supply is installed and all components are connected:
- Connect the AC power cord to the power supply's AC inlet.
- Plug the other end of the AC power cord into a grounded wall outlet.
- Flip the power switch on the back of the PSU to the 'I' (ON) position.
- You can now power on your computer using the case's power button.
To turn off your computer, always use the operating system's shutdown procedure. Once the system is off, you can flip the PSU switch to 'O' (OFF) for complete power disconnection, especially during maintenance or when leaving the system unattended for extended periods.
7. Maintenance
Proper maintenance can extend the lifespan of your power supply and ensure optimal performance.
- Dust Cleaning: Periodically (every 3-6 months, depending on environment) clean dust from the PSU's fan and ventilation grilles. Use compressed air to blow dust out of the unit. Ensure the computer is powered off and unplugged before cleaning.
- Ventilation: Ensure that the PSU's intake and exhaust vents are not obstructed by cables or other objects inside the case.
- Environment: Operate the power supply in a clean, dry, and well-ventilated environment. Avoid extreme temperatures.
8. Troubleshooting
If you encounter issues with your power supply, try the following troubleshooting steps:
8.1 No Power
- Check if the AC power cord is securely connected to both the PSU and the wall outlet.
- Ensure the PSU's ON/OFF switch is in the 'I' (ON) position.
- Verify that the wall outlet is functional by plugging in another device.
- Check all internal power connections (24-pin ATX, CPU, PCIe) to ensure they are fully seated.
- If possible, test the PSU with a PSU tester or by disconnecting all components except the motherboard (and CPU/RAM) to isolate the issue.
8.2 System Instability / Random Shutdowns
- Ensure the PSU is adequately rated for your system's total power consumption.
- Check for overheating. Ensure proper case ventilation and clean any dust from the PSU fan.
- Verify all power cables are securely connected. Loose connections can cause instability.
- If the issue persists, it might indicate a faulty component (not necessarily the PSU).
8.3 Excessive Fan Noise
- Clean any dust from the PSU fan and grilles. Dust buildup can cause the fan to work harder and make more noise.
- Ensure the PSU is not running under excessive load, which would cause the fan to spin faster.
- Verify that no cables are obstructing the fan blades.
If these steps do not resolve your issue, please contact Cooler Master support or your retailer.
9. Specifications
Detailed technical specifications for the Cooler Master MWE 500 White 230V V2 Power Supply Unit.
| Feature | Specification |
|---|---|
| Model Name | MWE White-v2 |
| Model Number | MPE-5001-ACABW-EU |
| Brand | Cooler Master |
| Output Wattage | 500 Watts |
| Form Factor | ATX |
| Efficiency Certification | 80 PLUS 230V EU White |
| Cooling Method | Air |
| Fan Size | 120 mm HDB Fan |
| Dimensions (LxWxH) | 14 x 15 x 8.6 cm |
| Weight | 1341 Grams |
| Power Scheme | Non-modular |
| Max Input Voltage | 240V AC |
| Min Input Voltage | 200V AC |
| Operating Temperature | Up to 40°C |
| Warranty | 3 Years |
10. Warranty and Support
The Cooler Master MWE 500 White 230V V2 Power Supply Unit comes with a 3-year limited warranty from the date of purchase. This warranty covers defects in materials and workmanship under normal use.
For warranty claims, technical support, or further assistance, please visit the official Cooler Master website or contact your local retailer.
Cooler Master Official Website: www.coolermaster.com