Introduction
This manual provides detailed instructions for the assembly, operation, and maintenance of your Relaxdays Garden Hand Cart. Please read this manual thoroughly before using the product to ensure safe and efficient operation. Keep this manual for future reference.

Image: The Relaxdays Garden Hand Cart, designed for versatile transport tasks.
Safety Instructions
- Always ensure all components are securely fastened before use.
- Do not exceed the maximum weight limit of 500 kg (1100 lbs).
- Distribute weight evenly within the cart to maintain stability.
- Be cautious when operating on uneven terrain to prevent tipping.
- Keep hands and feet clear of moving parts, especially during loading and unloading.
- This cart is not intended for transporting people.
- Store the cart in a dry, protected area when not in use.
Package Contents
Please check that all parts are present before beginning assembly:
- Cart frame (base and side panels)
- Handle assembly
- 4 pneumatic wheels
- Removable tarp
- Axles and mounting hardware (bolts, nuts, washers)
- Instruction manual
Setup and Assembly
Assembly is required. Please follow these steps carefully:
- Unpack Components: Carefully remove all parts from the packaging and lay them out on a clean, flat surface. Verify all parts are present against the package contents list.
- Attach Wheels:
- Slide each wheel onto an axle.
- Secure each wheel with the provided washers and nuts. Ensure they are tightened firmly but do not overtighten, allowing the wheel to spin freely.

Image: Detail of the pneumatic wheel and axle connection, showing proper attachment.
- Assemble Frame:
- Connect the side panels to the base frame using the provided bolts and nuts. Ensure the folding mechanisms are correctly aligned.
- Secure all panel connections.

Image: Detail of the side panel latch, illustrating how panels connect and secure.
- Attach Handle:
- Attach the handle assembly to the front of the cart frame using the designated mounting points and hardware.
- Ensure the handle can pivot freely for steering.
- Insert Tarp: Place the removable tarp inside the cart, ensuring it fits snugly along the bottom and sides.

Image: The cart with side panels folded down and the removable tarp, demonstrating its flexible design.
Operating Instructions
Loading the Cart
- General Use: Place items evenly within the cart. The maximum load capacity is 500 kg.
- Using the Tarp: For loose materials like soil, sand, or garden waste, use the removable tarp to contain the contents and facilitate easier unloading.
- Folding Side Panels: The side panels can be folded down or removed entirely to accommodate oversized items or for easier loading/unloading. To fold, unlatch the corner pins and lower the panels.

Image: The garden cart efficiently transporting multiple crates of bottles.

Image: The garden cart filled with gardening tools, showcasing its utility for yard work.
Transporting
- Grip the handle firmly and pull or push the cart. The pneumatic tires are designed for easy maneuverability over various terrains.
- Maintain a steady pace and be aware of your surroundings.

Image: The garden cart being used for transport at an outdoor event, highlighting its mobility.
Maintenance
- Cleaning: After each use, especially when transporting dirt or wet materials, clean the cart with water and a mild detergent. Rinse thoroughly and allow to dry to prevent rust.
- Tire Pressure: Periodically check the tire pressure of the pneumatic wheels. Maintain the recommended pressure (usually indicated on the tire sidewall) for optimal performance and longevity.
- Lubrication: Apply a light lubricant to moving parts, such as axle bearings and folding panel hinges, annually or as needed to ensure smooth operation.
- Hardware Check: Regularly inspect all bolts, nuts, and fasteners. Tighten any loose hardware to ensure the cart remains stable and safe.
- Storage: Store the cart in a dry, covered area to protect it from weather elements, which can prolong its lifespan.
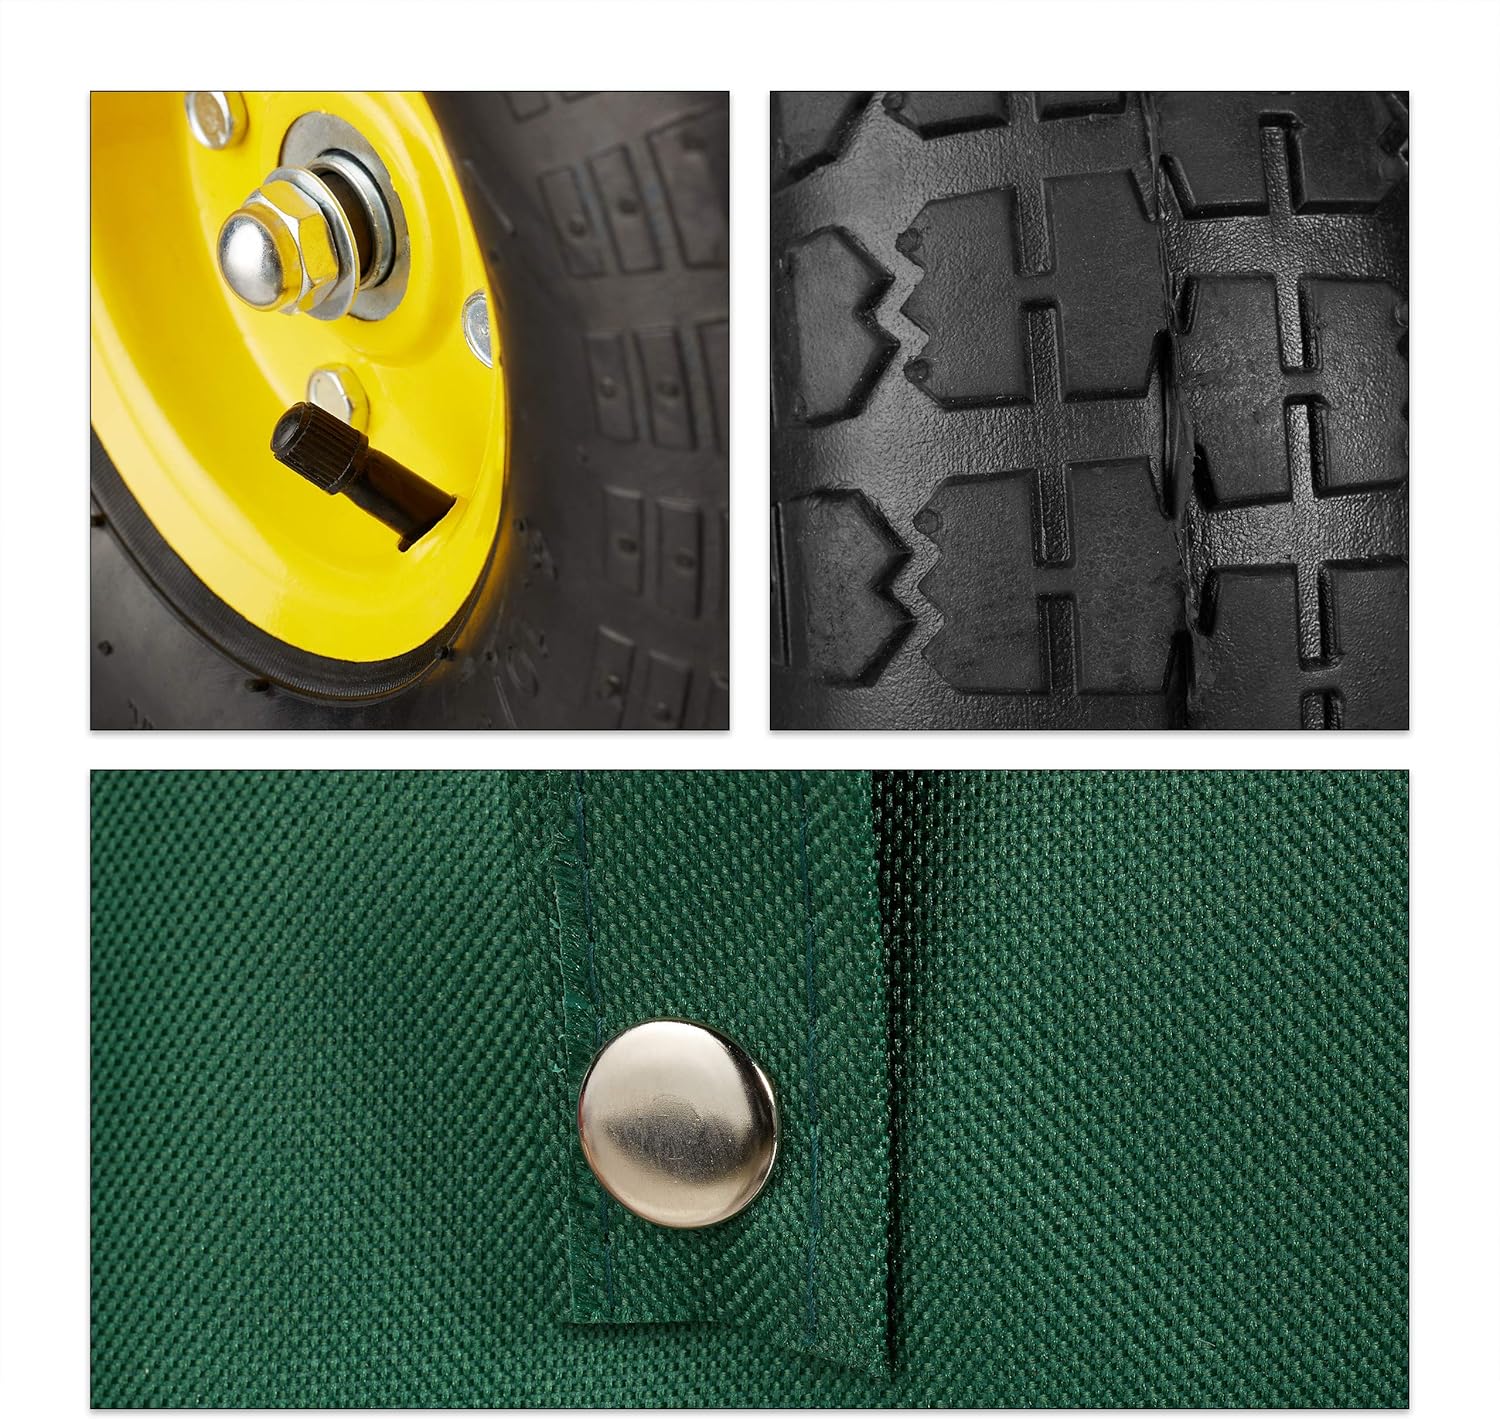
Image: Details of the robust tire tread and the durable tarp material, indicating quality and ease of maintenance.
Troubleshooting
| Problem | Possible Cause | Solution |
|---|---|---|
| Cart is difficult to pull/push. | Low tire pressure; Overloaded; Uneven weight distribution. | Check and inflate tires to recommended pressure; Reduce load; Redistribute items evenly. |
| Wheels wobble or are loose. | Loose axle nuts; Damaged wheel bearing. | Tighten axle nuts; Inspect and replace damaged wheel or bearing if necessary. |
| Side panels do not latch securely. | Misalignment; Damaged latch mechanism. | Adjust panel alignment; Inspect and repair/replace latch components. |
| Rust spots appearing on frame. | Exposure to moisture; Lack of proper drying after cleaning. | Clean and dry thoroughly after use; Apply rust-inhibiting paint to affected areas; Store in a dry place. |
Specifications
| Model Number | 10026073 |
| Brand | Relaxdays |
| Product Dimensions (Length x Width x Height) | 113 cm x 51 cm x 83 cm (approx. 44.5" L x 20.1" W x 32.7" H) |
| Inner Storage Dimensions (Length x Width x Height) | 94 cm x 47 cm x 50 cm (approx.) |
| Weight Limit | 500 Kilograms (1100 lbs) |
| Item Weight | 21.13 Kilograms (46.5 pounds) |
| Material | Alloy Steel (Frame), Fabric (Tarp) |
| Tire Type | Pneumatic |
| Color | Green |
| Assembly Required | Yes |

Image: Dimensional diagram of the garden cart, illustrating its overall size.
Warranty and Support
Relaxdays products are manufactured to high-quality standards. For information regarding warranty coverage, please refer to the warranty card included with your purchase or visit the official Relaxdays website. For technical support or replacement parts, please contact Relaxdays customer service.
Contact information can typically be found on the product packaging or the official brand website.


