1. Introduction
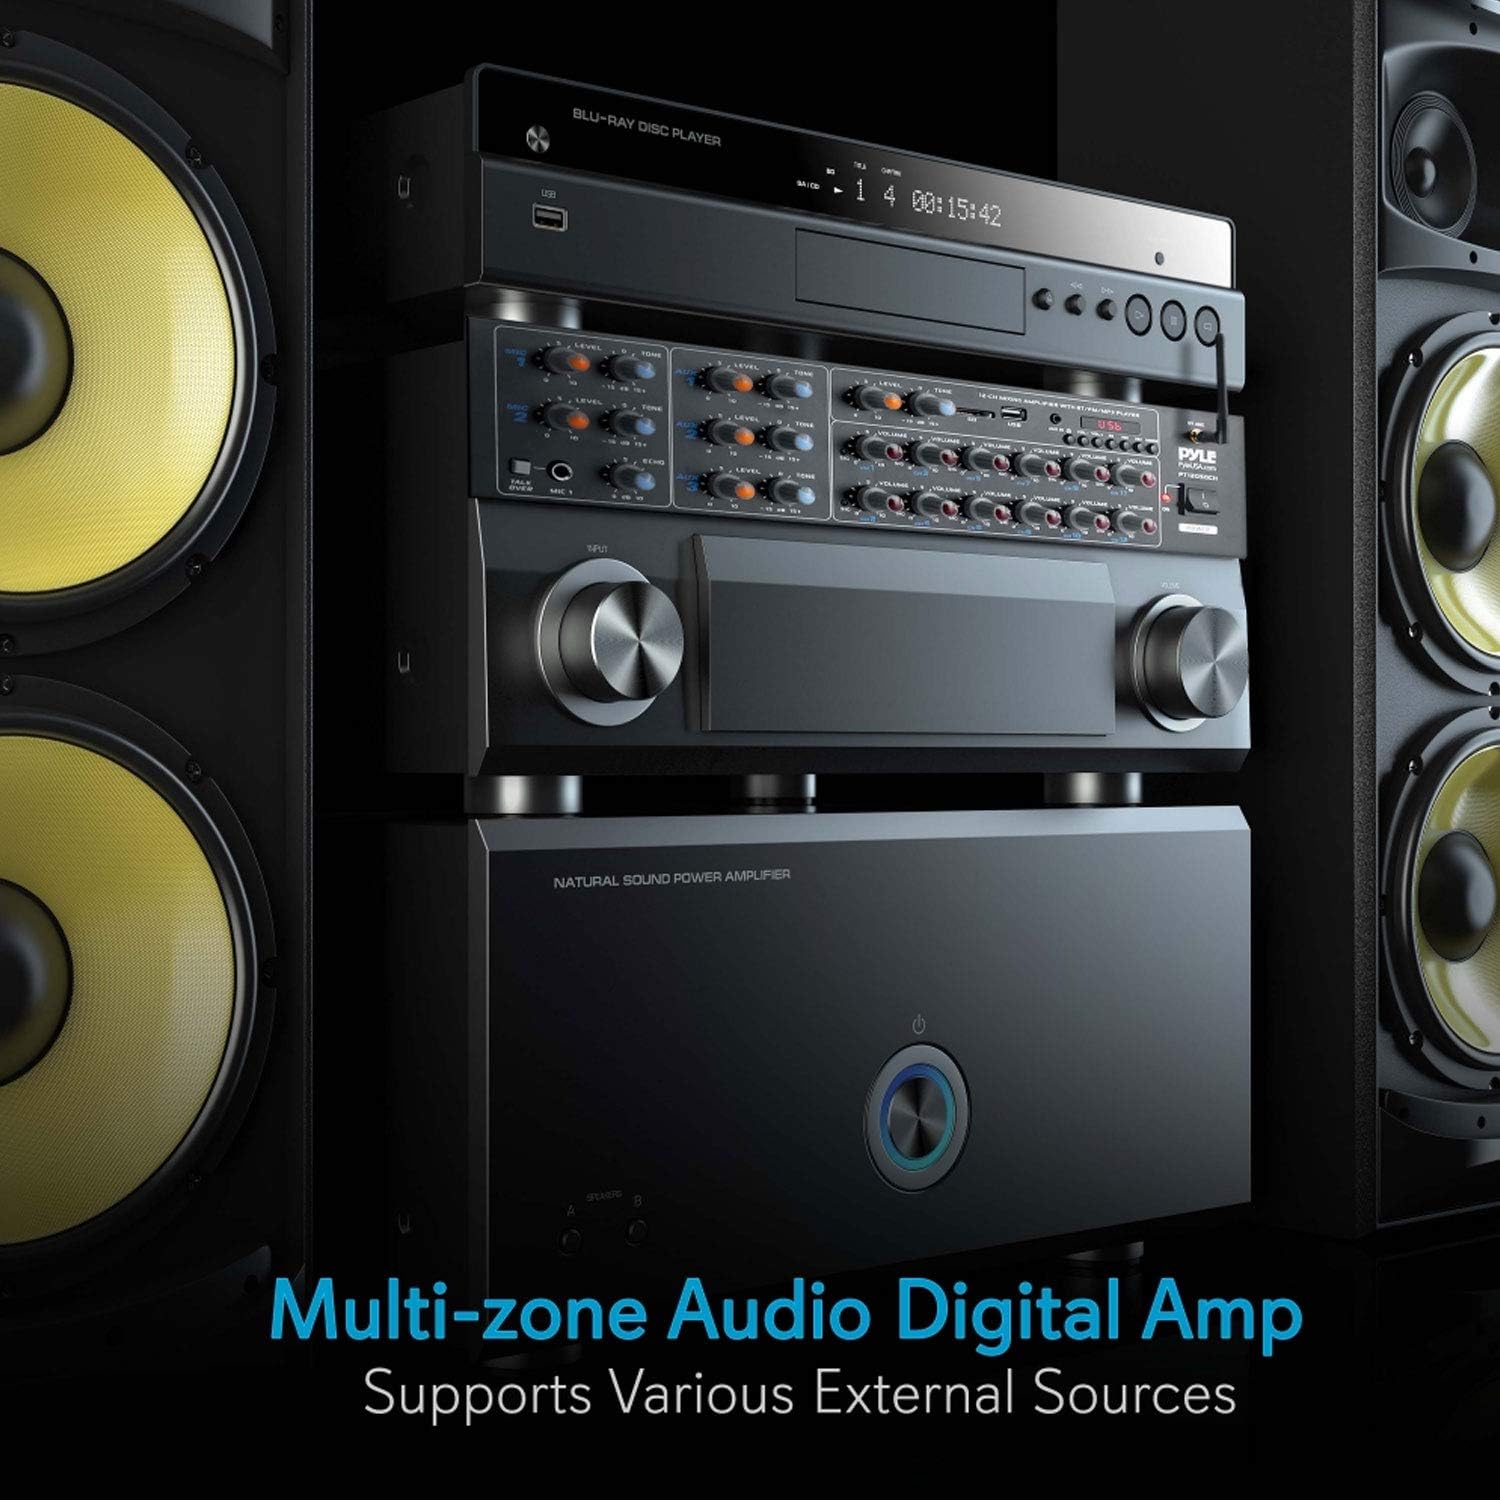
The Pyle PT12050CH is a 12-channel Bluetooth wireless power amplifier designed for multi-zone audio applications. This unit integrates sound amplification with various input options, including Bluetooth wireless streaming, USB, SD card, AUX, RCA, and microphone inputs. It is suitable for diverse environments such as restaurants, theaters, studios, or stages, providing flexible audio control and distribution.
This manual provides detailed instructions for the proper setup, operation, and maintenance of your PT12050CH amplifier to ensure optimal performance and longevity.
2. Safety Instructions
Please read and understand all safety instructions before operating this device. Retain this manual for future reference.
- Power Source: Connect the unit only to the type of power source indicated on the marking label. Ensure the voltage selector switch on the rear panel is set correctly for your region (115V/230V).
- Ventilation: Do not block any ventilation openings. Install in accordance with the manufacturer's instructions. Maintain adequate space around the unit for proper airflow.
- Water and Moisture: Do not expose this appliance to rain or moisture. Do not place objects filled with liquids, such as vases, on the apparatus.
- Heat: Do not install near any heat sources such as radiators, heat registers, stoves, or other apparatus (including amplifiers) that produce heat.
- Grounding: This appliance must be grounded. Do not defeat the safety purpose of the polarized or grounding-type plug.
- Servicing: Do not attempt to service this product yourself. Refer all servicing to qualified service personnel.
- Cleaning: Unplug this product from the wall outlet before cleaning. Do not use liquid cleaners or aerosol cleaners. Use a damp cloth for cleaning.
3. Package Contents
Verify that all items are present in the package:
- Pyle PT12050CH Amplifier Mixer System
- Remote Controller
- Bluetooth Antenna
- Detachable Rack Mount Brackets
- Power Cable
4. Product Overview
4.1 Front Panel Controls

- MIC 1 & MIC 2 Inputs: 1/4'' microphone input jacks with independent LEVEL and TONE controls.
- TALK OVER Button: Activates microphone priority function, reducing background music volume when a microphone signal is detected.
- AUX 1, AUX 2, AUX 3 Inputs: 3.5mm auxiliary input jacks with independent LEVEL and TONE controls.
- USB/SD Card Slot: For playing audio files from USB flash drives or SD memory cards.
- MP3 Player Controls: Play/Pause, Stop, Previous, Next, Mode, and Volume controls for USB/SD/Bluetooth playback.
- Bluetooth Antenna: For wireless Bluetooth connectivity.
- Channel Volume Controls (CH1-CH12): Independent rotary knobs to adjust the output volume for each of the 12 speaker channels.
- POWER Switch: Turns the amplifier on or off.
4.2 Rear Panel Connections

- POWER INPUT: AC power cord connection.
- VOLTAGE SELECTOR: Switch to select between 115V and 230V AC power.
- RCA AUDIO INPUTS (L/R): Three pairs of RCA inputs for connecting external audio sources like CD players, tuners, or tape decks.
- SPEAKER OUTPUTS (CH1-CH12): Screw-type terminals for connecting up to 12 speakers.
- MIC INPUTS (1/2): Additional 1/4'' microphone inputs.
5. Setup
5.1 Rack Mounting
The PT12050CH amplifier is designed for standard rack mounting. Attach the included rack mount brackets to the sides of the unit using the provided screws. Secure the unit into a standard 19-inch equipment rack.
5.2 Power Connection
- Before connecting the power cable, ensure the VOLTAGE SELECTOR switch on the rear panel is set to the correct voltage for your region (115V or 230V). Incorrect voltage selection can damage the unit.
- Connect the supplied power cable to the POWER INPUT on the rear panel of the amplifier.
- Plug the other end of the power cable into a suitable AC wall outlet.
5.3 Speaker Connections
The amplifier supports 4-8 ohm impedance speakers. Connect your speakers to the SPEAKER OUTPUTS (CH1-CH12) on the rear panel. Ensure correct polarity (positive to positive, negative to negative) for each speaker to avoid phase issues.

5.4 Audio Source Connections
- RCA Inputs: Connect external audio devices (e.g., CD player, DVD player, tuner) to the RCA AUDIO INPUTS (L/R) on the rear panel.
- AUX Inputs: Connect portable devices (e.g., smartphones, tablets) using a 3.5mm audio cable to the AUX 1, AUX 2, or AUX 3 jacks on the front panel.
- USB/SD Card: Insert a USB flash drive or SD memory card into the respective slot on the front panel. The unit will automatically detect and begin playing compatible audio files.
- Microphone Inputs: Connect microphones to the 1/4'' MIC 1 or MIC 2 jacks on the front panel, or to the additional 1/4'' MIC INPUTS on the rear panel.

6. Operating Instructions
6.1 Power On/Off
Press the POWER switch on the front panel to turn the amplifier on or off. The power indicator light will illuminate when the unit is on.
6.2 Input Selection
The amplifier automatically detects and prioritizes inputs. For USB/SD/Bluetooth, use the MODE button on the MP3 player section to cycle through input sources. For RCA and AUX inputs, ensure the corresponding input is active and its level is adjusted.
6.3 Volume Control
- Channel Volume: Use the individual VOLUME knobs for CH1-CH12 to adjust the output level for each connected speaker zone.
- Microphone Volume: Adjust the LEVEL knob for MIC 1 or MIC 2 to control microphone input volume.
- AUX Volume: Adjust the LEVEL knob for AUX 1, AUX 2, or AUX 3 to control auxiliary input volume.
- MP3 Player Volume: Use the dedicated volume controls in the MP3 player section for USB/SD/Bluetooth audio.
6.4 Bluetooth Pairing
- Ensure the Bluetooth antenna is securely connected to the rear panel.
- Turn on the amplifier.
- Press the MODE button on the MP3 player section until 'BLUETOOTH' is displayed.
- Activate Bluetooth on your smartphone, tablet, or computer.
- Search for available devices and select 'PYLEUSA' from the list.
- Once paired, you can stream audio wirelessly to the amplifier.

6.5 USB/SD Playback
Insert a USB flash drive or SD card containing MP3 or WMA audio files into the corresponding slot. The amplifier will automatically switch to USB/SD mode and begin playback. Use the MP3 player controls (Play/Pause, Previous, Next) to manage your audio.
6.6 Microphone Operation and Voice Priority
Connect your microphone to one of the 1/4'' MIC input jacks. Adjust the microphone's LEVEL and TONE controls for desired sound. Press the TALK OVER button to activate the voice priority function. When active, the background music volume will automatically decrease when a signal is detected from MIC 1, making announcements clearer.

6.7 Tone and Echo Adjustments
Use the TONE knobs for each microphone and auxiliary input to adjust the treble and bass frequencies. The ECHO control for MIC 1 and MIC 2 adds an echo effect to the microphone signal.
7. Maintenance
- Cleaning: Disconnect the power before cleaning. Use a soft, dry cloth to wipe the exterior of the unit. Do not use harsh chemicals, solvents, or abrasive cleaners.
- Ventilation: Regularly check that the ventilation openings are clear of dust and debris to prevent overheating.
- Storage: If storing the unit for an extended period, ensure it is in a cool, dry place, away from direct sunlight and extreme temperatures.
- Cable Connections: Periodically check all cable connections for secure fit and signs of wear.
8. Troubleshooting
If you encounter issues with your Pyle PT12050CH amplifier, refer to the following common problems and solutions:
| Problem | Possible Cause | Solution |
|---|---|---|
| No power | Power cable not connected; Power switch off; Incorrect voltage selection; Blown fuse. | Ensure power cable is securely connected. Turn on the POWER switch. Verify voltage selector is correct. Check and replace fuse if necessary (refer to qualified technician). |
| No sound output | Incorrect input selected; Volume levels too low; Speaker connections loose or incorrect; Faulty audio source. | Select the correct input source. Increase master and individual channel volume levels. Check all speaker wire connections for proper polarity and secure fit. Test with a different audio source. |
| Bluetooth not connecting | Amplifier not in Bluetooth mode; Device too far; Bluetooth not enabled on source device; Interference. | Ensure amplifier is in Bluetooth mode. Move source device closer to the amplifier. Enable Bluetooth on your device and re-scan. Avoid placing other wireless devices nearby. |
| USB/SD playback issues | Unsupported file format; Corrupted files; USB/SD card not properly inserted. | Ensure audio files are MP3 or WMA format. Try a different USB/SD card. Re-insert the card/drive. |
| Microphone not working | Microphone not connected; Microphone level too low; Faulty microphone. | Connect microphone securely. Increase MIC LEVEL knob. Test with a different microphone. |
| Unit gets warm | Normal operation; Insufficient ventilation; Overloaded speakers. | Some warmth is normal. Ensure adequate ventilation around the unit. Verify speaker impedance is within 4-8 ohms. Reduce volume if excessive heat is observed. |
| Input source defaults to USB on power cycle | Designed behavior. | This is a known operational characteristic. You will need to manually select your desired input source using the MODE button after each power cycle. |
| Volume defaults to low settings on power cycle | Designed behavior. | This is a known operational characteristic. Adjust volume levels to your preference after each power cycle. |
9. Specifications
- Model: PT12050CH
- Power Output: 6000 Watts MAX
- Channels: 12
- Speaker Impedance: 4-8 Ohm
- Inputs: 3 x RCA Audio (L/R), 2 x 1/4'' Mic (front), 2 x 1/4'' Mic (rear), 3 x 3.5mm AUX, USB, SD Card, Bluetooth
- Bluetooth Version: 2.1 (approximate)
- Bluetooth Wireless Range: 30+ ft.
- Digital Media File Support: MP3, WMA
- Features: Multi-Zone Audio Control, Voice Priority (Talk-Over), LCD Digital Display
- Item Weight: 15.97 pounds
- Dimensions: (Refer to product diagram for exact measurements)

10. Warranty and Support
Pyle products are designed and manufactured to the highest quality standards. For warranty information or technical support, please refer to the warranty card included with your product or visit the official Pyle USA website. You may also contact customer service for assistance with product registration, troubleshooting, or service inquiries.
Online Support: www.pyleusa.com


