Introduction
The Brinno ACC1000P Camera Clamp Plus is a robust and versatile mounting solution designed for time-lapse cameras and other compatible devices. This industrial-grade kit features a durable clamp, a flexible magic arm, and extension poles, allowing for secure attachment to various surfaces and precise positioning for capturing diverse viewing angles. Its heavy-duty construction ensures stability and reliability in demanding environments, making it ideal for construction monitoring and professional time-lapse videography.
What's in the Box
Verify that all components are present before proceeding with setup.
- Clamp: Constructed from stainless steel and aluminum.
- Magic Arm: Constructed from stainless steel and aluminum.
- Extension Pole & Wrench: Constructed from stainless steel.

Image: All components of the Brinno ACC1000P Camera Clamp Plus, including the main clamp, magic arm, extension pole, and wrench.
Setup and Installation
The Brinno ACC1000P is designed for easy and secure attachment to a variety of surfaces. Follow these steps for optimal setup:
- Identify Mounting Surface: The clamp features cubic jaws with two grip sides: irregular and grooved. Choose the side that provides the most secure hold for your specific surface (e.g., railings, pipes, ledges, beams). The clamp's range opens from 0.04 to 3.5 inches.
- Attach the Clamp: Position the clamp on your chosen surface. Use the soft plastic aluminum handlebar to tighten the clamp firmly. Ensure it is stable and does not wobble. No professional tools are required for this step.
- Attach Extension Pole (Optional): For extended reach, connect the extension pole to the clamp. This increases the reach to 10.6 inches.
- Connect Magic Arm: Attach the magic arm to the clamp or extension pole. The magic arm provides a double ball joint for flexible positioning.
- Mount Your Camera: Secure your camera or compatible device to the magic arm using its universal ¼” female thread. Ensure the camera is tightly fastened.
- Adjust Angle: Utilize the 360-degree rotating tripod clamp and 90-degree tilt of the magic arm to achieve your desired camera angle. Tighten all joints securely once the position is set.

Image: The Brinno ACC1000P clamp securely attached to a metal railing, demonstrating its grip on a flat surface.
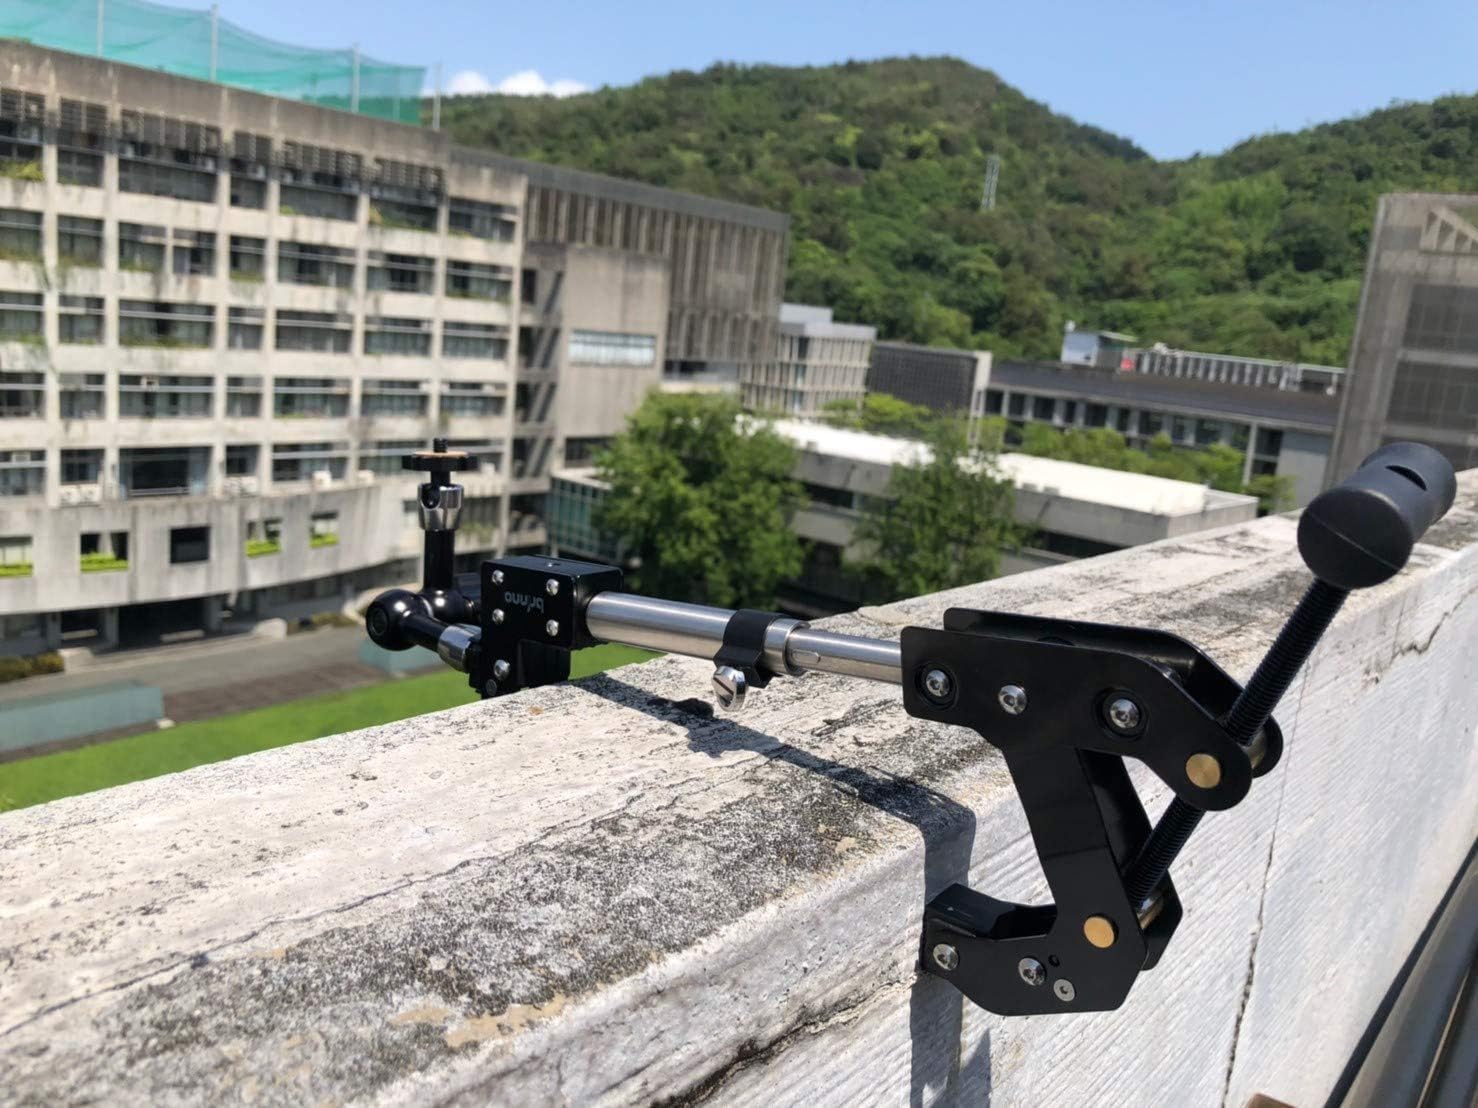
Image: The Brinno ACC1000P with its extension pole attached, mounted on a concrete ledge, showing extended reach.

Image: The Brinno ACC1000P clamp attached to a rusty metal pipe, illustrating its adaptability to various shapes.

Image: A person adjusting the Brinno ACC1000P clamp on a vertical pole, demonstrating the ease of placement and control.
Operating the Clamp and Magic Arm
Once installed, the Brinno ACC1000P offers flexible adjustments to achieve the perfect camera angle for your time-lapse projects.
- Adjusting the Clamp: The main clamp provides a secure base. Ensure it is tightened sufficiently to prevent any movement, especially in windy conditions or when supporting heavier cameras.
- Positioning with the Magic Arm: The magic arm features a double ball joint design, allowing for 360-degree rotation and 90-degree tilt. Loosen the central knob to adjust the arm to your desired position, then tighten it firmly to lock the angle.
- Utilizing Extension: If using the extension pole, ensure it is securely connected to both the clamp and the magic arm for maximum stability.

Image: A Brinno camera mounted inverted underneath a large beam using the ACC1000P, showcasing versatile mounting options.

Image: A Brinno camera mounted upright on top of a railing using the ACC1000P, demonstrating standard mounting.
Maintenance
To ensure the longevity and optimal performance of your Brinno ACC1000P Camera Clamp Plus, follow these simple maintenance guidelines:
- Cleaning: Wipe down the clamp and magic arm with a clean, damp cloth to remove dust, dirt, or debris. Avoid using harsh chemicals or abrasive cleaners, as these may damage the corrosion-resistant materials.
- Inspection: Periodically inspect all joints, screws, and moving parts for any signs of wear, loosening, or damage. Ensure the handlebar and tightening knobs operate smoothly.
- Storage: When not in use, store the clamp in a clean, dry environment to prevent rust or corrosion, especially if exposed to harsh outdoor conditions.
Troubleshooting
If you encounter issues with your Brinno ACC1000P, refer to the following common problems and solutions:
| Problem | Possible Cause | Solution |
|---|---|---|
| Clamp does not hold firmly. | Not tightened sufficiently; incorrect grip side used; surface too smooth/uneven. | Ensure the handlebar is fully tightened. Select the appropriate grip side (irregular or grooved) for the surface. If the surface is extremely smooth, consider adding a non-slip material. |
| Camera wobbles or shifts after positioning. | Magic arm joints not tightened enough; camera not securely mounted to ¼” thread. | Firmly tighten the central knob on the magic arm to lock the ball joints. Ensure your camera is securely screwed onto the ¼” thread. |
| Washer/cork material breaking upon tightening. | Over-tightening; material wear. | Tighten the clamp and magic arm components firmly but avoid excessive force. The clamp is designed to hold securely without extreme torque. If a washer is damaged, contact Brinno support for replacement parts. |
| Difficulty adjusting the magic arm. | Knob is too tight; debris in the joint. | Loosen the central knob completely before attempting to adjust the arm. Clean any visible debris from the ball joints. |
Specifications
| Feature | Detail |
|---|---|
| Model Number | ACC1000P |
| Product Dimensions | 8.27 x 4.72 x 2.76 inches (209 x 94 x 39 mm folded) |
| Item Weight | 2.2 pounds (1 Kilogram) |
| Clamp Load Capacity | 110 lbs (approx.) |
| Clamp Opening Range | 0.04 - 3.5 inches |
| Extension Pole Length | Extends total reach to 10.6 inches |
| Material | Stainless Steel, Aluminum |
| Compatible Devices | Cameras with universal ¼” female thread (e.g., Brinno time-lapse cameras, GoPro, small DSLR) |
| Color | Black |
Warranty and Support
Brinno is committed to providing reliable products and excellent customer service. For detailed warranty information, product registration, or technical support, please visit the official Brinno website or contact their customer service department.
Brinno has a legacy of innovation and over 10 years of service experience, ensuring quality and support for their products.
You can find more information and contact details on the Official Brinno Store on Amazon.
Extended protection plans may also be available for purchase to cover your product beyond the standard warranty period.